


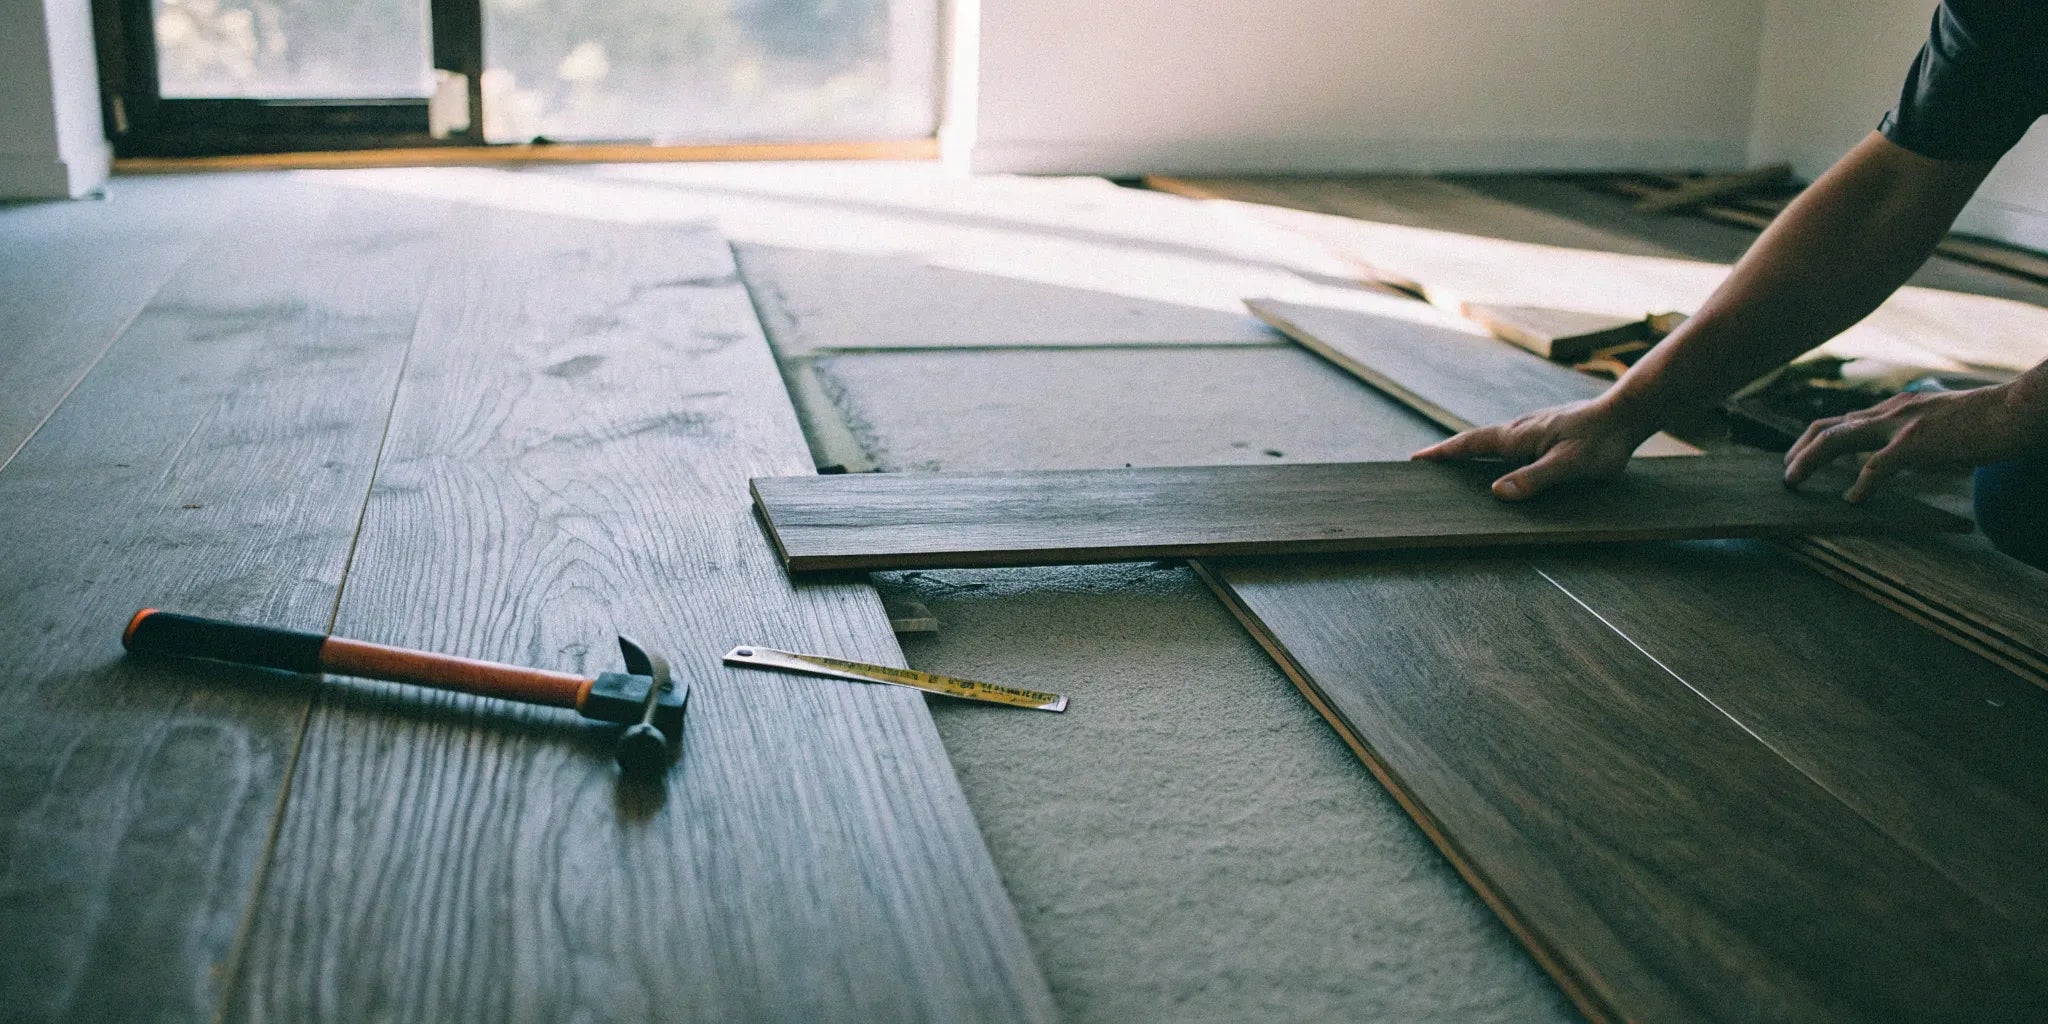
How to Install Engineered Hardwood Floors Yourself
You're ready to transform your space, and the last thing you want is a small mistake ruining your beautiful new floor. When you install engineered hardwood, tiny errors in alignment or spacing can become glaring issues later on. This guide is here to help you sidestep those common pitfalls. We’ll show you not only what to do, but also what not to do—from forgetting the crucial expansion gap to failing to mix planks from different boxes. Think of this as your expert checklist, ensuring your project is a success from the very first board to the final piece of trim.
Key Takeaways
- Preparation Is Everything: The success of your project is determined before you lay the first plank. Always let your flooring acclimate to the room for at least three days and ensure your subfloor is perfectly clean, level, and dry to prevent future squeaks or gaps.
- Plan Your Layout to Prevent Problems: A smart layout saves time and material. Start your first row along the longest, most visible wall, stagger the seams between planks for a natural look, and order 5-15% extra flooring to account for cuts and mistakes.
- The Expansion Gap Is Non-Negotiable: Always leave a 1/2-inch gap between your flooring and all walls and fixed objects. This space is the single most important factor in preventing your floor from buckling as the wood naturally expands and contracts with humidity changes.
What Is Engineered Hardwood Flooring?
If you love the timeless look of hardwood but need a more versatile and often more affordable option, engineered hardwood is your answer. Think of it as the modern evolution of classic wood flooring. It’s a composite product made with a genuine layer of real wood on top, which means you get the authentic grain and texture of species like oak or hickory. Every plank looks unique because it is unique. This construction gives you the best of both worlds: classic beauty and modern performance.
Breaking Down the Layers: How It's Made
Engineered hardwood is constructed like a high-tech sandwich. The top layer, called the wear layer, is a thin slice of solid hardwood—it’s the part you see and walk on. Beneath this veneer are multiple layers of plywood or high-density fiberboard (HDF) bonded together in a cross-grain pattern. This layered core is the secret to its strength. It makes the planks incredibly stable and far less likely to expand, contract, or warp when exposed to changes in temperature and humidity, which is a common issue with solid wood.
Why Choose It Over Solid Hardwood?
There are a few key reasons to choose engineered flooring over traditional solid hardwood. First, it’s often more budget-friendly, allowing you to get a high-end look for less. Its biggest advantage, however, is its resistance to moisture. While solid wood can be risky in damp areas, engineered hardwood handles humidity much better. Some modern options even feature a stone-plastic composite (SPC) core, making them 100% waterproof. This durability makes our collection of hardwood flooring a practical and stylish choice for busy households.
Where Should You Install Engineered Hardwood?
One of the best things about engineered hardwood is its versatility. You can install it in virtually any room of your house, on any level. Because of its excellent moisture resistance, it’s a great solution for spaces where you wouldn’t typically install solid wood. Feel confident putting it in your kitchen, laundry room, or even a finished basement. Its stable construction also allows it to be installed over different types of subfloors, including concrete slabs, which gives you more flexibility for your renovation projects and makes installation a smoother process.
Project Planning: What to Expect
Costs, Timeline, and Lifespan
Before you start, it’s helpful to understand the investment in terms of money, time, and long-term value. The cost of engineered hardwood flooring typically falls between $4.50 and $16 per square foot, giving you a wide range of options to fit your budget. As for the timeline, the most important step is patience. You must let your flooring acclimate to the room for at least three days before installation. This allows the wood to adjust to your home's specific temperature and humidity, preventing future issues. Once installed, engineered wood floors can last a surprisingly long time—anywhere from 20 to 80 years, depending on the thickness of the top layer and how well you maintain them. This durability makes it a fantastic long-term investment for your home.
Is This a DIY-Friendly Project?
Absolutely. If you’re wondering whether you can tackle this project yourself, the answer is most likely yes. According to the pros at Flooring Inc, installing engineered hardwood is mostly "grunt work" rather than highly skilled work, comparing it to putting together a big puzzle. While there are a few different installation methods, the floating floor method is widely considered the easiest and most straightforward for DIYers. This approach involves clicking the planks together over an underlayment without needing glue or nails. With careful preparation and a bit of physical effort, you can achieve a professional-looking result and save a significant amount on labor costs, making it a rewarding and manageable weekend project.
Your DIY Flooring Toolkit: Tools & Materials
A little prep goes a long way. Before you lay that first plank, let's make sure you have everything you need. Getting all your tools and materials organized first sets you up for a much smoother installation. There’s nothing worse than having to stop mid-project for a trip to the hardware store. We'll break it down into the essential tools, the extra materials you'll need besides the flooring, and the safety gear that will keep you protected throughout the job.
The Essential Tool Checklist
Let's get your toolkit ready. A few key items are non-negotiable for a clean, professional-looking installation. You'll definitely need a good saw—a circular saw or a reciprocating saw works great for making clean cuts on your floorboards. You'll also want a trusty hammer or a rubber mallet for gently tapping planks into place, along with spacers to maintain that crucial expansion gap along the walls. This gap allows the wood to expand and contract naturally with temperature changes. And please, don't forget your safety glasses, as sawdust gets everywhere. Finally, a good pair of knee pads will be your best friend by the end of the day. Your knees will thank you!
Tools for Removing Old Flooring
Before you can welcome your beautiful new floors, you have to say goodbye to the old ones. The tools you'll need for this step depend on what you're tearing out. If you're dealing with old carpet, a good pry bar is your best friend for yanking up those stubborn tack strips along the walls. You’ll also want a sturdy pair of pliers to pull out any remaining staples—don't skip this, as they can interfere with your new installation. For old vinyl or glued-down flooring, a floor scraper will help you remove any lingering adhesive and get the subfloor smooth. A sharp utility knife is also incredibly useful for cutting old carpet or vinyl into smaller, more manageable sections for disposal.
Tools for Your Specific Installation Method
Once your subfloor is prepped, your tool needs will shift based on how you plan to install your new engineered hardwood flooring. The most common DIY-friendly method is the floating floor, which requires a tape measure, pencil, tapping block, pull bar, and a saw for making cuts. If you're going with a glue-down installation, you'll need all of those tools plus a notched trowel specifically designed for flooring adhesive. For a nail-down or staple-down installation, which provides a more permanent bond, you'll need a pneumatic flooring nailer or stapler in addition to the basic cutting and measuring tools. No matter which method you choose, having the right equipment makes the job much easier and ensures a professional result.
Supplies You'll Need (Besides the Planks)
Once your tools are lined up, let's talk materials. Beyond your beautiful new hardwood flooring, you'll need underlayment. This thin layer goes between the subfloor and your new planks to add cushion, absorb sound, and provide a vital moisture barrier. Don't skip it! Also, make sure you order enough flooring to finish the job. A good rule of thumb is to buy 5–7% extra for simple, straight layouts and up to 15% more for intricate patterns like herringbone. This extra material, often called a "waste factor," accounts for any cutting mistakes or oddly shaped pieces you'll need along walls and in corners. It's much better to have a little left over than to run out just before the finish line.
A Note on Underlayment
When you're installing engineered hardwood, the underlayment is a critical step you really can't afford to skip. This thin layer of material might seem minor, but it performs several essential jobs that protect your investment and make your home more comfortable. Think of it as a multi-tasking barrier that sits between your subfloor and your beautiful new planks. It helps to block moisture from seeping up from below, adds a bit of insulation to keep the floor warmer underfoot, and even dampens sound to make the room quieter. Plus, it helps smooth out any tiny imperfections in the subfloor, ensuring your flooring lays flat and even.
Before you roll out the underlayment, make sure your subfloor is completely clean. Even a single grain of sand or a small piece of debris can create an annoying bump or a pressure point that could damage the planks over time. It's a small detail that makes a big difference. Some types of engineered hardwood flooring actually come with the underlayment already attached, which is a great time-saver and simplifies the installation process. If you choose a product like this, you can skip this step entirely. Either way, using a quality underlayment is a simple but effective way to prevent future problems and get the best performance from your new floors.
Don't Forget Your Safety Gear
This part is so important, so please don't skip it. Protecting yourself should always be your top priority during any DIY project. Start with a pair of thick gloves to save your hands from splinters and sharp edges. If you're tearing out old carpet, a respirator is a must to avoid breathing in years of trapped dust and dander. On your feet, wear thick-soled boots to protect against any stray tacks or staples left in the subfloor. And as I mentioned, kneepads are a game-changer for comfort, especially on a multi-day project. Taking these simple precautions not only keeps you safe but makes the whole process more pleasant and professional.
Setting the Stage: How to Prep Your Room
A beautiful new floor starts with a solid foundation. Taking the time to properly prepare your room is the single most important thing you can do to ensure your engineered hardwood floors look great and last for years. Rushing this stage can lead to uneven surfaces, annoying squeaks, and other issues down the road. Think of it as setting the stage for a flawless performance. By clearing, cleaning, and leveling the subfloor, you’re creating the perfect canvas for your new hardwood flooring. Let’s walk through the essential prep steps that will make your installation process smoother and give you professional-quality results.
Step 1: Clear and Clean the Room
First things first: empty the room completely. That means all furniture, rugs, and decorations need to go. If you’re replacing old flooring, you’ll need to remove it entirely. For carpet, this involves pulling up the carpet itself, the padding, and all the tack strips around the perimeter. Be thorough and get every last staple and nail out of the subfloor. Once everything is removed, give the subfloor a deep clean with a vacuum and a mop. Any leftover debris, dirt, or grit can create bumps under your new floor, leading to an uneven finish or creaking sounds later on. A perfectly clean, bare subfloor is your goal here.
Step 2: Get Your Subfloor Perfectly Prepped
With the room cleared, it’s time to inspect your subfloor. Carefully remove the baseboards so you can reinstall them later for a clean finish. Walk around the room and listen for any squeaks or feel for loose spots. If you find any, secure the subfloor to the joists below with screws to eliminate movement. Next, check if the floor is flat. You can do this by laying a long, straight edge (like a 10-foot 2x4 or a level) across different areas of the floor. If you see any gaps larger than 1/8 of an inch, you’ll need to level the area with a self-leveling compound before you can proceed.
Installing Over an Existing Floor
One of the great things about engineered hardwood is its installation flexibility. In many cases, you can install it directly over an existing hard-surface floor, like vinyl, laminate, or even solid hardwood. This method, known as a "floating floor" installation, can save you a ton of time and effort on demolition. The key is that the existing floor must be flat, clean, and in good condition. You should never glue or nail down new engineered planks over an old floor. Instead, the new floor will simply rest on top, held in place by the weight and interlocking system of the planks. Just remember to account for the added height, especially around doorways.
Dealing with Height Differences Between Rooms
When you're transitioning from your new hardwood to a different type of flooring in an adjacent room, like tile in a kitchen or bathroom, you'll likely have a height difference. This is perfectly normal, but you need to handle it correctly to avoid creating a trip hazard. A good rule of thumb is that any height difference over three-quarters of an inch needs a proper transition. This is where transition strips, or moldings, come in. They create a smooth, gradual ramp between the two floors. Before you start, plan for these transitions by measuring the height difference so you can buy the right type of molding for a safe and professional-looking finish.
How to Properly Lay Underlayment
Unless your engineered hardwood has a pre-attached pad, laying underlayment is a step you absolutely cannot skip. This thin layer of foam or felt serves several important functions: it acts as a moisture barrier, provides thermal insulation, dampens sound, and smooths out minor imperfections in the subfloor. Some of our hardwood flooring options even come with this feature built-in, simplifying your project. To install it, simply roll it out across the subfloor, cut it to size with a utility knife, and tape the seams together. Make sure the edges meet but don't overlap, as that can create an uneven surface under your beautiful new floor.
Step 3: Let Your New Flooring Acclimate
This step is crucial and can’t be skipped. Engineered hardwood needs to adjust to the temperature and humidity of the room where it will be installed. Bring the unopened boxes of flooring into the room and let them sit for at least three days. During this time, keep your home’s climate controls set to their normal, everyday levels. This process, called acclimation, allows the wood to expand or contract before it’s installed. Skipping this can cause the planks to buckle or create gaps after they’re laid down. It’s a simple step that prevents major headaches later.
Ideal Temperature and Humidity Levels
To give your flooring the best start, aim for a consistent room temperature between 60 and 80°F. This isn't just a suggestion; it's the sweet spot that helps the wood acclimate properly. Think of wood as a living material—it breathes, expanding in humidity and contracting in dryness. Maintaining a stable environment during the three-day acclimation period and installation prevents future problems like warping or gapping. While our engineered hardwood flooring is designed for stability, extreme swings in moisture can still affect it. Keeping your home's climate controls at their normal setting is the easiest way to ensure the planks settle in perfectly before they’re locked into place.
Step 4: Don't Skip the Moisture Test
Before you lay the first plank, you have to check the subfloor for moisture. Excess moisture is wood flooring’s worst enemy, and it can cause serious damage like warping and cupping. You can buy a simple moisture meter at most hardware stores to get an accurate reading. If you’re installing over a concrete subfloor, this step is especially important. If the test reveals high moisture levels, you’ll need to install a vapor barrier or underlayment with a built-in moisture barrier. This thin layer goes between the subfloor and your new hardwood, protecting your investment from potential water damage from below.
Plan Your Layout Like a Pro
A successful flooring project is all about the prep work. Before you lay that first plank, taking the time to map out your project will save you from headaches, wasted materials, and a finished product you’re not happy with. Think of it as creating a roadmap for your room. A solid plan ensures your lines are straight, your cuts are minimal, and the final look is seamless and professional. It’s the step that separates a good DIY installation from a great one. By figuring out your installation method, mapping your rows, and accounting for your room’s unique quirks ahead of time, you set yourself up for a smooth and rewarding process.
Float, Glue, or Nail? Choose Your Method
Engineered hardwood offers great flexibility in how you can install it. The three main methods are floating, glue-down, and nail-down. A floating floor, where planks click together and rest over an underlayment, is often the most DIY-friendly. The glue-down method involves applying adhesive directly to the subfloor for a solid, permanent bond. Finally, the nail-down method uses a flooring nailer to fasten planks to a wooden subfloor, a traditional technique that creates a very secure floor. The right choice depends on your subfloor type, your comfort level with the work, and the specific hardwood flooring you’ve selected. Always check the manufacturer’s recommendations to ensure you’re using the best method for your product.
Understanding the Staple-Down Method
The staple-down method is a close cousin to the nail-down technique. Instead of using a flooring nailer with cleats, you’ll use a pneumatic stapler to fasten the engineered hardwood planks to the subfloor. This approach is just as effective and secure, and some installers find it a bit faster. Just like with nailing, this method is only suitable for a wooden subfloor, such as plywood or OSB (Oriented Strand Board). The staples are driven through the tongue of each plank at an angle, hiding them from view once the next plank is fitted into place. It creates a strong, stable floor that feels solid underfoot and will last for decades.
Floating Floor: Pros and Cons
The floating floor is by far the most popular choice for DIYers, and for good reason. The planks are designed to click and lock together, creating a single, continuous surface that "floats" over the underlayment without being attached to the subfloor. The biggest pro is the ease of installation—it’s like putting together a puzzle. It also allows you to install flooring over many types of existing surfaces, saving you a ton of prep work. The main drawback is that it can sometimes feel slightly less solid underfoot and may produce a hollow sound when you walk on it. However, using a high-quality underlayment can significantly reduce this effect.
Glue-Down Floor: Pros and Cons
If you want your floors to feel incredibly solid and permanent, the glue-down method is the way to go. This technique involves spreading a specialized flooring adhesive directly onto the subfloor and then setting the planks into it. The result is a floor that’s completely bonded to the subfloor, eliminating any hollow sounds or movement. This makes it an excellent choice for installing over concrete slabs where nailing isn't an option. On the downside, it’s a messy and less forgiving process. The adhesive can be tricky to work with, and once the planks are down, they are very difficult to remove, making future repairs a significant challenge.
Nail-Down and Staple-Down Floors: Pros and Cons
Nail-down and staple-down methods are the traditional gold standard for installing wood floors. Using a special flooring nailer or stapler, you fasten the planks directly to the wooden subfloor. The primary advantage is the incredible stability and solid feel it provides—this floor isn’t going anywhere. It’s a durable, long-lasting installation that feels just like solid hardwood. The main limitation is that it absolutely requires a wooden subfloor; you can't use this method on concrete. It also requires renting or buying a specialized tool, and there’s a slight learning curve to using it without damaging the tongues of the planks. However, once you get the hang of it, the process is quite efficient.
How to Plan Your First and Last Rows
Your first row is the foundation for the entire floor, so getting it right is critical. The best practice is to start along the longest, most visible exterior wall in the room. Before you begin, do a "dry lay" of a few rows to see how the planks will fall. This helps you plan the width of your final row on the opposite wall. You want to avoid finishing with a tiny, awkward sliver of a plank. To start your first row, place 1/2-inch spacers against the wall to create an expansion gap. This small space is essential, as it allows the wood to expand and contract with changes in humidity, preventing it from buckling over time.
Measure Twice, Order Once
There’s nothing worse than running out of flooring just before you finish a project. To avoid this, always order more material than your room’s square footage requires. A good rule of thumb is to add a 5-7% "waste factor" for standard, straight-lay patterns. This extra material accounts for any cutting mistakes or planks you can’t use. If you’re planning a more complex pattern like herringbone, you’ll want to order about 15% extra to account for the additional angle cuts. Professionals who manage projects regularly can get help with material estimates by signing up for a trade account. Having a little extra on hand is a small price to pay for peace of mind.
Working with Awkward Room Shapes
Few rooms are perfect rectangles. You’ll likely run into doorways, vents, pipes, or other obstacles that require custom cuts. This is where a jigsaw becomes your best friend. For a clean fit, you can create a template out of cardboard to trace the shape onto your plank before cutting. Just remember to maintain that crucial expansion gap around any fixed objects, including pipes and door jambs. Taking your time to make precise cuts in these tricky areas is what truly gives your floor a polished, custom-installed look. It’s these details that make the entire room feel complete, especially when paired with other finishes like new wall panels.
How to Install Engineered Hardwood, Step by Step
With your room prepped and your layout planned, it’s time for the most rewarding part: laying the floor. This is where your vision starts to become a reality, plank by plank. Don’t rush this process. Taking your time here will ensure a beautiful, professional-looking result that you can be proud of for years to come. We’ll walk through each step together, from the first row to the final piece of trim.
Getting the First Row Perfectly Straight
The first row is the foundation for your entire floor, so getting it perfectly straight is non-negotiable. Start along the longest, most visible exterior wall in the room. Place 1/2-inch spacers between the wall and your first plank to create an expansion gap—this allows the wood to move with changes in humidity. Lay the first plank with its groove side facing the wall. Click the next plank into place at the end of the first one and continue until you reach the other side of the room. A straight first row ensures every subsequent row will be straight, too, so use a chalk line if you need a guide. This initial precision will save you from major headaches later on.
Installing Planks Across the Room
Once your first row is secure, the rest of the installation will start to move more quickly. As you lay the subsequent rows, make sure to stagger the end joints of the planks by at least 12 inches. This creates a more natural, visually appealing pattern and adds structural strength to the floor. To connect the planks, use a tapping block and a hammer to gently tap them together, ensuring a tight, seamless fit with no gaps. Continue to use your 1/2-inch spacers along the walls as you work your way across the room. This consistent gap is crucial for the long-term health of your beautiful new hardwood flooring.
A Pro Tip for Cutting Planks
When it comes to cutting your engineered hardwood planks, precision is what separates a good job from a great one. Always use the factory-cut, precise sides to align your pieces for a seamless, professional look. Don't stress if the outer edges against the wall aren't perfectly straight—quarter-round molding or your baseboards will cover any minor imperfections. Before making a cut, mark your line on the top side of the plank and be sure to cut with the finished side facing up. This simple step helps prevent chipping the beautiful wood veneer. A miter saw, table saw, or circular saw will give you the cleanest results.
If you’re dealing with tricky custom cuts around door frames or vents, creating a template is a game-changer. Just trace the shape you need onto a piece of cardboard, test its fit, and then transfer the outline to your plank before cutting. This method is incredibly helpful when you're working with awkward room shapes and ensures a clean, snug fit every time. Finally, always take a quick look at the manufacturer's instructions for any specific cutting guidelines related to your flooring. Following their recommendations is the best way to ensure a flawless installation and protect your investment.
How to Cut and Fit the Final Row
When you get to the last row, you’ll almost certainly need to cut the planks lengthwise to fit. To get the right measurement, lay a full plank directly on top of the last installed row. Then, place another plank on top of that one, but with its edge touching the wall (don't forget to use a spacer for the expansion gap). Draw a line on the plank underneath—this is your cut line. Measure the required width at several points along the wall, as walls are rarely perfectly straight. After cutting the plank, you’ll need a pull bar and a hammer to carefully snug it into place, since there won’t be enough room for a tapping block.
Making Cuts for Vents and Obstacles
Floors rarely have the luxury of being perfect, uninterrupted rectangles. You’ll likely encounter vents, support columns, or radiator pipes. For these obstacles, a jigsaw is your best friend. Place the plank next to the object and carefully trace the shape you need to cut out. Remember to leave a 1/2-inch expansion gap around the object, just as you did with the walls. It’s a good idea to practice on a scrap piece first to get a feel for the cut. Taking a moment to plan these cuts will make them much less intimidating and ensure a clean finish around your home’s existing plumbing and vents.
Adding Trim and Transition Strips
After the final plank is in place, you can stand back and admire your work—but you’re not quite done. The final step is to add the finishing touches that hide the expansion gaps and create a polished look. Start by removing all the spacers from around the perimeter of the room. Next, install transition strips in doorways or where your new floor meets another type of flooring, like tile or carpet. These pieces ensure a smooth and safe transition between rooms, especially when paired with new steel doors. Finally, install your baseboards or quarter-round molding to cover the expansion gap along the walls. Once the trim is on, your project is officially complete.
How to Tackle Tricky Spots
Even the most straightforward flooring project will have its challenges. Rooms are rarely perfect squares, and you’ll inevitably run into door frames, vents, pipes, and tricky corners. Don’t let these obstacles intimidate you. With a little patience and the right techniques, you can achieve a professional finish that looks seamless. These tricky spots are where attention to detail really pays off, turning a good installation into a great one. Getting these cuts and transitions right is what will make your new hardwood flooring look like it was always meant to be there. Think of these areas not as problems, but as opportunities to showcase your craftsmanship. We’ll walk through how to handle each of these common situations so you can keep your project moving forward with confidence.
Making Clean Cuts Around Door Frames
For a truly polished look, you’ll want your flooring to slide neatly under the door frames rather than cutting a rough shape around them. This is easier than it sounds. Just take a scrap piece of your engineered hardwood and lay it next to the door jamb. This scrap acts as a height guide. Then, using a handsaw held flat against the plank, carefully cut the bottom of the door frame. Once the piece is removed, your new flooring plank will fit perfectly underneath, creating a clean, seamless transition that looks professionally done.
Perfecting Your Cuts for Vents and Pipes
When you encounter floor vents, pipes, or other fixed objects, a jigsaw will be your most valuable tool. Measure the location of the obstacle on your plank and mark your cut lines carefully. It’s always better to cut a little less and trim more if needed than to cut too much. Use the jigsaw to cut out the necessary shape, ensuring the plank fits snugly around the fixture. Remember to leave a small expansion gap around the object, just as you would along the walls, to allow the wood to move naturally.
How to Transition to Stairs or Other Flooring
When your new hardwood meets another type of flooring—like tile in a bathroom or carpet on the stairs—you’ll need a transition strip. These pieces are designed to create a smooth and safe connection between two different floor heights or materials. They also protect the exposed edge of your hardwood from damage over time. Choose a transition strip that matches your flooring for a cohesive look. Simply cut it to the required length and secure it in place according to the manufacturer’s instructions for a clean, finished edge.
Working with Tricky Inside and Outside Corners
To ensure your floor is strong and looks its best, avoid lining up the seams of your planks from one row to the next. Instead, stagger the end joints in adjoining rows by at least 12 inches. This technique distributes stress across the floor and prevents weak spots from forming. It also creates a more natural, random appearance that is much more visually appealing than a repetitive pattern. When you get to a corner, this staggering method helps you fit custom-cut pieces without compromising the floor’s integrity.
Remember to Leave an Expansion Gap
This might be the most important rule of all: always leave an expansion gap. Wood is a natural material that expands and contracts with changes in temperature and humidity. You must leave about a half-inch gap between the flooring and the walls, cabinets, and any other fixed objects. This space gives your engineered hardwood flooring room to breathe without buckling. Don’t worry about the gap being visible—it will be completely covered once you install your baseboards or quarter-round molding for a perfect finish.
Common DIY Mistakes to Avoid
You’ve done the hard work of prepping and planning, but a few simple mistakes during installation can undo it all. Getting a beautiful, long-lasting floor is as much about what you don't do as what you do. Let's walk through the most common pitfalls so you can sidestep them and get that flawless finish you're after. Taking your time and paying attention to these details will make the difference between a floor that looks okay and one that looks professionally installed.
Mistake #1: Rushing the Prep Work
I can't stress this enough: proper preparation is everything. One of the biggest mistakes is skipping the acclimation process. Your new engineered hardwood flooring needs to sit in the room where it will be installed for at least 48 hours. This allows the wood to adjust to your home's specific temperature and humidity, preventing it from expanding or shrinking after it's laid. Another critical step is preparing the subfloor. If you ignore this, any imperfections—bumps, dips, or debris—will eventually cause your new floor to buckle, gap, or squeak. Make sure your subfloor is clean, flat, and dry before you lay a single plank.
Mistake #2: Incorrect Plank Staggering
Once you start laying planks, a common goof is not mixing boards from different boxes. It’s tempting to just open one box and go, but this can lead to noticeable patches of color or grain patterns. A pro tip is to open several boxes and lay out the planks beforehand. This lets you create a balanced, natural-looking floor by blending the variations in the wood. It also gives you a chance to inspect each board for defects before you install it. Planning your layout this way helps you avoid awkward patterns and reduces material waste, ensuring a more cohesive and beautiful result.
Mistake #3: Messing Up Your Spacing and Alignment
Details like spacing and alignment are what separate an amateur job from a professional one. Always remember to leave an expansion gap of about a quarter-inch to a half-inch between the flooring and the walls. Wood naturally expands and contracts with changes in humidity and temperature. Without this gap, the floor can buckle and warp when it expands. This gap will be covered by your baseboards, so no one will ever see it. Also, take extra care to ensure your first row is perfectly straight. If your starting line is even slightly off, the error will become more and more obvious as you move across the room.
Mistake #4: Using the Wrong Tools for the Job
Having the right tools for the job makes the entire process smoother and safer. You don’t need a full workshop, but using the wrong equipment can damage your new floors or lead to a sloppy finish. For example, using a dull saw blade will cause splintering and result in uneven cuts that are difficult to hide. Similarly, using a regular hammer instead of a tapping block and rubber mallet can damage the delicate tongue and groove of the planks, making it hard to get a tight fit. Ensure your tools are in good condition and that you know how to use them correctly before you begin.
Finishing Touches and Long-Term Floor Care
You’ve laid the last plank, and your new floor looks amazing. Now it’s time for the final steps that will take your project from "almost done" to professionally finished. These finishing touches are just as important as the installation itself, ensuring your floor not only looks complete but also stands the test of time. Let’s walk through how to wrap up your project and keep your beautiful new floors in top shape for years to come.
Installing Your Baseboards and Trim
This is where the room really starts to come together. First, carefully remove all the plastic spacers you placed along the walls. Now you can either reinstall your old baseboards or put in new ones to give the room a fresh look. The main job of the baseboard is to hide that essential expansion gap you left. When you attach the trim, make sure you nail it directly to the wall, not the floor. This is a critical step because it allows your engineered hardwood flooring to expand and contract with temperature changes without buckling. For a truly polished finish, fill any nail holes with a bit of matching wood putty.
The Post-Installation Clean-Up
With your trim in place, it’s time for the most satisfying part: the final clean-up. Installation can kick up a lot of dust and debris, and you’ll want to get it all up before moving furniture back in. Start by sweeping with a soft-bristle broom or using a vacuum with a hardwood floor attachment to avoid any accidental scratches on your brand-new surface. Follow up with a dry microfiber mop to pick up any fine dust that’s left. If you see any smudges, you can use a slightly damp cloth to spot-clean them, but avoid using too much water. This final sweep will reveal the true beauty of your hard work and get the floor ready for daily life.
Give the Floor Time to Settle
I know how tempting it is to tear open those boxes and get started right away, but this next step is one you absolutely cannot skip. Before you lay a single plank, your new engineered hardwood flooring needs time to get used to its new home. Bring the unopened boxes into the room where they'll be installed and just let them sit for at least three days. During this time, keep your thermostat set to its normal, everyday temperature. This process, called acclimation, gives the wood a chance to expand or contract based on your home's unique humidity. Trust me, this simple pause prevents major headaches like buckling or ugly gaps from showing up later.
While your flooring is acclimating, it's the perfect time to double-check your subfloor for moisture. Excess moisture is the number one enemy of any wood floor, and it can lead to serious issues like warping down the road. Making sure your subfloor is clean, level, and dry is all part of setting the stage for a successful installation and a floor that will look fantastic for years to come.
How to Keep Your New Floors Looking Great
Maintaining that just-installed look is easier than you think; it just takes a little routine care. The number one rule is to clean up spills as soon as they happen to prevent any potential water damage or staining. For daily upkeep, a quick sweep or vacuum will handle dust and dirt that can act like sandpaper underfoot. When it’s time for a deeper clean, use a pH-neutral cleaner designed for wood floors and a slightly damp mop. The key word here is damp, not wet. Soaking your floors is a surefire way to cause damage over time. A simple weekly cleaning schedule will keep your floors looking fantastic.
Cleaning Methods to Avoid
Just as important as knowing how to clean your floors is knowing what not to do. Steer clear of steam mops and soaking your floor with a wet mop; excessive water is the fastest way to cause warping and long-term damage to the wood. You should also avoid harsh chemical cleaners containing ammonia, vinegar, or bleach, as these can strip the protective finish right off your beautiful new floor. As a rule, stick to pH-neutral cleaners specifically made for wood. Abrasive tools like steel wool or scouring pads are also a no-go, as they will scratch the surface. Finally, avoid oil soaps or wax-based cleaners, which can leave behind a dull, sticky residue that attracts more dirt over time. Keeping your floors looking their best is all about gentle, consistent care.
Protecting Your Floors for the Long Haul
You put a lot of effort into installing your new floors, so let’s make sure they last. A few simple, proactive steps can make a huge difference. Place felt pads on the bottom of all your furniture legs—chairs, tables, sofas, you name it. This is the easiest way to prevent scratches and scuffs when things get moved around. In high-traffic areas like entryways and hallways, consider using area rugs to protect the finish from wear and tear. Finally, try to maintain a consistent humidity level in your home, ideally between 30% and 50%. This helps prevent the wood from expanding or shrinking too much, which can lead to gaps or warping down the road.
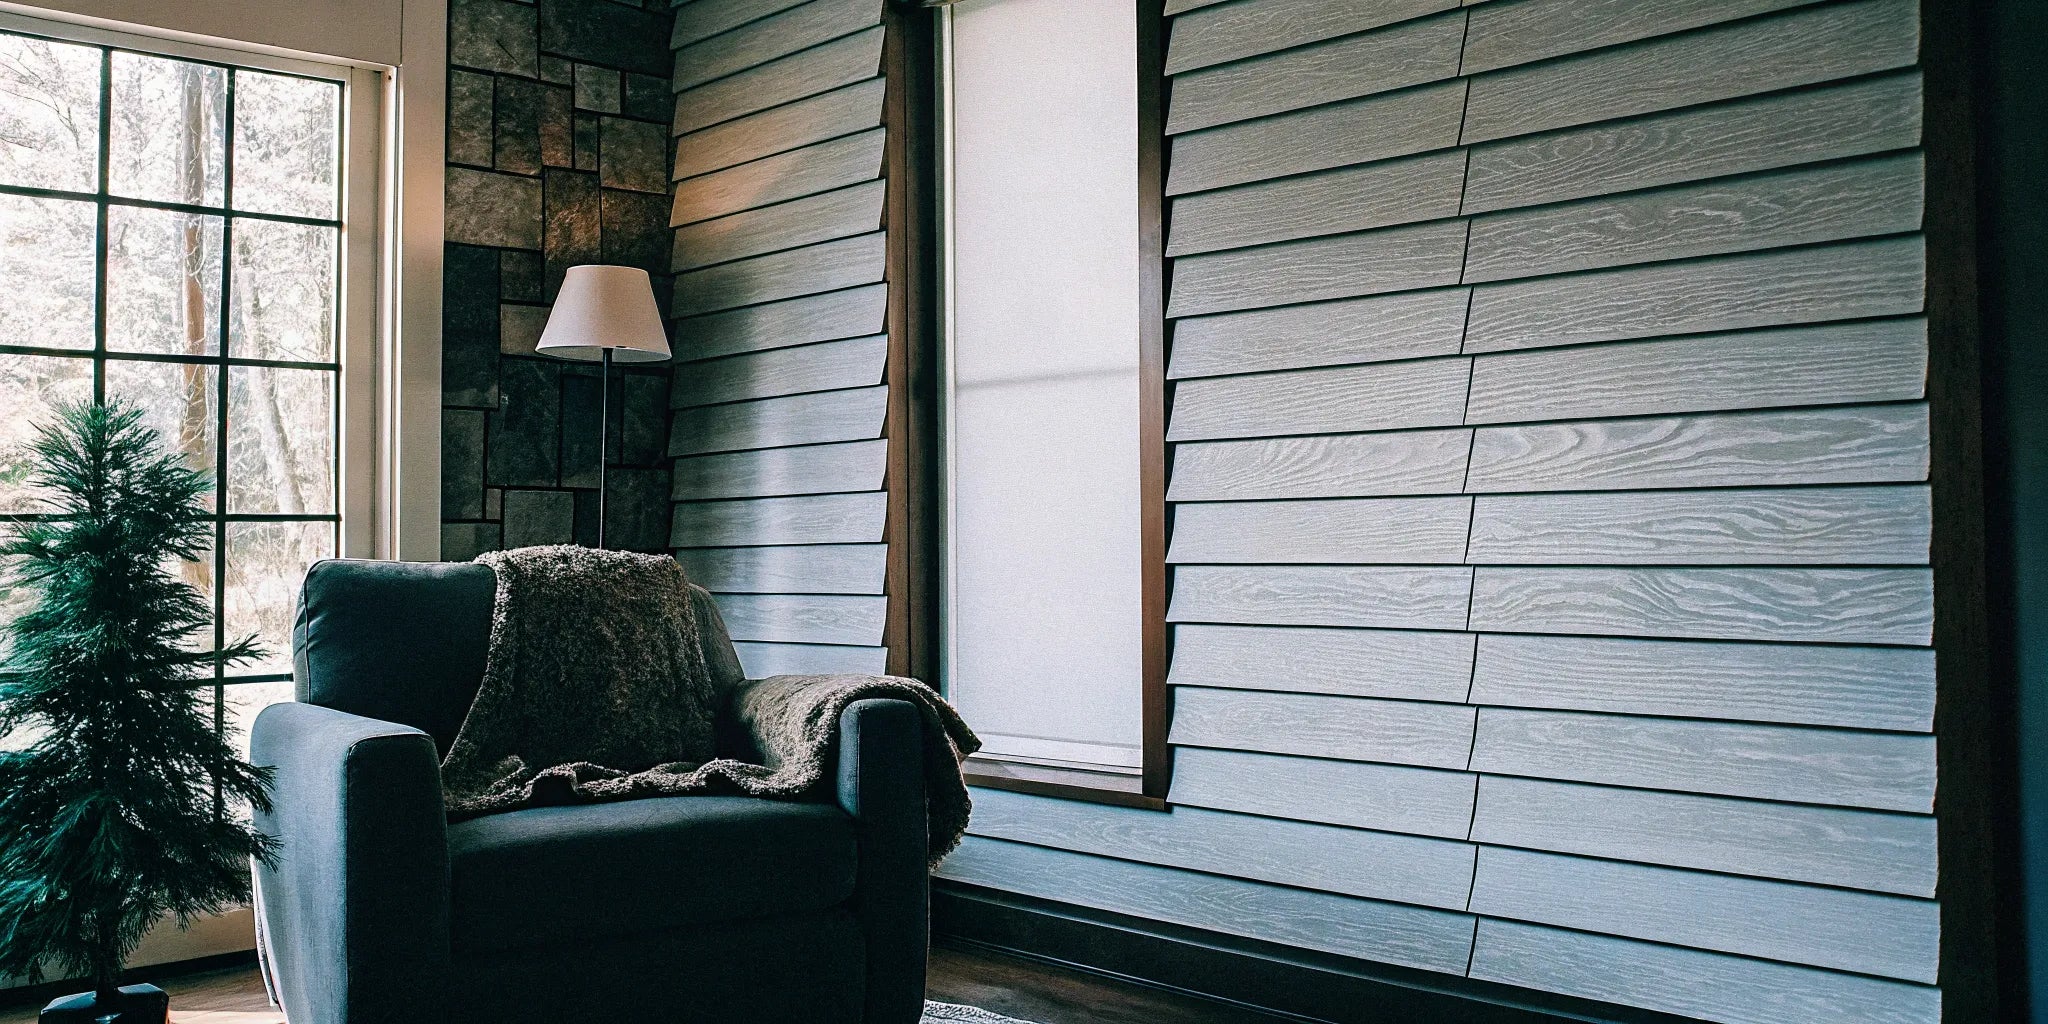
Preventing Scratches and Sun Fading
To keep your floors looking pristine, a little prevention goes a long way. The easiest win is to place felt pads on the bottom of all your furniture legs. This simple step is your best defense against the scratches and scuffs that happen when chairs and tables get moved around. For high-traffic areas like entryways, hallways, and living rooms, using area rugs or runners can protect the finish from daily wear. Also, be mindful of direct sunlight, which can cause the wood’s color to fade over time. Consider using curtains or blinds during the sunniest parts of the day to shield your floors and preserve their rich color for years to come.
Can You Refinish Engineered Hardwood?
This is a common question, and the answer is: it depends. The ability to refinish engineered hardwood comes down to the thickness of its top layer—the real wood veneer. Planks with a thicker wear layer (typically 3mm or more) can usually be sanded down and refinished at least once, sometimes more. This process can extend the life of your floor significantly, as engineered hardwood can last anywhere from 20 to 80 years depending on its quality and how well it's maintained. If you think you might want to change the color or repair deep scratches in the future, look for a high-quality hardwood flooring option with a substantial wear layer when you buy.
Troubleshooting Common Issues After Installation
Even with the most careful installation, floors can sometimes settle in unexpected ways. You might notice a new squeak, a small gap, or a slight bounce in one area. Don't panic—these are often minor issues that can be addressed without having to tear everything up. Most common post-installation problems have straightforward solutions that you can handle with a little patience and the right technique. Below, we’ll cover how to diagnose and fix some of the most frequent issues that can pop up after your project is complete, ensuring your floor remains stable and silent for the long haul.
How to Fix Squeaky Floors
A squeaky floor can be incredibly annoying, but the fix is often surprisingly simple. The solution depends on your installation method. For floating floors, the squeak is usually caused by friction between two planks. An easy trick is to sprinkle a fine powder, like talcum powder or powdered graphite, into the seam between the noisy boards and work it in. For nail-down floors, squeaks often mean a plank has come loose. You can solve this by adding more finishing nails in the squeaky spots. If the noise seems to be coming from below, you may need to secure the subfloor to the joists with screws to eliminate any movement.
Related Articles
- 12 Inch Wide Engineered Hardwood: A Buyer's Guide
- Engineered Wood Flooring vs Hardwood: Which Is Best?
- Engineered Hardwood vs Laminate: The Ultimate Guide
- Hardwood vs Engineered Hardwood: The Real Difference
Frequently Asked Questions
Can I really install engineered hardwood in my kitchen or basement? Absolutely. This is one of the biggest advantages of engineered hardwood. Its layered construction makes it much more stable and resistant to moisture than solid wood, so it performs beautifully in areas like kitchens, laundry rooms, and even finished basements. Just be sure to perform a moisture test on your subfloor beforehand, especially if it's concrete, and use the right underlayment with a moisture barrier for extra protection.
Is leaving an expansion gap around the edges of the room that important? Yes, it's one of the most critical steps in the entire process. Wood is a natural material that breathes, meaning it expands and contracts slightly as the temperature and humidity in your home change throughout the year. That small half-inch gap gives the floor the space it needs to move without buckling or warping. Don't worry, the gap will be completely hidden once you install your baseboards, but it's the key to a floor that stays flat and beautiful for the long haul.
How do I know which installation method—floating, glue-down, or nail-down—is right for me? The best method often depends on your subfloor and your comfort level. A floating floor, where the planks click together, is generally the most DIY-friendly and works over most subfloors, including concrete. The glue-down method creates a very solid feel underfoot but requires more meticulous subfloor prep. The nail-down method is a traditional choice that works only with a wooden subfloor. Always check the flooring manufacturer’s recommendation, but for most first-time projects, the floating method is a great place to start.
What should I do if I accidentally damage a plank while I'm installing it? Don't panic—it happens to everyone. This is exactly why you order 5-10% extra material. If you're installing a floating floor, the fix is fairly simple. You can carefully unclick the rows you've already laid to get back to the damaged plank, replace it with a new one, and then reinstall the rows. If you're near the end of the project, there are also special tools and techniques for replacing a single plank without taking the whole floor apart. A quick search for "plank replacement" will show you how it's done.
Do I really need to install underlayment? Yes, you should never skip the underlayment. It might seem like an extra step, but it serves several important functions. It provides a moisture barrier to protect your wood from anything coming up from the subfloor, it adds a bit of cushion underfoot, and it helps absorb sound to make the room quieter. Think of it as an inexpensive insurance policy that protects your much larger investment in the flooring itself.
