


Shiplap Wall Board: Your Ultimate Project Guide
It's no surprise that shiplap has moved from our living rooms to our home exteriors. The look is clean, timeless, and incredibly versatile—it can make a modern farmhouse feel cozy or give a new build a sharp, contemporary edge. But here's the critical part: the shiplap you use inside is not the same as what you need outside. Choosing the right shiplap wall board is the key to a beautiful finish that actually lasts. This guide will walk you through everything, from picking the right materials to avoiding common installation mistakes.
Key Takeaways
- Prioritize Your Needs When Choosing a Material: Decide what matters most—the authentic look of real wood, which requires regular upkeep, or the low-maintenance durability of modern composites and fiber cement, which are built to withstand the elements.
- Master the Installation Basics for a Lasting Finish: Proper installation is key to preventing future problems like water damage and warping. Always use a weather-resistant barrier, ensure your first board is perfectly level, and secure each plank to a stud to guarantee a durable result.
- Get High-End Style Without the High-End Price Tag: Exterior shiplap offers a great return on investment by blending timeless curb appeal with strong performance. It's a cost-effective way to achieve a polished, custom look that protects your home and holds its value.
What Is Exterior Shiplap?
Exterior shiplap is a type of siding where each board overlaps the one below it, creating a distinctive look with clean, horizontal lines. What makes it special is the "rabbet" joint—a small groove cut into the edge of each board. This allows them to fit together snugly, almost like puzzle pieces. This interlocking design isn't just for looks; it creates a strong, weather-resistant barrier that protects your home from rain, wind, and snow. It’s a fantastic way to add both character and durability to your home’s facade, which is why it’s become such a popular choice for everything from modern farmhouses to contemporary new builds. You get a polished finish that stands up to the elements.
The Anatomy of a Shiplap Board
Traditionally, exterior shiplap was made from solid wood like cedar or pine, valued for their natural durability. While wood is still a beautiful option, modern shiplap has evolved. Today, you’ll find high-performance Exterior Shiplap Cladding Wall Panels made from materials like wood polymer composites (WPC). These advanced composites blend wood fibers with polymers to create boards that are exceptionally tough. They’re engineered to resist common outdoor issues like sun fading, moisture damage, rot, and pests. This means you get the classic look of shiplap without the constant upkeep of traditional wood.
What Gives Shiplap Its Signature Look?
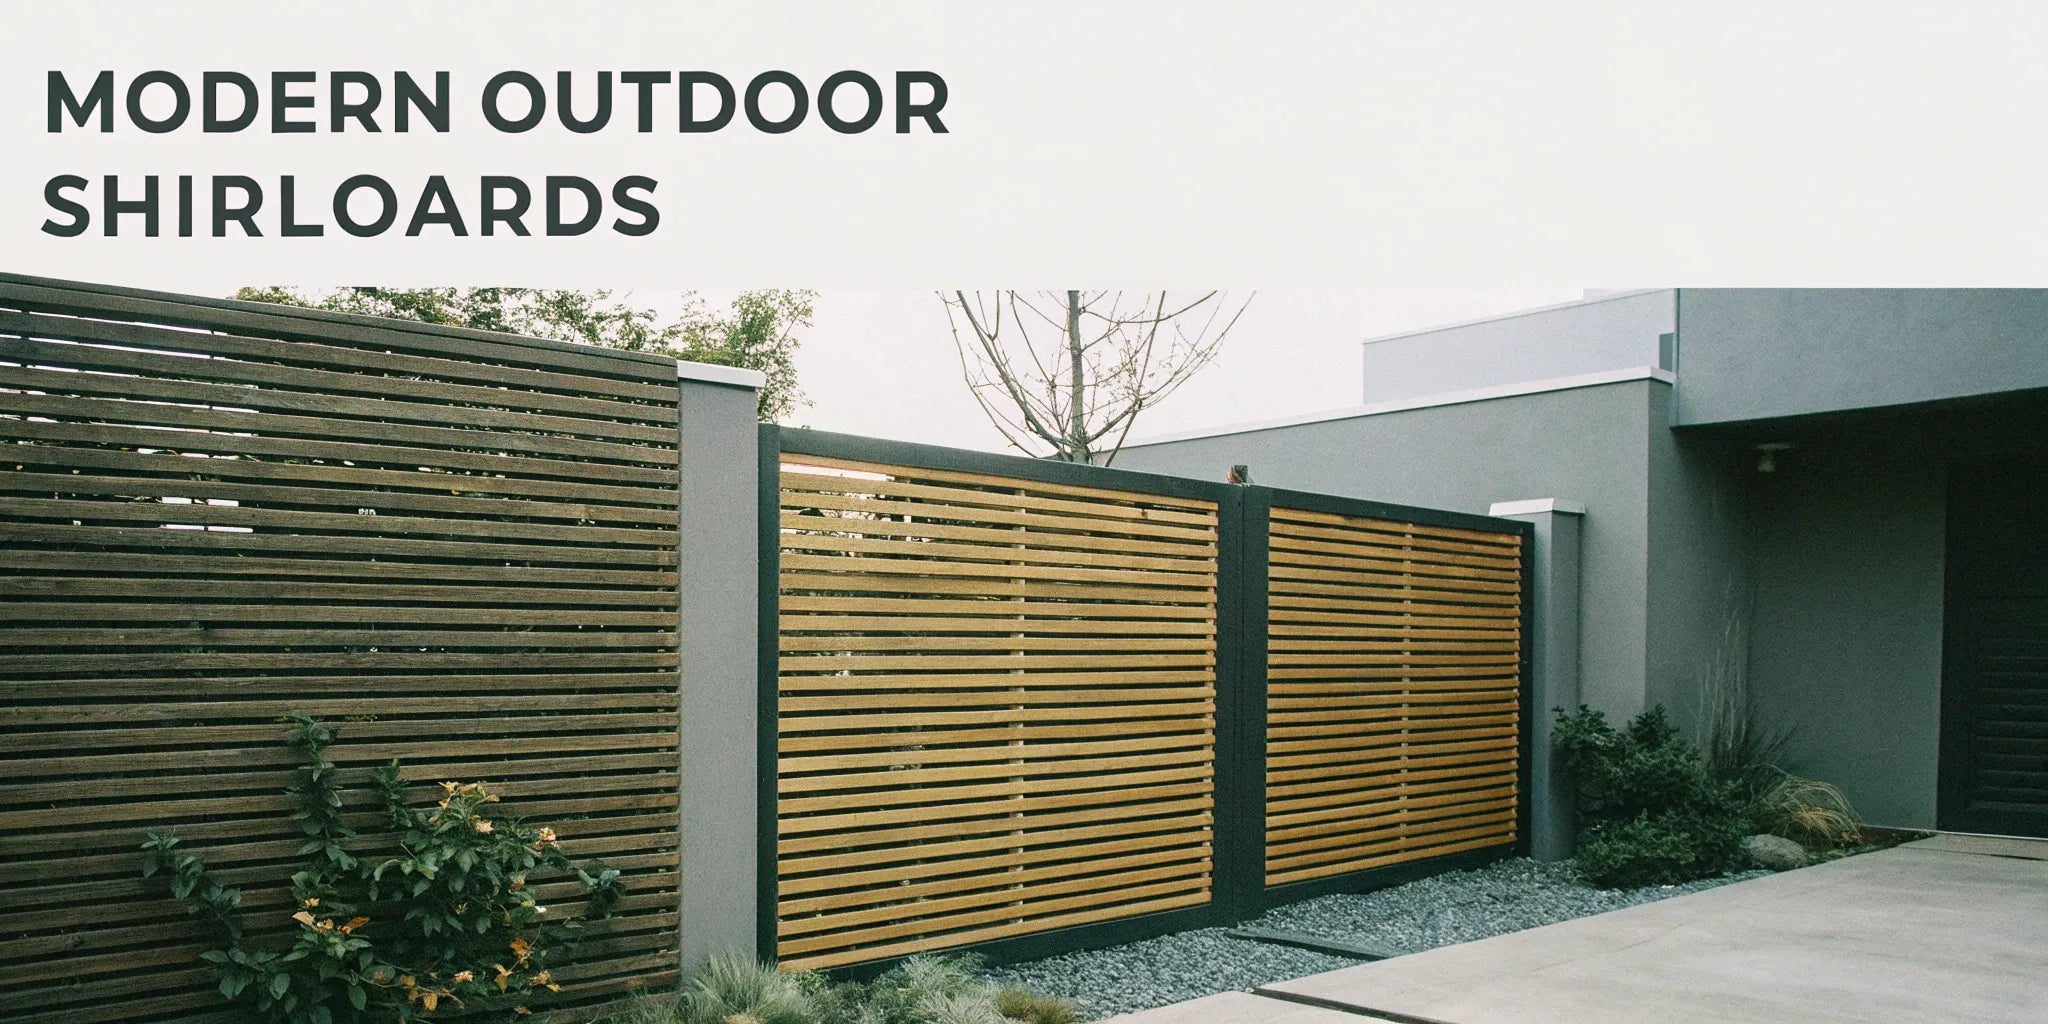
Shiplap’s signature style is all about clean lines and subtle texture. The horizontal grooves create visual interest and dimension, giving a home’s exterior a crisp, polished look that plain siding can’t match. While it’s often associated with rustic or farmhouse designs, shiplap is incredibly versatile. Painted a dark charcoal or black, it can feel sleek and modern. A classic white finish gives off a timeless, coastal vibe. This adaptability is a huge part of its appeal; it can enhance a home's appearance whether you're aiming for a traditional or contemporary feel, making it a go-to for designers and homeowners alike.
Shiplap for Interior Design
While exterior shiplap is all about durable protection, bringing it indoors is where the fun really begins. Interior shiplap is a designer’s secret weapon for adding texture, warmth, and character to any room. It has a unique ability to feel both timeless and modern, fitting seamlessly into design schemes ranging from coastal and farmhouse to Scandinavian and industrial. Whether you’re aiming for a cozy bedroom retreat or a striking living room feature, shiplap provides a backdrop that’s more dynamic than plain drywall without overwhelming the space. It’s a fantastic way to break up a large wall, add architectural detail to a flat ceiling, or introduce a subtle pattern that ties a room together. Plus, with so many materials and finishes available, from raw, unfinished wood to sleek, pre-painted panels, you can customize the look to perfectly match your vision. It’s a project that delivers a major visual impact.
Common Interior Applications
One of the best things about shiplap is its versatility. It’s not just for accent walls anymore. Designers and DIYers are finding creative ways to incorporate it throughout the home to add custom detail and charm. From making a grand statement to adding a subtle touch of texture, shiplap can be adapted to almost any surface. Here are a couple of the most popular and effective ways to use it inside your home, proving just how flexible this classic material can be. These applications work well because they highlight shiplap’s clean lines and add a layer of sophistication to otherwise ordinary spaces, turning them into intentional design moments.
Accent Walls and Ceilings
Creating an accent wall is arguably the most popular way to use shiplap indoors. Placing it on the wall behind a bed or a sofa instantly creates a focal point, drawing the eye and grounding the room’s design. It adds depth and texture that paint alone can’t achieve. But don’t forget to look up—a shiplap ceiling can completely transform a space. In a room with high ceilings, it can add warmth and make the space feel cozier. In a smaller room, running the planks parallel to the longest wall can create an illusion of more space. It’s an unexpected touch that adds a layer of architectural interest.
Kitchen Backsplashes and Wainscoting
Shiplap also shines in more functional roles. In the kitchen, it can serve as a beautiful and cost-effective backsplash. When sealed with a durable, wipeable paint, it stands up to splashes and spills while adding a touch of farmhouse charm. Another classic application is wainscoting—paneling the lower third of a wall. This is a great way to protect walls in high-traffic areas like hallways, mudrooms, or dining rooms. It adds a traditional, polished look and can be painted a contrasting color to create visual separation and a custom feel, blending durability with timeless style.
Popular Materials for Indoor Shiplap
The material you choose for your interior shiplap project will have a huge impact on the final look and feel of your space. While traditional wood is a classic choice, modern alternatives offer different benefits in terms of appearance, durability, and maintenance. Your decision will depend on your budget, your design goals, and how much time you want to spend on upkeep. Whether you’re drawn to the authentic grain of natural wood or the consistency of an engineered product, there’s a material that will help you bring your vision to life. Let’s explore some of the go-to options for indoor applications.
Pine, Oak, and Walnut
For a truly authentic look, nothing beats real wood. Pine is a popular and budget-friendly choice, known for its light color and prominent knots, making it perfect for a rustic or coastal vibe. It’s also soft enough to be easily cut and installed. Oak is a harder, more durable option with a beautiful, pronounced grain that adds warmth and a traditional feel. For a more dramatic and sophisticated statement, walnut offers a rich, dark color that works well in modern or mid-century designs. Choosing Unfinished Wood Wall Panels gives you the ultimate flexibility to paint or stain the wood to achieve your desired finish.
Reclaimed Barn Wood for a Unique Look
If you want a look that’s full of history and character, reclaimed barn wood is an incredible choice. Each plank tells a story, featuring unique weathering, saw marks, nail holes, and color variations that you simply can’t replicate with new materials. It’s perfect for creating a one-of-a-kind accent wall that feels both rustic and soulful. While sourcing true reclaimed wood can be a project in itself, the result is a stunning feature with unmatched texture and depth. For a similar aesthetic with more consistency, Natural Veneer Wall Panels can offer the look of aged wood with the reliability of a modern product.
Why Use Shiplap for Your Home's Exterior?
Choosing the right siding is a huge decision—it defines your home's character, protects it from the elements, and impacts your budget. While options like vinyl and brick are common, exterior shiplap has become a go-to for homeowners and builders looking for a blend of style and substance. Its signature overlapping boards create clean, horizontal lines that feel both classic and fresh, making it a versatile choice for everything from a modern farmhouse to a coastal retreat.
But shiplap is more than just a pretty face. Modern materials have made it a durable, low-maintenance option that stands up to harsh weather. If you're looking for siding that delivers on curb appeal without compromising on performance, shiplap is definitely worth considering. It offers a unique texture and shadow line that adds depth and interest to your home's facade, setting it apart from flatter, more conventional siding materials.
A Style That Never Fades
One of the biggest draws of shiplap is its incredible aesthetic versatility. The clean, distinct lines can steer your home’s style in several directions. You can create a cozy, rustic vibe or go for a sharp, contemporary look depending on the material, finish, and color you choose. This adaptability makes it a designer favorite. Whether you're renovating a classic home or building a new one, shiplap siding provides a polished finish that enhances architectural details. It has a timeless quality that won't look dated in a few years, ensuring your home looks great for the long haul.
Built to Withstand the Elements
Your home's exterior is its first line of defense, so siding needs to be tough. When installed correctly, traditional wood shiplap made from cedar or pine is known for its resilience. For even greater peace of mind, you can opt for exterior shiplap cladding made from composite materials. These advanced products are engineered to resist common issues like sun fading, rot, mold, and insects. The overlapping design of shiplap boards also creates a tight seal that helps shed water, protecting the structure of your home from moisture damage year after year.
Shiplap vs. Other Siding: A Cost Breakdown
When it comes to budget, shiplap is a mid-range siding option. Material costs typically run from $2.50 to $7.00 per square foot, depending on whether you choose wood, composite, or fiber cement. Professional installation adds another $1.00 to $5.00 per square foot. While real wood shiplap can be more expensive upfront than basic vinyl or aluminum siding, its durability and timeless appeal can offer better long-term value. It’s a worthwhile investment that balances cost with a high-end look and strong performance, giving you a great return in both curb appeal and protection.
What's the Best Material for Exterior Shiplap?
The material you choose for your exterior shiplap is the biggest decision you’ll make. It impacts everything from the final look and installation process to long-term durability and maintenance. Each option has its own set of strengths, so it’s all about matching the material to your climate, budget, and the amount of upkeep you’re willing to do. Think about whether you prefer the classic charm of real wood or the modern resilience of a composite or fiber cement. Let’s walk through the most common choices to help you find the perfect fit for your home.
The Classic Choice: Natural Wood
If you’re after an authentic, classic look, nothing beats real wood. It offers a natural warmth and texture that other materials try to imitate. Woods like cedar are especially popular for exteriors because they naturally resist rot and insects, making them a durable, long-lasting choice. While wood can be more expensive and requires regular maintenance like sealing or painting to protect it from the elements, many homeowners feel the timeless aesthetic is worth the investment. For a truly custom finish, you can select unfinished wood wall panels and stain or paint them to match your exact vision.
The Durable Alternative: Composite
For a low-maintenance alternative that’s built to last, composite shiplap is an excellent choice. Made from a wood polymer composite (WPC), this material is engineered to withstand just about anything. It’s highly resistant to fading, weather, rot, insects, and even fire. Composite boards are easy to install and require very little upkeep compared to real wood, saving you time and effort over the years. You get the clean lines and stylish look of shiplap without worrying about the constant maintenance that wood demands, making it a practical option for busy homeowners who want lasting beauty.
The Budget-Friendly Option: Vinyl
Vinyl is a go-to option if you’re working with a tighter budget but don’t want to sacrifice style. It’s one of the most affordable shiplap materials and performs well in a variety of weather conditions. Vinyl is lightweight, simple to install, and requires minimal maintenance—just an occasional cleaning is usually all it needs to look fresh. While it may not have the same authentic texture as wood, modern vinyl siding comes in a wide range of colors and finishes, making it easy to find a look that complements your home’s exterior design without breaking the bank.
The Ultimate Protector: Fiber Cement
Fiber cement offers the best of both worlds: the beautiful appearance of wood with exceptional durability. This material is tough enough to handle harsh weather, resists rot and pests, and is non-combustible. It provides the substantial feel and classic look of wood siding but without the demanding maintenance schedule. While it’s heavier than vinyl and may require professional installation, its strength and longevity make it a smart investment. Using fiber cement boards for your shiplap siding gives you peace of mind knowing your home’s exterior is built to endure for decades.
Modern Shiplap Alternatives
While we've focused on the robust materials needed for your home's exterior, the shiplap trend is just as popular inside. The demand for that clean, textured look has inspired some really clever and user-friendly products designed for interior spaces. These alternatives are perfect if you’re looking for a weekend DIY project or a less permanent way to add character to a room. They offer the classic shiplap aesthetic without the need for saws, nail guns, or a construction crew. From simple peel-and-stick options to innovative felt panels that also absorb sound, you can achieve a high-end look with minimal effort.
Peel-and-Stick Shiplap
If you want the fastest, most straightforward path to a shiplap wall, peel-and-stick panels are your answer. Just as the name suggests, these panels come with a pre-applied adhesive backing. You simply peel off the protective layer and press the panel firmly onto your wall. There’s no need for nails, screws, or messy glue, which makes it an ideal project for DIY beginners. This method is perfect for creating a quick accent wall in a bedroom, living room, or entryway. It’s a low-commitment way to add texture and style to a space without the permanence or complexity of traditional wood installation.
Felt Shiplap Panels
For a modern twist on shiplap that combines style with function, felt wall panels are an exciting option. Made from thick, durable polyester felt, these panels offer the same linear look of shiplap but with a soft, contemporary texture. They are also incredibly easy to install using peel-and-stick adhesive squares. Beyond their visual appeal, these panels have a secret weapon: sound absorption. This makes them a brilliant choice for rooms where noise and echo are a concern. While they offer a great DIY solution, for projects requiring professional-grade sound control, you might also explore dedicated Acoustic Wall Panels that are engineered for maximum performance.
Key Benefits of Felt Panels
The main advantage of felt shiplap panels is their dual-purpose design. You aren’t just installing a decorative feature; you’re also improving the room's acoustics. This makes them perfect for home offices where you need to reduce echo for clear video calls, nurseries where a quiet environment is key, or media rooms where you want to enhance sound quality. They provide a simple way to create a more peaceful and comfortable space while adding a sophisticated, textured look to your walls.
Sound Absorption and Echo Reduction
Felt panels work by trapping sound waves, which helps to deaden noise and reduce reverberation in a room. Many of these panels have a Noise Reduction Coefficient (NRC) rating around 0.35, meaning they can absorb about 35% of the sound that hits them. In practical terms, this creates a noticeably quieter atmosphere. The sharp sounds of conversation, footsteps, or music will be softened, making the entire room feel more serene and less hollow.
Renter-Friendly Installation
One of the biggest challenges for renters is making a space feel like their own without making permanent changes. Felt shiplap panels are a fantastic solution. The peel-and-stick adhesive is designed to be strong enough to hold the lightweight panels securely in place but can typically be removed cleanly without stripping paint or damaging the wall underneath. This allows you to customize your space and then easily take the panels down when it’s time to move, making them a smart, damage-free decorating choice.
Our Top Picks for Exterior Shiplap Brands
When you’re ready to start shopping, you’ll find a variety of brands offering high-quality exterior shiplap. Each has its own strengths, from specific materials to unique aesthetic qualities. It’s smart to compare a few options to find the perfect fit for your home’s style, your climate, and your budget. To get you started, here are a few standout brands that are known for their performance and design.
USA Builders Depot: For Quality Cladding
We designed our Exterior Shiplap Cladding Wall Panels to offer a clean, modern look that’s built to last. Made from durable materials, these panels provide excellent protection against the elements while creating a stunning facade. We also focus on making installation straightforward for contractors and DIYers alike. For example, one tip we always share is to drill small pilot holes before nailing the boards. This simple step prevents the wood from splitting, ensuring a flawless finish that stands the test of time. It’s this attention to detail that helps you achieve a professional-grade result.
SlatSolution: The Composite Specialist
If low maintenance is at the top of your list, SlatSolution is a brand worth looking into. Their composite shiplap is known for its incredible durability. It’s constructed from a wood polymer composite (WPC) that is highly resistant to common issues like sun fading, rot, mold, and insects. This makes it an excellent choice for homeowners who want the look of wood without the regular upkeep. Because it’s engineered to withstand harsh weather, it’s a practical and long-lasting siding solution that keeps its good looks for years.
More Brands Worth Checking Out
The market offers a wide range of styles if you’re looking for something specific. For instance, brands like BARNWOODUSA specialize in reclaimed wood planks that deliver a beautiful, rustic charm perfect for farmhouse or traditional designs. On the other end of the spectrum, you can find MDF board kits from companies like Weysat that are ideal for creating sleek, modern accent walls or exteriors. Exploring these different brands can help you find the exact texture, finish, and material to bring your unique vision to life.
What Makes a Quality Shiplap Wall Board?
Not all shiplap is created equal. When you're choosing siding for your home's exterior, a few key features separate the good from the great. Look for materials that offer a combination of robust protection, straightforward installation, and long-term value. These qualities ensure your investment not only looks fantastic on day one but also holds up beautifully for years with minimal fuss.
Look for Weather and Rot Protection
High-quality exterior shiplap is engineered to be your home’s first line of defense against the elements. Materials like wood-polymer composite (WPC) are a game-changer, offering incredible resistance to sun fading, moisture, and temperature swings. Unlike traditional wood, these advanced materials won't rot, warp, or attract insects. This means you get the classic, rustic look of shiplap without the constant worry of weather damage. When you choose durable exterior shiplap cladding, you’re investing in a protective shield that keeps your home safe and sound, season after season.
A Straightforward and Secure Fit
One of the best things about shiplap is its clever design. Each board is milled with a special overlapping joint, called a rabbet, that allows them to fit together snugly. This interlocking system not only creates a tight, weather-resistant seal but also makes the installation process much simpler. The boards align easily, ensuring straight, consistent lines across your wall. This makes it a manageable project for a seasoned DIYer and a more efficient job for a professional contractor. The result is a clean, polished look without the complex fitting required by other types of siding.
Find a Low-Maintenance Finish
Let’s be honest—no one wants to spend their weekends on siding upkeep. Quality exterior shiplap is designed for a low-maintenance lifestyle. Because materials like fiber cement and composite are so resilient, they don’t require the frequent scraping, staining, or painting that wood does. A simple wash with mild soap and water once or twice a year is usually all it takes to remove dirt and keep your siding looking fresh. This frees up your time and saves you money on costly maintenance products, giving you more moments to simply enjoy your beautiful home.
A Warranty That Backs Up Durability
A strong warranty is a sign that a manufacturer stands behind its product. When you're shopping for shiplap, look for options that come with solid warranty coverage, as this reflects the material's expected lifespan and performance. High-quality composite and fiber cement shiplap are built to last for decades, retaining their color and structural integrity far longer than traditional wood. Investing in durable wall panels means you get peace of mind knowing your home’s exterior is protected by a warranty and built for the long haul.
How to Install Exterior Shiplap
Installing exterior shiplap is a manageable project that can completely transform your home's facade. With the right preparation and a methodical approach, you can achieve a professional-looking finish that lasts for years. The key is to work carefully, measure twice, and ensure every board is secure and level. Let’s walk through the process step by step.
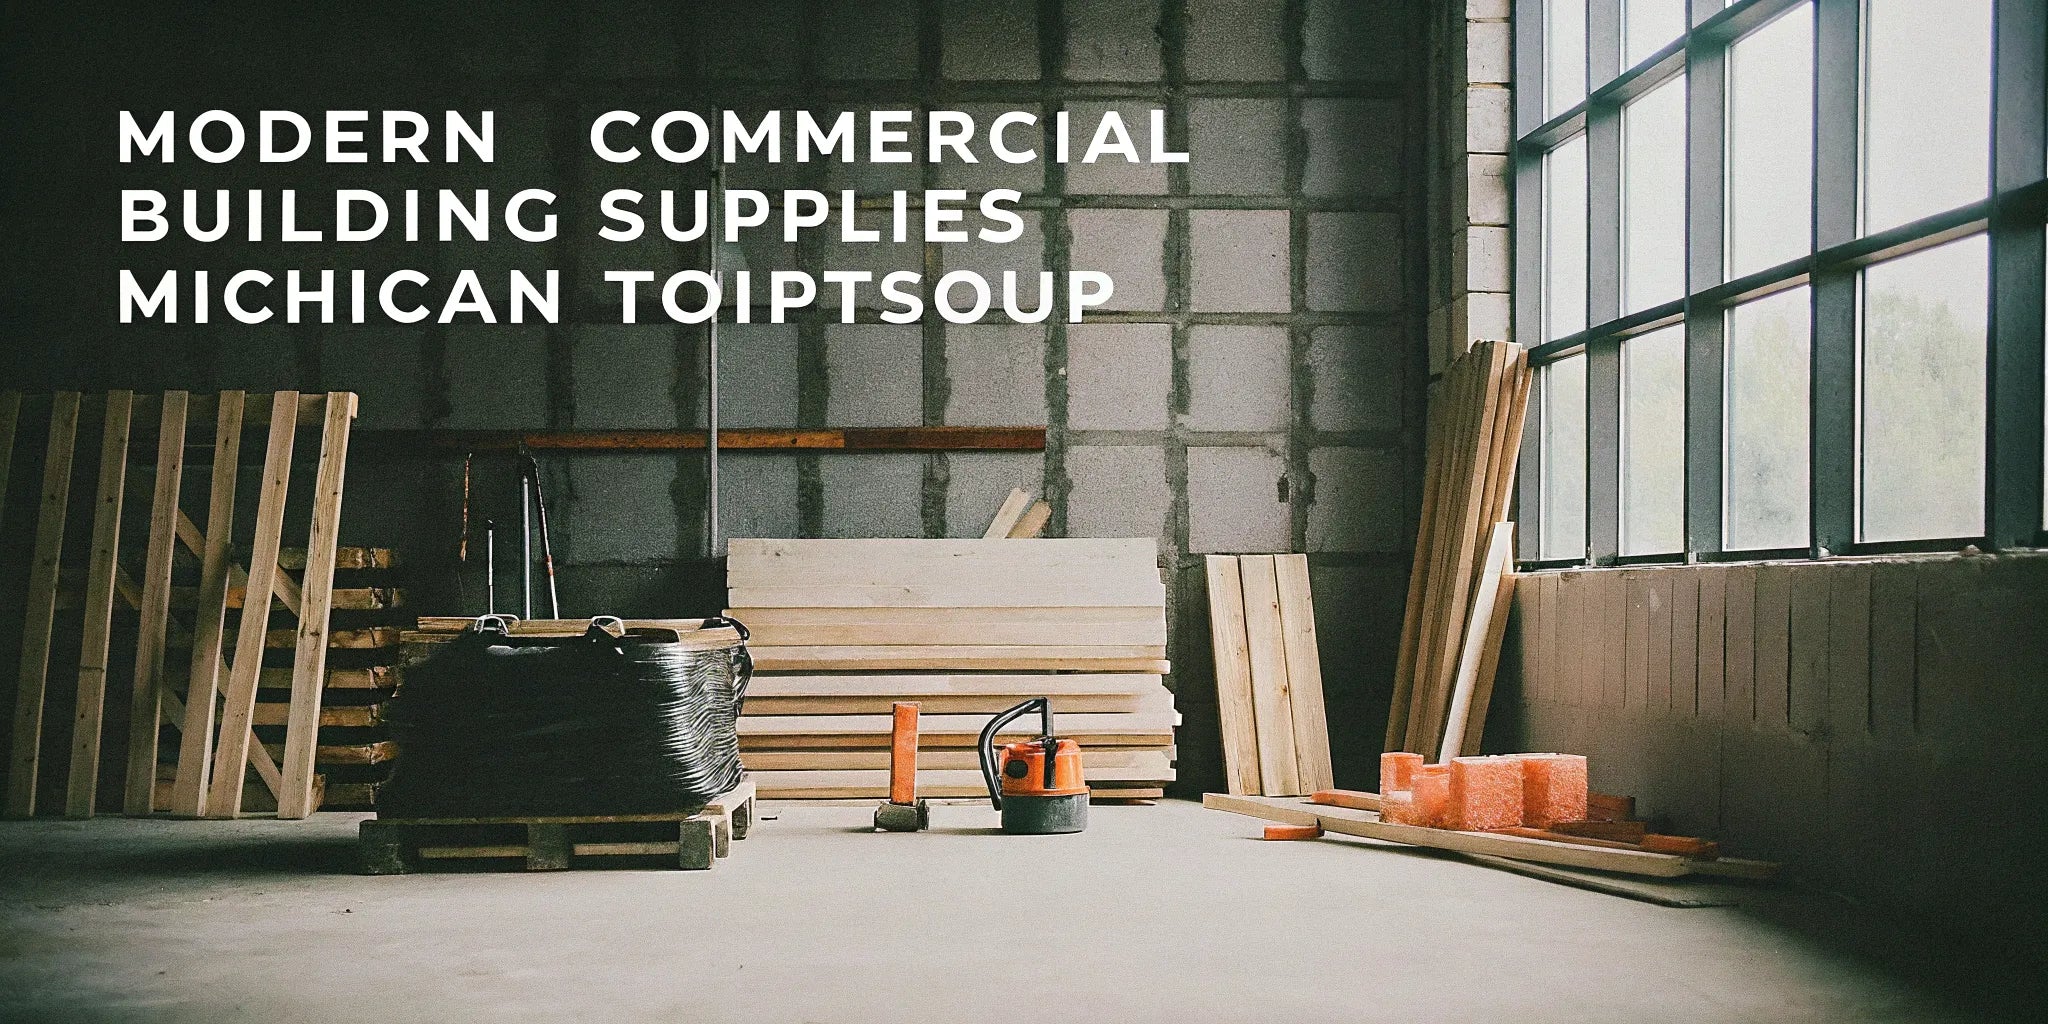
Gather Your Tools and Materials
Before you start, get all your tools and materials in one place. This simple step saves you from making extra trips to the hardware store later. You’ll need your Exterior Shiplap Cladding Wall Panels, of course, along with a few essentials. At a minimum, grab a tape measure, pencil, level, and a speed square. For cutting, a miter saw will give you the cleanest angles, but a circular saw or even a hand saw can work. You’ll also want a stud finder, a nail gun (or a hammer and nails), and some high-quality construction adhesive to ensure everything stays put.
Prep Your Workspace
A smooth installation starts with a well-prepped surface. Clear the area where you’ll be working and make sure the wall is clean and dry. Exterior shiplap should be installed over a weather-resistant barrier and drywall or sheathing to create a solid, even base. If you’re working with an older home, you might find uneven surfaces or have to work around existing window trim. Taking the time to ensure your starting surface is flat will prevent headaches down the line and give your shiplap a seamless, professional look. This is the foundation for a successful project.
Pro Tips for Planning Your Installation
A little bit of planning before you nail up the first board can make all the difference between a good result and a great one. These professional tips will help you think through the details, ensuring your installation is smooth, secure, and looks perfectly balanced. From locating studs to planning your layout for visual appeal, thinking like a pro from the start is the secret to a project you’ll be proud of. Taking the time to map out your project now will save you from common mistakes and help you achieve that flawless finish you’re aiming for.
Marking Studs and Removing Baseboards
Your shiplap is only as secure as what it’s attached to, which is why locating and marking your wall studs is a non-negotiable first step. Use a stud finder to find the vertical framing inside your wall and mark each location with a pencil or a chalk line from floor to ceiling. This gives you a clear guide for nailing each board securely. For the cleanest finish, it’s also a good idea to remove existing baseboards and trim. This allows the shiplap to sit flush against the wall, giving you a more integrated and professional look once you reinstall new or existing trim on top.
Planning Your Layout for a Balanced Look
To avoid ending up with a skinny, awkward-looking plank at the top of your wall, plan your layout in advance. Start by measuring the total height of your wall and dividing it by the width of your shiplap boards. If this calculation leaves you with a very narrow final row, consider ripping (cutting lengthwise) your first board down a bit. By starting with a slightly narrower board at the bottom, you ensure that the final board at the top will be a similar width, creating a much more balanced and intentional design that looks custom-fit to the space.
Choosing the Right Nail Length
This is a small detail that makes a huge difference in how secure your installation is. Your nails need to be long enough to pass through the shiplap, the drywall (or sheathing), and penetrate at least an inch into the wall stud. For example, if your shiplap is half an inch thick and your drywall is also half an inch thick, you’ll need a nail that is at least two inches long to get that secure hold. Using nails that are too short is a common mistake that can lead to loose boards over time, so double-check your measurements before you start fastening.
Handling Trim and Outlet Extenders
When your shiplap meets existing window or door trim, the general rule is that the trim should be thicker than the siding. If your current trim is thicker, you can simply butt the shiplap boards up against it for a clean edge. However, if your trim is thinner, the shiplap will stick out awkwardly. In this case, your best bet is to replace the old trim with a thicker style after the shiplap is installed. Don’t forget about electrical outlets and switches; you’ll need to install outlet box extenders to bring them flush with the new surface for a safe and polished finish.
Understanding Wood Movement
Wood is a natural material that responds to its environment. It expands when humidity is high and contracts when the air is dry. This natural process, known as wood movement, happens with all wood and wood-based products, including many types of exterior wall panels. While modern composite materials are engineered to be more stable, it’s still important to account for slight shifts. Understanding this concept is key to a successful installation, as it influences how you should handle joints and gaps to ensure your siding looks great for years to come.
Why You Shouldn't Caulk Butt Joints
It can be tempting to fill every tiny gap with caulk or wood filler for a perfectly seamless look, but you should resist the urge when it comes to butt joints (where two boards meet end-to-end). Because of natural wood movement, the boards will shift slightly with changes in temperature and humidity. Any rigid filler you apply to these joints will eventually crack and flake out, making the seam more noticeable and messy than if you had left it alone. It’s better to focus on making clean, tight cuts and allowing the material to breathe as it was designed to.
Your Step-by-Step Installation Guide
Once you’re prepped, it’s time to install. Start at the bottom of the wall and work your way up. The most critical step is making sure your very first board is perfectly level. Use your level and take your time—if the first piece is crooked, every subsequent board will be too. To prevent the wood from splitting, always drill a small 1/8-inch pilot hole before driving in a nail. Secure each board to the wall studs with nails and construction adhesive for extra hold. Continue this process, locking each new board into the one below it, until you reach the top.
Painting Shiplap for a Professional Finish
Painting is the final step that pulls your entire exterior shiplap project together. It’s not just about color; a quality paint job protects the material from moisture and sun, extending its life and keeping it looking sharp. The difference between a finish that looks professionally done and one that looks like a weekend DIY project often comes down to technique. Taking the time to prep the surface correctly and apply the paint evenly will pay off in a big way. With a little patience, you can achieve a smooth, durable finish that highlights the clean lines of your shiplap and gives your home that polished curb appeal you’re after.
Pre-Painting Preparation and Dust Removal
Never underestimate the power of good prep work. Before you even think about opening a can of paint, you need to make sure your shiplap boards are perfectly clean. Any dust, dirt, or debris left on the surface will prevent the paint from adhering properly, leading to a bumpy finish that can peel or chip later on. Once the boards are clean and dry, applying a quality primer is a non-negotiable step, especially if you're working with unfinished wood wall panels. Primer seals the wood, ensures the paint goes on smoothly, and prevents any natural wood tannins from bleeding through and staining your final color.
Using a Paint Sprayer for a Smooth Finish
For a truly flawless finish, a paint sprayer is your best friend. It delivers an even coat of paint without any brush or roller marks, giving your shiplap a sleek, almost factory-finished look. If you don’t have a sprayer, you can still get great results with a combination of tools. Use a small, angled brush to carefully paint inside the shiplap grooves, then go over the flat faces of the boards with a small foam roller. This method gives you crisp lines and a smooth surface. Whichever technique you choose, it’s always a good idea to practice on a scrap piece of shiplap first to get your application just right.
Common Shiplap Installation Mistakes to Avoid
Installing exterior shiplap can completely transform your home’s curb appeal, but a few simple missteps can lead to a finish that doesn’t last. Taking the time to get the details right from the start will save you from costly repairs and headaches down the road. By avoiding these common mistakes, you can ensure your shiplap siding looks fantastic and protects your home for years to come.
Mistake: Picking the Wrong Material for Your Climate
While shiplap is incredibly versatile, not every board is suited for outdoor use. One of the biggest mistakes is using interior-grade shiplap on your home's exterior. Materials designed for the indoors lack the necessary treatments to stand up to moisture, UV rays, and temperature swings. In a humid or rainy climate, the wrong wood can quickly warp, rot, or grow mold. That’s why it’s essential to select exterior shiplap cladding specifically engineered to handle your local weather conditions. Always check the product specifications to confirm it’s rated for exterior applications before you buy.
Mistake: Forgetting About Water Management
Even the most durable shiplap can fail if water gets trapped behind it. Proper water management is about creating a complete defensive system, not just relying on the siding itself. Before you install the first board, make sure you have a high-quality weather-resistant barrier (WRB), or house wrap, correctly installed over your sheathing. If water finds its way behind the shiplap, the WRB is your home’s last line of defense against rot and structural damage. It’s also crucial to properly flash and seal around all windows, doors, and corners to prevent water intrusion at these vulnerable points.
Mistake: Skipping Critical Installation Steps
The small details of installation make a huge difference in the final outcome. First, always make sure your first board is perfectly level—it will guide every other board that follows. Second, don't skip drilling pilot holes, as this simple step prevents the boards from splitting when you nail them in. Finally, make sure your boards always end on a stud. This provides a secure anchor point and prevents the shiplap from bowing or pulling away from the wall over time. Taking a few extra minutes on these steps ensures a professional, long-lasting finish.
How to Maintain Your Exterior Shiplap
One of the best things about exterior shiplap is that it doesn’t demand a lot of your time. With just a little routine care, you can keep it looking fantastic and protecting your home for years. Proper maintenance prevents small issues like dirt buildup or peeling paint from turning into bigger, more expensive problems. Think of it as a simple way to protect your investment and maintain your home’s curb appeal. A little effort a couple of times a year is all it takes to ensure your shiplap siding remains a durable and stylish feature.
Your Go-To Cleaning and Sealing Routine
Keeping your shiplap clean is straightforward. Once or twice a year, give it a gentle wash with a soft brush using mild soap and warm water. This simple step removes the dirt, dust, and pollen that can accumulate over time and helps prevent mold or mildew from taking hold. For wood shiplap, it’s also important to inspect the sealant or paint. A strong finish is your first line of defense against moisture. If you notice it’s wearing thin or peeling, it’s time for a touch-up to keep the wood protected.
Seasonal Upkeep Checklist
A quick seasonal inspection can make all the difference. In the spring, after winter has passed, walk around your home and check for any signs of damage, like cracks or warping. This is also a great time for that annual cleaning. In the fall, clear away any fallen leaves or debris resting against the siding, as they can trap moisture. This is also the perfect time to check the paint or stain. Addressing any peeling spots before winter arrives will help your Exterior Shiplap Cladding stand up to the elements.
How to Handle Repairs and Replacements
If you spot a damaged board, it’s best to address it quickly to prevent water from getting behind the siding. Because of the way shiplap boards interlock, replacing just one can be tricky. Often, the most effective solution is to remove and replace the entire damaged plank. For small cracks or holes, a high-quality exterior wood filler and a bit of paint can do the trick. If you’re dealing with extensive damage or aren’t comfortable making the repair yourself, calling a professional is always a smart choice to ensure the job is done right.
How Much Does Exterior Shiplap Cost?
Budgeting for a home exterior project can feel like a moving target, but understanding the numbers is the best way to start. Exterior shiplap is a fantastic choice that balances classic style with modern durability, and its cost is often more approachable than other siding options. When you're planning, it's helpful to think about the total investment, which isn't just the price per board. The final cost of your project will come down to two main factors: the materials you choose and the cost of labor to get it installed perfectly.
The type of shiplap—whether it's natural wood, fiber cement, or a composite material—will be the biggest variable in your material budget. Each comes with its own price point and long-term maintenance needs, which is an important part of the value equation. Then there's installation. While a DIY approach might seem like a way to save money, improper installation can lead to costly repairs down the road from issues like water damage. Hiring a professional ensures your siding is weathertight and looks great for decades. Let’s walk through what you can expect to invest in your home’s beautiful new look.
A Look at Material Costs
The price for shiplap materials typically falls between $2.50 and $7.00 per square foot. This range is influenced by the specific material you select. For example, traditional wood options like pine or cedar will have different price points, while modern alternatives like fiber cement or composite boards offer their own cost structures. High-quality Exterior Shiplap Cladding Wall Panels are engineered for performance and provide excellent long-term value. The great news is that shiplap siding often costs less than many other types of wood siding, making it an accessible option for achieving a high-end finish without an extravagant budget.
Don't Forget Labor and Installation Fees
Unless you’re a seasoned DIYer, you’ll want to factor in the cost of professional installation, which can range from $1.00 to $5.00 per square foot. While it might be tempting to save on labor, putting up shiplap siding is a job best left to experts. Proper installation is critical for ensuring your siding is weathertight, durable, and looks flawless for years to come. A professional installer will handle the details that protect your home from moisture and ensure every board is perfectly aligned. For contractors, we offer bulk discounts for trade professionals to help manage project costs effectively.
Tips for Getting the Best Value
Getting the best value means looking at the big picture, not just the initial price tag. When planning your budget, consider the total cost, which includes materials, installation, and any ongoing maintenance. Wood shiplap, for instance, might require periodic sealing or painting to keep it protected, while fiber cement and composite options are known for being very low-maintenance. The right choice depends on your climate, your aesthetic goals, and how much time you want to spend on upkeep. By weighing these factors, you can select a material that delivers both the look you love and a smart, long-term investment for your home.
