


The Ultimate Guide to Paintable Wood Paneling
Flat, painted walls can feel a little... boring. If you're craving that custom, high-end feel without the huge price tag, the secret is adding texture and dimension. This is where paintable wood paneling comes in. It's the perfect way to add architectural character to any room. Create a modern, minimalist vibe with sleek fluted panels or a cozy, traditional look with classic beadboard. The best part? It’s completely adaptable. When you're ready for a change, just grab a paintbrush. Here, we’ll cover the best types of panels and share actionable tips for installation and painting.
Key Takeaways
- Customize Your Walls with Any Color: Paintable paneling offers complete design freedom. You can select the exact paint shade to complement your decor or create a dramatic focal point, and you always have the option to repaint as your style evolves.
- Sanding and Priming Are Your Keys to Success: For a flawless, durable finish, never skip the prep work. A light sanding helps the paint adhere, while a quality primer seals the surface, preventing blotchiness and ensuring your color looks rich and even.
- Choose the Right Material for Lasting Results: The panel's material should fit the room's function. Use durable, high-density MDF for busy hallways and living areas, and select moisture-resistant options for humid spaces like bathrooms to prevent damage and ensure longevity.
What Is Paintable Wood Paneling?
Think of paintable wood paneling as a blank canvas for your walls. It’s a versatile wall covering that adds texture, depth, and character to any room, with the added bonus that you can paint it any color you choose. Unlike traditional wallpaper or a simple coat of paint, these panels introduce architectural detail, turning a flat, boring wall into a dynamic feature. Whether you’re aiming for a modern, minimalist vibe or a classic, cozy feel, paintable paneling gives you the creative freedom to bring your vision to life without being locked into a specific finish from the start.
These versatile wall panels are typically made from materials like Medium Density Fiberboard (MDF) or various types of real wood, all specifically prepared to accept paint. They offer an approachable way to achieve a high-end, custom look without the complexity or cost of a full-scale renovation. From a striking accent wall in your living room to durable and stylish wainscoting in a hallway, paintable paneling provides a foundation for endless design possibilities. The real magic is in its adaptability; you can change the color down the road as your style evolves, something you can't easily do with pre-finished panels. It’s all about giving you total control over the final look and feel of your space.
What Types of Paneling Can You Paint?
Paintable paneling comes in several popular styles, each offering a distinct aesthetic. Fluted or slatted panels are a favorite for creating a modern, textured look with clean vertical lines that can make a room feel taller. Beadboard paneling delivers a more traditional, charming feel, perfect for cottage, coastal, or farmhouse designs. Shiplap and tongue-and-groove panels provide a classic, rustic look with clean, overlapping lines that add subtle dimension. For those who want complete creative control from the ground up, Unfinished Wood Wall Panels are an excellent choice, allowing you to prime and paint them to match your exact specifications.
Wood, MDF, and Beyond
When it comes to paintable paneling, the material you choose is just as important as the style. Medium Density Fiberboard (MDF) is a top contender because its smooth, consistent surface is practically made for painting, giving you a flawless finish without any wood grain peeking through. It’s also stable and less prone to warping, making it a reliable choice for most indoor applications. For those who appreciate the authentic character of real wood, Unfinished Wood Wall Panels are an excellent option. They provide a solid foundation that can be sanded, primed, and painted to perfection, offering both durability and the timeless appeal of natural materials.
Faux Finishes: Brick, Stone, and 3D Styles
If you want to make a bold statement, look beyond traditional flat panels. Modern paneling offers incredible textures that can mimic other materials or create a sculptural effect. Imagine the industrial-chic vibe of a white-washed brick wall or the rustic charm of stone, all achievable with lightweight, easy-to-install panels that you can paint to match your decor. For a contemporary look, 3D and geometric panels add depth and visual interest, playing with light and shadow to turn your wall into a piece of art. Styles like fluted slat panels are perfect for this, creating clean, vertical lines that add a sophisticated and dynamic element to any room.
What Makes Wood Paneling Paintable?
The secret to a great paint job is the surface, and that’s exactly what makes certain wood panels "paintable." These panels are manufactured with a smooth, consistent surface that is ideal for paint adhesion. Many options come pre-primed right out of the box, which is a huge time-saver. This factory-applied primer creates a uniform base that prevents the paint from soaking into the material, ensuring an even, professional-looking finish with fewer coats. Even unprimed panels are made from materials like MDF or specific wood species known for their ability to take primer and paint well, giving you a flawless result once you’ve completed the prep work.
Special Features to Consider
Waterproof Panels for Kitchens and Baths
Not all paneling is created equal, especially when it comes to rooms with high humidity like kitchens and bathrooms. Standard MDF or wood can warp, swell, or even grow mold when exposed to constant moisture. That’s why choosing panels specifically designed for these environments is so important. Moisture-resistant or waterproof wall panels are engineered to withstand steam from hot showers and splashes from the sink without compromising their structure or finish. These tough panels ensure your beautiful design stays that way for years, giving you peace of mind and saving you from costly repairs down the line. They provide the perfect blend of style and function for the hardest-working rooms in your home.
Acoustic Panels for Sound Control
If you're tired of echoey rooms or noise traveling through your home, acoustic paneling is a game-changer. These panels are designed not just for looks but also to absorb sound, making your space quieter and more comfortable. They are an amazing solution for home offices where you need to focus, media rooms for a better movie-watching experience, or even in open-concept living areas to reduce clatter. By adding Acoustic Wall Panels, you can create a more serene environment without sacrificing style, as they come in the same beautiful, paintable designs as standard panels. It's a simple way to improve your room's function while adding a stunning architectural feature.
Eco-Friendly and Low-VOC Options
The materials you bring into your home matter, and that includes what you put on your walls. Many modern paintable panels are made with health and sustainability in mind. Look for options labeled as low-VOC (Volatile Organic Compounds), which means they release fewer harmful chemicals into the air. According to the Environmental Protection Agency, this is crucial for maintaining good indoor air quality for you and your family. These eco-friendly choices are often made from recycled or sustainably sourced materials, so you can feel good about your design choices. Choosing safe, low-VOC panels ensures your beautiful new walls contribute to a healthier living environment from the moment they're installed.
Why Choose Paintable Wood Paneling?
If you're looking for a way to add character and a custom touch to your space without a massive renovation, paintable wood paneling is a fantastic solution. It strikes the perfect balance between classic architectural detail and modern design freedom. Unlike pre-finished options that lock you into a specific color or wood tone, paintable panels give you a blank canvas to bring your exact vision to life. Whether you want to create a dramatic accent wall, add subtle texture, or completely change the feel of a room, this versatile material delivers on style, durability, and value. It’s a straightforward way to get a high-end look that’s perfectly tailored to your home or project.
Customize Your Look with Paint
The single biggest advantage of paintable wood paneling is the complete creative control it gives you. You aren’t limited by a manufacturer's color palette; instead, the entire paint store is at your disposal. This means you can find the perfect shade to match your existing decor, create a bold, eye-catching feature wall, or even change the color down the road as your style evolves. Many unfinished wood wall panels come pre-primed and ready for paint, which saves you a significant amount of prep time. This flexibility allows you to add texture and depth to a room while ensuring the final look is uniquely yours, transforming a plain wall into a sophisticated design element.
Painting vs. Removing Old Paneling
If you're staring at dated wood paneling, you might be tempted to grab a crowbar and start tearing it down. Before you do, consider the alternative: a fresh coat of paint. Removing old paneling is a surprisingly big job that’s often messy, expensive, and can leave you with damaged drywall that needs significant repairs. Painting, on the other hand, is a much more cost-effective and straightforward way to completely transform the space. With proper prep work like light sanding and a quality primer, you can turn those dark walls into a bright, modern feature that adds character. While painting is a permanent choice, it’s a powerful way to achieve a high-end look without the headache of a full demolition project.
A Durable and Long-Lasting Choice
When you invest time and effort into a project, you want it to last. Paintable wood paneling is designed for durability, making it a reliable choice for almost any room. Many panels are made from tough, high-density materials like MDF that stand up well to the daily wear and tear of busy households and commercial spaces. This resilience means they can be installed in high-traffic areas like hallways, living rooms, and kitchens without you having to worry about constant dings and scratches. With the right paint and finish, many options are also moisture-resistant, making them a stylish and practical addition to bathrooms or basements where humidity can be a concern.
Achieve a High-End Look on a Budget
Getting a custom, high-end look doesn't have to come with a high-end price tag. Paintable wood paneling is an affordable way to achieve a sophisticated finish that looks far more expensive than it is. Because you can handle the painting yourself, you can save on labor costs while still getting a professional-quality result. For contractors and designers, offering clients a customizable paneling option adds incredible value. It’s a simple way to create bespoke interiors that stand out. Plus, trade professionals can often access bulk pricing, making it an even more budget-friendly material for large-scale residential or commercial projects.
A Guide to the Best Paintable Wood Panels
Once you’ve decided to go with paintable paneling, the next step is picking the right material. The options can feel endless, but they generally fall into a few key categories. Each type has its own unique character, benefits, and best-use cases. Whether you’re aiming for a completely custom look with natural wood or a perfectly smooth finish with an engineered product, understanding these differences will help you find the perfect canvas for your walls. Let's explore some of the most popular choices.
Unfinished Panels: Your Blank Canvas
If you want complete creative freedom, unfinished wood panels are your best friend. These panels give you a blank slate to work with, allowing you to choose the exact paint color and finish that fits your vision. Real wood brings a richness and authentic feel to any room that’s hard to replicate. While they require a bit more prep work—sanding and priming are essential—the result is a truly personalized look. Options like our Paint and Stain Grade Panels are designed specifically for this purpose, giving you a high-quality base for a durable, beautiful finish that is uniquely yours. It’s the perfect choice for the detail-oriented designer who wants to control every aspect of the final look.
MDF: The Smooth and Stable Option
For a flawless, uniform finish, Medium-Density Fiberboard (MDF) is a fantastic choice. Because it’s an engineered product, MDF has a super smooth surface with no knots or wood grain. This consistency is exactly what you want for an even paint application, free of imperfections. MDF panels are great for making plain walls more interesting and adding depth to a room without the texture of natural wood. They are also dimensionally stable, meaning they won’t expand or contract with changes in humidity as much as solid wood might. This makes MDF a reliable and budget-friendly option for creating sleek accent walls, wainscoting, or custom built-ins that look sharp and modern.
When to Use Plywood or Engineered Wood
Plywood and other engineered wood panels offer a great balance of durability, versatility, and value. They are strong, relatively lightweight, and come in large sheets, which can simplify the installation process for bigger projects. While you can achieve a smooth painted surface, some plywood types will retain a subtle wood grain texture, adding a bit of character to the final look. The key to success with these materials is using the right installation methods. Different types of paneling require specific adhesives or fasteners to ensure a secure, long-lasting fit. Taking the time to install them correctly will prevent gaps or warping and give you a professional-quality result.
Natural Woods That Take Paint Beautifully
Don’t be afraid to paint high-quality natural wood. Certain species, like poplar, birch, and pine, accept paint beautifully while still offering the durability and feel of solid wood. Even when painted, the subtle texture of the wood grain can peek through, adding a layer of sophistication that you just don’t get from engineered materials. Many homeowners find these panels are easy to install and praise their high-quality construction. Choosing a Natural Veneer Wall Panel gives you the best of both worlds: the timeless appeal of real wood and the endless color possibilities of paint. It’s an ideal way to create a feature wall that feels both classic and completely fresh.
How to Choose the Right Paintable Paneling
With so many options available, picking the perfect paintable paneling can feel like a big decision. But it doesn't have to be complicated. Thinking through a few key factors—what it’s made of, how it’s prepped, where it’s going, and how you’ll install it—will help you find the right fit for your project. Let’s break down what you need to consider to make a choice you’ll be happy with for years to come.
Choosing the Right Material
The material of your paneling is the foundation of its look and longevity. Many high-quality paintable panels are made from tough, high-density MDF (medium-density fiberboard), which provides a super smooth surface for paint and holds up well over time. The density is especially important in high-traffic areas like hallways, kitchens, or commercial spaces where walls are more likely to get bumped. A denser material ensures your beautiful new wall panels will resist dents and dings, keeping your design looking crisp and clean.
Should You Buy Primed or Unprimed Panels?
Next, you’ll want to decide between primed and unprimed panels. Pre-primed panels are a great time-saver because they arrive with a base coat already applied, giving you a smooth surface that’s ready for your final paint color. This convenience eliminates a major prep step. On the other hand, unfinished wood panels give you complete control over the finishing process. You can select the exact primer and paint system that works best for your environment and desired look, ensuring a truly custom result from start to finish.
What About Moisture Resistance?
Where you plan to install your paneling matters a lot. For rooms with high humidity, like bathrooms, laundry rooms, or kitchens, you need a material that can handle moisture without warping or deteriorating. While some wood panels can be sealed to add protection, materials like WPC (Wood Plastic Composite) or fiber cement boards are specifically designed for these conditions. If you’re paneling a moisture-prone area, look for products explicitly labeled as moisture-resistant to ensure your installation lasts. This will save you from potential headaches and repairs down the road.
How Will You Install Your Panels?
Finally, think about how the panels will be installed. Most modern paintable paneling is designed for a straightforward installation, often using a combination of construction adhesive and finishing nails. This method is efficient for both professional contractors and experienced DIYers. Using a strong adhesive does most of the work, while a few strategically placed nails hold the panels securely in place as the glue cures. For a flawless look, just remember to fill any nail holes with wood filler before you start painting. This small step makes a huge difference in achieving a seamless, professional finish.
Traditional Glue and Nails vs. Peel-and-Stick
While the traditional glue-and-nail method is the industry standard for a secure, long-lasting installation, you might also come across peel-and-stick options. Peel-and-stick panels are designed for convenience and are often popular for quick, DIY-friendly updates. However, for substantial, high-quality materials like MDF or unfinished wood panels, the combination of construction adhesive and finishing nails provides unmatched stability. This method ensures your panels stay perfectly flat and secure against the wall, creating a seamless, professional finish that will stand the test of time. For a permanent architectural feature, the traditional approach is almost always the better choice.
Check Customer Reviews for Real-World Insight
Product descriptions give you the specs, but customer reviews tell you the real story. Before you commit to a specific type of paneling, take some time to read what other homeowners and contractors have to say. Reviews offer invaluable, real-world insight into the installation process, the quality of the material, and how the final product actually looks in a space. For example, you might learn that a particular peel-and-stick panel requires extra adhesive for a secure bond or that a certain pattern is tricky to align perfectly. Reading through customer feedback can also confirm if a panel takes paint well or if it’s as durable as promised, giving you confidence in your choice.
How to Install Wood Paneling Like a Pro
A flawless finish starts long before you pick up a paintbrush. Proper installation is the secret to making your new wall panels look like they were installed by a seasoned pro. Rushing through the setup can lead to uneven gaps, peeling adhesive, and a finish that just doesn’t look right. By taking your time with a few key steps—preparation, planning, and precise measurements—you set the stage for a stunning result that will last for years.
Think of it as building a strong foundation. A clean, smooth wall ensures your panels adhere properly, while a well-planned layout guarantees a balanced, symmetrical look. Using the right tools and techniques not only makes the job easier but also prevents costly mistakes. From prepping the wall surface to making that final cut, each step is an important part of the process. Let’s walk through exactly how to get it right so you can move on to the fun part: painting.
Prep Your Walls and Plan Your Layout
Before you even think about opening a tube of adhesive, take a good look at your walls. Ignoring wall preparation is a huge mistake, since a surface that's dirty, uneven, or damp will cause major problems down the line. Start by cleaning the wall with a mild soap and water solution to remove any dust or grime. Fill any cracks or holes with spackle, let it dry completely, and sand it smooth. Once your wall is clean and flat, map out your design. It’s a great idea to lay the panels on the floor to visualize the pattern and find the center of your wall to start from. This ensures your design looks balanced and helps you avoid ending up with a tiny, awkward sliver of a panel at the edge.
Select the Right Adhesive and Tools
Not all adhesives are created equal. The type of paneling you choose—whether it’s a lightweight MDF or a heavier Natural Veneer Wall Panel—will determine the best adhesive for the job. Always check the panel manufacturer’s recommendations first. A high-quality construction adhesive applied with a caulking gun is usually a safe bet. For extra security, especially with heavier panels, you can also use a brad nailer to add a few small nails along the edges. Having the right tools on hand will make the process much smoother. You’ll need a tape measure, a level, a pencil, and a fine-tooth saw for making clean cuts.
Recommended Tools for Cutting Panels
Making clean, precise cuts is non-negotiable for a professional-looking installation, and the right tool makes all the difference. For cutting panels to length, a miter saw is your best bet for quick, accurate 90-degree cuts. A circular saw or a table saw are also excellent choices, especially if you need to rip panels lengthwise. Whichever saw you use, the key is to equip it with a fine-tooth blade; this will give you a clean edge and prevent the material from splintering. While a utility knife might work for very thin paneling, for the durable MDF or Natural Veneer Wall Panels we offer, a power saw is essential for getting those perfect seams. Always remember to measure twice and cut once!
Measure Twice, Cut Once
This age-old advice is your best friend during a paneling project. Misaligned panels and uneven gaps are incredibly noticeable, and once a panel is stuck to the wall with adhesive, fixing it can be a real challenge. Measure the height and width of your wall carefully before making any cuts. Remember to account for things like light switches, outlets, and windows. To do this, measure their exact location on the wall and carefully transfer those dimensions to the back of your panel before cutting out the opening with a jigsaw. Taking an extra minute to double-check every measurement will save you from frustration and wasted materials.
Handling Tricky Installations
Not every wall is a perfect, uninterrupted rectangle. You'll almost certainly run into challenges like curved surfaces, outlets, light switches, or TV mounts. Don't worry—these obstacles are completely manageable with a bit of extra planning. A successful installation in these tricky spots is what separates a DIY project from a truly professional-looking finish. Tackling these areas with patience and the right technique will ensure your new wall panels look seamless and fully integrated into the space, rather than like an afterthought.
Installing Panels on Curved Surfaces
One of the best features of modern paneling is its flexibility. If you’re working with an arched wall or a curved feature, you don’t have to give up on your design vision. Many high-quality panels are designed to bend, allowing them to conform to surfaces with a radius as tight as 18 inches. This adaptability is perfect for creating stunning architectural features, like wrapping a curved accent wall or a rounded column. When selecting your materials, check the product specifications for flexibility to ensure you choose a panel that can handle the unique contours of your space, giving you a smooth, continuous look without any awkward gaps or breaks.
Working Around Outlets and TV Mounts
Working around outlets and other wall fixtures is one of the most common installation challenges, but it’s easy to master with a precise approach. The most important rule is to mark and cut any openings before you apply adhesive and attach the panel to the wall. To get it right, measure the exact location of the outlet box on the wall, then carefully transfer those dimensions to the back of your panel. Use a level to ensure your lines are straight. Once you’re confident in your measurements, use a jigsaw to carefully cut out the opening. This careful preparation ensures a snug fit and maintains a clean, professional appearance around every fixture.
Prepping Your Panels for a Perfect Paint Job
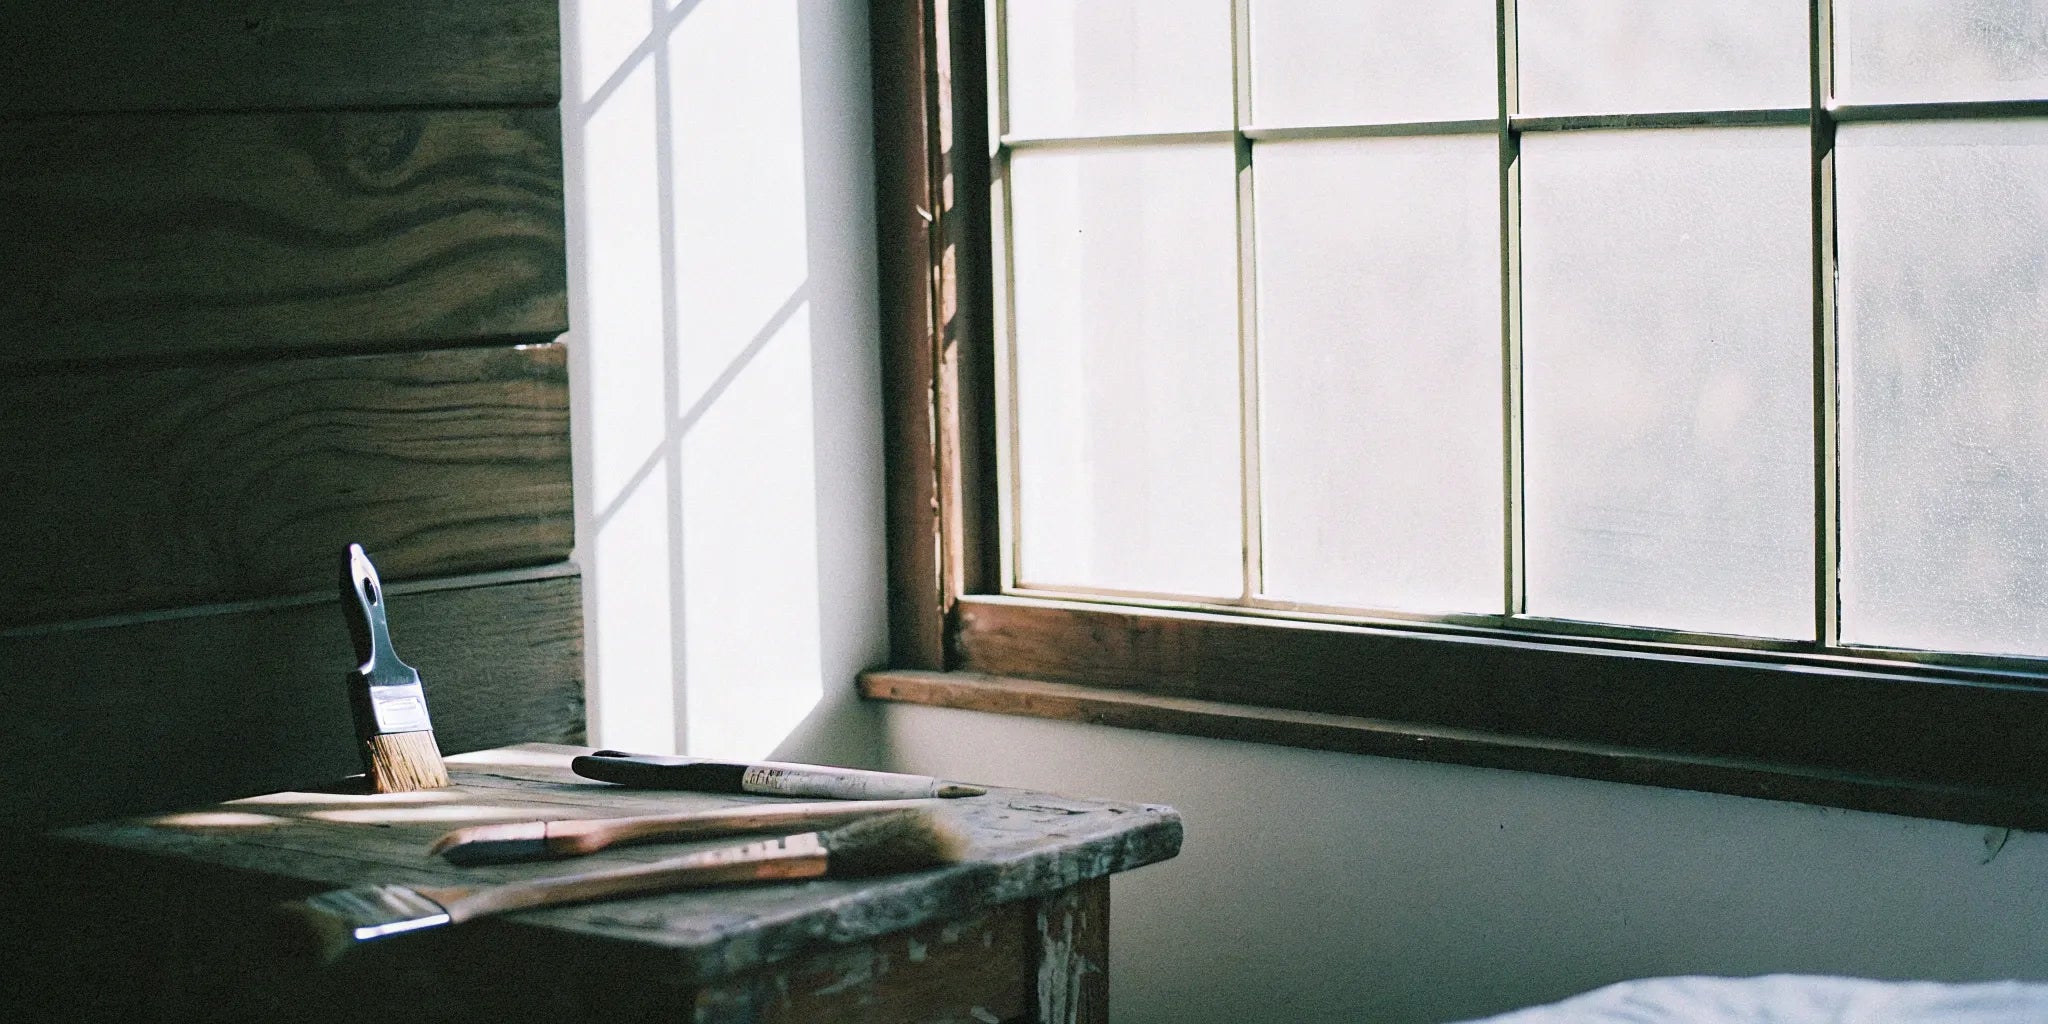
Once your panels are securely on the wall, you’re just one step away from painting. To get that perfectly smooth, professional finish, you need to prep the panel surface itself. Even if you’re using pre-primed or Paint and Stain Grade Panels, a light sanding with fine-grit sandpaper (around 220-grit) is a great idea. This scuffs up the surface just enough to give the primer and paint something to grip onto, preventing chips and peeling later. After sanding, wipe away every bit of dust with a tack cloth. If you used nails, fill the holes with a dab of wood filler, let it dry, and sand it flush for a seamless look.
Pro Painting Tips for a Perfect Finish
Once your panels are installed, the final step is painting. This is where your design vision truly comes to life, but a great result depends on more than just picking a color. The right preparation and application techniques are what separate an amateur job from a flawless, professional finish. Don’t worry—you don’t need to be a pro to get it right. By following a few key steps, you can ensure your newly paneled walls look incredible and stand the test of time. These tips will guide you through the process, from prepping the surface to applying the final protective coat.
Why You Can't Skip Sanding and Priming
Skipping the prep work is one of the biggest mistakes you can make. Many wood panels have a very smooth surface that paint can’t easily stick to. A light sanding with fine-grit sandpaper (around 180-220 grit) is essential to scuff up the surface just enough for the primer to grab hold. After sanding, always apply a quality primer. Porous materials like MDF will drink up paint, leading to a blotchy finish. Primer seals the surface, ensuring your paint color looks rich and consistent while improving durability. This two-step process is non-negotiable for a lasting result on your paint and stain grade panels.
When to Use a Stain-Blocking Primer
While a general-purpose primer is great for sealing a surface, some situations call for a more specialized tool. If you're working with natural wood, especially species like cedar, redwood, or pine, a stain-blocking primer is essential. These woods contain natural tannins and resins, particularly in knots, that can bleed through layers of paint over time, leaving you with frustrating yellow or brown stains. A stain-blocking primer creates a powerful barrier that locks in these substances, ensuring your beautiful white or light-colored paint job stays crisp and clean. Think of it as insurance for your finish—it’s a critical step for preventing discoloration and guaranteeing a professional result that lasts.
Choose the Best Paint for Your Panels
The type of paint you choose is just as important as the color. For high-traffic areas like hallways, a satin or semi-gloss finish is a smart choice because it’s durable and easy to clean. For bedrooms or offices, an eggshell or matte finish can provide a soft, sophisticated look. If you’re installing panels in a bathroom or kitchen, be sure to use a paint formulated to resist moisture and mildew. For most interior projects, a high-quality water-based (latex) acrylic paint is the best all-around option—it offers excellent coverage, low odor, and easy cleanup.
How to Get a Smooth, Professional Finish
To avoid drips, streaks, and brush marks, focus on your application technique. Use a high-quality angled brush to "cut in" around the edges and any trim. For the large, flat surfaces, a small foam or microfiber roller will give you the smoothest finish. The key is to apply two or three thin, even coats rather than one thick one. A thick coat is more likely to drip and takes longer to cure. Always allow the paint to dry completely between coats, following the time recommended on the paint can. Rushing this step can cause the paint to peel or bubble.
Application Technique: Brush Grooves First, Then Roll
For textured surfaces like beadboard or fluted paneling, your application method is key to avoiding drips and missed spots. The best technique is to work in small sections, tackling the details first. Use a small angled brush to apply paint inside all the grooves and corners where a roller can’t reach. Then, while the paint is still wet, immediately go over the flat surfaces with a small foam or microfiber roller. This "wet-on-wet" approach helps blend the brushed and rolled areas seamlessly, smoothing out any brush marks for a uniform, professional look. It's the perfect strategy for getting a flawless finish on detailed Unfinished Wood Wall Panels.
Should You Add a Protective Top Coat?
For panels in high-traffic zones like a mudroom or playroom, consider adding a final protective layer. A clear, water-based polyurethane or polycrylic top coat will act as a shield against scuffs, scratches, and stains, keeping your paint job looking fresh for years. Apply one or two thin coats with a high-quality brush. For an extra-smooth, professional-grade finish, lightly sand the surface with 220-grit sandpaper after your final color coat is dry and before applying the top coat. This small step makes a huge difference in the final look and feel.
Finishing Touches: Painting Trim and Molding
Painting the trim and molding is the final detail that pulls the whole project together, giving it that polished, professional look. This is where precision really matters. To get those crisp, clean lines where the trim meets the wall, use a high-quality angled brush to carefully "cut in" the paint. Just like with the main panels, don't skip the prep work. A light sanding with fine-grit sandpaper followed by a quality primer is essential for making sure the paint adheres properly and resists chipping over time. For trim, I almost always recommend a satin or semi-gloss finish. It’s more durable than matte paint and much easier to wipe clean, which is a huge plus for baseboards and door casings that see a lot of wear. This finishing touch will make your new wall panels look truly complete.
Design Inspiration for Any Room
One of the best things about paintable wood paneling is its incredible versatility. It’s not just for one type of room or one specific style. Whether you’re aiming for a cozy, traditional feel or a sharp, modern look, the right paneling can set the perfect tone. Because you can paint it any color you imagine, you have complete creative control to match your existing decor or create a brand-new focal point that completely transforms your space. From living rooms and bedrooms to home offices and commercial entryways, these panels add texture, depth, and character.
The key is to think beyond a simple flat wall. Paneling introduces architectural detail that makes a room feel more intentional and finished. You can use it to create an accent wall, add interest to a ceiling, or even build a custom headboard. With a diverse selection of wall panels available, you can find the perfect texture and style to start with. Then, a coat of paint ties it all together, giving you a custom look that feels both personal and professional. Let’s look at a few ideas to get your creativity flowing.
Make Your Living Room Pop with an Accent Wall
Your living room is often the heart of your home, making it the perfect place for a statement wall. A painted wood panel accent wall can add warmth and texture, turning a plain wall into a stunning centerpiece. Imagine a wall of vertical slats painted in a deep, moody green behind your sofa, or classic shiplap in a soft, creamy white to create a bright and airy coastal vibe. The texture of the panels catches the light in a way that flat paint can’t, adding subtle dimension and sophistication.
This is a fantastic way to define a space, especially in an open-concept home. By using Unfinished Wood Wall Panels, you get a blank canvas to bring your vision to life. You can choose a color that complements your furniture and art or go for a bold contrast that makes everything in front of it pop.
Add Style to Offices and Commercial Spaces
Paintable paneling isn’t just for homes; it’s a game-changer for offices and commercial environments, too. In a home office, a paneled wall can create a professional and inspiring backdrop for video calls. Plus, certain styles offer functional benefits. For instance, Acoustic Wall Panels can help dampen sound, reducing echo and creating a quieter, more focused workspace.
In a commercial setting, like a reception area or boutique, a painted panel wall can reinforce your brand’s aesthetic. You can paint it in your company’s colors or choose a sophisticated neutral that makes your logo or products stand out. It’s a durable and stylish solution that adds a high-end touch, showing clients and customers that you care about the details.
Experiment with Fluted and Geometric Designs
If you want to add modern texture and movement to a room, look no further than fluted or geometric paneling. Fluted panels, with their repeating vertical grooves, create a beautiful play of light and shadow that adds rhythm and depth to a wall. When painted, this effect becomes even more dramatic. A dark color will highlight the shadows, while a lighter shade will emphasize the clean, linear pattern.
You can also get creative by cutting and arranging flat panels into unique geometric patterns like chevrons, diamonds, or squares. This approach allows you to design a one-of-a-kind feature wall. Products like Interior WPC Fluted Slat Wall Panels come ready to install, making it easy to achieve this high-end, architectural look without the custom millwork price tag.
Make a Statement with Bold Colors
While neutral tones are always a safe bet, don’t be afraid to make a statement with a bold paint color. A paneled wall is the perfect canvas for experimenting with dramatic hues. A deep navy, rich emerald, or warm terracotta can turn a simple wall into a work of art. Because the paneling already has texture, a strong color feels intentional and sophisticated rather than overwhelming.
Conversely, a lighter tone on a textured wall can make a small room feel larger and more interesting. High-quality Paint and Stain Grade Panels provide a smooth, consistent surface that’s perfect for achieving a flawless paint job. The best part? If you ever decide to change your color scheme, you can simply repaint the panels for a fresh new look.
Beyond the Walls: Ceilings and Kitchen Islands
Don’t let your creativity stop at the walls. Paintable wood paneling is a fantastic tool for adding architectural detail to other parts of a room, creating a cohesive, designer-led feel. Consider cladding the base of your kitchen island; it’s a high-impact area that benefits from the added durability, and a fresh coat of paint can turn it into a stunning focal point that complements your cabinetry. Another often-overlooked surface is the ceiling. Applying unfinished wood wall panels overhead draws the eye upward, adding warmth and texture that makes the entire space feel more intentional and complete. It’s a simple way to achieve a custom look that ties all your design elements together beautifully.
How to Budget for Your Paneling Project
A beautiful paneled wall is an achievable goal for many budgets, but it helps to know what to expect before you start. Planning your expenses ahead of time prevents surprise costs and ensures your project goes smoothly from start to finish. Let's break down the key areas you'll need to account for when creating your budget. From the panels themselves to the final coat of paint, having a clear financial picture will help you make smart decisions and create a space you love without breaking the bank.
What Will the Panels Cost?
The biggest line item in your budget will be the panels themselves. The price can vary quite a bit depending on the material, style, and thickness you choose. For example, solid wood panels will typically cost more than MDF options. To get an accurate estimate, first measure the total square footage of the wall or walls you plan to cover. This will tell you how many panels you need to buy. Our collection of Unfinished Wood Wall Panels offers a great starting point for exploring different styles and finding one that fits your budget and design vision.
Understanding Typical Price Ranges
As a general guide, you can find paintable paneling options to fit nearly any budget, but the price per square foot will depend heavily on the material and design complexity. On the more affordable end, you'll find basic MDF or thin plywood panels that offer a great look for less. Stepping into the mid-range, you’ll see higher-quality, thicker MDF, pre-primed options, and simpler solid wood styles. Premium choices often include intricate designs like detailed fluted slat panels, specialty materials like acoustic or moisture-resistant composites, or high-grade natural wood veneers. The best approach is to determine your total square footage first, then explore different collections to see how various styles align with your budget. This allows you to balance the look you want with the price you're comfortable with.
Will You DIY or Hire a Pro?
Next, decide if you'll install the paneling yourself or hire a professional. Many modern wall panels are lightweight and designed for straightforward DIY installation using adhesive, nails, or screws. Going the DIY route can save you a significant amount on labor costs. However, it’s important to have a clear layout plan before you begin to avoid costly mistakes like uneven spacing or awkward cuts. If you’re short on time or prefer a guaranteed professional finish, hiring a contractor is a great option. Just be sure to factor their labor fees into your overall budget.
Don't Forget Paint and Supplies
Don't forget to budget for the finishing touches that will bring your project to life. This category includes everything you'll need to get that perfect, durable finish: sandpaper, a high-quality primer, your chosen paint color, brushes, rollers, and painter's tape. Priming is an especially crucial step, particularly for porous materials like MDF, which can soak up paint unevenly if not properly sealed first. Taking the time to sand and prime the surface is the secret to achieving a smooth, professional look that lasts.
How to Save with Bulk and Trade Pricing
If you're tackling a large project or are a contractor, you can find ways to save on materials. Buying your panels in bulk can often reduce the per-unit cost. For builders, designers, and other industry professionals, signing up for a dedicated discount program is one of the smartest ways to manage costs. Our trade program, for example, offers exclusive pricing and benefits that help you get the high-quality materials you need while staying on budget. It’s a simple way to make your project more affordable without compromising on quality.
Keep Your Painted Panels Looking New
You’ve put in the work to install and paint your wood paneling, and the results are stunning. Now, the key is keeping them looking fresh for years to come. The good news is that maintenance is straightforward. With a few simple habits and quick fixes, you can protect your investment and ensure your walls remain a beautiful focal point in your home or commercial space. A little proactive care goes a long way in preventing minor issues from turning into bigger projects down the road.
How to Clean Your Painted Panels
Maintaining your painted panels is easier than you might think. For routine cleaning, a quick dusting or a wipe-down with a soft, damp cloth is usually all you need to remove dust and smudges. Avoid harsh chemical cleaners, as they can damage the paint finish. If you’re installing panels in a high-traffic area like a hallway or a kid's room, consider using an eggshell or satin paint. These finishes have a slight sheen that makes them more durable and much easier to clean than a flat or matte finish, so you can easily wipe away fingerprints without leaving a mark.
Choosing a Durable Finish for High-Traffic Areas
In busy spots like hallways, mudrooms, or commercial entryways, your walls have to withstand a lot. The paint finish you select is critical for how well your paneling holds up to daily wear and tear. For these high-traffic zones, a satin or semi-gloss finish is a smart choice. The slight sheen creates a harder, more durable surface that’s incredibly easy to wipe clean. This pairs perfectly with a resilient base material, like the tough, high-density MDF used in many paintable wall panels. For an extra layer of defense against scuffs and stains, apply a clear, water-based polyurethane top coat. This final step acts as a shield, keeping your paint job looking fresh for years to come.
How to Handle Touch-Ups
Scuffs and scratches happen, but they don’t have to be a big deal. The secret to a seamless repair is proper prep. For minor marks, you might just need to dab on a little paint. For a slightly deeper scratch, it’s best to lightly sand the specific area to rough up the surface. This simple step, often overlooked, helps the new paint adhere properly and blend in with the existing finish. Always keep a small, well-sealed container of your leftover paint and primer on hand for these exact moments. This ensures you have a perfect color match every time.
Tips to Prevent Scuffs and Damage
The best way to keep your panels looking great is to protect them from damage from the start. This begins with choosing the right material for the right room. For spaces with high moisture, like bathrooms or basements, standard MDF might not be the best choice. Instead, look for moisture-resistant materials or consider our Exterior Shiplap Cladding for covered outdoor areas. Also, never skip the primer, especially on porous surfaces like MDF. Primer seals the material, preventing it from soaking up your paint and ensuring a durable, even finish that stands up to daily life.
Related Articles
- 4x8 Paintable Wall Panels: The Ultimate Guide
- How to Paint Wood Wall Panels: A Pro Guide
- 3D Wood Wall Panels: Everything You Need to Know