


Step-by-Step WPC Exterior Wall Cladding Installation
If you’re tired of the endless cycle of sanding, staining, and sealing traditional wood siding, you’re not alone. WPC offers a beautiful, low-maintenance alternative that stands up to the elements without the constant upkeep. It’s a smart, durable material that protects your home while looking fantastic. However, the long-term benefits of this material are only as good as its installation. A poorly executed job can lead to warping and moisture issues, undermining the very reason you chose it. This comprehensive guide will show you how to do it right, covering the entire wpc exterior wall cladding installation process to ensure your new exterior performs flawlessly for years to come.
Key Takeaways
- Set Your Project Up for Success: The best installations start with great prep. Before you begin, make sure your walls are clean and dry, install a support frame to allow for airflow, and let your WPC panels acclimate to the local climate for at least 48 hours to prevent buckling.
- Focus on the Finer Details: Two things separate a DIY job from a professional one: expansion gaps and the right fasteners. Leave a 1/4-inch gap around all panels to accommodate temperature changes, and always use stainless steel hardware to ensure a secure, rust-free hold.
- Enjoy a Low-Maintenance Finish: WPC cladding is designed to be a durable, long-term solution. Its composite material resists common issues like rot and pests, outlasting traditional wood and requiring only simple cleaning to maintain its appearance for years.
What Is WPC Exterior Wall Cladding?
If you're looking for an exterior finish that gives you the warm, natural look of wood without all the maintenance, you've likely come across WPC. So, what exactly is it? WPC stands for Wood Plastic Composite, and it’s a hybrid material made from a blend of recycled wood fibers and plastics. Think of it as the best of both worlds: it captures the timeless beauty of wood while adding the strength and resilience of modern polymers.
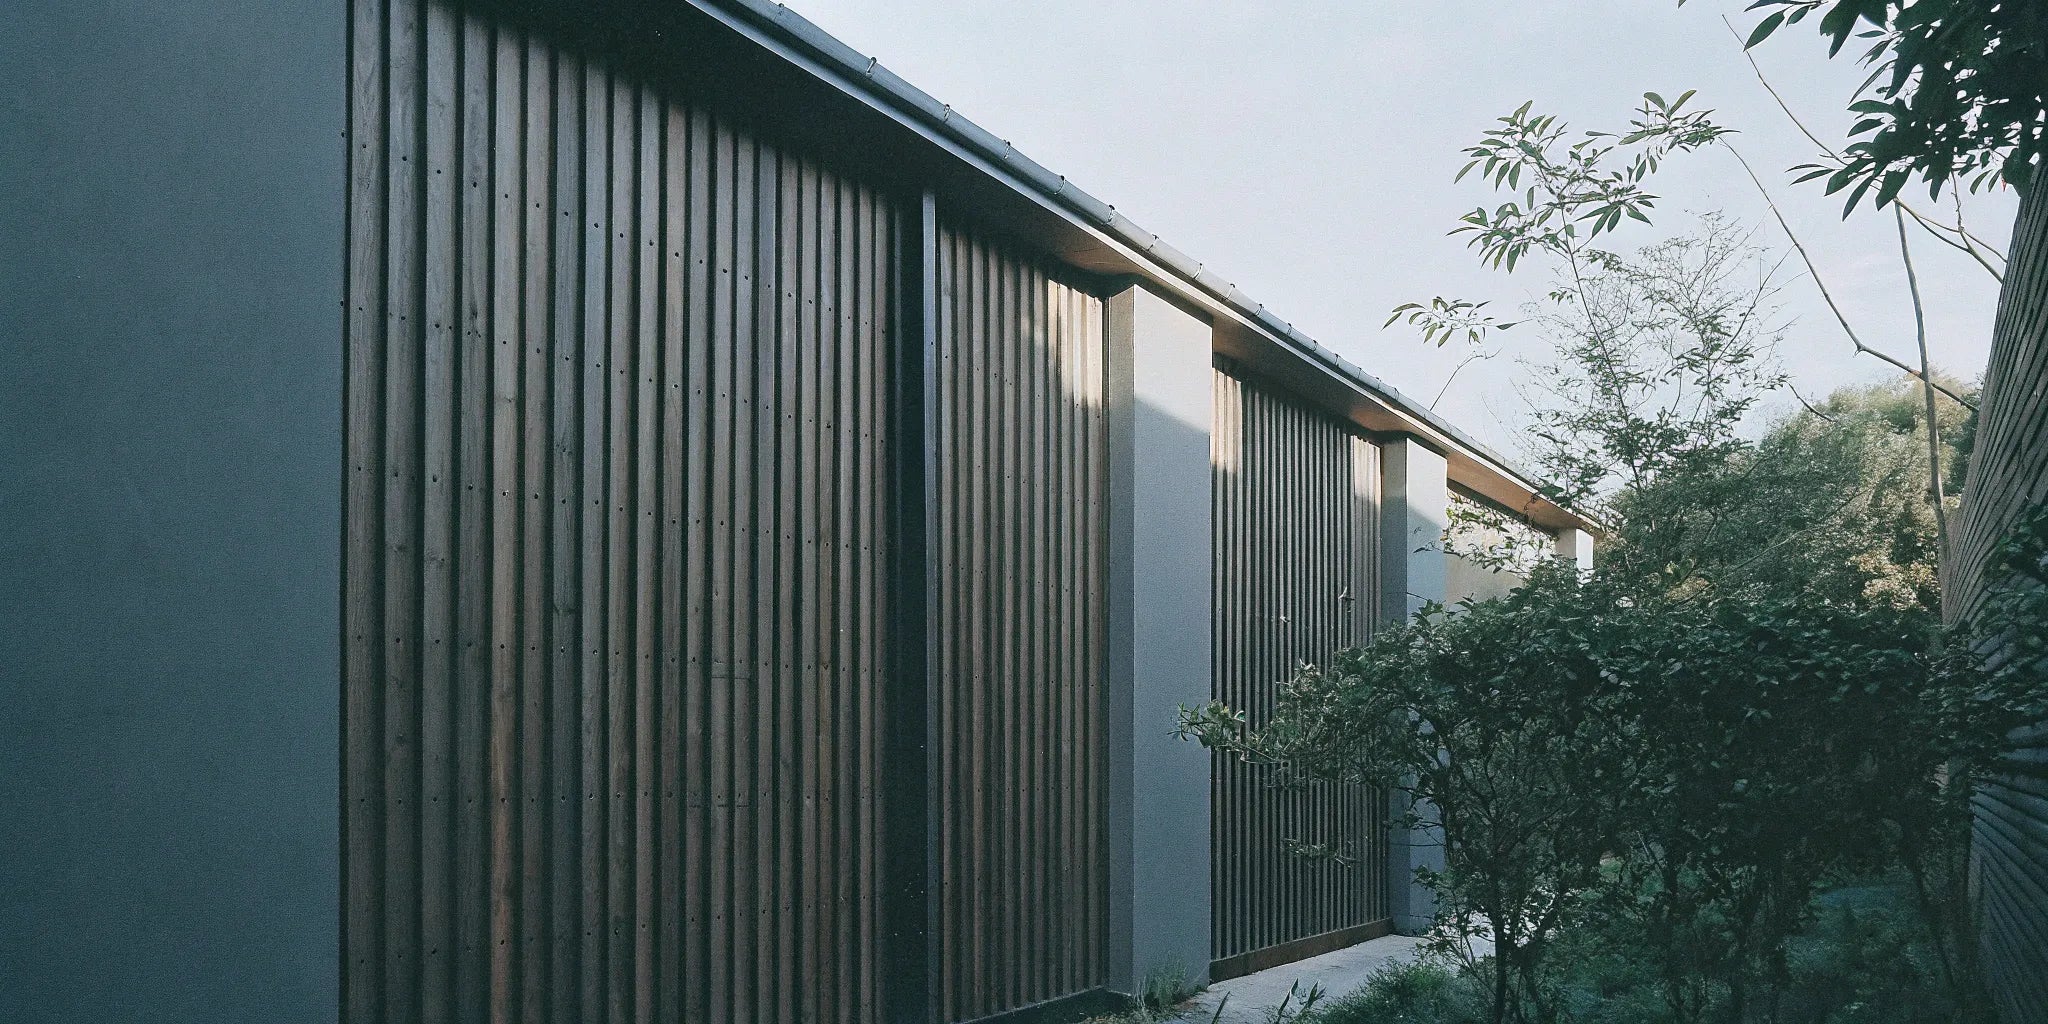
This combination creates a durable, protective layer for your home or building. Exterior wall cladding made from WPC is designed to stand up to the elements—rain, sun, and temperature changes—far better than traditional wood. It acts as a shield, protecting your structure while giving it a major style upgrade. Whether you’re aiming for a rustic farmhouse vibe or a sleek, modern facade, WPC panels offer a versatile and long-lasting solution that keeps your exterior looking sharp for years to come.
Why Choose WPC Cladding?
The real appeal of WPC cladding lies in its strength and low-maintenance design. Because it’s a composite material, it’s incredibly resistant to common issues that plague traditional wood. You won’t have to worry about it warping, rotting, or attracting mold and mildew after a few seasons of rain. This makes it a reliable choice for any climate.
Beyond its durability, WPC is simply easier to care for. Forget about the annual cycle of sanding, staining, and sealing. A simple cleaning is usually all it takes to keep your cladding looking fresh. It’s a practical, set-it-and-forget-it option that delivers both high performance and great aesthetics, giving you peace of mind and more time to enjoy your home.
WPC vs. Traditional Wood
When comparing WPC to traditional wood, the biggest differences come down to longevity and long-term cost. While natural wood might have a lower upfront price tag, WPC proves to be a more economical choice over time. Its impressive lifespan of 15 to 25 years easily outlasts the 5 to 15 years you might get from traditional wood.
This extended lifespan is thanks to its superior resistance to moisture and pests. You’ll spend far less on repairs and maintenance, saving both money and effort down the road. So, while the initial investment for WPC panels may be slightly higher, you’re paying for a durable, hassle-free material that holds its value and appearance for decades.
Your WPC Installation Checklist: Materials and Tools
A successful project always starts with good preparation. Before you attach the first panel, let’s walk through everything you’ll need to have on hand. Gathering your materials and tools first will save you from making extra trips to the hardware store and help your installation day run smoothly. Think of it as setting up your workspace for a seamless, professional-looking finish. With the right gear ready to go, you can focus on getting the job done right.
The Materials You'll Need
First, you’ll need the star of the show: your Exterior Fluted Slat Wall Panels. Make sure you’ve ordered enough to cover your entire project area, plus a little extra for any cutting mistakes. Alongside your panels, you’ll need a few other key items to build a solid foundation and secure everything in place.
Here’s what to add to your shopping list:
- Joists or Battens: These create the support framework that your cladding will attach to.
- Stainless Steel Screws or Clips: Using stainless steel is crucial for exterior projects to prevent rust and ensure a long-lasting hold.
- Fascia Boards or Trims: These are optional but give your project a clean, professional edge by covering corners and seams.
Essential Tools for the Job
You don’t need a workshop full of fancy equipment, but having the right tools makes all the difference. Most of these are probably already in your garage or shed. Before you start, check to make sure everything is in good working order.
Your go-to toolkit should include:
- Measuring Tape & Level: For accurate measurements and perfectly straight lines. A 4-foot level is ideal for this kind of work.
- Saw: A circular saw or jigsaw with a fine-toothed blade will give you the cleanest cuts on WPC panels.
- Drill: For creating pilot holes and driving in your screws.
- Caulking Gun: To apply construction adhesive for extra bonding where needed.
- Utility Knife: Perfect for trimming small pieces or cleaning up edges.
- Rubber Mallet: Use this to gently tap panels into place without causing any damage.
Don't Forget Your Safety Gear
This last part is short, but it’s non-negotiable. Working with building materials and power tools requires putting safety first. A few simple pieces of gear can protect you from common job site injuries and make the entire process more comfortable. Don’t even think about making your first cut until you have your safety equipment on.
Here are the absolute must-haves:
- Safety Goggles: Protect your eyes from sawdust and any small debris that can fly up while you’re cutting or drilling.
- Work Gloves: A good pair of gloves will safeguard your hands from sharp panel edges and potential splinters, giving you a better grip on your tools.
How to Prep Your Walls for Installation
Proper preparation is the secret to a flawless finish that lasts for years. Before you even think about attaching the first panel, you need to get your walls ready. Think of this as setting the stage for your project—a little effort now prevents major headaches later. A well-prepped surface ensures your WPC cladding will be stable, secure, and look professionally installed. It’s the difference between a project that looks great on day one and a project that looks great for decades. This foundational work protects your home from moisture damage, prevents panels from warping, and guarantees a clean, even appearance across the entire wall. We’ll walk through the four key steps to get your exterior walls in perfect shape: inspecting the surface for damage, building a solid support frame, mapping out your design with precision, and letting your new panels get used to their environment. Taking the time to complete each step carefully will make the actual installation process much smoother and give you results you can be proud of.
Inspect for Moisture and Damage
Start by giving your wall a thorough once-over. The goal is a surface that is completely clean, dry, and smooth. Clear away any dirt, cobwebs, or peeling paint. If you find any cracks, holes, or soft spots, now is the time to repair them to create a solid, even base. Pay close attention to any signs of moisture, as trapping water behind your new cladding can lead to serious problems down the road. Make sure all leaks are fixed and the wall is completely dry before you proceed. A solid substrate, like fiber cement boards, can provide an excellent, durable surface to build upon if your existing wall needs significant work.
Install the Support Framework
Your WPC panels shouldn't be installed directly onto the wall. Instead, you’ll attach them to a support framework, usually made of vertical joists or furring strips. This framework does two very important things: it creates a perfectly flat and level surface for your panels (even if your wall isn't), and it provides a small gap behind the cladding. This gap is essential for proper water drainage and air circulation, which helps prevent moisture buildup and keeps your wall healthy. Attach the joists securely to the wall according to the manufacturer’s guidelines, ensuring they are straight and evenly spaced to properly support your new wall panels.
Measure and Mark Your Layout
Before you make a single cut, plan your design. Decide whether you want your panels to run vertically or horizontally and think about where the seams will land. A thoughtful layout can minimize waste and create a more polished, intentional look. Measure the entire wall surface to calculate exactly how many panels you’ll need. Use a chalk line or a pencil to mark where your support joists are and to create guidelines for your first row of panels. This visual map will keep your installation straight and accurate from start to finish. Taking a few extra minutes to measure and mark your layout will save you from frustrating mistakes later on.
Let Your Panels Acclimate
This is a simple step that’s incredibly easy to skip, but don’t. WPC panels need time to adjust to their new environment. Let the panels sit in the area where they will be installed for at least 48 hours before you begin. Lay them flat and give them space to breathe. This process, called acclimation, allows the material to get used to the local temperature and humidity levels. Skipping this step can cause the panels to expand or contract after installation, leading to warping or buckling. A little patience here ensures your cladding remains stable and flat for the long haul, protecting the investment you’ve made in your home’s exterior.
Installing Your WPC Cladding, Step by Step
With your walls prepped and your tools ready, it’s time for the most rewarding part: the installation. This is where your vision starts to become a reality. We’ll walk through the process one step at a time to ensure your project goes smoothly and the final result looks clean and professional. Follow these instructions carefully for a secure and beautiful finish that lasts.
Plan Your Layout and Expansion Gaps
Before you make a single cut, take a moment to plan your layout. Decide whether you want to install your panels vertically or horizontally and map out where each panel will go. Measure your wall space to confirm how many panels you’ll need for full coverage. Most importantly, plan for expansion gaps. WPC material naturally expands and contracts with temperature changes, so leaving a small gap (about 1/4 inch) between panels and at all edges—floor, ceiling, and corners—is essential. This simple step prevents buckling and ensures your exterior cladding remains flat and stable for years to come.
Cut the Panels to Size
Precision is key when cutting your panels. Always follow the old rule: measure twice, cut once. Use a pencil to mark your cut lines on the back of the panel. To avoid chipping or splintering the decorative surface, make your cuts with the finished side facing down. A fine-toothed saw will give you the cleanest edge. As you cut the pieces for your layout, remember to account for the 1/4-inch expansion gap you planned for around the entire perimeter. Taking your time here will pay off with tight, professional-looking seams and a flawless finish.
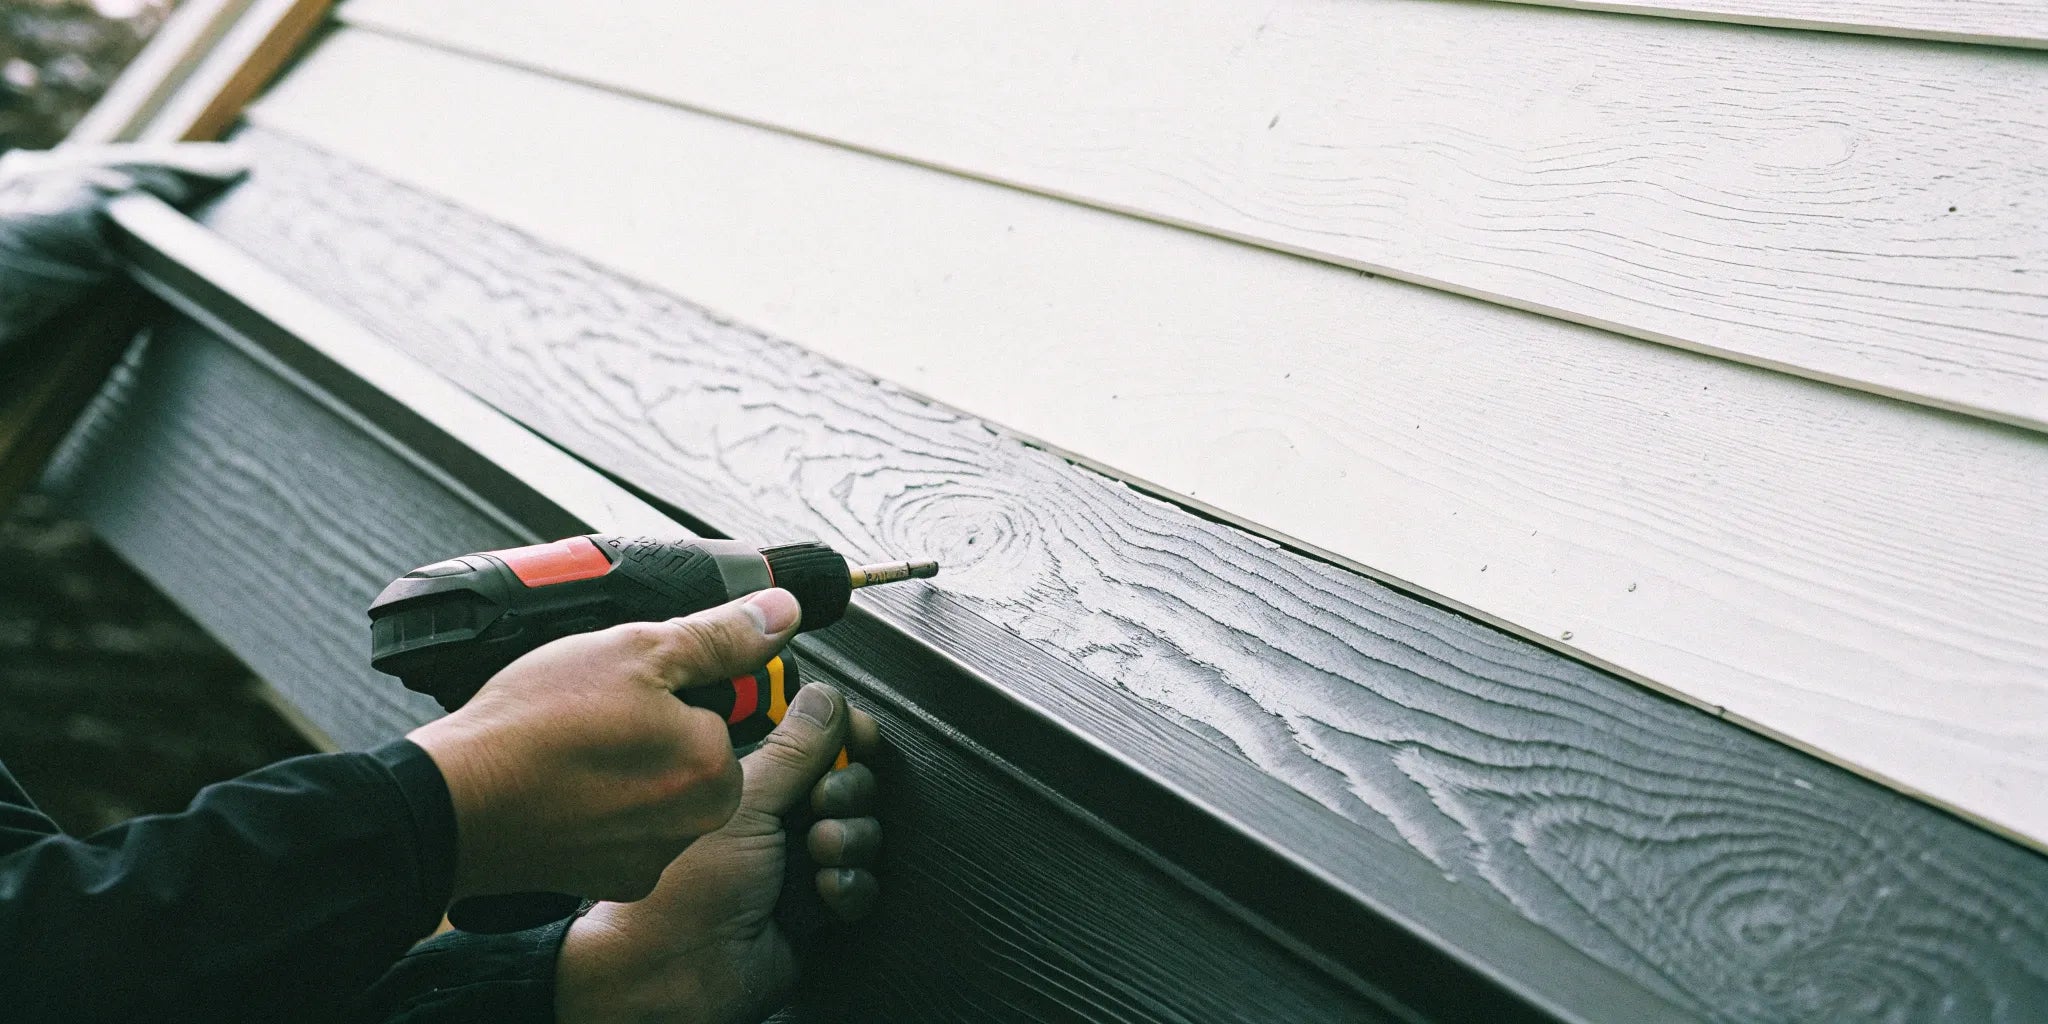
Secure the Panels with the Right Fasteners
A solid installation relies on using both adhesive and mechanical fasteners. Start by applying a quality construction adhesive to the back of the panel in a zigzag pattern; this creates a strong, even bond with the wall. Next, secure the panel to the support framework. Drill small pilot holes first to prevent splitting, then attach starter clips to the joists. These clips hold the bottom edge of the first panel in place. Each subsequent panel will lock into the previous one and be fastened with screws, ensuring your wall panels are held firmly in place from top to bottom.
Add Corner Trims and Finishing Touches
The final touches are what give your project a polished, high-end look. Once all the main panels are installed, it’s time to add the corner trims. These L-shaped pieces cover the exposed edges at inside and outside corners, creating a clean, finished line. Fasten them securely with screws. Take a final look at all the seams and joints. You can use a color-matched sealant for a seamless appearance or touch up any minor scuffs with paint. These finishing details protect the panel edges and tie the entire installation together beautifully.
How to Handle Corners and Tricky Areas
Let’s be honest—the straight runs are the easy part. It’s the corners, windows, and outlets that can feel a bit daunting. But getting these details right is what separates a good-looking installation from a truly professional one. With a little patience and the right techniques, you can handle these tricky spots without any trouble. The key is to slow down, measure carefully, and follow a few simple steps to ensure every cut and corner looks clean and intentional. Think of these areas as opportunities to show off your craftsmanship.
Tackling Inside and Outside Corners
A crisp, clean corner is incredibly satisfying. The best way to achieve this is by using trim pieces designed for your wall panels. Instead of trying to perfectly miter two panel edges, you can simply install L-shaped corner trim and fasten it securely with screws. This method not only gives your project a polished, finished look but also protects the panel edges from the elements. It creates a neat border that makes it easier to line up the rest of your cladding, ensuring a seamless transition from one wall to the next.
Working Around Windows and Doors
Precision is your best friend when working around openings like windows and doors. Start by carefully measuring and cutting your panels to fit snugly around the frames. For an even better fit and added insulation, you can place a layer of Styrofoam on the back of the cladding pieces before attaching them. When you’re framing out new steel doors or windows, it’s also a good idea to install two joists under each window for extra support. This reinforces the structure and helps keep your panels perfectly aligned for years to come.
Cutting Panels for Vents and Outlets
The old rule "measure twice, cut once" has never been more important. Before you pick up the saw, carefully measure and mark where you need to cut openings for vents, pipes, or electrical outlets. Always mark your cuts on the back of the panel. When you make the cut, keep the decorative side facing down to prevent the saw from chipping or scuffing the visible surface. Using a fine-toothed saw will also help you get a cleaner edge. Taking your time on this step ensures all your fixtures fit perfectly and your final installation looks flawless.
Common Installation Mistakes to Avoid
Even the most seasoned pros can make a simple mistake, but a little foresight goes a long way in getting your WPC cladding installation just right. A flawless finish comes down to avoiding a few common pitfalls that can trip up an otherwise perfect project. Think of it less as a list of what not to do and more as a guide to what you should pay close attention to.
Getting these details right from the start saves you from future headaches like warping, moisture issues, or an uneven appearance. We’ll walk through the three most critical areas to watch: giving your panels room to breathe, using the correct hardware, and making sure your walls are properly prepped for moisture. Nail these steps, and you’ll have a beautiful, long-lasting exterior that you can be proud of for years to come.
Forgetting Expansion Gaps
This is one of the most important—and most often overlooked—steps. WPC materials naturally expand and contract as the temperature changes throughout the day and across seasons. If you install the panels too tightly against each other, they’ll have nowhere to go when they expand in the heat. This pressure can cause the panels to buckle, warp, or bow outwards, ruining the clean, flat look of your wall. To prevent this, always leave a small, consistent gap between each panel. Check the manufacturer’s guidelines for your specific Exterior Fluted Slat Wall Panels to find the recommended gap size for a perfect, lasting fit.
Using the Wrong Fasteners or Poor Alignment
The hardware you use is just as important as the panels themselves. Using the wrong screws or clips can compromise the entire installation, leading to loose panels or damage over time. Always use fasteners designed specifically for WPC cladding to ensure a secure hold. Just as crucial is your alignment. Before you even hang the first panel, make sure your wall is clean and level. As you work, use a level tool regularly to keep your lines perfectly straight. Even a slight deviation in an early row can become a very noticeable slant by the time you reach the top of the wall. A straight, secure installation is key to a professional finish that our trade professionals swear by.
Overlooking Moisture and Ventilation Needs
Trapping moisture behind your cladding is a recipe for disaster, potentially leading to mold, mildew, and damage to your home’s structure. Before you begin, thoroughly inspect your wall for any signs of moisture issues and resolve them completely. The support framework, or battens, you install isn’t just for attaching the panels—it also creates a vital air gap. This space allows air to circulate behind the cladding, which helps any moisture that gets behind it to dry out quickly and harmlessly. Proper ventilation is your best defense against water damage, ensuring both your WPC wall panels and the wall behind them stay dry and sound.
Troubleshooting Common Installation Issues
Even with careful planning, you might run into a few hiccups during your installation. The good news is that most common issues are easy to fix without having to start over. Whether it’s a panel that isn’t sitting quite right or a gap that looks a little too wide, a few simple adjustments can get your project back on track.
The key is to address these problems as they come up rather than waiting until the end. A small correction early on can save you a major headache later. Think of it as fine-tuning your work to get that polished, professional finish you’re aiming for. Below, we’ll walk through some of the most frequent challenges and provide straightforward solutions to help you handle them like a pro. From warped panels to tricky joints, we’ve got you covered.
How to Fix Warped or Misaligned Panels
Noticing a panel that’s slightly out of line can be frustrating, but it’s usually a simple fix. If you catch it quickly, you can often correct the alignment without causing any damage. Grab a small pry bar and carefully slide it behind the edge of the misaligned panel. With gentle pressure, you can loosen it just enough to shift it back into the correct position. This method gives you the control to make small adjustments for a perfect fit. The goal is to nudge it, not force it, ensuring your wall panels remain in pristine condition while you achieve a seamless look.
Solving Fastener and Joint Problems
Consistent spacing between panels is crucial for a clean, professional appearance. If you’re struggling to maintain even gaps, small tile spacers can be a huge help. Just place them between the panels as you work to ensure uniformity. If you find a small gap that needs closing, don’t be tempted to hammer the panel directly. Instead, place a scrap piece of WPC against the edge and gently tap it with a rubber mallet. This technique protects the panel’s tongue and groove from damage while allowing you to create a snug, secure joint. It’s a simple trick that many trade professionals use to get flawless results.
Dealing with Weather-Related Challenges
WPC material naturally expands and contracts with temperature fluctuations. Installing it in extreme weather—either very hot or very cold—can lead to problems later on. If you install panels on a hot day when they are fully expanded, they may shrink in the cold and create unsightly gaps. Conversely, installing them on a cold day can lead to warping or buckling when the weather heats up. The best approach is to install your Exterior Fluted Slat Wall Panels in mild temperatures. This allows the material to acclimate properly and ensures it will fit perfectly in all weather conditions, preventing future issues.
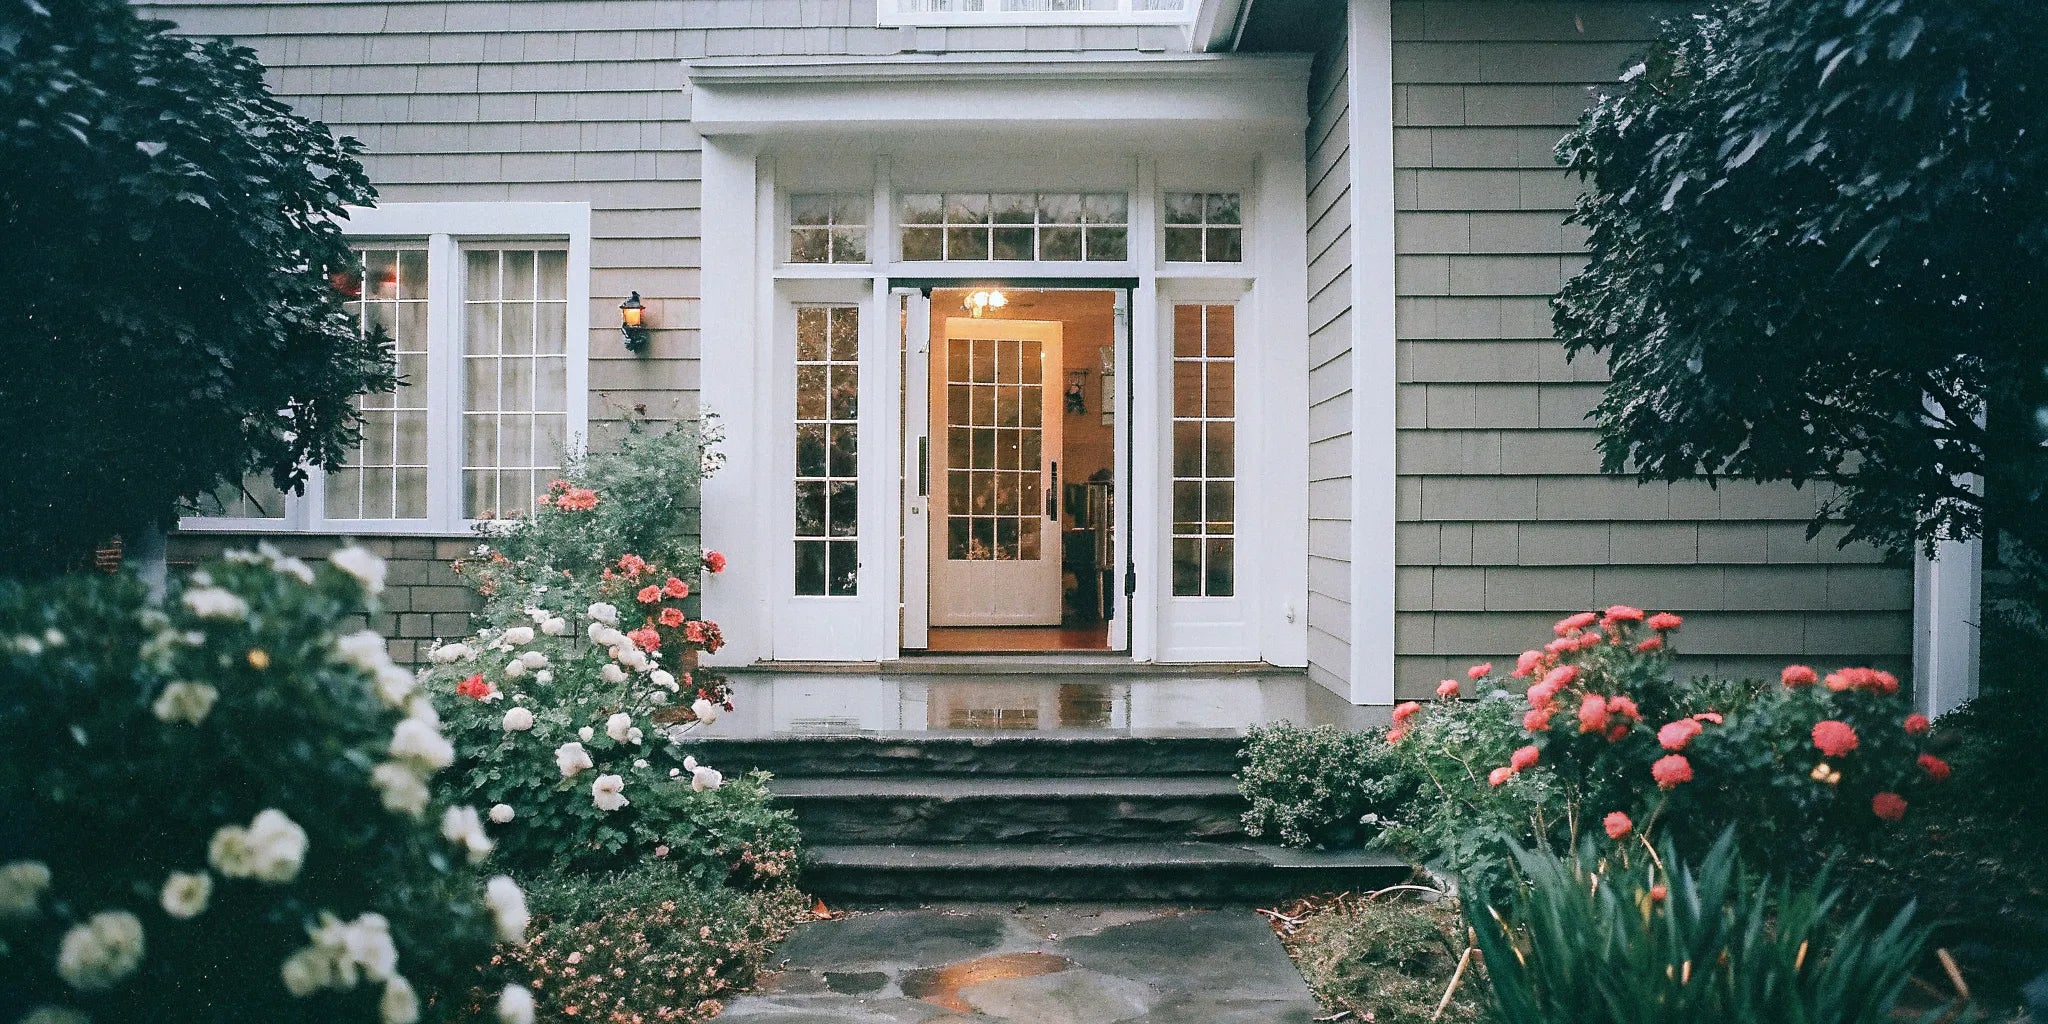
How to Maintain Your New WPC Cladding
One of the best things about WPC cladding is how little maintenance it requires. Unlike traditional wood that needs regular staining and sealing, WPC is designed to withstand the elements with minimal fuss. But "low-maintenance" doesn't mean "no-maintenance." A little bit of care will go a long way in keeping your exterior walls looking brand new for years to come.
Think of it like caring for a car—a quick wash and occasional check-up prevent bigger issues down the road. By following a simple routine, you can protect your investment and ensure your home’s exterior remains a source of pride. These straightforward steps will help you clean your panels, perform seasonal checks, and keep the color looking vibrant. It’s all about simple, proactive care that saves you time and effort in the long run.
Your Regular Cleaning and Inspection Routine
Keeping your WPC cladding clean is incredibly simple. For routine dust and dirt, all you need is a soft microfiber cloth and some warm water to wipe the panels down. If you come across tougher spots like grime or bird droppings, a mild soap solution will do the trick. Just be sure to rinse the area thoroughly with clean water afterward to avoid leaving any residue.
While you’re cleaning, take a moment to inspect the panels for any scuffs or scratches. It’s best to avoid abrasive cleaners or stiff-bristled brushes, as they can damage the surface. A gentle approach is all that’s needed to maintain the beautiful finish of your Exterior Fluted Slat Wall Panels.
Simple Seasonal Maintenance Tasks
A couple of times a year, it’s a good idea to give your cladding a quick seasonal check-up, especially after major temperature shifts. Walk around your home and visually inspect the panels to ensure they are still properly aligned and that the spacing is consistent. Pay close attention to the fasteners to make sure everything is still secure.
This is also a good time to check the corner trims and edges. These finishing pieces aren't just for looks; they help protect the ends of the panels from moisture and pests. If you notice any gaps or loose trim, addressing them early can prevent water from getting behind the cladding. This simple walk-around can catch small issues before they become problems.
Preventing Fading and UV Damage
Like any exterior product, WPC cladding is exposed to the sun’s UV rays, which can cause colors to fade over time. The most effective way to handle this is by starting with a high-quality product. Modern WPC cladding is manufactured with UV inhibitors and protective coatings designed to resist fading and maintain its original color for years.
Choosing a reputable supplier ensures your panels have this built-in protection from day one. While all exterior materials will eventually show some signs of aging, selecting a product engineered for color stability means you won’t have to worry about significant fading. This initial choice is your best defense against the sun.
DIY vs. Hiring a Pro: What's Right for You?
Deciding whether to install your new WPC cladding yourself or bring in a professional is one of the biggest choices you'll make in your project. There’s no single right answer—it really comes down to your comfort level, budget, and timeline. While tackling the project yourself can be incredibly rewarding (and save you some money on labor), a professional brings experience and efficiency that can be well worth the cost. They’ve seen it all and can handle unexpected challenges without breaking a sweat, ensuring a flawless finish that stands the test of time.
This decision isn't just about money; it's about getting the result you want with the least amount of stress. Think about the satisfaction of stepping back and admiring a wall you installed yourself versus the peace of mind that comes with knowing an expert handled every detail. WPC cladding is a fantastic investment in your home's curb appeal and durability, so you want the installation to match the quality of the material. A DIY job done well is a huge accomplishment, but a poorly executed one can lead to costly repairs down the road. Let’s walk through the key factors to help you figure out the best path for your home renovation.
Assess Your Skills and the Project's Complexity
First, it’s time for an honest self-assessment. Have you handled projects of this scale before? Are you comfortable with precise measuring, cutting, and ensuring everything is perfectly level? Our Exterior Fluted Slat Wall Panels are designed for a straightforward installation, but achieving that seamless, professional look still requires attention to detail. Think about the specifics of your project, too. A simple, flat wall is one thing, but a wall with multiple windows, doors, and complex corners will add a significant layer of difficulty. If you’re a seasoned DIYer with the right tools and a good dose of patience, you’re likely well-equipped for the job.
Compare the Cost and Time Commitment
The most obvious benefit of a DIY installation is the cost savings on labor. However, it’s important to remember that your time has value, too. Map out how many weekends or evenings you can realistically dedicate to the project. Installing WPC cladding is often faster than working with traditional materials like tile, but it’s still a significant time investment. On the other hand, hiring a pro costs more upfront but frees up your time and often means the job gets done much faster. For contractors and trade professionals, our trade program can help manage material costs, making either option more budget-friendly.
When to Call in a Professional
Sometimes, calling a professional is the smartest move you can make. If you inspect your walls and find signs of structural issues or significant moisture damage, it’s best to have an expert diagnose and fix the root cause before any cladding goes up. The same goes for the installation itself—if you start the project and run into major problems, like panels that are warping or just won’t align correctly, don’t hesitate to call for backup. A professional can troubleshoot these issues effectively, ensuring your beautiful new cladding is installed correctly and will last for years to come. It's about protecting your investment and ensuring the final result is something you're proud of.
Related Articles
Frequently Asked Questions
How does WPC cladding hold up in harsh weather like heavy snow or intense sun? This is where WPC really shines. It’s an engineered material, meaning it was specifically designed to handle the elements. The plastic components make it highly resistant to moisture, so it won’t rot, swell, or warp after heavy rain or snow. For sunny climates, high-quality WPC panels are made with UV inhibitors that protect the color from fading, so your home’s exterior will look great for years without needing to be re-stained.
Can I install WPC panels directly over my old siding? It’s tempting to take a shortcut, but for the best results, you should always remove the old siding first. Installing WPC cladding requires a flat, solid surface and a support framework to create an essential air gap for ventilation. Placing it over old siding can trap moisture, create an uneven finish, and may void the product warranty. Taking the time to prep the wall correctly is the key to a professional, long-lasting installation.
What's the single most important step to get right for a successful DIY installation? If I had to pick just one thing, it would be properly planning for and leaving expansion gaps. WPC material naturally expands and contracts with temperature changes. If you install the panels too tightly together, they can buckle or warp when the weather gets hot. Leaving a small, consistent gap between each panel and around all edges gives the material room to move and is the number one thing you can do to ensure your walls stay flat and beautiful.
Can I paint WPC cladding if I decide I want a different color in the future? While you technically can paint WPC, it’s generally not recommended. The factory finish is designed to be durable, weather-resistant, and low-maintenance. Painting it introduces a new surface that will eventually chip and peel, creating a regular maintenance task you were trying to avoid. It’s always best to choose a color you love from the start to take full advantage of the material’s hassle-free benefits.
How much extra material should I order for cuts and mistakes? A good rule of thumb is to order about 10-15% more material than your measurements call for. This extra amount gives you a comfortable buffer to account for any cutting mistakes, tricky angles around windows or doors, and any pieces that might get damaged during the project. It also leaves you with a few extra panels for any potential future repairs, which is always a smart move.