


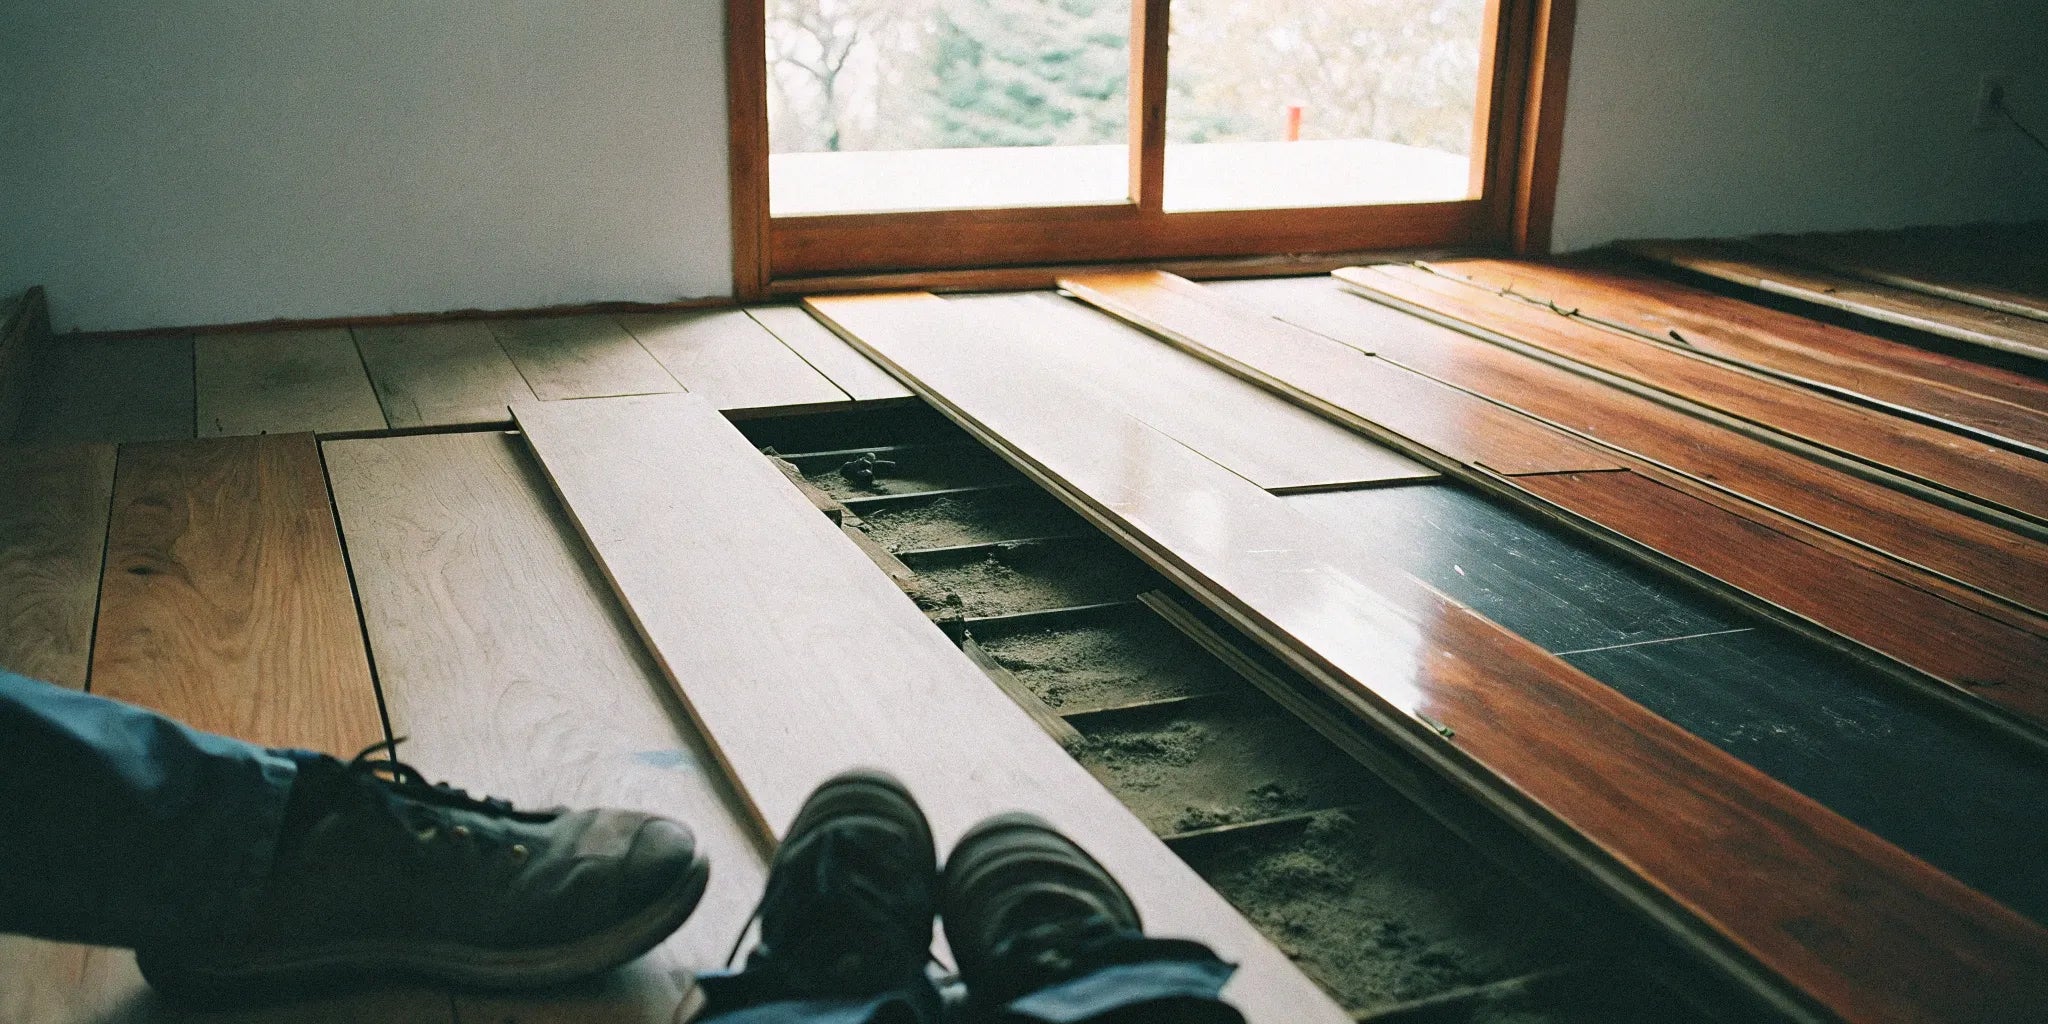
How to Install Engineered Wood Flooring: A DIY Guide
The secret to a beautiful floor isn’t just the planks you choose—it’s the foundation you lay them on. Get your plywood subfloor wrong, and you’re setting yourself up for future squeaks, gaps, and uneven boards. That’s why this guide starts from the ground up. We’ll walk you through every critical step of how to install engineered wood flooring over plywood. From the essential prep work to the tools you'll need, we'll cover everything required for a durable, stunning result that looks professionally done.
Key Takeaways
- A great floor starts with a solid foundation: Before you begin, dedicate time to preparing your plywood subfloor—make sure it's clean, level, and free of squeaks. Just as importantly, let the engineered wood planks acclimate in the room for at least 72 hours to prevent future warping or gapping.
- Match the installation method to your project: Engineered wood's versatility is its strength. Whether you choose a nail-down, glue-down, or floating installation depends on your skill level and the final feel you want—a solid glue-down floor feels different from a DIY-friendly floating one.
- Mind the gaps and staggers for a professional finish: Two details make all the difference in the final look and performance. Always use spacers to maintain an expansion gap around the room's perimeter, and be sure to stagger the end joints of your planks for a strong, classic wood floor pattern.
What Is Engineered Wood Flooring, Anyway?
If you're looking for the timeless beauty of wood without some of the traditional drawbacks, engineered wood flooring is your answer. Think of it as a high-tech version of classic hardwood. It’s constructed with a multi-layer core of plywood or high-density fiberboard (HDF) that’s topped with a genuine layer of real hardwood. This layered design is its secret weapon, giving it incredible stability. Unlike solid wood, which can expand, contract, or warp with changes in temperature and humidity, engineered wood holds its shape beautifully. This structural integrity makes it a reliable choice for almost any room in your home, including basements and kitchens where moisture levels can fluctuate.
And the best part? Because that top layer is a real wood veneer, you get the same beautiful, authentic look of oak, maple, or hickory without the same level of sensitivity. It’s the perfect blend of natural beauty and modern engineering. This construction also makes it a more sustainable option, as it uses less of the slow-growing premium hardwood for the visible layer. You can find a great selection of hardwood flooring options that fit this description, offering both durability and style for your project. It often comes at a more budget-friendly price point than solid hardwood, giving you a premium look without the premium cost.
Engineered Wood vs. Solid Hardwood: What's the Difference?
The main difference between these two comes down to construction. Solid hardwood flooring is exactly what it sounds like—each plank is milled from a single, solid piece of wood. It’s classic, beautiful, and can be sanded and refinished many times over its long lifespan. Engineered hardwood, on the other hand, features a layered core of man-made materials like plywood or HDF, with only the top layer being solid wood. This structure makes it more dimensionally stable. While you can’t refinish engineered wood as many times as solid wood (depending on the thickness of the top veneer), it offers greater versatility in where it can be installed.
Why Engineered Wood Is Perfect for Plywood Subfloors
Engineered wood flooring is an ideal match for plywood subfloors. Plywood itself is a stable and reliable base, and when you pair it with the dimensional stability of engineered planks, you get a floor that’s built to last. Because engineered wood is less reactive to moisture and temperature shifts, it’s less likely to cup, gap, or buckle over a plywood subfloor. This makes it a go-to choice for installations over concrete slabs in basements or in rooms with radiant heating systems. Its versatility means you can confidently install it in kitchens, bathrooms, and laundry rooms—areas where you might hesitate to use solid hardwood due to potential moisture exposure.
Key Factors to Consider Before Buying
Before you fall in love with a specific style of engineered wood, it’s smart to zoom out and look at the big picture. Understanding the factors that influence cost, durability, and aesthetics will help you choose a floor that not only looks great on day one but also performs well for years to come. From the thickness of the wear layer to the species of wood, every detail plays a role in the final price and longevity of your investment. Thinking through these elements now will ensure you find the perfect balance of style, function, and budget for your project, preventing any surprises down the road.
Breaking Down the Cost of Engineered Wood
The price of engineered wood flooring can vary quite a bit, but it’s generally more affordable than solid hardwood. The final cost depends on several factors, including the brand, the thickness of the wear layer, and the species of the wood veneer. It’s helpful to set a budget per square foot before you start shopping, but remember to also account for underlayment, adhesive or nails, and any tools you might need to rent or buy. By understanding what drives the price, you can make informed decisions and find a high-quality floor that fits your financial plan without compromising on the look you want.
Price by Wood Species
The type of wood used for the top veneer is one of the biggest factors in the overall cost. Common and readily available woods tend to be more budget-friendly, while more exotic or rare species will command a higher price. For instance, oak engineered flooring is often a cost-effective choice, typically ranging from $4 to $8 per square foot. In contrast, a species like maple might cost between $5 and $9 per square foot. If you have your heart set on a specific look, like the rich tones of walnut or the unique grain of hickory, be prepared for those choices to influence your budget.
Finding Deals and Sale Prices
You don’t always have to pay top dollar to get a beautiful floor. Engineered wood often provides a premium look without the premium cost associated with solid hardwood. You can find a great selection of hardwood flooring options that are both durable and stylish, making it easier to stay within your budget. Keep an eye out for sales, clearance events, and overstock deals from suppliers. For contractors and trade professionals, opening a trade account can also provide access to bulk discounts, which can lead to significant savings on larger projects.
Durability, Lifespan, and Maintenance
Engineered wood is known for its durability, but its lifespan and maintenance needs are directly tied to its construction—specifically, the top layer of real wood. This "wear layer" is what you see and walk on, and it determines how well the floor stands up to daily life and how many times, if any, it can be refinished. A thicker wear layer provides more resilience against scratches and dents, giving you a floor that can handle foot traffic, pets, and kids. Proper care is also key; with the right maintenance routine, your engineered wood floors can look fantastic for decades.
Understanding the Wear Layer
The wear layer is the single most important factor for your floor's longevity. It’s the top slice of genuine hardwood, and its thickness dictates how durable the plank is. A thicker wear layer offers more protection against scratches and impacts and allows for the possibility of sanding and refinishing the floor in the future. When comparing products, always check the specifications for the wear layer thickness. A more substantial layer might cost a bit more upfront, but it provides better long-term value and extends the life of your floor significantly.
Expected Lifespan and Refinishing Limits
With proper care, you can expect your engineered hardwood floors to last anywhere from 20 to 30 years. The ability to refinish the floor depends entirely on the thickness of that top wood veneer. Floors with a very thin wear layer (1-2mm) generally cannot be sanded down without exposing the core layers beneath. However, those with a thicker wear layer (3mm or more) can typically be sanded and refinished at least once, and sometimes more. This is a key difference from solid hardwood, which can often be refinished multiple times over its life.
Basic Care and Cleaning
One of the best things about engineered hardwood is how easy it is to maintain. Regular sweeping or vacuuming (with a hard floor attachment) is usually all you need to handle dust and debris. For a deeper clean, a lightly damp mop with a pH-neutral cleaner designed for wood floors works perfectly. The key is to avoid excessive water, which can damage the wood over time. Proper cleaning and maintenance are essential to keeping your floors looking as good as the day they were installed, ensuring they remain a beautiful feature in your home.
Exploring Your Style Options
Engineered wood flooring opens up a world of design possibilities. Because the top layer is real wood, you get all the authentic character, grain patterns, and warmth you’d expect from traditional hardwood. But thanks to modern manufacturing, you have even more choices when it comes to species, textures, and plank sizes. Whether your style is rustic farmhouse, sleek and modern, or something in between, there’s an engineered wood floor to match. This versatility allows you to customize your space and achieve a truly high-end look that reflects your personal taste.
Available Wood Species
You aren't limited to just one or two looks. Engineered wood flooring is available in a wide variety of domestic and exotic species, giving you plenty of options to find the perfect match for your home's decor. Popular choices include the classic and versatile oak, the clean and modern look of maple, and the rustic character of hickory. You can also find engineered planks in birch, walnut, acacia, and even bamboo. Each species offers a unique color, grain pattern, and hardness, allowing you to tailor the floor to your aesthetic and lifestyle needs.
Surface Textures and Finishes
Beyond the wood species, the surface texture can dramatically change the look and feel of your floor. You can choose from a variety of finishes to suit your style. A smooth finish offers a classic, refined look that’s sleek and elegant. For a more rustic or lived-in feel, you might opt for a wire-brushed texture, which subtly highlights the wood grain. Handscraped and distressed finishes provide a more aged, character-rich appearance, perfect for hiding minor wear and tear in busy households. These different surface finishes add another layer of customization to your design.
Plank Sizes and Dimensions
The size of the planks can also have a major impact on the overall feel of a room. Engineered hardwood is available in a wide range of widths, from narrow strips around 3.5 inches to wide planks of 9.5 inches or more. Wider planks have become increasingly popular as they can make a space feel larger and more open, with fewer seams creating a cleaner, more contemporary look. Thickness also varies, typically from 0.25 to 0.75 inches. A thicker plank can feel more solid underfoot and often corresponds with a thicker, more durable wear layer.
How Engineered Wood Compares to Other Flooring
When you're in the market for new flooring, the choices can feel overwhelming. Engineered wood is a fantastic option, but it’s helpful to see how it stacks up against other popular materials like laminate and luxury vinyl plank (LVP). Each has its own set of strengths and is suited for different applications and budgets. Understanding the core differences in their construction, appearance, and performance will help you confidently decide which flooring type is the right fit for your home, your lifestyle, and your project goals.
Engineered Wood vs. Laminate Flooring
The most significant difference between engineered wood and laminate is the surface layer. Engineered wood features a top layer of real, solid wood, giving it an authentic look and feel that is unique to each plank. Laminate flooring, on the other hand, is a synthetic product with a photographic layer designed to look like wood. While high-quality laminate can be very convincing, it doesn't have the natural variation of real wood. Because of its layered plywood core, engineered wood is also more dimensionally stable and offers a more solid feel underfoot compared to laminate.
Engineered Wood vs. Luxury Vinyl Plank (LVP)
This is a common comparison, as both are known for their durability. The choice often comes down to material preference and location. Engineered wood provides the authentic beauty and warmth of real wood because its surface *is* real wood. LVP is a synthetic product made from PVC, which makes it completely waterproof and a great choice for areas like bathrooms or basements where significant moisture is a concern. While both are durable, engineered wood offers a more premium, natural aesthetic, whereas LVP excels in its resistance to water and scratches, often at a lower price point.
Potential Downsides to Keep in Mind
While engineered wood flooring is an excellent choice for many homes, it’s important to be aware of its limitations. No flooring material is perfect for every situation, and understanding the potential downsides will help you set realistic expectations and ensure you’re making the best choice for your specific needs. The two main areas to consider are its relationship with moisture and its susceptibility to physical damage. Knowing these limitations ahead of time allows you to plan your installation accordingly and take the right steps to protect your investment for the long term.
Moisture Resistance Limitations
Engineered wood’s layered construction makes it much more stable and resistant to humidity than solid hardwood. However, it is not waterproof. The core layers are wood-based, and the top layer is real wood, both of which can be damaged by excessive or prolonged exposure to water. While it can handle the occasional spill if cleaned up quickly and is suitable for kitchens, it should not be installed in very wet areas like full bathrooms with showers. It’s crucial to protect it from standing water to prevent swelling, warping, or delamination of the layers.
Potential for Scratches and Dents
Just like solid hardwood, the real wood surface of engineered flooring can be scratched or dented. Its durability against daily wear and tear is largely dependent on the hardness of the wood species (Janka rating) and the quality of the factory finish. While it is a durable product, it can still be susceptible to damage from things like dragging heavy furniture, pet claws, or dropped objects. Choosing a floor with a thicker wear layer and a textured finish, like wire-brushed or handscraped, can help camouflage minor imperfections and keep the floor looking its best.
Getting Your Plywood Subfloor Ready for Installation
Think of your subfloor as the foundation of your new floor. If the foundation isn't solid, level, and clean, you’ll run into problems down the road—like squeaks, gaps, or an uneven finish. Taking the time to properly prepare your plywood subfloor is the single most important thing you can do to ensure your new hardwood flooring looks great and lasts for years. A little extra work now saves you from major headaches later.
The goal is to create a surface that is structurally sound, flat, and free of any debris. A properly prepped subfloor prevents the engineered wood planks from flexing or separating over time, which protects your investment and keeps the floor looking pristine. It also makes the actual installation process much smoother. We’ll walk through the three key steps to get your plywood subfloor ready for installation: securing any loose spots, checking for levelness, and clearing away old materials for a fresh start. Don't be tempted to rush this part; a perfect subfloor is the secret to a professional-looking installation that you can be proud of for a long time.
How to Inspect and Secure Your Subfloor
First, walk across the entire plywood subfloor, paying close attention to how it feels and sounds underfoot. Do you hear any squeaks or creaks? Do any areas feel bouncy or loose? These are signs that the plywood isn't securely fastened to the floor joists below. To fix this, drive deck screws through the plywood and into the joists in any problem areas. Screws provide a much stronger, longer-lasting hold than nails and are your best defense against future squeaks. A solid, quiet subfloor is the first step toward a successful flooring installation.
Is Your Subfloor Level and Dry?
Next, make sure your subfloor is flat. You can check this by laying a long, straight edge (at least six to ten feet) across different sections of the floor. Look for any gaps between the straightedge and the subfloor. As a rule of thumb, the floor shouldn't have any dips or peaks greater than 3/16 of an inch over a 10-foot span. If you find high spots, you can sand them down. For low spots, use a self-leveling compound to fill them in and create a smooth, even surface. While moisture is a bigger concern for concrete, always ensure your plywood is completely dry before you begin.
Clearing the Way: Removing Old Flooring and Baseboards
Before you can install your beautiful new engineered wood, the old flooring has to go. Remove any existing carpet, vinyl, or tile completely. This includes pulling up all the staples, tack strips, and scraping away any old adhesive residue. You want a perfectly clean slate to work with. You’ll also need to carefully remove the baseboards and any shoe molding from the perimeter of the room. Use a putty knife to protect the wall as you gently pry them off with a pry bar. Label the back of each piece so you know exactly where it goes for easy reinstallation later.
What Tools Do You Need for Installation?
Before you lay the first plank, let's talk about prep. Getting all your tools and materials in one place before you start is one of the best things you can do to ensure a smooth installation. Think of it like gathering your ingredients before you start cooking—it saves you from frantic searching later and helps you focus on the task at hand. A well-organized workspace not only makes the job easier but also leads to a more professional finish. This step is all about setting yourself up for success.
When you have everything you need within arm's reach, you can get into a rhythm and work more efficiently. It also prevents mistakes that can happen when you're rushing or improvising with the wrong tool. We'll cover the essential tools for cutting and fitting your new hardwood flooring, as well as the critical supplies like underlayment that protect your investment for years to come. Don't forget about safety gear; a good pair of glasses and a dust mask are non-negotiable when you're cutting wood. Taking a little extra time now to get organized will pay off big time, trust me. Let's walk through exactly what you need, so you can feel confident and ready to go.
The Essential Tool Checklist
Having the right tools makes all the difference. Here’s a rundown of what you should have ready before you begin.
- Measuring & Marking: Tape measure, pencil, and a chalk line for snapping straight guidelines.
- Cutting: A miter saw for clean, angled cuts on trim, and a circular or table saw for ripping planks. A jigsaw is also handy for cutting around tricky shapes.
- Fitting: A tapping block, pull bar, and hammer to get those planks snug. A pry bar helps with the last row.
- Safety: Don't skip the safety glasses and a dust mask! Knee pads will also save you a lot of discomfort.
- Other Essentials: A utility knife and ½-inch spacers to maintain your expansion gap.
Beyond tools, you'll need your flooring, underlayment, and the right fasteners or adhesive for your chosen installation method. Always order 5% to 10% extra flooring to account for cuts and mistakes.
How to Choose the Right Underlayment and Supplies
Underlayment is the unsung hero of a great flooring installation. This thin layer of material goes between your plywood subfloor and your new engineered wood, and it does some heavy lifting. It acts as a moisture barrier, which is crucial for preventing warping and damage over time. It also helps muffle sound—a huge plus for second-story rooms or condos—and can even add a bit of thermal insulation to keep your floors from feeling too cold. Some engineered wood flooring comes with an underlayment already attached. If yours doesn't, simple options like 15# felt paper are effective and budget-friendly. Always check the flooring manufacturer's recommendations to ensure you choose a compatible underlayment.
Which Installation Method Is Right for You?
Once your subfloor is prepped and ready, it's time to decide how you'll actually install your beautiful new engineered wood flooring. Unlike solid hardwood, engineered planks offer a few different installation options, giving you the flexibility to choose what works best for your project and skill level. The three primary methods for installing over a plywood subfloor are nail-down, glue-down, and floating. Each has its own set of benefits and considerations, from the tools you'll need to the final feel of the floor underfoot. Your choice will impact the project's timeline, budget, and even the sound and feel of your finished floor. For example, a glue-down floor will feel incredibly solid, while a floating floor offers a simpler, more forgiving installation process. There's no single "best" way—it's all about what's right for your home and your comfort level with the work involved. Thinking through these options beforehand will set you up for a smooth installation and a result you'll love for years. Let's break them down to help you make the right call.
Nailing It Down: The Traditional Method
This is the classic, time-tested method for installing wood floors. The nail-down approach involves using a special flooring nailer or stapler to physically fasten the engineered wood planks to your plywood subfloor. Each nail is driven at an angle through the tongue of the plank, hiding it from view once the next board is in place. This creates an incredibly secure and permanent floor that feels solid underfoot. While it requires renting or buying a flooring nailer, it’s a fantastic option for a long-lasting, professional-quality installation directly over a wood subfloor. It's the go-to for many pros who want that traditional, sturdy feel.
Sticking With It: The Glue-Down Method
For a floor that feels exceptionally solid and quiet, the glue-down method is an excellent choice. With this technique, you’ll spread a specialized wood flooring adhesive directly onto the plywood subfloor and then set the planks into the glue. This creates a permanent bond between the flooring and the subfloor, eliminating any hollow sounds or movement. It’s a popular choice for high-traffic areas because of its stability. The process can be a bit messy and requires careful work, but the rock-solid result is often worth the extra effort. Following the adhesive manufacturer's instructions is key to success here.
Effortless Install: The Floating Method
If you’re looking for a more DIY-friendly approach, the floating method is your best friend. In this installation, the planks aren't attached to the subfloor at all. Instead, they connect to each other using a click-lock or tongue-and-groove system, "floating" over an underlayment pad. This is often the fastest and cleanest installation method. A major benefit is that it allows the entire floor to expand and contract as a single unit with changes in temperature and humidity, which helps prevent gaps or buckling. It’s a forgiving method that delivers great results without the need for nailers or messy adhesives.
Getting Started: Prepping Your Room and Flooring
With a clean and level subfloor, you're almost ready to start laying planks. But before you do, a couple of preparatory steps are essential for a flawless, long-lasting result. This is where you give your new flooring time to adjust to its environment and map out a clear installation plan. Taking the time to acclimate the wood and plan your layout prevents common issues like buckling and ensures your floor looks professionally installed. Let’s cover the simple but crucial steps to prepare your space.
Why You Can't Skip Acclimation
Engineered wood needs to get used to its new environment before installation. This process, called acclimation, prevents future buckling. Bring the unopened boxes of your hardwood flooring into the room, then open them to expose the planks to the air. Let them sit for at least three days to adjust to the room's unique temperature and humidity. This simple step is one of the most important for ensuring your floor remains stable and beautiful for years to come. It’s a small investment in time that protects your bigger investment in materials.
How to Plan Your Layout and Find Your Starting Wall
A thoughtful layout makes all the difference. Always start your installation along the longest, most visible exterior wall—this will be your visual anchor. As you work, place 1/2-inch spacers against the walls to maintain a consistent expansion gap from the very beginning. To achieve that classic, staggered wood floor look, use a leftover piece from the previous row to start the next one, making sure the piece is at least six inches long. This technique breaks up the seams and creates a more natural, appealing pattern across the entire room.
Don't Forget the Expansion Gaps
Wood flooring naturally expands and contracts, so it needs room to move. An expansion gap is a small space left around the perimeter of the room that allows for this movement. Use 1/4-inch spacers between the flooring and the walls as you install each row. You’ll also need to leave a 1/2-inch gap around any fixed objects, such as kitchen islands, support columns, or pipes. Don’t worry about how this looks—these gaps will be completely hidden once you install your baseboards and trim, leaving you with a perfect, professional finish.
Installing Your Engineered Wood Flooring: A Step-by-Step Guide
With your subfloor prepped and your materials ready, it’s time for the most rewarding part: laying the floor. This is where your vision starts to become a reality. Follow these steps carefully to ensure a professional-looking, durable finish that you’ll love for years to come. Remember to work at a steady pace and double-check your measurements as you go. A little extra care during installation makes all the difference in the final result.
How to Lay the First Row Perfectly
Your first row is the foundation for the entire floor, so getting it straight is critical. Start along the longest, most visible exterior wall in the room. Place 1/2-inch spacers between the wall and your first plank to create an expansion gap—this allows the wood to expand and contract naturally with changes in humidity. Lay the first plank with its groove side facing the wall. Connect the next plank by its short end, continuing until you reach the end of the row. You’ll need to cut the last plank to fit, making sure to leave that same 1/2-inch gap from the wall. This first row sets the standard for the rest of your beautiful new hardwood flooring.
The Secret to a Natural Look: Staggering Joints
To create a classic, professional look and add structural strength, you need to stagger the end joints from one row to the next. Never let the seams line up. A good rule of thumb is to start your second row with the piece you cut off from the end of the first row (as long as it’s at least 12 inches long). Angle the tongue of the new plank into the groove of the plank in the first row and press down firmly to lock it in place. Use a tapping block and a rubber mallet to gently tap the planks together for a tight, seamless fit. Continue this pattern, ensuring all end joints are at least 12 inches apart.
Making the Cut: Fitting Planks Around Obstacles
Few rooms are perfect rectangles. You’ll likely encounter doorways, vents, pipes, or cabinets that you need to work around. This is where precise measurements and cuts are key. For these custom fits, measure the area carefully and mark the plank where it needs to be cut. A jigsaw is the perfect tool for making these intricate, non-linear cuts. Take your time to get a snug fit, but don’t forget to leave a 1/2-inch expansion gap around all fixed objects, just as you did against the walls. This ensures the entire floor has room to breathe, preventing buckling down the road.
Avoid These Common Installation Mistakes
Installing a new floor is exciting, but a few common missteps can turn your dream project into a headache. Getting the details right from the start ensures your beautiful new engineered wood floors will look great and perform well for years. By avoiding these key mistakes, you can achieve a professional-quality finish that lasts.
The three most common pitfalls involve the subfloor, the flooring material itself, and the way the planks are laid. Taking the time to address each of these areas properly is non-negotiable for a successful installation. Let’s walk through what to watch out for so you can get it right the first time.
Mistake #1: Skipping Subfloor Prep
The final quality of your new floor is directly tied to the condition of the subfloor beneath it. A clean, flat, and stable surface is the foundation for everything else. Before you lay a single plank, walk across the entire plywood subfloor to check for squeaks or loose spots. Secure any problem areas with screws to eliminate movement. You should also repair any damaged sections of the plywood. If the subfloor is in rough shape, you may need to install a thin layer of new plywood over it to create a smooth, solid base for your new hardwood flooring.
Mistake #2: Ignoring Moisture and Acclimation
Engineered wood is a natural product that responds to its environment. Before installation, you must let the planks acclimate to the room where they will be installed. This simply means leaving the unopened boxes of flooring in the room for at least 24 hours. This allows the wood to adjust to the home’s specific temperature and humidity levels, which prevents the planks from buckling or gapping after they’re installed. It’s also a smart move to test the plywood subfloor for moisture to ensure it’s within the acceptable range recommended by the flooring manufacturer.
Mistake #3: Incorrect Spacing or Fastening
Wood naturally expands and contracts with changes in humidity. To account for this movement, you need to leave a small expansion gap—typically about 1/4 inch—between the flooring and the walls. Use spacers during installation to maintain this gap consistently around the perimeter of the room. Once the floor is installed and you’re ready to add baseboards, you can remove the spacers. This gap will be hidden by the trim, but it’s essential for preventing the floor from buckling. For professionals, getting these details right on every job is key to building a great reputation, which is why many join a trade program to access the best materials and support.
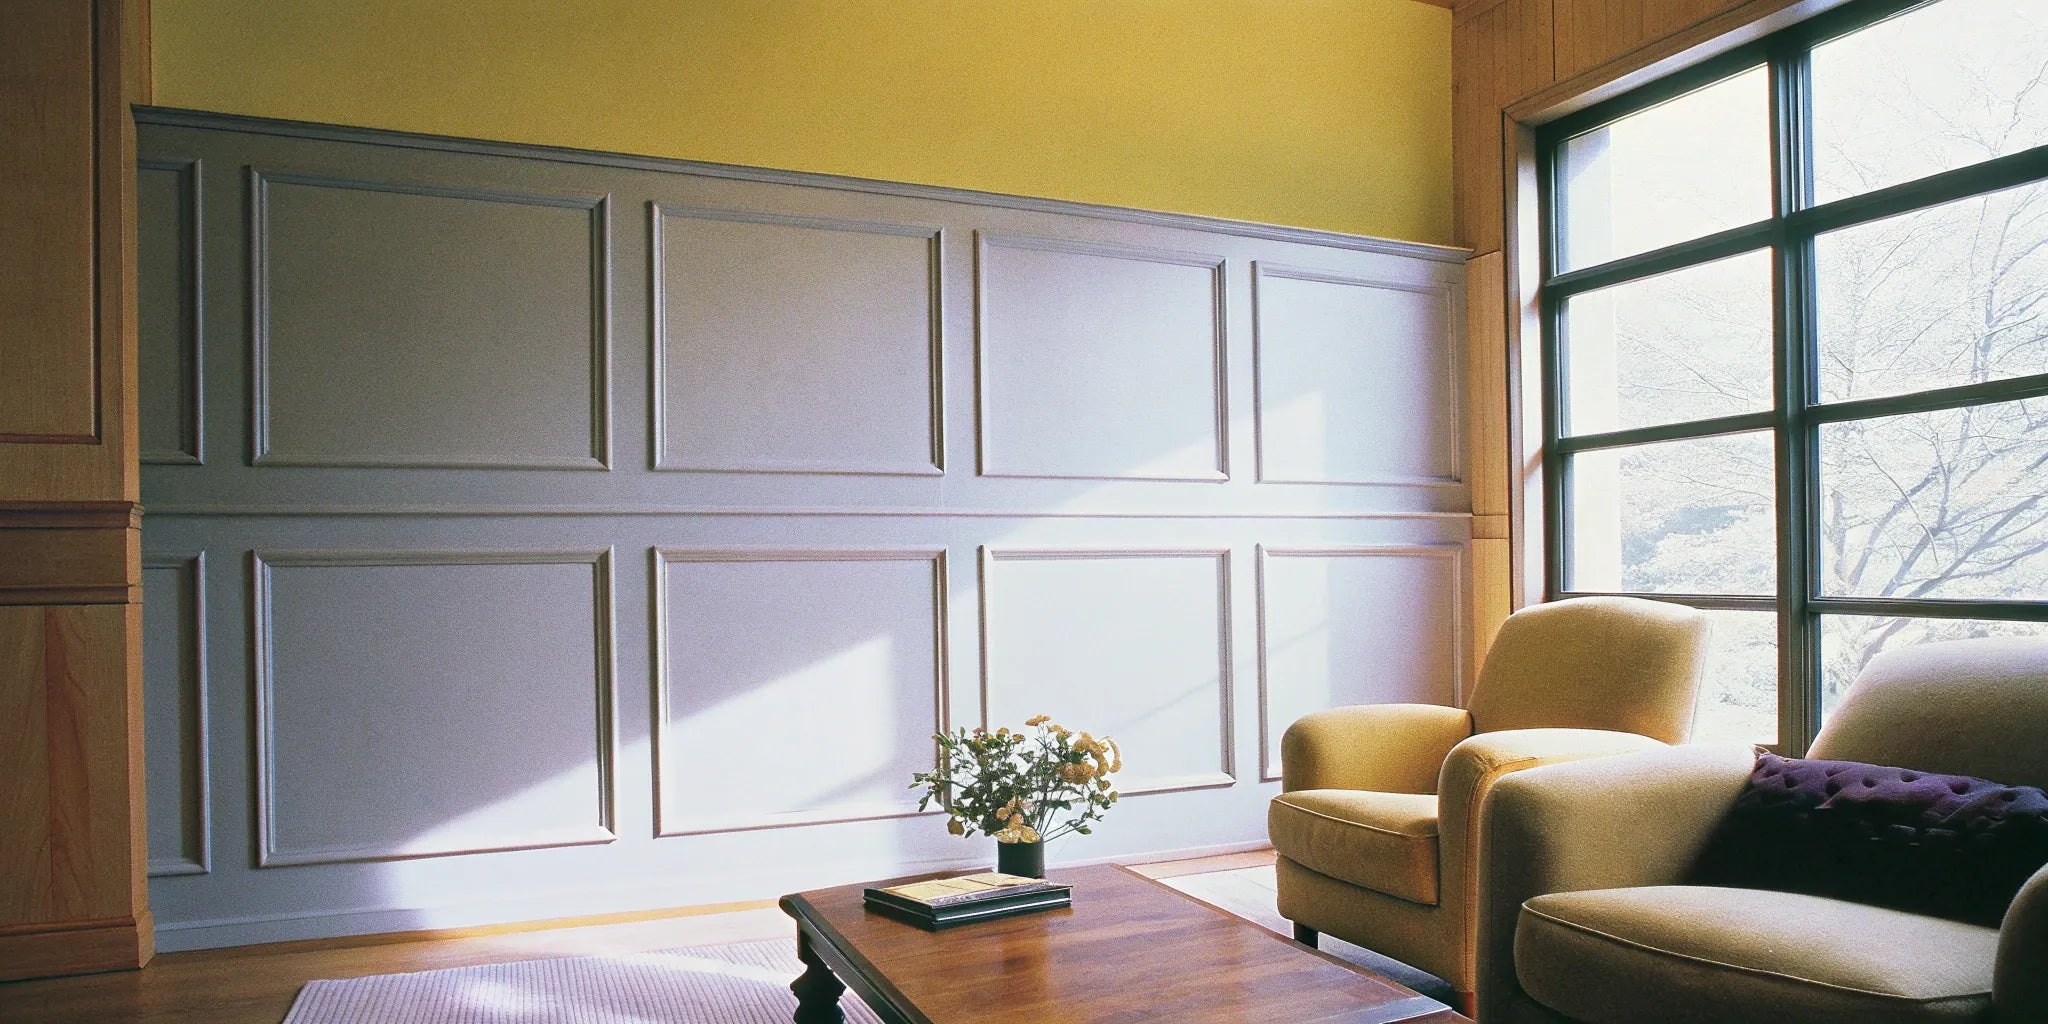
Add the Finishing Touches
Your new engineered wood floor is down, and it looks fantastic. Now it’s time for the final steps that will give your project a truly professional and polished appearance. These finishing touches are what separate a good installation from a great one. They seamlessly integrate your new floor with the rest of the room, from the walls to the doorways, ensuring every detail is perfect. Taking the time to complete these last tasks properly will protect your investment and make your new floor the true centerpiece of the space, perfectly complementing other updates like new lighting fixtures or a modern steel door.
Installing Your Baseboards and Trim
Remember those expansion gaps you carefully left along the walls? Now it’s time to cover them up with baseboards and trim. This step not only hides the gap but also creates a clean, finished line where the floor meets the wall. When you’re ready to install, make sure to nail the baseboards directly to the wall, never into the floor itself. This allows the flooring to expand and contract naturally underneath. For an even more refined look, you can add a small piece of shoe molding or quarter-round trim along the bottom edge of the baseboard. This is a great way to conceal any minor unevenness between the baseboard and the new floor.
Adding Professional-Looking Transition Strips
Transition strips are essential for creating a smooth and safe connection between your new engineered wood and any adjacent flooring, like tile in a bathroom or carpet in a hallway. These pieces bridge the different heights and materials, preventing tripping hazards and protecting the edges of your planks. To install one, simply measure the width of the doorway or opening, cut the strip to size with a miter saw, and secure it in place. Depending on the type, it might snap into a track or require screws. Choosing the right transition piece ensures your beautiful new hardwood flooring flows perfectly from one room to the next.
The Final Cleanup and Inspection
The hard work is done, but before you move the furniture back in, give your new floor some time to settle. It’s best to avoid heavy foot traffic and wait at least 24 hours before placing heavy items on the surface. Use this time to do a thorough cleanup. Sweep up any remaining sawdust and debris, and give the floor a light cleaning according to the manufacturer’s instructions. Walk the entire room and inspect your work, looking for any loose boards or noticeable gaps. Addressing small issues now is much easier than later. Once everything looks good, you can finally arrange your furniture and enjoy the beautiful result of your efforts.
