


How to Install WPC Fluted Panel: A DIY Guide
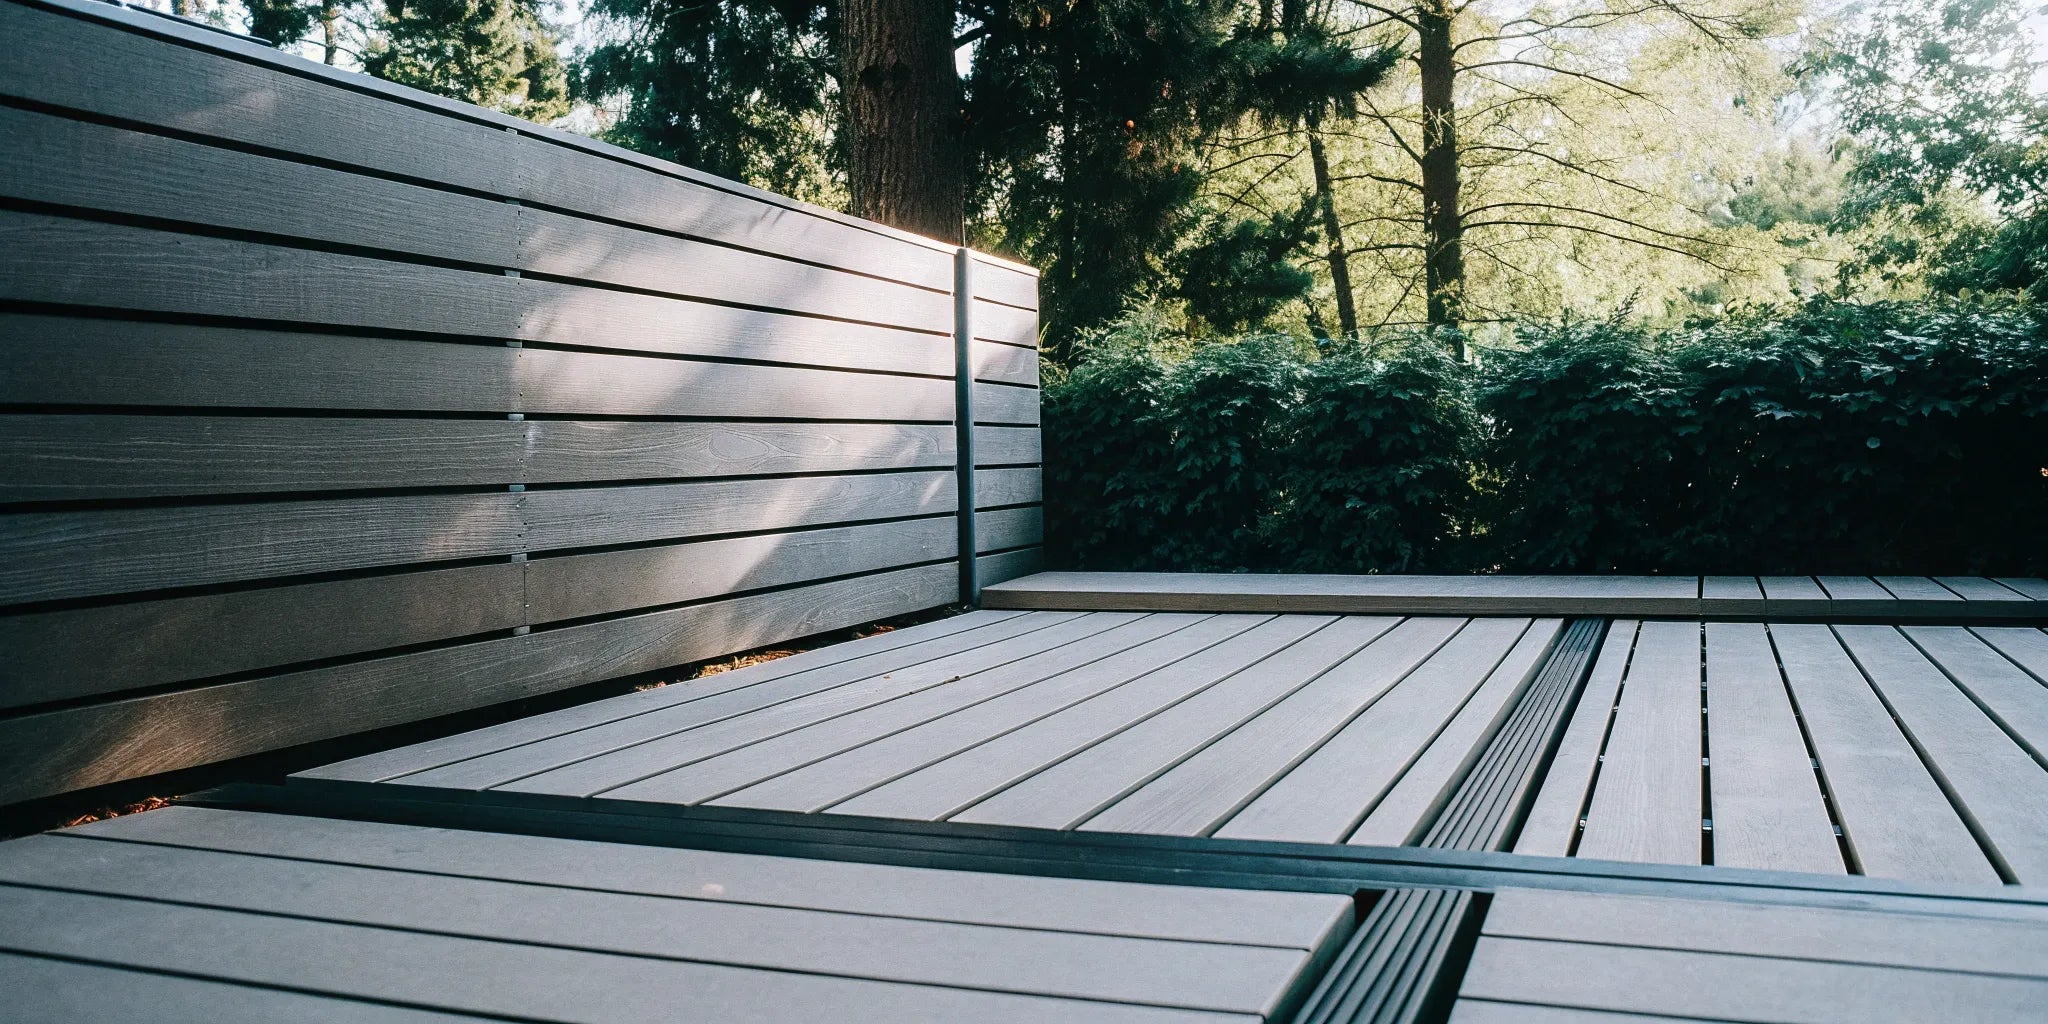
Giving your home's exterior a facelift doesn't have to be a massive project. Sometimes, one feature makes all the difference. A WPC fluted panel is the perfect way to add modern texture, depth, and serious curb appeal to any outdoor space. Its vertical grooves create a dynamic play of light and shadow that instantly modernizes a tired facade or entryway. Unlike real wood, these composite panels are built to last, resisting moisture and fading. If you’re ready to transform your home, this guide will walk you through your outdoor installation for a flawless, long-lasting finish.
Key Takeaways
- Proper prep work prevents future problems: Let your WPC panels acclimate to the outdoor climate for 48 hours before you begin. This simple step, combined with a clean and smooth wall surface, prevents warping and ensures a secure, professional-looking installation.
- Expansion gaps are non-negotiable: Always leave a 1/4-inch gap between panels and at all edges to allow for natural movement with temperature changes. This is the key to preventing buckling and keeping your wall flat for years.
- A support frame is crucial for outdoor use: Installing exterior WPC panels on a frame of joists or battens creates an essential air gap. This allows for proper ventilation and moisture drainage, protecting both the panels and your home's structure.
What Are WPC Fluted Panels?
If you want to give your home’s exterior a modern finish without the constant upkeep of wood, WPC fluted panels are a perfect solution. These innovative wall panels deliver the textured look of natural wood with the resilience of a composite material. The "fluted" design—a series of vertical grooves—creates a stunning play of light and shadow, adding depth to any surface. WPC stands for Wood Plastic Composite, an engineered material that blends the best of both worlds. It’s a fantastic choice for outdoor projects because it’s built to withstand the elements. Unlike real wood, WPC won’t rot, warp, or fall victim to pests, giving you a gorgeous, long-lasting result with minimal maintenance.
What's Inside a WPC Panel?
So, what exactly is in these panels? WPC is a hybrid material made from a unique blend of recycled wood fibers and plastics. This combination creates a product that has the warm, natural appearance of wood but with added strength and durability. The manufacturing process ensures each panel is dense, uniform, and resistant to the issues that plague traditional timber. This smart composition is why WPC has become a go-to for exterior wall cladding. You get the aesthetic you want without compromising on performance, making it a practical and sustainable choice.
Why WPC Panels Thrive Outdoors
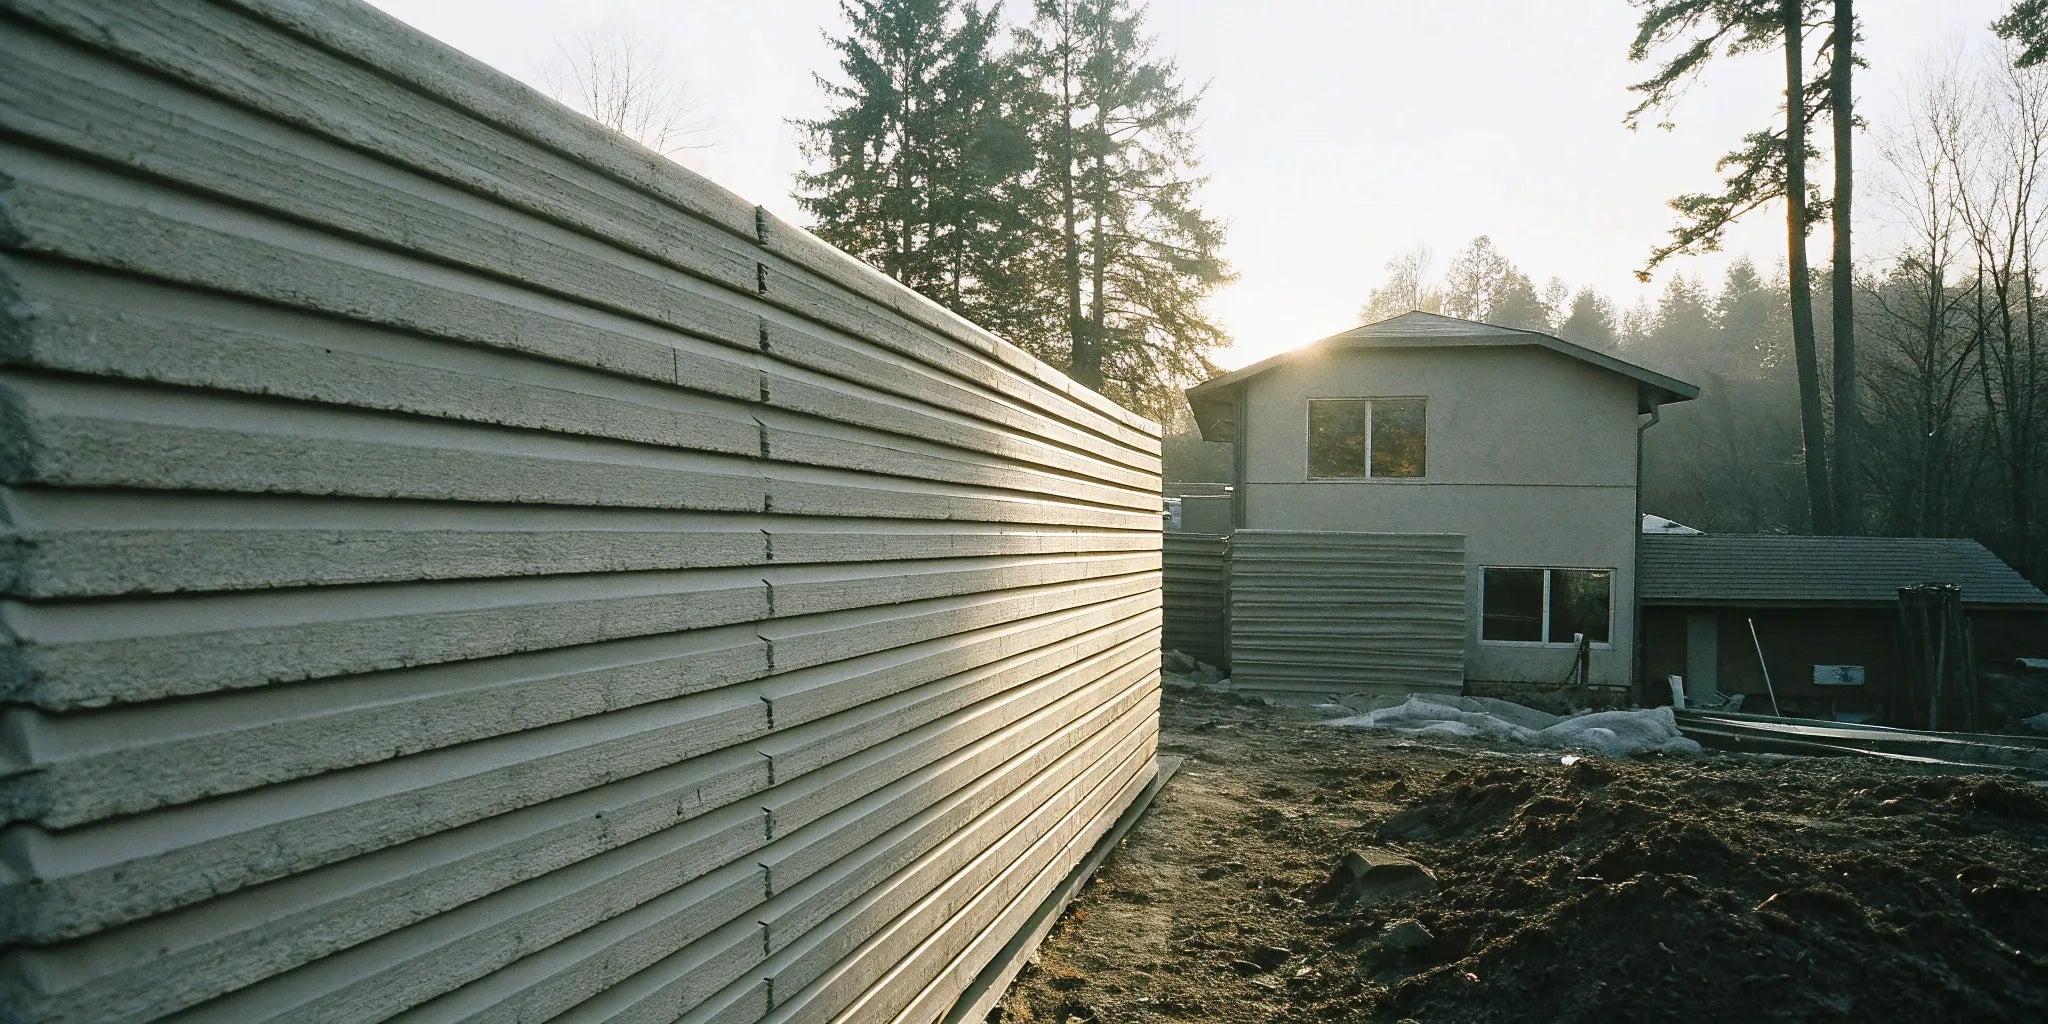
When it comes to outdoor projects, moisture is often the biggest enemy. WPC panels are completely waterproof, so they won’t swell, warp, or rot when exposed to rain, snow, or high humidity. This makes them ideal for any climate, from damp coastal regions to areas with heavy rainfall. Because they don’t absorb water, you also don’t have to worry about mold, mildew, or fungal growth. This inherent resistance to moisture ensures your exterior walls will maintain their structural integrity and appearance for years, without needing constant sealing or treatment.
How Weather-Resistant Are WPC Panels?
Beyond handling moisture, WPC panels are also built to endure constant sun exposure. The composite material has excellent UV resistance, which prevents the color from fading and the panel from becoming brittle or cracking over time. This sun-proof quality is a game-changer for outdoor facades, garden walls, and any surface that gets a lot of direct sunlight. While traditional wood siding might fade or require repainting every few years, WPC panels can transform your home exterior with a finish that stays vibrant and intact, season after season.
Common Applications: Indoors and Out
One of the best things about WPC fluted panels is their versatility. While they are a fantastic choice for exteriors, their application doesn't stop there. These panels are durable, waterproof, and stylish, making them a popular choice for both interior and exterior projects. Inside, they can transform a plain room into a sophisticated space, while outdoors, they serve as durable and attractive cladding. This flexibility allows you to create a cohesive design that flows from your indoor living areas to your outdoor entertaining spaces, all with a single, reliable material.
Interior Feature Walls and Ceilings
Indoors, WPC fluted panels are a designer's dream for creating stunning feature walls. Whether you're accenting the wall behind your TV in the living room, adding texture to a bedroom, or even cladding a ceiling for a dramatic effect, these panels bring warmth and modern character. Their vertical lines draw the eye upward, making rooms feel taller and more spacious. Because they are waterproof and easy to clean, they are also a practical choice for kitchens and bathrooms, where they can add a touch of elegance without the worry of moisture damage that comes with natural wood.
Commercial and High-Traffic Spaces
Beyond residential use, WPC panels are an excellent material for commercial settings. Think hotel lobbies, office reception areas, restaurants, and retail stores. These panels are ideal for high-traffic areas due to their exceptional durability and resistance to wear and tear. They can handle the daily bumps and scuffs of a busy environment while maintaining their polished appearance. For business owners, this means a stylish interior that requires minimal upkeep, making it a smart, long-term investment that keeps the space looking fresh and professional for years.
Available Styles, Sizes, and Finishes
You're never locked into one look with WPC panels. They come in a wide variety of colors and wood-like styles, so you can easily find an option that fits your home's aesthetic perfectly. Whether you prefer the rich, warm tones of walnut or a lighter, more contemporary oak finish, there's a panel to match your vision. This design flexibility allows you to create anything from a rustic accent wall to a sleek, modern facade. You can explore different wall panel collections to see the range of finishes available and find the perfect complement for your project.
A Note on Acoustic Properties
An often-overlooked benefit of WPC fluted panels is their ability to improve a room's acoustics. The grooved, multi-layered structure helps to absorb and diffuse sound waves, reducing echo and creating a quieter, more comfortable environment. This makes them a fantastic addition to home theaters, offices, or large, open-plan living spaces where sound can bounce around. While they aren't a substitute for dedicated soundproofing, these panels can help improve the sound quality in a room, adding another layer of functional value to their stylish appearance. For projects where sound control is a priority, consider pairing them with specialized acoustic wall panels.
Benefits and Potential Drawbacks of WPC Panels
Like any building material, WPC fluted panels come with their own set of pros and cons. The benefits are significant—they offer a unique combination of style, durability, and low maintenance that is hard to beat. From their long lifespan to their safety features, they are engineered for modern living. However, it's also important to understand the considerations before you commit. Thinking about factors like initial cost and material properties will help you make an informed decision and ensure that WPC panels are the right fit for your specific project needs and budget.
Key Benefits of WPC
The advantages of choosing WPC panels are compelling, especially for homeowners and builders looking for a reliable, long-term solution. These panels are designed to solve the common problems associated with traditional materials like wood, offering superior performance without sacrificing aesthetic appeal. Their engineered composition provides peace of mind through enhanced durability, resistance to the elements, and safety features that protect your home and family. These key benefits make WPC a smart and practical choice for a wide range of applications, both inside and out.
Exceptional Durability and Lifespan
When you invest in an exterior upgrade, you want it to last. WPC panels deliver on that front, with an expected lifespan of 20 years or more. This impressive longevity is thanks to their composite structure, which resists fading, cracking, and degradation from sun and moisture. Unlike wood that needs regular staining or painting to protect it, WPC holds its color and integrity for decades with very little maintenance. This makes it a cost-effective choice over the long run, saving you time and money on future repairs and replacements.
Health and Safety Considerations
Your home should be a safe environment, and the materials you use play a big role in that. WPC panels are a great choice because they are fire-resistant, waterproof, and do not contain harmful chemicals like formaldehyde or heavy metals. This makes them a healthier option for your family, especially for interior applications where air quality is a concern. The fire-resistant properties add an extra layer of safety and peace of mind, ensuring your home is not only beautiful but also built with materials you can trust.
What to Consider Before Buying
Before you place your order, it's helpful to know a few things about WPC panels. While they are incredibly strong, it's important to note that WPC wall panels are thicker than PVC wall panels, which contributes to their superior durability and impact resistance. This thickness can be a factor in your installation planning. Additionally, while the wood-like finishes are very realistic, they are still a composite material. For those who are set on the authentic feel and grain of real wood, WPC might feel different to the touch. Weighing these factors against the low-maintenance benefits is key to making the right choice.
How WPC Compares to Other Materials
When planning a project, you'll likely compare several material options. WPC fluted panels stand out when measured against common alternatives like PVC and natural wood. Each material has its place, but WPC often strikes the perfect balance between performance, aesthetics, and long-term value. Understanding the key differences in durability, maintenance requirements, and weather resistance will help clarify why WPC is frequently the superior choice for both exterior cladding and interior feature walls, giving you confidence in your decision.
WPC vs. PVC Panels
At first glance, WPC and PVC panels can seem similar, but their performance differs significantly, especially outdoors. WPC panels offer superior durability and moisture resistance compared to PVC, making them a much better choice for exterior applications. Because WPC contains wood fibers, it has greater strength and rigidity, making it more resistant to impact. PVC is a lighter plastic that can become brittle over time with sun exposure, whereas WPC is engineered to withstand the elements without cracking or warping, ensuring a longer-lasting and more reliable finish for your home.
WPC vs. Natural Wood Cladding
The choice between WPC and natural wood often comes down to maintenance. While nothing beats the authentic look of real wood, it requires significant upkeep. Wood needs to be regularly sealed, stained, or painted to protect it from moisture, pests, and UV damage. In contrast, WPC gives you a beautiful, textured finish without the constant work. Unlike real wood, WPC won’t rot, warp, or fall victim to pests, giving you a gorgeous, long-lasting result with minimal maintenance. This makes it a practical alternative for anyone who loves the look of wood but not the work that comes with it.
Budgeting and Purchasing Your Panels
Once you've decided that WPC panels are right for your project, the next step is planning your budget and purchase. The cost can vary based on the style, finish, and supplier, so it's important to do your research. Beyond the price of the panels themselves, you'll also need to account for additional materials like trims, fasteners, and potentially a support frame. Understanding the full scope of the costs and knowing where to look for deals will help you stay on budget and ensure a smooth ordering process from start to finish.
Understanding the Costs
Figuring out the budget for your WPC panel project involves looking at more than just the sticker price. You'll need to calculate the total square footage of your area to determine how many panels you need. It's also wise to order about 10% extra to account for any cuts or mistakes. Remember to factor in the cost of shipping, as well as any necessary accessories like corner trims or starter strips, which are essential for a clean, professional installation. Planning for these elements upfront will prevent any surprise expenses later on.
Per-Panel vs. Per-Square-Foot Pricing
When shopping for WPC panels, you'll notice that prices can be listed per panel or per square foot. The price for these panels can range from as low as $2.99 (which is likely for a small sample) up to $179.00 for a premium, full-sized panel. To accurately compare costs between different suppliers, it's best to calculate the price per square foot for each option. This will give you a true apples-to-apples comparison and help you determine the most cost-effective choice for the total area you need to cover.
Additional Costs: Trims and End Caps
To achieve a polished, finished look, you'll need trims and end caps. These pieces are designed to cover exposed edges at the corners, tops, and bottoms of your installation, creating clean lines and protecting the panel ends. Some suppliers sell these pieces separately, while others may offer them in kits. For example, some fluted panels are priced per box, which might include a certain number of trims. Always confirm what's included in the price and be sure to add the cost of any necessary finishing pieces to your overall budget.
Finding Deals and Wholesale Pricing
If you're a contractor, builder, or designer, you may be able to access special pricing. Many suppliers, including USA Builders Depot, offer trade programs that provide bulk discounts and wholesale rates for professionals. By signing up for a trade account, you can save significantly on materials, especially for larger projects. For homeowners undertaking a big renovation, it's always worth asking if there are discounts available for bulk orders, as this can help reduce the overall cost of your project.
The Ordering Process
Ordering WPC panels is typically a straightforward process, but there are a few things to keep in mind. Before placing your order, double-check your measurements and calculations to ensure you're getting the right amount of material. It's also a good idea to order a sample first to see the color and texture in person, as online photos can sometimes be misleading. Once you're ready, you can place your order online or over the phone, but be sure to clarify shipping details and lead times.
Minimum Orders and Shipping
Many suppliers have minimum order requirements to ensure cost-effectiveness, especially for shipping large items. For instance, you may need to order at least 20 slats to complete a purchase. This is common for building materials that are shipped via freight. When choosing a supplier, look for one that offers clear shipping policies and nationwide delivery, which can simplify the logistics of getting the materials to your job site, whether it's a residential home or a commercial property.
Your Installation Checklist: Tools & Materials
A smooth installation starts long before you hang the first panel. Taking the time to gather everything you need upfront will save you from making frustrating trips to the hardware store mid-project. Think of this as your pre-flight check—ensuring you have the right tools and materials on hand makes the entire process easier and helps you achieve a professional-looking finish. Let’s walk through exactly what you’ll need to get the job done right.
Essential Tools for the Job
Having the right tools is non-negotiable for a clean and secure installation. You don’t need a massive workshop, just a few key items to handle the job. Before you begin, make sure you have these essentials ready to go:
- Measuring Tape: For accurate measurements of your wall and panels.
- 4-Foot Level: This is your best friend for ensuring every panel is perfectly straight.
- Saw with a Fine-Toothed Blade: To get clean cuts, always cut panels with the finished side facing down to prevent chipping the surface.
- Drill: For creating pilot holes and driving screws.
- Caulking Gun: For applying adhesive or sealant smoothly and evenly.
- Utility Knife: Perfect for trimming small pieces or cleaning up edges.
- Rubber Mallet: Use this to gently tap panels into place without causing any damage.
Your Materials and Hardware List
Once your tools are lined up, it’s time to check your materials. Proper planning here prevents you from running out of supplies when you’re in the zone. Here’s what you’ll need to have on site:
- WPC Panels: Make sure you have enough panels to cover your entire area. A pro tip is to order 10–15% extra to account for any miscalculations or cutting mistakes. It’s always better to have a little leftover than to run short.
- Joists or Battens: These create the structural frame your panels will attach to.
- Stainless Steel Screws or Clips: These are essential for securing your panels.
- Optional Trim Pieces: For a clean, finished look around the edges and corners of your installation.
How to Choose the Right Fasteners
Don’t overlook the importance of choosing the right fasteners—they’re what holds your entire project together. For outdoor WPC panel installations, you should always use high-quality stainless steel screws or clips. These are specifically designed to work with composite materials and are crucial for preventing rust and corrosion over time, especially in damp or humid climates. Using the wrong type of fastener can lead to staining, instability, and can ultimately compromise the longevity of your beautiful new wall. Investing in the correct hardware ensures your Exterior Fluted Slat Wall Panels will remain secure and look great for years to come.
How to Prep Your Wall for Installation
Before you even think about picking up a tube of adhesive, let's talk about prep work. I know it’s the least glamorous part of any project, but trust me, taking the time to plan your layout and prepare your surface is the secret to getting that flawless, professional finish you’re aiming for. A little bit of planning now saves a ton of headaches later, ensuring your project goes smoothly from the first panel to the last.
Measure Twice: Planning Your Panel Layout
First things first, decide on the orientation of your panels. Will they run vertically for a sense of height, or horizontally to make the space feel wider? There’s no wrong answer—it’s all about the look you want. Once you’ve decided, grab a tape measure and map out your wall. Mark the locations of any obstacles like windows, outdoor outlets, or light fixtures. Planning these cuts ahead of time ensures your Exterior Fluted Slat Wall Panels fit together seamlessly, giving you a clean and polished result without any surprises mid-installation.
How to Clean and Prepare the Surface
Your WPC panels need a solid foundation to look their best and stay put for years. Before you begin, make sure the wall surface is completely clean, dry, and smooth. Take a moment to fill any significant cracks or holes with a suitable exterior filler and sand them down once dry. Then, give the entire wall a good wipe-down to remove any dust, dirt, or grease. This step is critical because it allows the construction adhesive to create a strong, lasting bond. Skipping this can lead to panels peeling away over time, and nobody wants to redo their work.
Don't Skip This Step: Acclimating Your Panels
This might be the easiest—and most overlooked—step in the entire process. Before installing, lay your WPC panels flat in the area where they will be installed for at least 48 hours. This is called acclimation. It gives the material time to adjust to the specific temperature and humidity of your outdoor environment. Why does this matter? It helps prevent the panels from expanding, contracting, or warping after they’re already on the wall. It’s a simple, hands-off step that protects your investment and ensures your beautiful new wall cladding stays straight and stable for the long haul.
How to Install WPC Fluted Panels: A Step-by-Step Guide
With your space prepped and your tools ready, it’s time for the most rewarding part: the installation. Installing Interior WPC Fluted Slat Wall Panels is a straightforward process that you can definitely handle. The key is to work methodically and pay attention to the details. We’ll walk through each step together, from marking your first guideline to locking in the final panel. Take your time, measure twice, and you’ll have a stunning feature wall in no time.
Step 1: Mark Your Starting Guideline
First things first, you need a perfectly straight starting line. A level is your best friend here. Use it to draw a vertical plumb line where you want the first panel to go. This single line will guide your entire installation, so make sure it’s spot on. Before you draw, double-check that your wall is clean, dry, and smooth. If you’re working with a bumpy or uneven surface, you may need to sand it down or install a flat backer board like plywood to ensure the panels adhere properly. A smooth start is the secret to a seamless finish.
Step 2: Placing the First WPC Panel
With your guideline marked, you’re ready to place the first panel. This piece is the most important one, as it sets the standard for the rest of the wall. Apply a high-quality construction adhesive to the back of the panel. A common technique is to apply it in long, wavy "S" shapes to get good coverage. Carefully press the panel onto the wall, aligning its edge perfectly with the pencil line you drew. Apply firm, even pressure for about 30 seconds to help the adhesive grab hold. Make sure it’s perfectly vertical before moving on.
Step 3: Apply Adhesive and Secure Each Panel
For each subsequent panel, repeat the adhesive process. Apply your construction glue in vertical lines or "S" shapes on the back, making sure you get solid coverage without putting too much near the edges where it could squeeze out. For outdoor projects or for extra peace of mind, you can also use mechanical fasteners like screws or nails. Drive them through the tongue or groove of the panel where they will be hidden by the next piece. This combination of adhesive and fasteners creates an incredibly strong, long-lasting bond that will hold up to the elements.
Step 4: Creating an Expansion Gap
This step is critical, especially for outdoor installations. WPC material naturally expands and contracts with changes in temperature and humidity. To prevent the panels from buckling or warping over time, you must leave a small expansion gap—about 1/4 inch is standard. This gap should be maintained between each panel and at all edges where the panels meet another surface, like the floor, ceiling, or corners. It might seem counterintuitive to leave a gap, but it gives the material the breathing room it needs to stay flat and secure for years.
Step 5: Align and Connect Subsequent Panels
Most WPC panels are designed with a tongue-and-groove system, which makes connecting them feel a bit like putting together puzzle pieces. After applying adhesive to the back of your next panel, gently slide its groove over the tongue of the panel already on the wall. You should feel it lock into place with a snug fit. Avoid forcing or hammering the panels together, as this can damage the edges. A gentle tap with the palm of your hand is usually all that’s needed to ensure a tight, seamless connection between the panels.
Avoid These Common Installation Mistakes
Even the most seasoned DIY pro can slip up on a few key details. When it comes to installing WPC panels, a few small oversights can lead to big headaches later on, like warping, buckling, or an uneven finish that undermines all your hard work. The goal is a beautiful, durable exterior that lasts for years, and avoiding these common pitfalls is the secret to getting it right the first time. A successful project isn't just about following the steps; it's also about knowing what not to do.
Think of this as your friendly checklist to keep your project on track and ensure your new wall looks as professional as it feels. We'll walk through the three most common mistakes—from prep work to the final placement—so you can sidestep them with confidence. Getting these details right will make the difference between an installation that looks good for a season and one that enhances your home's curb appeal for years to come. Let's make sure your project is a success from start to finish.
Mistake #1: Forgetting Expansion Gaps
This is probably the single most important—and most often forgotten—step. WPC is a composite material, which means it will naturally expand and contract as the temperature changes throughout the day and across seasons. If you install the panels flush against each other and against surrounding surfaces, they'll have nowhere to go when they expand. This can cause them to buckle or warp. To prevent this, always leave a small expansion gap of about 1/4 inch between each panel and at all edges, including where they meet the floor, ceiling, and corners.
Mistake #2: Skipping Surface Preparation
It’s tempting to jump right into installation, but the surface you’re working with needs to be ready. Before you begin, make sure your wall is clean, dry, and smooth. Patch any cracks or holes for a perfectly even foundation. Most importantly, don't install WPC panels directly onto the wall. You need to build a support frame using joists or battens first. This creates a vital air gap behind the Exterior Fluted Slat Wall Panels, allowing for proper air circulation and letting any moisture drain away. This step is non-negotiable for a long-lasting, mold-free installation.
Mistake #3: Rushing Cuts or Ignoring Weather
Your timing matters. Try to plan your installation for a day with mild temperatures. Installing WPC in extreme heat or cold can cause issues as the material expands or contracts significantly with the temperature swings, making it harder to get your spacing right. Patience is also key when it comes to making cuts. Rushing through measurements or using the wrong tool can lead to sloppy edges and wasted material. Take your time, measure twice, and cut once. A clean, precise cut is essential for a seamless and professional-looking finish that you'll be proud of.
Cutting WPC Panels Around Outlets and Windows
It’s rare to find a perfectly flat, uninterrupted wall. Most outdoor spaces have light fixtures, outlets, windows, or spigots you’ll need to work around. Don’t worry—cutting your WPC fluted slat wall panels to fit these obstacles is a standard part of the job. With careful measurements and the right tools, you can make precise cuts that look clean and professional. The key is to take your time and follow a few simple steps to get it right.
Accurately Measuring and Marking Your Cuts
The old saying "measure twice, cut once" is your best friend here. Before you even think about picking up a saw, carefully measure the obstacle and its exact position on the wall. Transfer those measurements to the panel, double-checking everything. Use a pencil and a straight edge to draw your cut lines directly on the back of the panel. Marking on the back helps prevent visible marks on the finished side. For extra precision and to reduce chipping, you can apply painter's tape along the cut line and draw on top of it. Planning where each panel will go ensures your final layout looks balanced and intentional.
What's the Best Tool for Cutting WPC Panels?
Using the right tool is essential for a clean, straight cut. A circular saw or miter saw equipped with a fine-toothed blade is perfect for straight cuts. The fine teeth will slice through the composite material without tearing it, leaving a much smoother edge. For more complex shapes, like cutting a square for an outlet or a circle for a pipe, a jigsaw is your best bet. Always cut from the back side of the panel to minimize any potential chipping or rough edges on the visible surface. And, of course, always wear safety glasses and gloves when operating power tools.
How to Get a Clean, Finished Edge
After making your cut, you might have a slightly rough edge. To get that perfectly polished look, lightly sand the cut edge with fine-grit sandpaper until it’s smooth. This small step makes a huge difference in the final appearance. If the cut edge will be exposed, you can conceal it with a matching trim piece or a bead of color-matched exterior caulk for a seamless transition. This not only looks great but also helps seal the edge from moisture. Making sure your cuts are exact will ensure the panels fit snugly around any obstacle, giving your project a truly professional finish.
Tips for Perfect Panel Alignment
Getting your panels perfectly aligned isn't just about making them look good—it's about ensuring they perform correctly for years to come. A little extra attention to detail here prevents common issues like buckling, warping, and moisture buildup. Think of it as setting the foundation for a flawless finish. By using guides, maintaining consistent gaps, and allowing for proper airflow, you'll create a professional-looking installation that stands up to the elements. These three steps are your secret to a durable and beautiful WPC wall.
Why Levels and Guidelines Are Your Best Friends
This is where your level becomes your best friend. Before you even think about attaching the first panel, you need a perfectly straight reference line. Use a level and a chalk line to mark your starting point on the wall or support frame. This single line will guide the placement of every subsequent panel, so take your time to get it right. A crooked start will only get more noticeable as you move across the wall. Marking your guidelines first ensures every panel sits straight and true, giving you that clean, modern look you’re aiming for.
How to Maintain Consistent Spacing
WPC material naturally expands and contracts with temperature changes, so giving it a little breathing room is essential. You’ll need to leave a small expansion gap—typically about 1/4 inch—between each panel and at all edges where the panels meet another surface, like the ground, ceiling, or corners. This prevents the panels from buckling or warping under pressure. To keep your gaps uniform, use temporary spacers as you install each piece. This simple trick guarantees a consistent, professional finish while protecting your wall panels from weather-related stress.
Why Ventilation Behind Panels Matters
Proper ventilation behind your panels is a non-negotiable step for any outdoor installation. By mounting your WPC panels on a support frame of battens or joists, you create a small air gap between the panels and your home’s exterior wall. This gap is crucial—it allows air to circulate and any moisture to drain away, preventing it from getting trapped. Without this ventilation channel, you risk moisture buildup, which can lead to mold, mildew, and rot. This is one of the most important steps for protecting both your new exterior fluted slat wall panels and the structure of your home.
How to Add Professional Finishing Touches
You’re in the home stretch! With your panels securely in place, it’s time to focus on the details that transform your project from a simple installation into a professional-looking feature wall. These final steps are all about creating clean lines, seamless transitions, and a durable finish that will look great for years to come.
Adding Trim and Edge Caps for a Clean Look
To give your WPC fluted panels a clean, polished look, you’ll want to install matching trim pieces. This is the key to covering any exposed panel edges and creating a truly finished appearance. You can use L-trims for outer edges or corner trims to wrap around inside or outside corners. Simply cut them to size and attach them with a quality construction adhesive or small finishing nails. This step frames your new feature wall beautifully, ensuring the installation looks seamless and intentional. It’s a small detail that makes a huge impact on the final result.
Should You Seal the Joints? (And How to Do It)
When you’re working with multiple Interior WPC Fluted Slat Wall Panels, you’ll have seams where the panels meet. Making these joints disappear is crucial for a high-end look. You can use matching trim pieces or a color-matched, paintable sealant to hide the seams and create a smooth, continuous surface. Taking the time to carefully address each joint will enhance the overall aesthetic of your installation. This attention to detail is what separates a good DIY project from a great one, giving your space a refined and cohesive feel.
Your Final Inspection Checklist
Once everything is installed, take a moment to do a thorough final walk-through. Look over the entire surface for any imperfections. Now is the time to fill any small gaps, joints, or holes left by nails or screws. You can then sand and finish these spots to make the surface perfectly smooth and uniform. This final inspection ensures your project not only looks fantastic but also meets your quality standards. For contractors and designers, this level of detail is standard practice, which is why we offer a trade program to support professionals who demand the best.
How to Maintain Your WPC Fluted Panels
Once your project is complete, you’ll want to keep it looking its best. The great news is that WPC panels are incredibly low-maintenance, but a little bit of care goes a long way in preserving their beauty and durability for years to come. With just a few simple steps, you can ensure your new feature wall or cladding remains as stunning as the day you installed it. These tips will help you protect your investment and keep your outdoor space looking sharp.
Easy Cleaning and Long-Term Care
Maintaining your WPC fluted panels is surprisingly easy. For routine cleaning, all you need is a bucket of water and some mild soap. Use a soft cloth or brush to gently wash away any dirt, dust, or grime that has accumulated. This simple wash-down is usually enough to restore the panels’ fresh, vibrant look. Avoid using harsh chemicals or abrasive scrubbers, as they can damage the surface. A quick clean once or twice a year is typically all it takes to keep your panels in top condition, allowing you to spend more time enjoying your beautiful outdoor space and less time working on it.
What to Look for in Seasonal Check-Ups
Think of this as a quick health check for your installation. A couple of times a year, preferably in the spring and fall, take a few minutes to walk around and inspect your panels. Check to make sure all the fasteners are still secure and that the corner trims are tight. Look for any signs of shifting and confirm the panels remain properly aligned. This proactive approach helps you catch any potential issues before they become bigger problems. Regular inspections are a simple habit that ensures the long-term structural integrity and flawless appearance of your exterior wall cladding.
How to Handle Small Repairs
Even the most durable materials can sometimes need a minor touch-up. If you happen to notice any small gaps or minor imperfections developing over time, don’t worry—the fix is usually simple. A bit of color-matched exterior caulk is perfect for sealing small gaps between panels or along trim pieces. This not only restores the seamless, professional look of your installation but also helps keep moisture out, preventing any potential issues down the road. Applying caulk is a quick and easy task that any DIYer can handle, ensuring your WPC panels continue to look polished and perfect.
DIY vs. Pro: When to Call for Help
There’s a huge sense of accomplishment that comes with a successful DIY project, but it’s also important to know your limits. Sometimes, handing the job over to a professional is the smartest move you can make. It can save you time, prevent costly mistakes, and ensure the job is done right the first time. Let’s walk through a few scenarios where calling in an expert is your best bet.
Signs Your Project Needs a Professional
Be honest about your skill level before you start. If you’re comfortable with precise measuring, cutting, and leveling, a straightforward accent wall is a great DIY project. However, if your project involves lots of tricky corners, windows, or other obstacles, the complexity ramps up quickly. The biggest red flags are discovering structural damage or significant moisture issues on your walls after you’ve started. If you run into these problems, it’s time to pause and call a professional. They have the experience to fix the underlying issues and ensure your new exterior fluted slat wall panels have a solid, secure foundation for a perfect, long-lasting finish.
Understanding Local Building Codes
Did you know that some exterior cladding projects require adherence to local building codes? This is especially true for larger installations or commercial properties. These regulations exist to ensure safety and structural integrity, and failing to comply can lead to fines or even an order to tear down your work. A licensed contractor will be familiar with the specific requirements in your area, from fastener types to fire ratings. Professionals who are part of a trade program stay current on these standards. Hiring an expert provides peace of mind that your project is not only beautiful but also fully compliant and safe.
How to Decide: DIY or Hire a Contractor?
Ultimately, the decision comes down to balancing your skills, time, and budget. WPC is a fantastic, low-maintenance material, but its performance depends entirely on proper installation. Critical steps like preparing the wall surface correctly and leaving adequate expansion gaps are non-negotiable for preventing warping and water damage down the road. If you feel unsure about tackling these details with precision, hiring a professional is a wise investment. Think of it as insurance for your project—it guarantees a quality finish that protects your home and lets you enjoy the results without any lingering worries.
Related Articles
- WPC Fluted Panel Exterior: A Complete Guide
- WPC Fluted Panel: The Ultimate Buyer's Guide
