


3D Wall Panels 101: Everything You Need to Know
When you think about upgrading a wall, you’re probably focused on the visual impact. But what if a design choice could offer practical benefits, too? While their stylish appearance is the main draw, a 3D wall panel comes with some surprising perks. The textured, multi-layered material naturally helps to absorb sound, which can make a room feel quieter and more serene—perfect for a home office or bedroom. They also add a thin layer of insulation to your walls. This guide will cover everything you need to know about this smart design solution, proving that you don’t have to choose between beauty and function.
Key Takeaways
- Transform Your Space in an Afternoon: 3D peel and stick wall panels are a straightforward, DIY-friendly way to add texture and character to any room. They deliver the visual impact of a major renovation without the typical cost, time, or mess.
- Plan Your Project for Flawless Results: A professional finish starts with good preparation. Always measure your wall accurately, plan your layout on the floor first, and let the panels acclimate to the room for at least 48 hours to ensure they adhere properly and don't warp over time.
- Use Design Elements to Enhance Texture: Make your new wall a true centerpiece by using its texture to your advantage. Strategic lighting will create dramatic shadows that highlight the pattern, while coordinating the panel style with your flooring and furniture will create a cohesive, intentional look.
So, What Are 3D Peel and Stick Wall Panels?
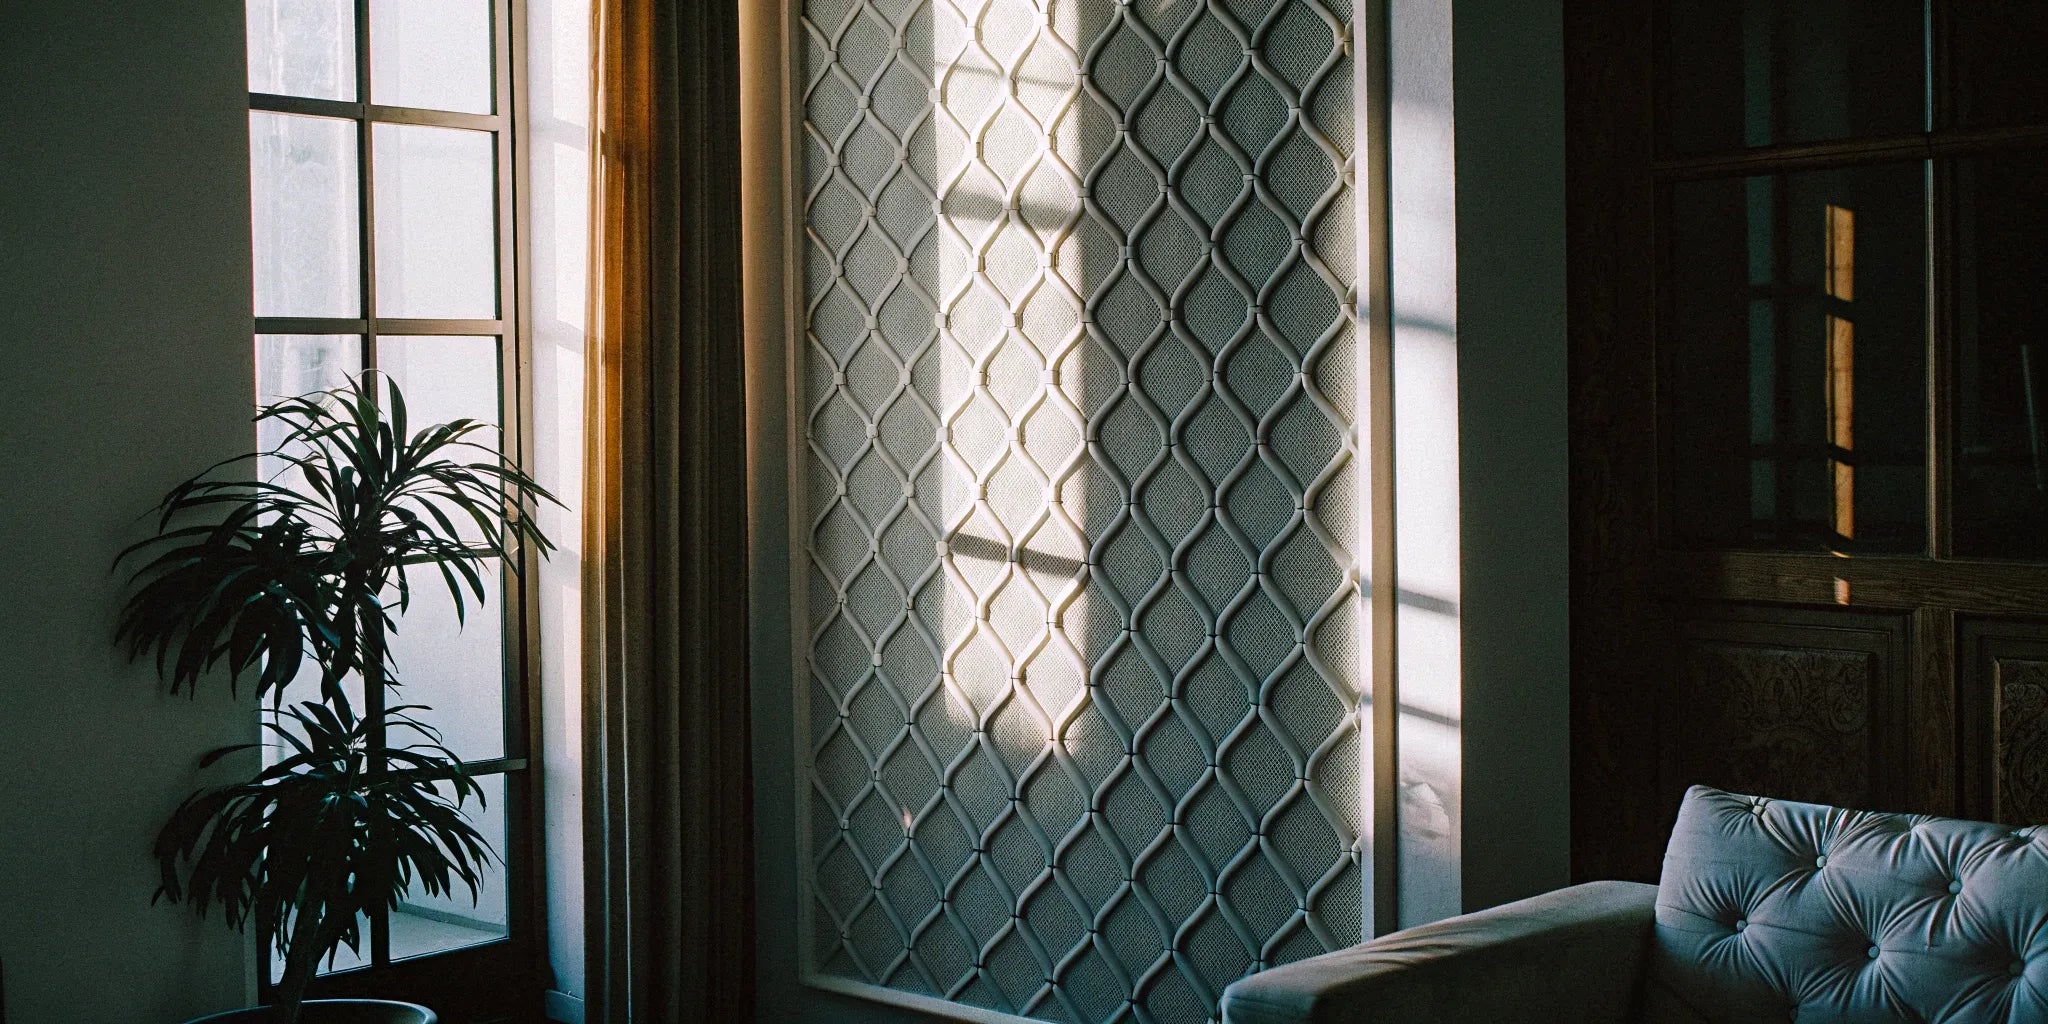
If you’ve ever looked at a plain, flat wall and wished it had a little more personality, you’re in the right place. Think of 3D peel and stick wall panels as the ultimate shortcut to a high-impact feature wall, without the hassle of a major renovation. These are decorative panels that have raised, textured patterns on their surface. This three-dimensional quality adds instant depth and character to a room, playing with light and shadow to create a dynamic, visually interesting effect.
Unlike traditional wall coverings that require messy glues, grout, or a team of professionals, these panels are designed for everyone. They come with a self-adhesive backing, making installation as simple as peeling off a sticker and pressing it onto the wall. It’s a straightforward way to introduce texture, from subtle waves to bold geometric designs, and completely transform the feel of your space in just a few hours. Whether you’re a homeowner looking for a weekend project or a contractor needing a quick and impressive finish, these panels offer a versatile and stylish solution.
What Materials Are Used?
You’ll find 3D wall panels made from a few different materials, each with its own look and benefits. Many popular options are made from PVC, a type of durable, lightweight plastic that’s easy to clean and often water-resistant, making it a great choice for various spaces. For a warmer, more organic feel, you can find panels made from MDF (medium-density fiberboard) or natural wood, which bring a classic and sophisticated texture to a room. Some panels are also crafted from plant fibers or gypsum for a more eco-friendly or plaster-like finish. The material you choose will influence the final look, durability, and feel of your wall.
Eco-Friendly and Safe Materials
If you’re aiming for a home that’s as conscious as it is beautiful, you’ll be happy to know that many 3D wall panels are made with sustainability in mind. Some of the most innovative options are crafted from natural sugarcane fiber, an eco-friendly byproduct that is both renewable and biodegradable. This material is surprisingly durable and lightweight, making installation a breeze. These panels typically come in a neutral off-white, providing a perfect canvas that you can easily paint to match your existing decor. Choosing materials like these allows you to add stunning texture to your walls while making a choice that’s better for the environment.
Acoustic Panels for Sound Dampening
One of the most overlooked benefits of 3D wall panels is their ability to improve a room's acoustics. The textured surfaces and layered materials are great at absorbing sound waves, which helps to reduce echo and dampen ambient noise. This makes them an excellent choice for spaces where sound control is important, like a home office where you take calls, a media room for movie nights, or even a nursery. Our collection of Acoustic Wall Panels is specifically designed for this purpose, combining high-end style with practical sound-dampening properties to create a more peaceful and focused environment.
Understanding Panel Dimensions and Thickness
Before you start your project, it’s important to get familiar with the panel dimensions. Most 3D peel and stick panels come in standard square or rectangular sizes, such as 12x12 inches or 20x20 inches, and are sold in packs that cover a specific square footage. Knowing these measurements is key to calculating exactly how many boxes you’ll need to complete your wall without running short or overbuying. Always measure your wall’s height and width carefully to determine the total square footage. Planning your layout on the floor beforehand can also help you visualize the pattern and ensure a perfect fit, especially if you need to make cuts around outlets or windows.
Exploring Popular 3D Panel Styles
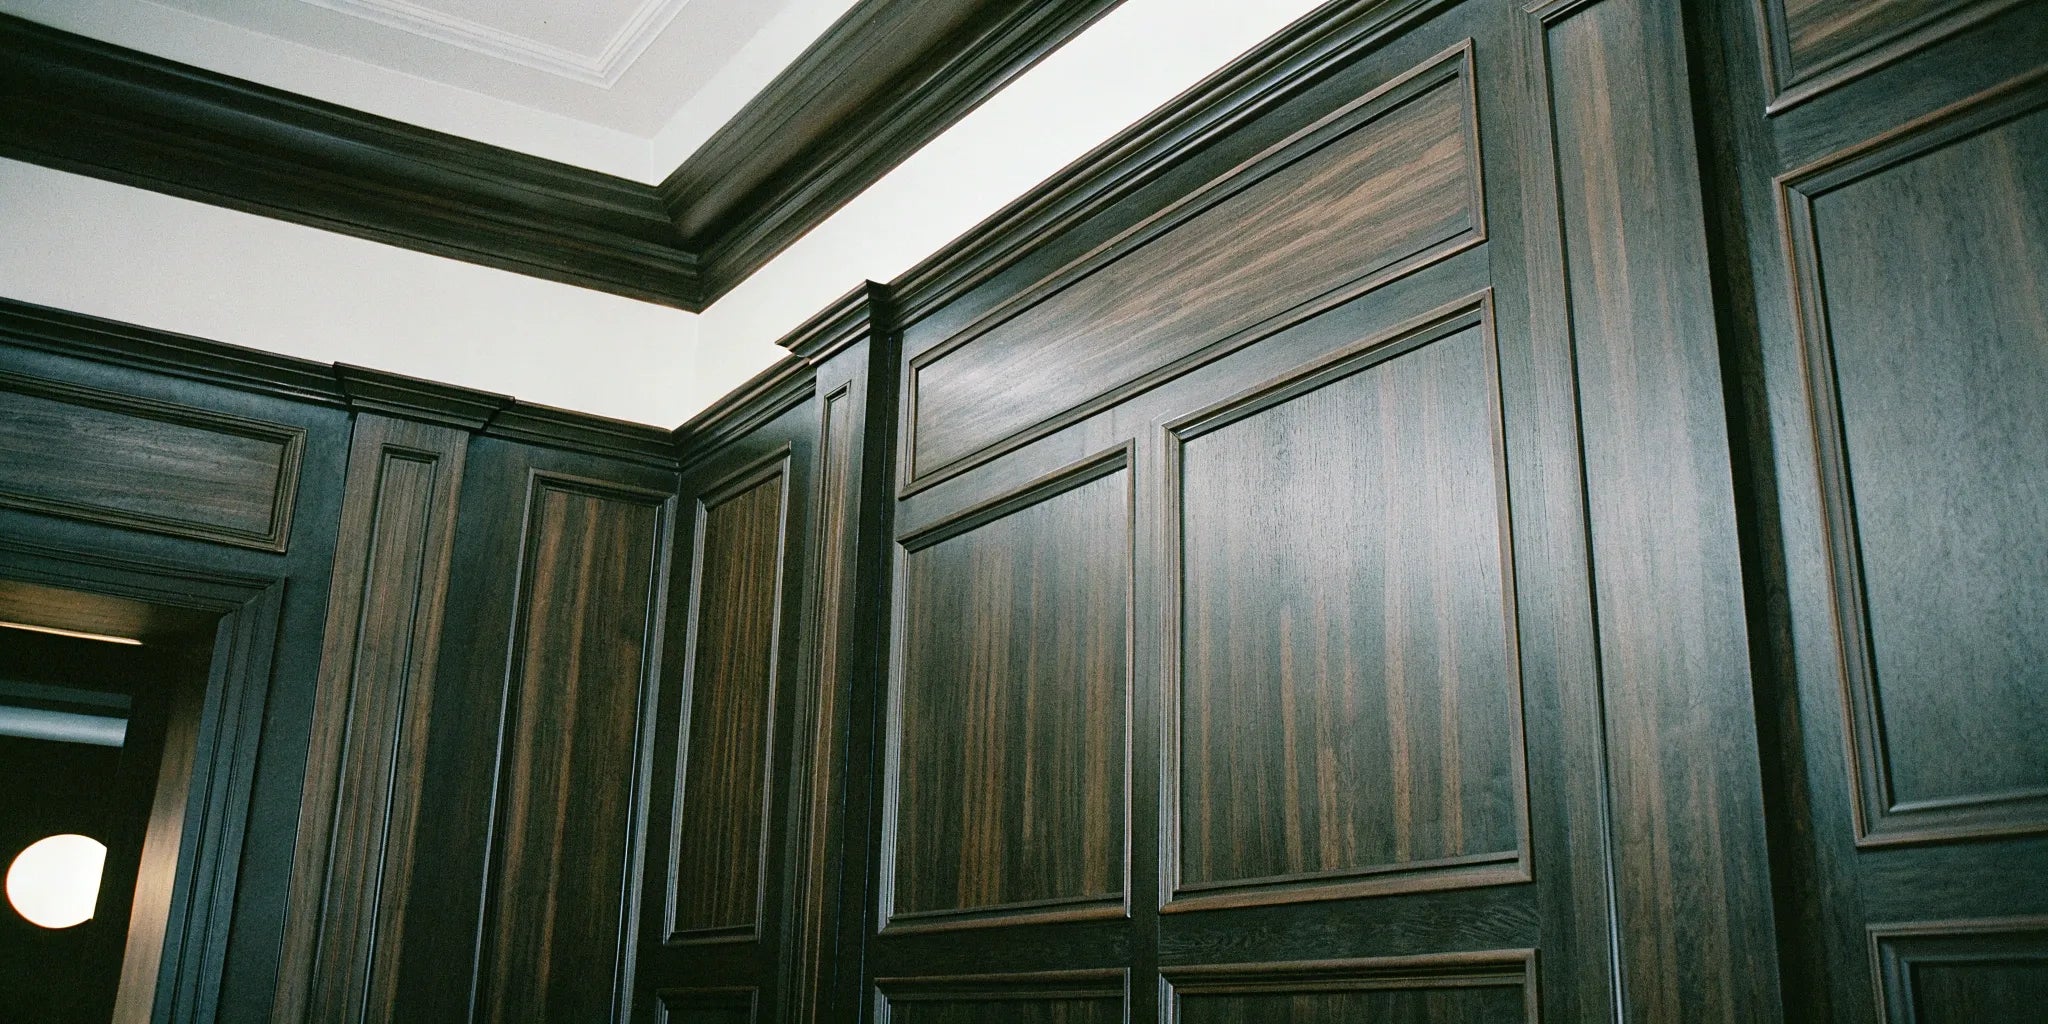
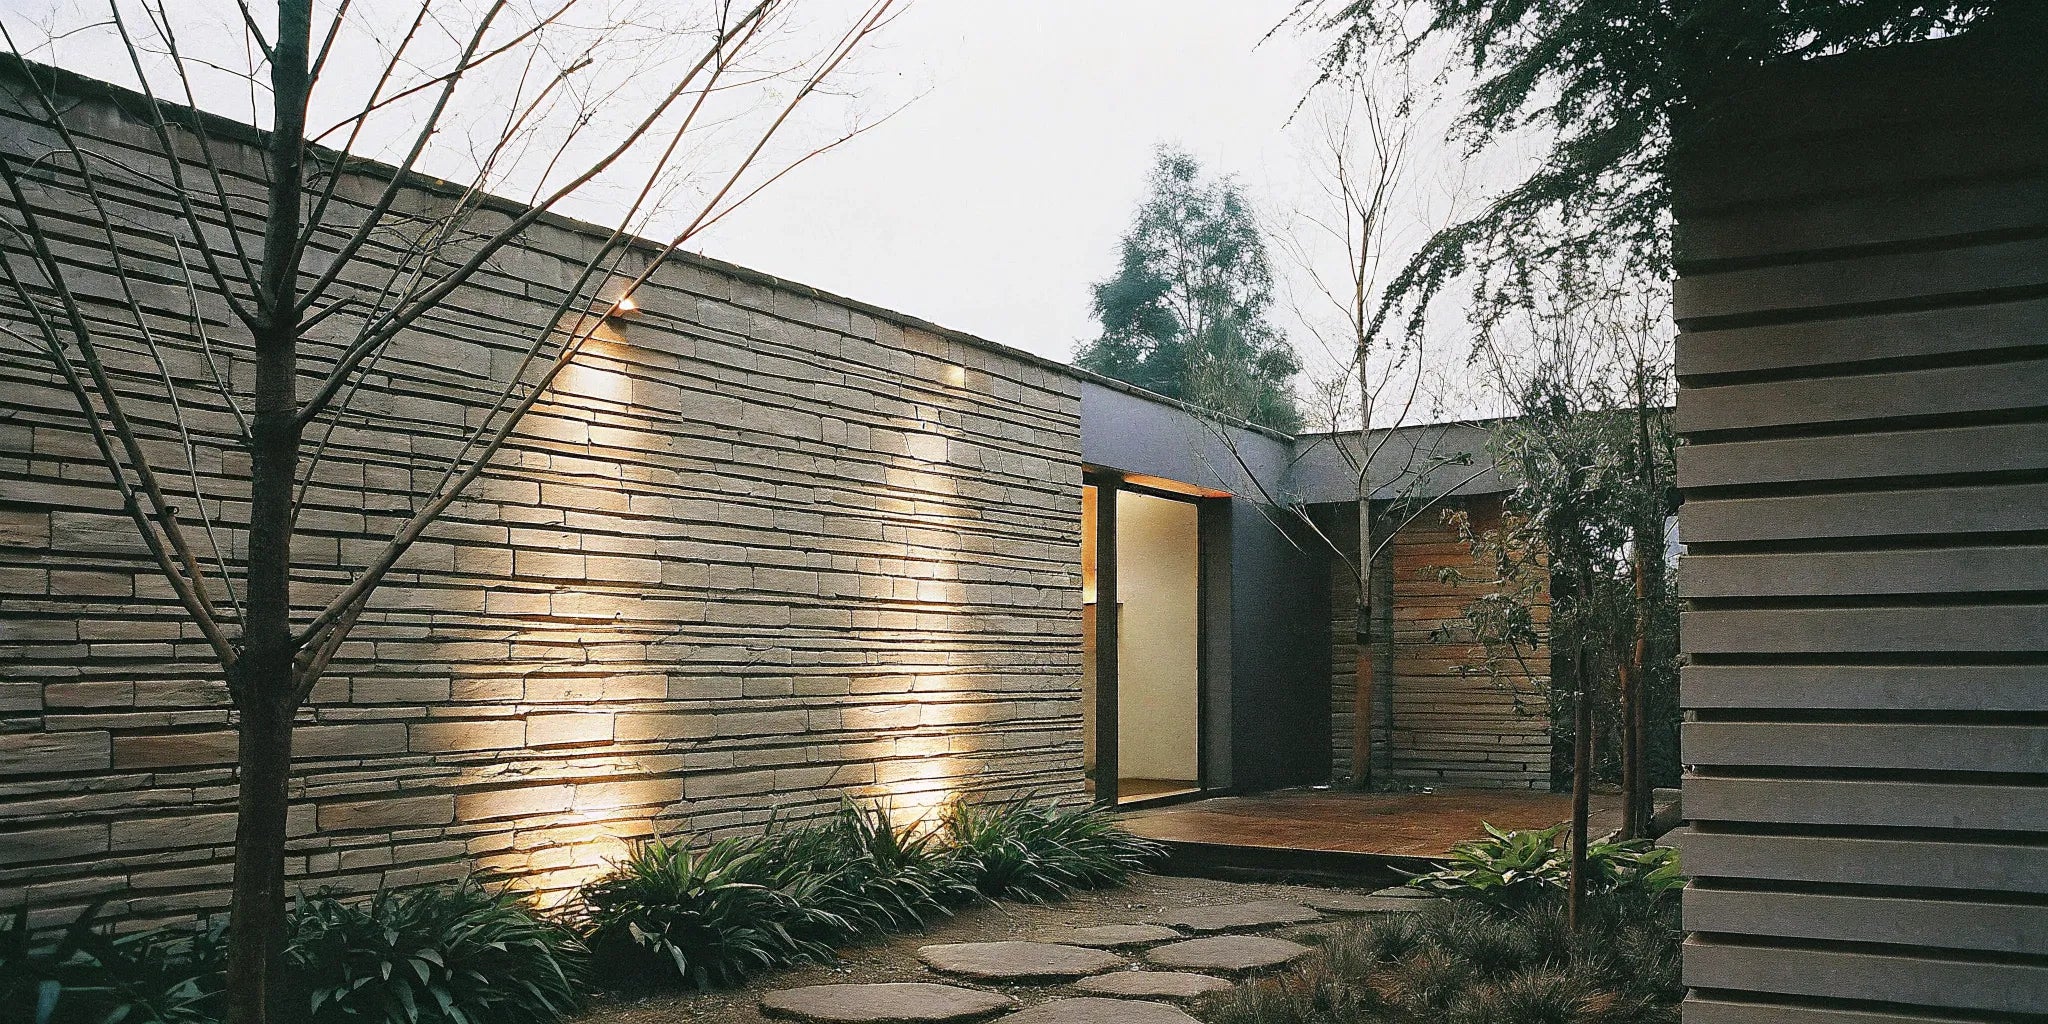
The best part about 3D wall panels is the sheer variety of designs available. You can find a style to match virtually any interior design aesthetic. Sleek, slatted wood panels are perfect for creating a modern, Scandinavian, or mid-century modern vibe. If you love an industrial or rustic look, faux brick or stone panels give you that authentic texture without the weight and expense of the real thing. For a touch of elegance, consider geometric patterns like diamonds and hexagons, or classic wainscoting styles that add timeless character to the lower half of your walls. The options are truly endless, allowing you to get creative and find the perfect fit for your home.
How Does the Peel and Stick Magic Work?
The magic of these panels is right in the name: peel and stick. They are specifically designed to be DIY-friendly, so you don't need any special skills or complicated tools to get a professional-looking result. Each panel has a strong adhesive backing covered by a protective film. To install one, you simply peel off the film to expose the sticky side and press the panel firmly onto a clean, smooth wall. This simple application process eliminates the mess and drying time associated with traditional wallpapers or tiles. It’s a straightforward project you can easily tackle in an afternoon for an instant room makeover.
Common Myths About 3D Wall Panels, Busted
One of the biggest questions people have is, "Are these panels permanent?" It's a common myth that once they're on, they're on for good. The truth is, most 3D peel and stick wall panels are designed to be removable. This makes them a fantastic option for renters or anyone who enjoys changing up their decor every few years. While the adhesive is strong enough to last, the panels can typically be taken down with a bit of heat from a hairdryer to soften the glue. When done carefully, this process helps protect the underlying wall surface from damage, giving you both a beautiful finish and peace of mind.
The Top Reasons to Try 3D Wall Panels
If you're looking for a project that delivers a major style upgrade without a major headache, 3D wall panels are your answer. They are one of the most straightforward ways to add texture, character, and a high-end feel to any room. Beyond their good looks, these panels offer some surprisingly practical perks, from easier installation to a quieter, more comfortable space. They bridge the gap between a simple coat of paint and a complex, costly renovation, giving you a professional finish with minimal effort. Whether you’re a seasoned contractor looking for an efficient way to impress a client or a homeowner ready for a weekend DIY, you’ll find plenty of reasons to work with these versatile materials. Exploring the different wall panels available is the first step toward transforming a flat, boring wall into a stunning focal point that redefines your entire room. From creating a dramatic accent wall behind a bed to adding subtle texture to a hallway, the applications are incredibly flexible. Let's get into the specific reasons why these panels are becoming a go-to choice for designers and homeowners alike.
Enjoy a Quick and Easy Installation
One of the best things about 3D peel and stick panels is how simple they are to install. You don’t need a crew of professionals or a garage full of specialized tools to get the job done. Most panels are designed with a strong adhesive backing, so the process is as easy as peeling off the protective layer and pressing the panel firmly onto a clean wall. This makes it a perfect project for a Saturday afternoon. You can completely change the look and feel of a room in just a few hours, giving you instant gratification and a beautiful result with minimal fuss.
Get a High-End Look on a Budget
Textured walls are a hallmark of luxury interior design, but achieving that look with traditional materials like stone, wood, or plaster can be expensive and time-consuming. 3D wall panels offer a brilliant alternative. Their raised, geometric patterns create depth and dimension, playing with light and shadow to make your walls pop. This effect adds a sophisticated, architectural element to your space for a fraction of the cost. The right lighting can further enhance the shadows and highlights, making the texture even more dramatic and giving the room a truly custom-designed feel.
Find a Design That’s Perfectly You
Your walls should reflect your personal style, and 3D panels make that easy to achieve. The design possibilities are nearly endless. You can find panels that mimic the rustic look of wood, the sleek feel of stone, or even the soft texture of linen. If you have a specific color in mind, many panels come in a paintable matte white finish, giving you complete creative control. This versatility means you can find the perfect design to complement any aesthetic, whether you’re creating a modern minimalist living room, a cozy bedroom retreat, or a bold, artistic entryway.
Create a Quieter, More Peaceful Room
An unexpected benefit of adding 3D panels to your walls is improved acoustics. The textured, multi-layered material is naturally sound-absorbent, helping to dampen echoes and reduce ambient noise within a room. This makes them a fantastic choice for spaces where sound control matters, like a home office where you take calls, a media room for movie nights, or a bedroom where you want a more peaceful atmosphere. It’s a simple way to make your environment feel more serene and comfortable without having to install dedicated soundproofing materials.
Get an Extra Layer of Insulation
Beyond looking great and quieting a room, 3D wall panels also provide a bit of extra insulation. While they won't replace traditional insulation, the added layer on your walls can help regulate room temperature. The material helps trap air, which can keep a room slightly warmer in the winter and cooler in the summer. This small improvement in thermal performance can contribute to a more comfortable living space and potentially even lead to modest energy savings over time. When paired with other quality materials like well-fitted steel doors, these panels contribute to a more efficient home.
Potential Downsides and Considerations
As much as I love a good design shortcut, it’s always smart to look at a project from all angles before you start. While 3D peel and stick panels are a fantastic solution for many spaces, there are a few things to keep in mind to make sure they’re the right fit for your home and that you’ll be happy with the results for years to come. Thinking through factors like the size of your room, the longevity of the design, and the durability of the material will help you choose the perfect panels and avoid any potential frustrations. It’s all about making an informed choice so your weekend project turns into a long-term win.
Making a Room Feel Smaller
Because 3D panels have physical depth, they can sometimes make a small space feel a bit more cramped. The added texture and shadows can create visual weight, which might feel heavy in a room that's already short on square footage. If you're working with a smaller area, this doesn't mean you have to abandon the idea entirely. Instead of covering every wall, consider creating a single accent wall to serve as a focal point. This approach gives you that beautiful texture without overwhelming the space. Choosing panels in lighter colors or with more subtle patterns can also help maintain a sense of openness and keep the room feeling airy.
Risk of Designs Going Out of Style
It’s easy to fall in love with a bold, trendy pattern, but it’s worth considering how you’ll feel about it in five or ten years. Some highly specific geometric or abstract designs could look dated over time, and while peel and stick panels are removable, the process still takes more effort than simply repainting. If you’re concerned about longevity, you might want to lean toward more timeless styles. Classic designs like natural wood slats or simple shiplap offer a sophisticated texture that complements a wide range of decor styles and is less likely to fall out of fashion. Our Unfinished Wood Wall Panels are a great option because you can stain or paint them to adapt to future design updates.
Durability of Softer Materials
Not all 3D panels are created equal when it comes to toughness. Materials like foam or softer MDF can be susceptible to dents, scratches, and scuffs, which makes them less ideal for high-traffic areas. Before you buy, think about where the panels will be installed. A busy hallway, a playroom, or an entryway that sees a lot of action will benefit from a more robust material like PVC or WPC (Wood Plastic Composite). These options are built to withstand daily wear and tear much better. Always check the product specifications to understand the material’s durability and ensure it’s a good match for the demands of the space.
Higher Maintenance for Certain Finishes
While most 3D panels are designed to be low-maintenance, some materials require a bit more care. Smooth PVC panels can usually be wiped clean with a damp cloth, but textured fabric panels might collect dust and need regular vacuuming with a brush attachment. Similarly, natural wood panels may require special cleaners or even occasional re-staining to keep them looking their best. It’s a good idea to consider the upkeep before making your final decision. For areas like kitchens or bathrooms, choosing a waterproof and easy-to-clean option like our Interior WPC Fluted Slat Wall Panels will make long-term maintenance much simpler.
Top Brands for 3D Wall Panels to Check Out
With so many options out there, figuring out where to buy your wall panels can feel like a project in itself. The truth is, the "best" brand really depends on your specific needs—your budget, your style, and how much time you want to spend on installation. Some brands are known for their incredibly easy peel-and-stick application, making them perfect for a weekend DIY project. Others offer high-end, architectural-grade materials that a contractor would love.
To help you get started, I’ve pulled together a list of some of the most popular and reliable brands on the market. We’ll look at what makes each one unique, from their material quality and design variety to their ease of installation. Think of this as your personal cheat sheet for finding the perfect panels to bring your vision to life. Whether you’re looking for a budget-friendly refresh or a durable, long-term solution, you’ll find a great option here.
USA Builders Depot
If you’re looking for high-quality materials that stand the test of time, USA Builders Depot is a fantastic choice. We offer a curated selection of durable and stylish wall panels designed for both homeowners and trade professionals. Our focus is on providing products that not only look great but are also built to last. Plus, with fast nationwide shipping, you can get your materials delivered right to your door, no matter where your project is located. This makes it easy to stick to your timeline and get your renovation done without the hassle of sourcing materials locally.
Art3d
You’ve likely seen Art3d panels pop up if you’ve done any searching online, and for good reason. As a highly regarded brand, their products frequently top the Amazon Best Sellers list for 3D wall panels. Art3d is celebrated for its huge range of eye-catching designs and its straightforward installation process. If you want a brand with a proven track record and tons of customer reviews to browse, Art3d is a solid place to start your search. Their aesthetic appeal makes them a go-to for creating dramatic accent walls.
Walston Architectural Products
For the true DIY enthusiast, Walston Architectural Products is a dream. They specialize in peel and stick wall panels that make installation incredibly simple. Their self-adhesive backing means you can completely transform a room without needing messy glues, special tools, or professional help. This is the perfect option if you want to refresh your space over a weekend. Walston proves that you don’t need a complicated process to achieve a high-impact, professional-looking result in your home.
Woody Walls
Woody Walls offers beautiful 3D wall panels with a focus on unique patterns and an important safety feature. Many of their panels come with a Class B fire rating, which means they have a good level of fire resistance. This makes them a safe and smart choice for various rooms in your home or commercial space. Their panels are also designed to be easy to install, so you get both peace of mind and a stunning final product. You can find helpful guides on their site to install 3D wall panels correctly.
DumaWall
If you’re planning a project in a moisture-prone area like a bathroom, kitchen, or laundry room, DumaWall is a name you should know. They specialize in waterproof wall tiles and panels made from PVC. These panels are designed to lock together tightly, creating a watertight seal that protects your walls from splashes and humidity. They offer the elegant look of traditional tile without the hassle of grout, making them a low-maintenance and durable alternative for tricky spaces.
WallArt
For those who prioritize sustainability, WallArt is an excellent brand to check out. They are known for their eco-friendly 3D wall panels, which are often made from the fibrous residue of sugarcane stalks. This renewable resource makes their products 100% biodegradable and compostable. With WallArt, you can create a stunning, textured feature wall while making an environmentally conscious choice. Their commitment to green design proves that style and sustainability can go hand in hand.
DIY Decor Store
Just as the name suggests, DIY Decor Store caters to homeowners looking for accessible and affordable design solutions. They typically offer a wide variety of popular styles, from classic geometric patterns to modern, abstract designs, making it easy to find something that fits your home’s aesthetic. This brand is a great starting point if you’re working with a specific budget or are tackling your very first wall panel project. Their products are generally designed for easy, user-friendly installation.
How to Plan Your 3D Wall Panel Project
A little planning goes a long way in making sure your wall panel project is a success. Before you start peeling and sticking, taking some time to think through your design, measurements, and budget will save you headaches later and ensure you get a result you absolutely love. Think of this as your pre-project checklist. By considering the size of your room, the right pattern and color, and where you’ll install the panels, you can move forward with confidence. This prep work is the key to transforming a plain wall into a stunning feature without any surprises. Let’s walk through the simple steps to map out your project from start to finish.
Matching Panels to Your Room Size
The scale of your room plays a big role in which wall panel design will look best. If you’re working with a smaller space, like a powder room or a cozy home office, bold patterns and dark colors can sometimes make the room feel a bit closed in. For these areas, consider lighter-colored wall panels with more subtle textures. They’ll add dimension without overwhelming the space. On the other hand, if you have a large, open room with high ceilings, you can go big with dramatic patterns and rich colors to create a truly impressive focal point.
How to Choose the Perfect Pattern
3D wall panels are all about adding depth and texture to a flat surface. Their raised patterns play with light and shadow, creating a dynamic effect that changes throughout the day. When choosing a pattern, think about the overall style you’re aiming for. Are you drawn to clean, geometric lines for a modern look? Or do you prefer soft, wavy patterns for a more organic feel? Browse different styles and imagine how they’ll complement your existing furniture and decor. The right pattern will tie the whole room together and reflect your personal taste.
Tips for Coordinating Your Color Palette
Color is just as important as pattern. Wall panels come in a wide range of hues, from classic white and neutral grays to deep, moody blacks and browns. Think about whether you want your new feature wall to blend in or stand out. A panel color that’s similar to your existing wall paint will create a subtle, textural effect. If you want to make a statement, choose a contrasting color that pops. It’s always a good idea to get a few samples to see how the colors look in your room’s specific lighting before you commit.
Measure Twice, Budget Once
Grab a tape measure and let’s get your numbers straight. Carefully measure both the width and height of the wall you plan to cover. Don’t forget to subtract any areas that won’t be covered, like windows or doors. Once you have your total square footage, it’s smart to add about 10% to your order to account for any cuts or mistakes. With your measurements in hand, you can set a realistic budget. Knowing how much you want to spend will help you narrow down your options and find the perfect panels without breaking the bank.
Average Installation Costs
Let's talk numbers. On average, you can expect the cost to install 3D wall panels to be around $20 per square foot. However, this is just a ballpark figure, and the actual price can swing quite a bit depending on the materials you choose and whether you hire a professional. For a budget-friendly DIY project using simple materials, you might spend as little as $1 per square foot. On the other end of the spectrum, high-end wood or metal panels installed by a contractor could push the cost up to $40 per square foot or more. This range covers both the price of the panels themselves and the labor involved in putting them up.
How Material and Style Affect Price
The single biggest factor influencing your project's cost is the material of the panels. Basic MDF panels are very affordable, often running between $0.40 and $1 per square foot. Wood offers a huge range, from about $1 per square foot for common pine to over $40 for exotic or reclaimed varieties. Composite materials are another cost-effective choice, typically falling between $0.50 and $2 per square foot. If you’re aiming for an industrial or ultra-modern look, metal panels are a durable option but come at a higher price, usually from $12 to $25 per square foot. Exploring different wall panels will help you see how these material choices fit into your budget.
Factoring in Professional Help
While many 3D wall panels are designed for DIY installation, sometimes it makes sense to call in a pro. Hiring a contractor to install your panels typically costs between $1,000 and $1,600 for an average-sized wall. As a general rule, you can expect labor to account for 10% to 15% of your total project cost, especially for more complex jobs with tricky cuts or patterns. If you’re short on time or working with expensive materials where mistakes would be costly, professional installation is a smart investment. For contractors and designers, signing up for a trade program can also provide access to bulk discounts on materials, helping to manage overall project costs.
Money-Saving Tips for Your Project
If you want to get that high-end look without the high-end price tag, there are a few ways to save. The most effective strategy is to install the panels yourself. According to a cost breakdown from Woody Walls, taking on the labor is a great way to cut costs, but be sure to follow the instructions carefully to avoid expensive errors. Another tip is to buy larger sheets of material like MDF or pine and cut the panels to size yourself, which is often cheaper than buying pre-cut pieces. Finally, plan ahead and buy all your materials at once. Many suppliers offer better pricing on bulk orders, which can lead to significant savings on a larger project.
The Best Spots for 3D Wall Panels
The beauty of 3D wall panels is their versatility. They can add a touch of style to almost any room in the house. They’re a popular choice for creating an accent wall behind a TV in the living room or a headboard wall in the bedroom. But don’t be afraid to get creative! Consider using them to add character to an entryway, bring texture to a home office, or even create a unique backsplash in a dry bar area. Panels are a fantastic way to define a specific zone within a larger, open-concept space.
Are There Any Rooms to Avoid?
While wall panels are incredibly versatile, they aren’t suited for every single environment. The main thing to watch out for is high humidity. In rooms with a lot of moisture, like full bathrooms with showers or damp basements, some panel materials might warp or have trouble adhering over time. Always check the product specifications before you buy. If you’re set on adding texture to a bathroom wall, look for panels made from waterproof materials like PVC or consider durable alternatives like cement boards that are designed to handle moisture.
Smart Shopping Tips for Wall Panels
Shopping for the perfect wall panels is exciting, but it's easy to get overwhelmed by all the choices. To make sure you end up with a wall you love, it’s smart to approach it like a pro. A little bit of research upfront can save you from common pitfalls, like choosing a color that looks different in your home's lighting or ordering the wrong amount of material. These simple shopping tips will help you make confident decisions, find the best value for your budget, and ensure your project goes smoothly from the moment you start browsing to the final installation.
Ordering Samples Before You Commit
You wouldn't pick a paint color without testing it on your wall first, right? The same rule applies to 3D wall panels. Photos online can be a great starting point, but they can’t capture the true color, texture, and finish of a material. Ordering a few samples allows you to see exactly how the panels look in your space, under your home’s unique lighting conditions. You can hold them up to your furniture, compare them with your flooring, and feel the quality of the material for yourself. This small step is the best way to make sure the design you fell in love with on screen is the one that will look perfect in your room.
Checking Customer Ratings and Reviews
Before you add anything to your cart, take a few minutes to see what other people are saying. Customer reviews are an invaluable resource for getting an honest look at a product’s quality and performance. Look for comments that mention the ease of installation, the strength of the adhesive, and how the panels have held up over time. Photos from other buyers are even better, as they show you how the panels look in a real home, not just a professionally styled product shot. Seeing a product with consistently high ratings can give you the confidence you need to make the final purchase.
Finding Sales and Bulk Discounts
Everyone loves a good deal, and with a little patience, you can often find your dream wall panels at a great price. Keep an eye out for seasonal sales or holiday promotions, as many retailers offer significant discounts during these times. If you’re a contractor or designer tackling a larger project, it’s always worth asking about trade programs. Many suppliers, including us at USA Builders Depot, offer bulk discounts for professionals, which can lead to major savings. Signing up for a trade account can give you access to exclusive pricing that makes a big difference to your bottom line.
Understanding Shipping and Return Policies
The final step before you buy is to get familiar with the company’s shipping and return policies. Find out how long shipping will take to arrive, especially if you’re working on a tight project timeline. It’s also important to know what the return process looks like, just in case the panels aren’t quite right or you end up with extra boxes. A clear and fair return policy can make your purchase feel much more secure. Look for retailers that offer straightforward returns, as this shows they stand behind their products and want to ensure you’re completely happy with your choice.
How to Install 3D Wall Panels Step-by-Step
Ready to transform your room? Installing 3D peel and stick wall panels is a satisfying project you can easily tackle yourself. Think of it as a grown-up puzzle where the final picture is a stunning, textured wall. With a bit of planning and the right approach, you’ll have a professional-looking feature wall in just a few hours. Follow these steps to ensure your installation is smooth, simple, and successful.
First, Gather Your Tools and Materials
Before you begin, let’s get everything you need in one place. Having your tools ready will make the whole process much smoother. You won’t need a massive workshop—just a few key items will do the trick.
Here’s your checklist:
- Your beautiful new 3D wall panels
- Measuring tape or ruler
- A level
- A pencil for marking
- Strong construction adhesive
- A clean, dry cloth
- A fine-toothed saw for any necessary cuts (a miter saw or jigsaw works well)
Gathering these items first means you can get into a good workflow without having to stop and search for a tool mid-project.
Important DIY Safety Precautions
Before you get started, let's talk safety. It’s easy to get excited and jump right in, but a few simple precautions will make sure your project goes smoothly from start to finish. Always wear the proper safety gear, especially when you’re cutting panels—think gloves to protect your hands and safety glasses for your eyes. It’s also a good idea to keep your workspace tidy and free of clutter to prevent any trips or falls. Make sure you're familiar with the tools you're using and always be mindful of what’s behind the wall, like electrical wiring or plumbing, before you make any cuts. Taking a moment to prioritize safety ensures your beautiful new wall is the only lasting impression from your project.
How to Prep Your Walls for a Perfect Finish
The secret to a long-lasting finish is all in the prep work. For your panels to adhere properly, they need a clean, smooth surface. Take a few minutes to wipe down the wall with a clean, damp cloth to remove any dust, dirt, or grime. Let it dry completely before you start. If you have any significant bumps or holes, you’ll want to sand them down or fill them in and let them cure. A smooth starting point prevents air bubbles and ensures every panel sits perfectly flat against the wall, giving you that seamless, high-end look.
Surfaces to Avoid
Not all walls are ready for peel and stick panels right away. The adhesive needs a smooth, stable surface to create a strong, lasting bond. Avoid applying panels directly over heavily textured walls, like those with a popcorn or knockdown finish, as the adhesive won’t be able to make full contact, leading to weak spots. Similarly, applying panels over existing wallpaper is a bad idea; the weight of the panels could cause the wallpaper to peel away from the wall, taking your new feature wall with it. Finally, be patient with freshly painted walls. You’ll need to let the paint fully cure, which can take up to four weeks, before installation. Applying panels too soon can trap moisture and cause the adhesive to fail.
The Importance of Primer for Paintable Panels
If you’ve chosen paintable panels, like our Paint and Stain Grade Panels, there’s one step you absolutely shouldn’t skip: priming. When you're planning to paint MDF or bare wood panels, you should always put a primer on them first. This is because materials like MDF are porous and will soak up paint like a sponge, leading to a splotchy, uneven finish. A good quality primer seals the surface, creating a uniform base that ensures your paint goes on smoothly and the color looks rich and consistent. For panels in busy areas, follow up the primer with a durable paint that is easy to wipe clean, keeping your beautiful new wall looking fresh for years to come.
Does Temperature and Humidity Matter? (Yes!)
This step is one that people often skip, but it’s so important for getting the best results. Before you even think about sticking them on the wall, let your panels acclimate to the room. Simply unbox them and lay them out in the room where you’ll be installing them for at least 48 to 72 hours. This allows the material to adjust to the room's specific temperature and humidity levels. Doing this prevents the panels from expanding or contracting after installation, which could cause gaps or warping down the line. It’s a simple, hands-off step that guarantees your wall looks great for years to come.
Map Out Your Panel Layout
A little planning goes a long way. Before applying any adhesive, lay your panels out on the floor to decide on a pattern and see how they’ll fit together. This is your chance to get creative and visualize the final look. Once you have a design you love, find the center of your wall and use your pencil and level to draw a straight vertical and horizontal line. Starting your installation from the center of the wall, rather than a corner, often results in a more balanced and symmetrical design, especially if your walls aren't perfectly square.
Applying the Panels: The Fun Part!
Now for the fun part! Start with the panel that will sit at the intersection of your center guidelines. Apply your construction adhesive to the back of the panel, following the manufacturer’s instructions. Press it firmly onto the wall, aligning it with your pencil marks. Use your level to double-check that this first piece is perfectly straight—it will guide all the others. Continue adding panels, working your way out from the center. Make sure the edges of each panel are snug against the last one to create a seamless look. Wipe away any excess adhesive with your clean cloth as you go.
Alternative Installation Methods
While the peel-and-stick method is incredibly convenient, sometimes a project calls for a little extra security. If you're installing panels in a high-traffic hallway, on a wall that isn't perfectly smooth, or you just want a more permanent installation, you can use construction adhesive. Simply apply a few beads to the back of each panel before pressing it onto the wall. This creates a super-strong bond that’s built to last. For rooms with a lot of moisture, like a bathroom, it’s best to choose materials specifically designed for wet conditions. In those cases, you might look at durable options like fiber cement boards, which can handle humidity without warping, ensuring your design stays flawless.
Common Installation Mistakes (and How to Avoid Them)
Even simple projects have a few potential pitfalls. Here are some common mistakes to watch out for to ensure your project is a success from the start. First, don’t skip the wall prep. A dusty or uneven surface is the number one reason for adhesion failure. Second, always plan your layout and use a level. "Eyeballing it" can lead to crooked lines and misaligned patterns that become more obvious as you add more panels. Finally, be precise with your measurements. It’s always better to measure twice and cut once to avoid wasting a panel or ending up with an awkward gap.
Adding Professional Finishing Touches
You’ve successfully installed your panels, and the wall already looks incredible. Now it’s time for the final touches that will take your project from looking like a great DIY to a flawless, professional installation. These small details, like filling in tiny gaps or adding a fresh coat of paint, are what truly complete the transformation. They create a polished, cohesive look that ensures your new feature wall integrates perfectly with the rest of your space. Taking a little extra time on these steps not only enhances the visual appeal but also helps maximize the practical benefits, like improved acoustics, by creating a solid, seamless surface.
Using Silicone for a Seamless Look
A thin bead of paintable silicone caulk is your secret weapon for achieving that perfectly seamless finish. Carefully apply it to any small gaps between the panels or along the edges where the panels meet the ceiling, baseboards, or corners. This simple step hides any imperfections and creates a smooth transition that looks incredibly clean and intentional. Once applied, use a caulk tool or a wet finger to smooth the bead for a professional result. This not only looks great but also prevents dust from settling in the seams, making your new wall panels easier to maintain over time.
Design Ideas for Your New 3D Walls
Once your panels are up, the fun part begins: styling the rest of your space to complement your new feature wall. Think of 3D wall panels as more than just a background element; they are a dynamic part of your room's design. The right styling choices can turn a great-looking wall into a truly show-stopping focal point. It’s all about creating a cohesive look that feels intentional and reflects your personal style.
Whether you’re aiming for a minimalist, modern vibe or a cozy, rustic feel, these panels are incredibly versatile. The key is to consider how their texture, pattern, and color interact with your furniture, lighting, and accessories. For example, a bold geometric pattern can serve as the primary art piece in a room, allowing you to keep other decor simple. On the other hand, a subtle, wavy texture can add a layer of softness and depth without overwhelming the space. We’ll walk through some current trends and practical tips to help you integrate your new wall panels seamlessly and create a room you’ll love spending time in.
Current Trends in Wall Panel Design
Forget flat, boring walls. The biggest trend in interior design right now is all about texture and dimension. Homeowners and designers are moving away from simple paint and wallpaper in favor of surfaces that add character and depth. This is where 3D wall panels truly shine. They are decorative wall coverings designed to give your walls a tactile quality. The raised patterns create fascinating plays of light and shadow that shift throughout the day, making your walls feel alive and dynamic. This trend is about creating spaces that are not just visually appealing but also engaging to the touch, making your home feel more curated and luxurious.
Get Creative with Your Panel Layouts
While many panels are designed for a straightforward grid layout, don't be afraid to think outside the box. You can create a completely custom look by getting creative with how you arrange them. Popular styles range from classic diamond patterns and modern wood slats to industrial faux brick and traditional wainscoting. Consider running linear patterns horizontally to make a room feel wider or vertically to add height. For a truly unique design, you could even mix and match complementary patterns or paint individual panels in different shades before installation. The goal is to use the pattern to enhance your room's architecture and overall aesthetic.
Create a Stunning Accent Wall
If you're new to 3D panels, creating an accent wall is the perfect way to start. It’s a lower-commitment project that delivers a huge design impact. These panels are ideal for a main "statement" wall, like the one behind your sofa in the living room or your headboard in the bedroom. This single feature can anchor the entire room's design, serving as a focal point that draws the eye. Plus, it’s a fantastic way to get a high-end look without the cost of a large piece of art. As an added bonus, the texture can even help absorb sound, making your room a little quieter and cozier.
Using Lighting to Highlight Your 3D Walls
The way you light your 3D wall panels can completely transform their appearance. The texture and depth of the panels are designed to interact with light, so strategic placement of your light sources is key. Natural light from a window will create soft, shifting shadows throughout the day. In the evening, consider using directional lighting like track lights, sconces, or an uplight from the floor to graze the wall. This will accentuate the three-dimensional patterns, highlighting the peaks and valleys of the design and adding a dramatic, sophisticated touch to your room. Experiment with different angles and temperatures of light to see what works best.
How to Match Panels with Your Current Décor
To create a truly cohesive space, make sure your wall panels work in harmony with your existing décor. Think about the materials, colors, and styles already in your room. For instance, using 3D wooden wall panels that match the tone of your hardwood flooring or furniture can make the entire room feel more connected and thoughtfully designed. If you have a modern aesthetic with clean lines, a sleek geometric panel will fit right in. For a more rustic or industrial space, a faux brick or concrete-style panel can enhance that vibe. The idea is to choose a panel that complements, rather than competes with, your other design elements.
Caring for Your 3D Wall Panels
One of the best things about 3D peel and stick wall panels is how simple they are to maintain. Unlike traditional wallpaper that can stain or paint that chips, high-quality wall panels are designed to stand up to daily life. Good quality panels resist moisture, scratches, and fading, so you can spend less time worrying about upkeep and more time enjoying your beautiful space. With just a little bit of routine care, you can ensure your walls look just as stunning years from now as they did on day one. From simple cleaning tricks to fixing minor mishaps, here’s everything you need to know to keep your panels in pristine condition.
How to Clean Your Panels
Keeping your wall panels clean is incredibly easy. For routine dusting, a quick pass with a feather duster or a soft, dry cloth is all it takes to remove surface dust. If you notice any smudges or light dirt, they usually just need a quick wipe. Simply dampen a soft cloth or sponge with a mixture of mild soap and water. Gently clean the affected area, then follow up with a clean, dry cloth to prevent water spots. It’s best to avoid abrasive cleaners, harsh chemicals, or scouring pads, as these can damage the panel’s surface. The goal is to be gentle; these panels are built to last and rarely need more than a light touch to look their best.
Simple Tips to Prevent Scuffs and Damage
The best way to handle damage is to prevent it from happening in the first place. This starts with a solid installation on a smooth, clean wall, which gives the panels the best foundation. Once they’re up, be mindful of their placement in high-traffic areas. If you’re installing panels in a hallway or behind a dining table, consider adding a chair rail to protect them from bumps and scrapes. When moving furniture, take care not to drag heavy items against the wall. A little bit of caution goes a long way in preventing accidental scuffs, scratches, and dents, ensuring your accent wall remains the focal point for all the right reasons.
Long-Term Care for Lasting Results
To keep your panels looking vibrant for years, pay attention to their environment. While many panels are UV-resistant, it's a good idea to avoid exposing them to direct sunlight for long periods, as this can eventually cause some colors to fade. If your panels are on a wall that gets a lot of sun, using blinds or curtains during the brightest parts of the day can make a big difference. Similarly, try to avoid installing peel and stick panels in areas with constant high humidity. In a bathroom or basement, ensure you have good ventilation or use a dehumidifier to prevent moisture from weakening the adhesive over time.
How to Handle Minor Repairs
Even with the best care, minor issues can pop up. Don’t worry—most are simple to fix. If you notice a corner or edge starting to lift, you can usually press it back into place. For a more permanent solution, apply a small amount of strong spray adhesive or wallpaper seam adhesive behind the peeling section and press firmly until it holds. For small nicks or scratches, a touch-up paint pen in a matching color can make the imperfection disappear. It’s always a good idea to save an extra panel or two from your project, just in case a section gets damaged and needs to be replaced.
How to Safely Remove Panels When You're Ready for a Change
Ready for a change? The good news is that most 3D peel and stick panels are designed to be removable without destroying your walls. The key is to work slowly and gently. Start by warming the surface of a panel with a hairdryer on a low setting. This helps soften the adhesive, making it easier to peel away. Once warm, use a putty knife to carefully lift one corner. From there, you can slowly pull the panel off the wall, applying more heat as needed. Their simplicity in installation and removal helps to minimize harm to the surface, making your next design project that much easier.
Related Articles
Frequently Asked Questions
Can I install these panels over a textured wall or existing wallpaper? For the best and most lasting results, you should always start with a smooth, clean surface. Installing panels over heavily textured walls can create air gaps and prevent the adhesive from making full contact, which could cause them to peel over time. The same goes for wallpaper, which can pull away from the wall under the weight of the panels. Your best bet is to sand down any texture and remove old wallpaper before you begin.
The blog mentions construction adhesive, but aren't these peel and stick? That's a great question. While most of these panels come with a strong self-adhesive backing that works well on its own, think of adding a bit of construction adhesive as extra insurance. It creates an even stronger, more permanent bond that ensures your panels won't budge, especially if your walls aren't perfectly even or if you live in an area with fluctuating humidity. It’s a simple step that guarantees a professional, long-lasting finish.
How difficult is it to cut the panels to fit around outlets or corners? It’s much easier than you might think. The right tool depends on the panel material, but for most PVC or fiber panels, a sharp utility knife or a fine-toothed saw works perfectly. The key is to measure carefully. For outlets, I recommend turning off the power, removing the faceplate, and tracing its outline onto the panel before making your cut. A little patience and precise measurements will give you a clean, seamless fit.
Are these panels a good choice for a bathroom or kitchen? It depends on the specific location and the panel material. You should avoid installing most peel and stick panels in areas with constant, direct water exposure, like inside a shower. However, many panels made from PVC are water-resistant and work beautifully as a kitchen backsplash or on a main wall in a well-ventilated bathroom. Always check the product’s specifications to ensure it’s suitable for moisture-prone spaces.
Can I paint the panels to match my room's exact color scheme? Absolutely! This is one of the best features for getting a truly custom look. Many 3D wall panels come in a paintable matte white finish, which acts as a perfect canvas. For the best results, apply a coat of primer first to ensure the paint adheres smoothly and evenly. Then, you can use any quality interior paint to match your walls or create a bold, contrasting accent color.