

Fluted Wall Paneling: Your Design & Installation Guide

Fluted wall paneling brings repeating grooves and shadow lines to a wall. It can create a quiet backdrop or a prominent architectural feature, depending on the profile, finish and lighting. A successful project starts with selecting the right panel for its location and planning the edges before installation.
Choose the Profile, Direction and Lighting Together
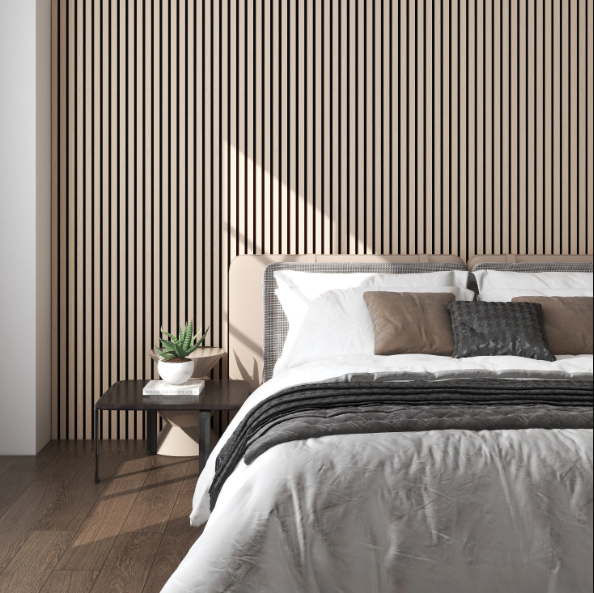
Compare groove depth and spacing using a sample. A deep profile creates stronger shadows; a shallow profile provides a subtler texture. Product names sometimes use fluted and slatted interchangeably, so inspect the actual surface and joint rather than choosing by name alone.
Vertical lines draw attention upward, while horizontal lines emphasize width. Check which orientations the selected system allows. View samples beside flooring, cabinetry and furniture in both daylight and evening light. Light directed along the wall can emphasize joints as well as the texture.
For a TV wall, plan cable routes, ventilation and mounting support before fitting panels. Shelves, mirrors and televisions need appropriate support behind the decorative finish. See our TV wall panel ideas for layout considerations.
Compare Construction and Finish
| Panel construction | What to confirm |
|---|---|
| Solid wood or veneer | Surface material, substrate, finish, movement requirements and approved room conditions. |
| Paintable MDF or other board | Moisture limitations, edge preparation, primer and coating instructions. |
| Interior WPC | Approved interior applications, panel dimensions, matching trims and installation accessories. |
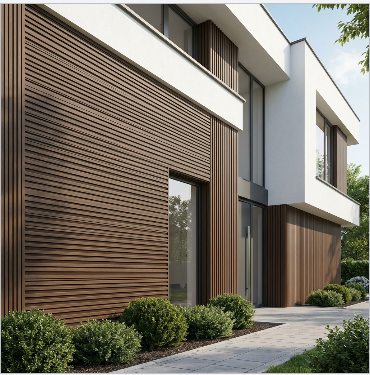
| Exterior WPC | Exterior designation, support and fastening details, drainage, ventilation and movement allowances. |
These categories describe different options; they do not establish stock availability. Compare the current wall panel collection and each product listing. Do not paint, stain or sand a factory finish unless its instructions permit it.
Keep Interior and Exterior Requirements Separate
An interior panel is not automatically suitable for an exterior facade, covered patio, shower or damp room. Choose the product for the actual exposure. A moisture-resistant face does not make the complete wall assembly waterproof.
For outdoor projects, browse exterior wall panels and review the exterior WPC cladding technical resources. Coordinate cladding with the wall's flashing, drainage and weather protection. Interior decorative installation instructions cannot replace exterior assembly details.
Fluting alone does not establish sound absorption or soundproofing. If acoustic performance matters, use the exact product's test information and mounting configuration. Our acoustic wood panel guide explains what to check. Fire, emissions and other performance claims also need product-specific documentation.
Match Accessories by Range, Profile and Color
Select accessories alongside the panels. Matching color is important, but the trim must also fit the panel's thickness, shape and application. Corner and edge trims perform different finishing roles.
For interior WPC fluted panels, review the interior WPC wall clips. The Alder interior WPC corner trim is the Alder finish option; choose the corresponding finish for other panel colors rather than automatically ordering Alder.
For exterior fluted panels in black, review the black corner trim and black edge trim. For other colors, confirm the matching trim finish. Review the exterior WPC clips and spacer clips against the exact installation instructions; do not assume both types are required.
Shiplap L-trims, natural veneer corners and acoustic end slats should not be substituted merely because they look similar. See our clip compatibility guide for planning help.
Measure Coverage and Plan the Cuts
Record wall height and width, openings, corners and exposed ends. Draw the panel direction and joints before calculating quantities. Use installed coverage rather than overall board width where joints overlap, and confirm whether the listing sells individual panels or packs.
Area divided by coverage provides a starting quantity. Adjust it for actual cuts, pattern alignment and spare material; a fixed ten-percent allowance will not suit every layout. Measure trims separately by length, and calculate clips and fasteners from the specified support spacing and installation details.
Prepare for the Exact Installation System
Confirm substrate condition, support requirements, storage or conditioning instructions and approved fasteners or adhesive. Decorative panels may still need a suitable backing wall. Do not treat them as a universal substitute for drywall or structural sheathing.
Resolve dampness and loose surfaces before installation. Plan outlets and additional wall thickness with the appropriate professional. Follow specified gaps and edge details, and do not fill joints intended for movement or drainage. Cutting methods and any ceiling installation requirements must come from the selected product's instructions.
Check Care Requirements and the Complete Order
Use the recommended cleaning method for the actual surface and backing. Test any permitted cleaner in an inconspicuous area. Avoid assuming all panels tolerate water, abrasive tools or refinishing.
Compare the complete project cost: panels, matching trims, approved supplies, preparation, labor and delivery. Confirm finish, quantity, availability and return terms before ordering. Contact USA Builders Depot with measurements and photos for help reviewing your selection. Showroom visits are by appointment only.