

How to Choose & Install Faux Brick Panel

Faux brick panels create a brick-pattern surface without a full masonry wall. Their materials, weight, edge details and approved uses vary, so choose the actual product before planning the installation. A brick appearance alone does not establish moisture resistance, heat suitability or structural performance.
Use this guide to prepare your project questions, then browse wall panel options or contact USA Builders Depot to confirm current availability for the look you want.
Compare material, texture and edge details
Faux brick is a description of appearance, not one construction type. Confirm what the panel is made from, its dimensions and weight, and whether its color is a surface finish. Thin brick veneer is another product category and should not be treated as interchangeable with a molded decorative panel.
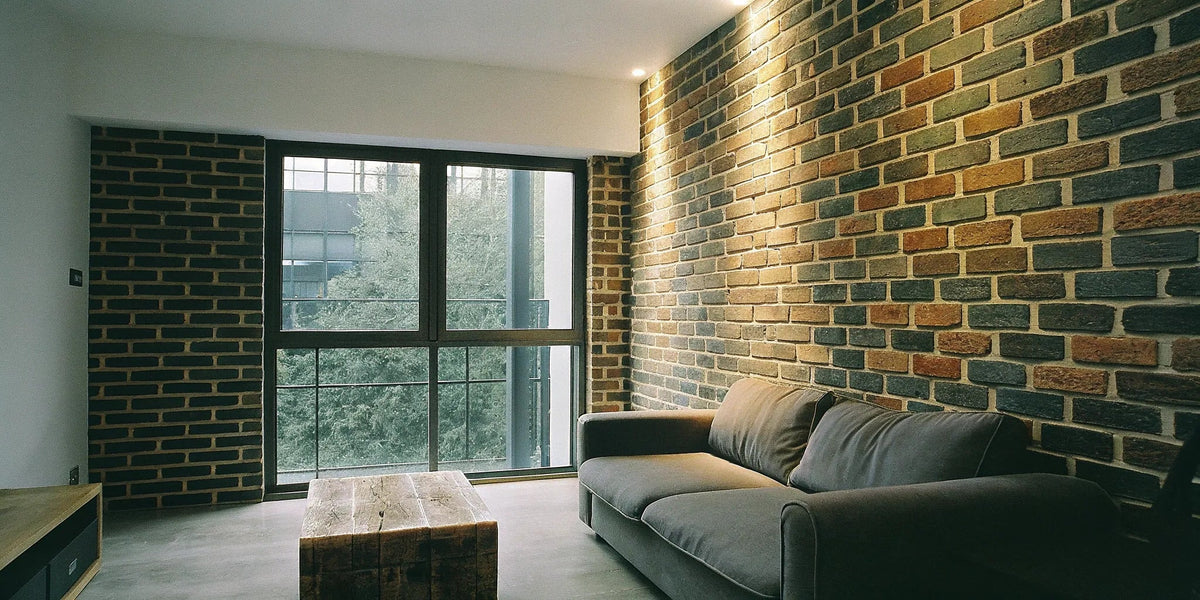
Review a sample in the room’s daylight and evening lighting. Look at the brick scale, relief, mortar-line color and repeating pattern. Ask to see how two panels meet: an interlocking edge may help disguise a joint, but it does not guarantee an invisible seam. Plan corners and exposed edges using compatible parts or an approved finishing detail.
Confirm the panel is approved for the location
Interior decorative panels should not be assumed suitable for exterior exposure, shower walls or splash zones. Ask for the selected product’s intended-use information and installation instructions before choosing it for a kitchen or bathroom. A moisture-resistant surface is not, by itself, a complete waterproof wall system.
For a fireplace surround or an area near cooking equipment, confirm the panel’s suitability and the appliance’s required clearances with the appropriate installer. A brick look does not establish that a material is noncombustible. Request any fire-performance documentation your project requires rather than relying on appearance or general marketing descriptions.
Draw the wall and plan the pattern
Measure width and height at several points. Mark doors, windows, outlets, switches and fixed furniture. Decide where the pattern starts and how the brick courses will meet at corners. Review the location of joints and narrow cut pieces before fixing the first panel.
Calculate quantities from the product’s installed coverage, including any overlaps, rather than its overall dimensions alone. Have the installer allow for cuts, pattern matching and spare material. Offcuts may not be reusable where the pattern or edge connection must align.
Order the required panels and finishing components together when practical, but do not assume one order guarantees identical coloring. Confirm expected variation and inspect the delivered pieces before installation.
Assess the wall before attaching panels
Identify the substrate and check that it meets the panel manufacturer’s requirements. Resolve dampness, loose coatings and unstable surfaces before covering them. Decorative panels are not a repair for a damaged wall or an ongoing moisture problem.
Confirm any flatness, cleanliness, storage and acclimation requirements. Do not assume that adhesive will bond reliably to every painted or textured surface. Where the instructions require a test or primer, complete that preparation before the full installation.
Follow a product-specific installation plan
Obtain the current instructions for the selected panel and confirm the approved adhesive, mechanical fixings, spacing and edge clearances. These details vary across materials. Do not substitute a generic glue pattern, fastener schedule or cutting tool for the manufacturer’s specified method.
Dry-fit the layout where appropriate and check alignment as work progresses. Plan cuts around openings before attaching panels. Electrical boxes and cover plates may need adjustment for the new wall thickness; have a qualified electrician handle electrical changes and keep required access available.
Mount shelves, televisions and other loads to suitable structural support rather than relying on the decorative panel. Complex corners, damaged substrates and unfamiliar materials are good reasons to involve an experienced installer.
Confirm painting, cleaning and repair options
Do not assume every faux brick panel can be painted. Ask whether coatings are permitted and which preparation and products are compatible. A test piece can help assess appearance, but it does not replace approval for a treatment that could affect performance or warranty coverage.
Follow the manufacturer’s cleaning instructions and avoid saturating joints or using abrasive products without approval. Ask how damaged edges or surface marks should be repaired. Keep spare pieces where practical, along with the product labels, finish details and warranty.
Compare the complete project cost
Include panels, corner pieces, edge trim, approved fixings, substrate preparation, installation and delivery. Compare cost per installed area, not just price per panel. Neither faux brick nor real brick veneer is automatically cheaper for every project once the full scope is included.
Confirm current stock, dispatch timing, shipping charges and return terms before purchase. Warranty length alone does not tell you what is covered; read the conditions for the selected product and application.
For help reviewing available wall finishes, contact USA Builders Depot with your measurements and inspiration photos. Showroom visits are by appointment only. You can also read our 3D brick-look panel guide for further planning considerations.