


How to Install Exterior Shiplap: A Step-by-Step Guide
We’ve all seen a siding job that looks great at first, only to show problems after a season or two. Think uneven gaps, warped boards, or frustrating water stains. These issues almost always trace back to a few common—and completely avoidable—installation mistakes. Getting the details right is what separates a professional finish from a future headache. This guide will show you exactly how to install exterior shiplap correctly, focusing on the critical errors to avoid, from proper acclimation to the right fastening techniques.
Key Takeaways
- Your project's success is decided before you hang the first board: Acclimating the wood, prepping the wall, and installing furring strips creates a vital air gap for moisture drainage, which is the key to preventing rot and warping.
- Get the first row perfectly level, as it guides the entire wall: For a clean finish, use a technique called blind nailing—driving fasteners through the top flange of each board so the next course hides them. This secures the siding while allowing for natural expansion and contraction.
- Protect your work by sealing every cut end of the wood before installation: After the boards are up, use quality exterior caulk and a protective finish to create a watertight barrier. Consistent cleaning and inspections will keep your siding looking great for years.
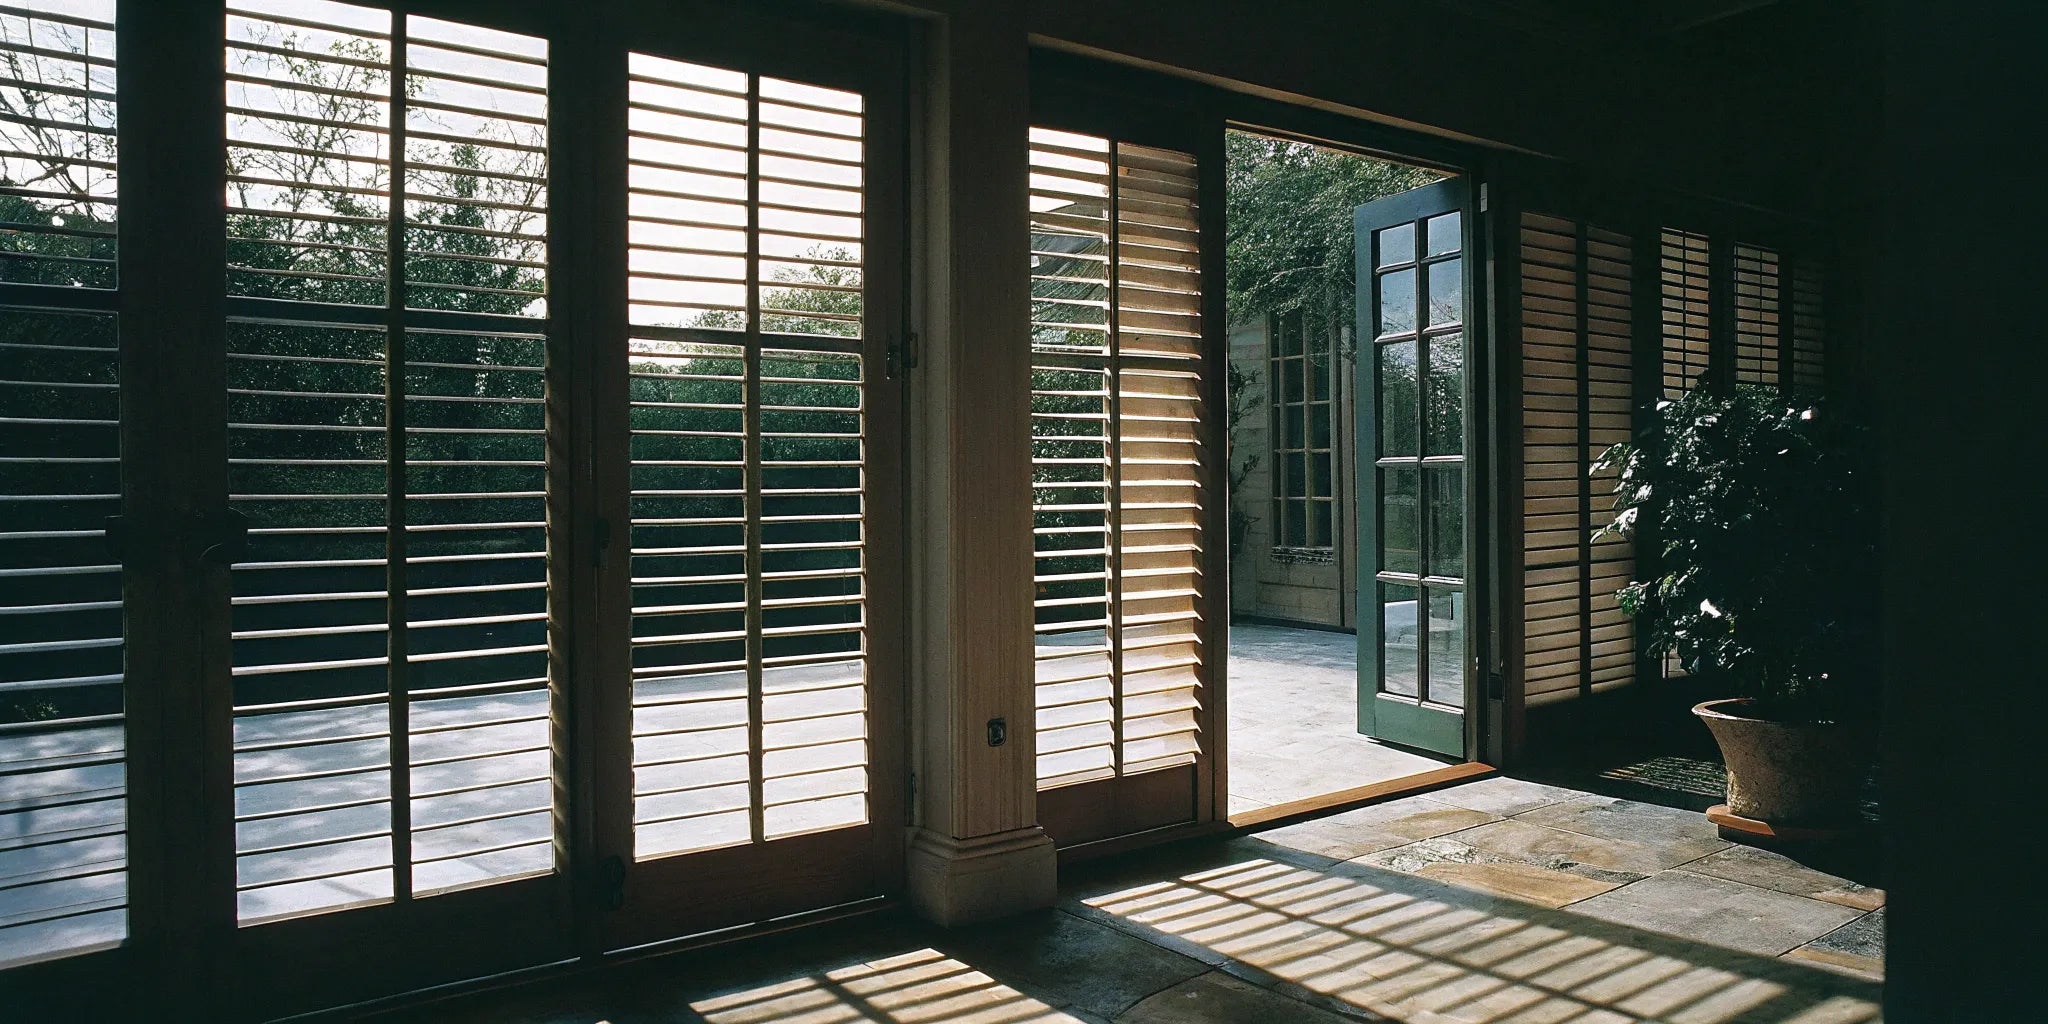
What is Exterior Shiplap Siding?
At its core, shiplap siding is a type of wooden plank profile designed for a tight, overlapping fit. Each board has a special groove, called a rabbet joint, cut along its top and bottom edges. This L-shaped notch allows the planks to overlap snugly, creating a channel between them that adds a distinct shadow line and visual texture. The name itself gives a clue to its origins—this method was first used to build ships, where the overlapping boards created a watertight hull strong enough for the open sea.
Today, that same weather-resistant design makes it a fantastic choice for home exteriors. It delivers clean, horizontal lines that can feel both classic and modern, adding character and curb appeal to any structure. Unlike tongue-and-groove siding, which locks together, shiplap’s overlapping joint allows for slight movement as the wood expands and contracts with changing weather. This flexibility helps prevent cracking and warping over time, making it a durable and reliable choice. Our Exterior Shiplap Cladding Wall Panels offer this timeless look with the durability needed to protect your home from the elements.
Why Choose Shiplap for Your Home's Exterior?
So, what makes shiplap a go-to choice for siding? First and foremost, it’s incredibly weather-resistant. The overlapping design creates a strong seal that stands up to wind and rain, directing water away from the wall sheathing underneath. This protective quality is a huge advantage for any home’s exterior.
Beyond protection, shiplap is built for longevity. Wood naturally expands and contracts with changes in temperature and humidity. Shiplap’s design gives the boards room to move without buckling or creating large gaps, which means it lasts longer with less stress on the material. Aesthetically, shiplap siding has a distinct visual appeal. Its clean lines and subtle shadows add texture and character, fitting in with styles from rustic farmhouse to sleek contemporary designs. It’s a versatile look that has truly stood the test of time.
What Materials Are Used for Shiplap Siding?
When it comes to exterior shiplap, the material you choose makes a big difference in both appearance and long-term performance. Natural wood is the traditional choice, and for good reason. Cedar is a fantastic option because it contains natural oils that help it resist moisture and deter pests, making it ideal for outdoor use. It’s a durable wood that holds up well in various climates.
Pine is another common wood choice, often more budget-friendly than cedar, but it requires more thorough sealing and regular maintenance to protect it from the elements. For those looking for lower-maintenance alternatives, materials like fiber cement are gaining popularity. Fiber cement boards can be manufactured to mimic the look of wood shiplap but offer enhanced durability against rot, fire, and insects, often requiring less upkeep over the years.
Understanding Shiplap Costs and Material Behavior
Before you start a shiplap project, it’s important to understand two key factors: how much it will cost and how the material will behave over time. Wood is a natural product that responds to its environment, and different materials come with different price tags and maintenance needs. Thinking about these details upfront helps you choose the right siding for your budget and climate, ensuring your investment looks great for years to come. Let's break down the typical costs, the reality of wood shrinkage, and some popular alternative materials you might consider.
Typical Costs for Exterior Shiplap
The cost of exterior shiplap can vary quite a bit depending on the material you choose and where you live. As a general guideline, siding a 1,000-square-foot home with shiplap can range from about $2,800 to $7,500. This range accounts for different wood species—like affordable pine versus premium cedar—as well as labor costs, which can differ significantly by region. It's also smart to factor in the long-term costs of maintenance, as some materials require more upkeep than others. For contractors and trade professionals, sourcing materials in bulk can help manage these costs. Programs like our Trade Application offer discounts that make a real difference on large projects.
Considering Wood Shrinkage
If you’re working with natural wood, you have to plan for a little bit of movement. Wood expands and contracts with changes in humidity and temperature, which leads to some shrinkage over time. It’s a completely normal behavior for the material. On average, you can expect about 1/8 inch of shrinkage on a 4-inch wide board and up to 1/4 inch on a 6-inch board. This is precisely why proper installation is so critical. Acclimating the wood to your local climate before installation and using the correct fastening techniques gives the boards the flexibility they need to move without causing issues like buckling or creating unsightly gaps.
Alternative Materials: Metal and Salvaged Wood
While traditional wood is a beautiful choice, it’s not the only option out there. For homeowners looking for a lower-maintenance solution, fiber cement is an excellent alternative. Our fiber cement boards are designed to look just like wood shiplap but offer superior durability against rot, fire, and pests with minimal upkeep. For a more modern or industrial aesthetic, metal shiplap provides a sleek, durable finish that stands up to harsh weather. On the other end of the spectrum, salvaged or reclaimed wood offers a rustic, one-of-a-kind look with a sustainable story, though it often requires more prep work to ensure the boards are sound and ready for installation.
What Tools and Materials Do You Need?
Getting everything you need in one place before you start is key to a smooth installation. It saves you from extra trips to the store and keeps your momentum going. Below is a breakdown of the tools, materials, and safety gear you’ll want to have on hand.
Your Essential Tool Checklist
Having the right tools makes all the difference. You’ll want a reliable measuring tape, a pencil, and a chalk line for marking your layout. A long level—at least three feet—is essential for keeping every board perfectly straight. For cutting, a miter saw gives you clean angles for corners and trim, while a table saw or circular saw is necessary for long rip cuts. To fasten the boards, a pneumatic nailer makes the job go much faster than hammering by hand. Finally, have a good caulk gun ready for sealing all the gaps when you’re finished.
Choosing the Right Materials and Hardware
This is where your project takes shape. First, you'll need your Exterior Shiplap Cladding Wall Panels; it's a good idea to order about 10% extra to account for cuts and mistakes. You’ll also need furring strips to create a drainage plane and a high-quality vapor barrier to protect the sheathing. For fasteners, choose corrosion-resistant options like stainless steel nails or screws to prevent rust stains. To complete the look, gather your exterior-grade trim boards, a paintable exterior caulk for sealing gaps, and a quality primer and paint formulated to withstand the elements. Sandpaper will also be useful for smoothing any rough edges.
Safety First: Essential Gear for the Job
Working on any home project means putting safety first. It’s simple, but it’s important. Always wear safety glasses or goggles to protect your eyes from sawdust and debris, especially when cutting or nailing. A dust mask is a must-have to keep from breathing in fine particles. Since you’ll be using power tools, a pair of earplugs or earmuffs will protect your hearing from loud noise. Finally, a sturdy pair of work gloves helps prevent splinters and gives you a better grip on your materials and tools as you work.
How to Prepare for Your Shiplap Installation
A beautiful, long-lasting shiplap exterior starts long before you nail the first board to the wall. Proper preparation is the single most important factor in getting a professional result that stands up to the elements for years to come. Taking the time to complete these initial steps helps you avoid common pitfalls like warping, moisture damage, and even fines from your local building authority. Think of it as setting the foundation for a successful project. Rushing this stage can lead to frustrating and costly repairs down the road, so let’s walk through exactly what you need to do to get your project started on the right foot. From checking local regulations to letting your materials adjust to the climate, each step plays a vital role in the final outcome.
Check Local Building Codes
Before you get started, your first step is to connect with your local building department. Every city and county has different rules, and you’ll need to know if your project requires a permit or has to follow specific installation guidelines. Many homeowner's associations (HOAs) also have their own rules about exterior materials and finishes. A quick phone call can clarify what you need to do to ensure your project is compliant. This simple check helps you understand local building codes and avoid any potential headaches or penalties later on. It’s a five-minute task that can save you a lot of trouble.
Give Your Shiplap Time to Acclimate
Wood is a natural material that expands and contracts with changes in temperature and humidity. To prevent your siding from warping or buckling after installation, you need to let it acclimate. This just means letting the boards sit at your project site for at least seven days before you install them. Stack the boards on a flat, dry surface with spacers between the layers to allow for even air circulation. This gives the wood time to adjust to your local climate, ensuring a stable and secure fit once it’s on the wall. Skipping this step is one of the biggest mistakes you can make, as it can compromise the entire installation.
Acclimation Times for Different Woods
While a seven-day acclimation period is a solid rule of thumb for most wood species, it's important to remember this is a baseline. Denser hardwoods might take a bit longer to adjust, while softer woods like pine might acclimate more quickly. The key isn't just the time but the environment. The goal is to let the wood's moisture content reach equilibrium with its new surroundings. Rushing this step can lead to the wood shrinking or swelling after it's already on your wall, causing gaps or buckling that are difficult to fix. Patience here pays off in the long run.
Proper Wood Storage Before Installation
How you store your shiplap during acclimation is just as important as the time you give it. Never store the wood directly on the ground or a concrete slab, as moisture can seep into the bottom boards. Instead, elevate the stack at least 12 inches off the ground using wood blocks. To ensure proper airflow, place small wood pieces, often called "stickers" or shims, between each layer of boards. This allows air to circulate freely around all sides of the wood, helping it acclimate evenly. Proper storage protects your investment in materials like Exterior Shiplap Cladding Wall Panels and sets the stage for a flawless installation.
Pre-Finishing Boards for Maximum Protection
For the best possible performance and longevity, you should pre-finish all six sides of your siding—front, back, top, bottom, and both ends—before you install it. This is a step that many people skip, but it’s critical for preventing moisture damage. The back and ends of a board are particularly vulnerable to absorbing moisture from the air or wall cavity. Sealing them creates a complete barrier that protects the wood from warping, cupping, and rot. Also, remember to finish any cuts you make on-site, especially the end grain, as these fresh cuts will soak up water quickly if left exposed.
How to Prep Walls and Add a Vapor Barrier
Your existing wall needs to be clean, dry, and smooth before you can install siding. Remove any old, loose siding, and make any necessary repairs to the sheathing underneath. Once the wall is prepped, it’s essential to install a weather-resistant barrier, often called a house wrap. This material acts as a vapor barrier, preventing moisture from getting trapped behind your shiplap, which could lead to rot and mold. You can find detailed instructions on how to properly install it, ensuring all seams are overlapped and taped correctly for a watertight seal that protects your home’s structure.
How to Install Furring Strips
Before you can hang your beautiful new shiplap, you need to install furring strips. Think of these thin strips of wood as the unsung heroes of your siding project. They are fastened vertically to your wall studs, creating a small air gap between the wall’s weather-resistive barrier and the back of your siding. This gap is a game-changer for moisture management. It allows any water that gets behind the siding to drain away and promotes air circulation, which helps everything stay dry and prevents mold, mildew, and rot.
This setup, often called a rainscreen system, is a best practice for installing exterior shiplap cladding and is sometimes required by local building codes. It also gives you a perfectly flat and stable surface to attach your shiplap to, which is especially helpful if your existing wall sheathing isn't perfectly even. Taking the time to install furring strips correctly is one of the most important steps to ensure your siding looks great and lasts for decades.
How to Find and Mark Wall Studs
First things first, you need to know where your wall studs are. This is where your furring strips—and later, your siding—will be securely attached. The most reliable way to do this is with an electronic stud finder. Run it horizontally across the wall sheathing and mark the location of each stud near the top and bottom of the wall.
Wall studs are typically spaced 16 inches apart on center, but it's always best to confirm their exact location. Once you’ve found them, use a chalk line to snap a vertical line down the center of each stud. This gives you a clear visual guide for attaching your furring strips, ensuring every fastener hits its mark and provides a solid connection.
Planning Your Furring Strip Layout
With your studs clearly marked, it’s time to plan the layout for your furring strips. You’ll be using thin wood strips, often 1x3 or 1x4 boards, for this step. The plan is simple: attach one vertical furring strip directly over each chalk line you marked for the wall studs. This consistent 16-inch spacing creates the vertical framework needed to support your horizontal shiplap boards.
It’s also smart to plan for extra support around openings. You’ll want to install furring strips around the perimeter of all windows and doors. This provides a solid surface for fastening the ends of the shiplap boards that you’ll need to cut to fit these areas.
How to Securely Attach the Furring Strips
Now it’s time to attach the furring strips. Align each strip with the chalk lines you marked on the wall. Using corrosion-resistant screws or nails, fasten the strips securely into the studs. Your fasteners need to be long enough to go through the furring strip, the wall sheathing, and at least 1.5 inches into the stud itself.
As you attach each strip, use a level to make sure it’s perfectly plumb (vertically straight). If your wall has bows or dips, you may need to use shims behind the furring strips to create a single, flat plane. This step is critical for a professional finish, as it ensures your shiplap siding will lay flat without any waves or bumps.
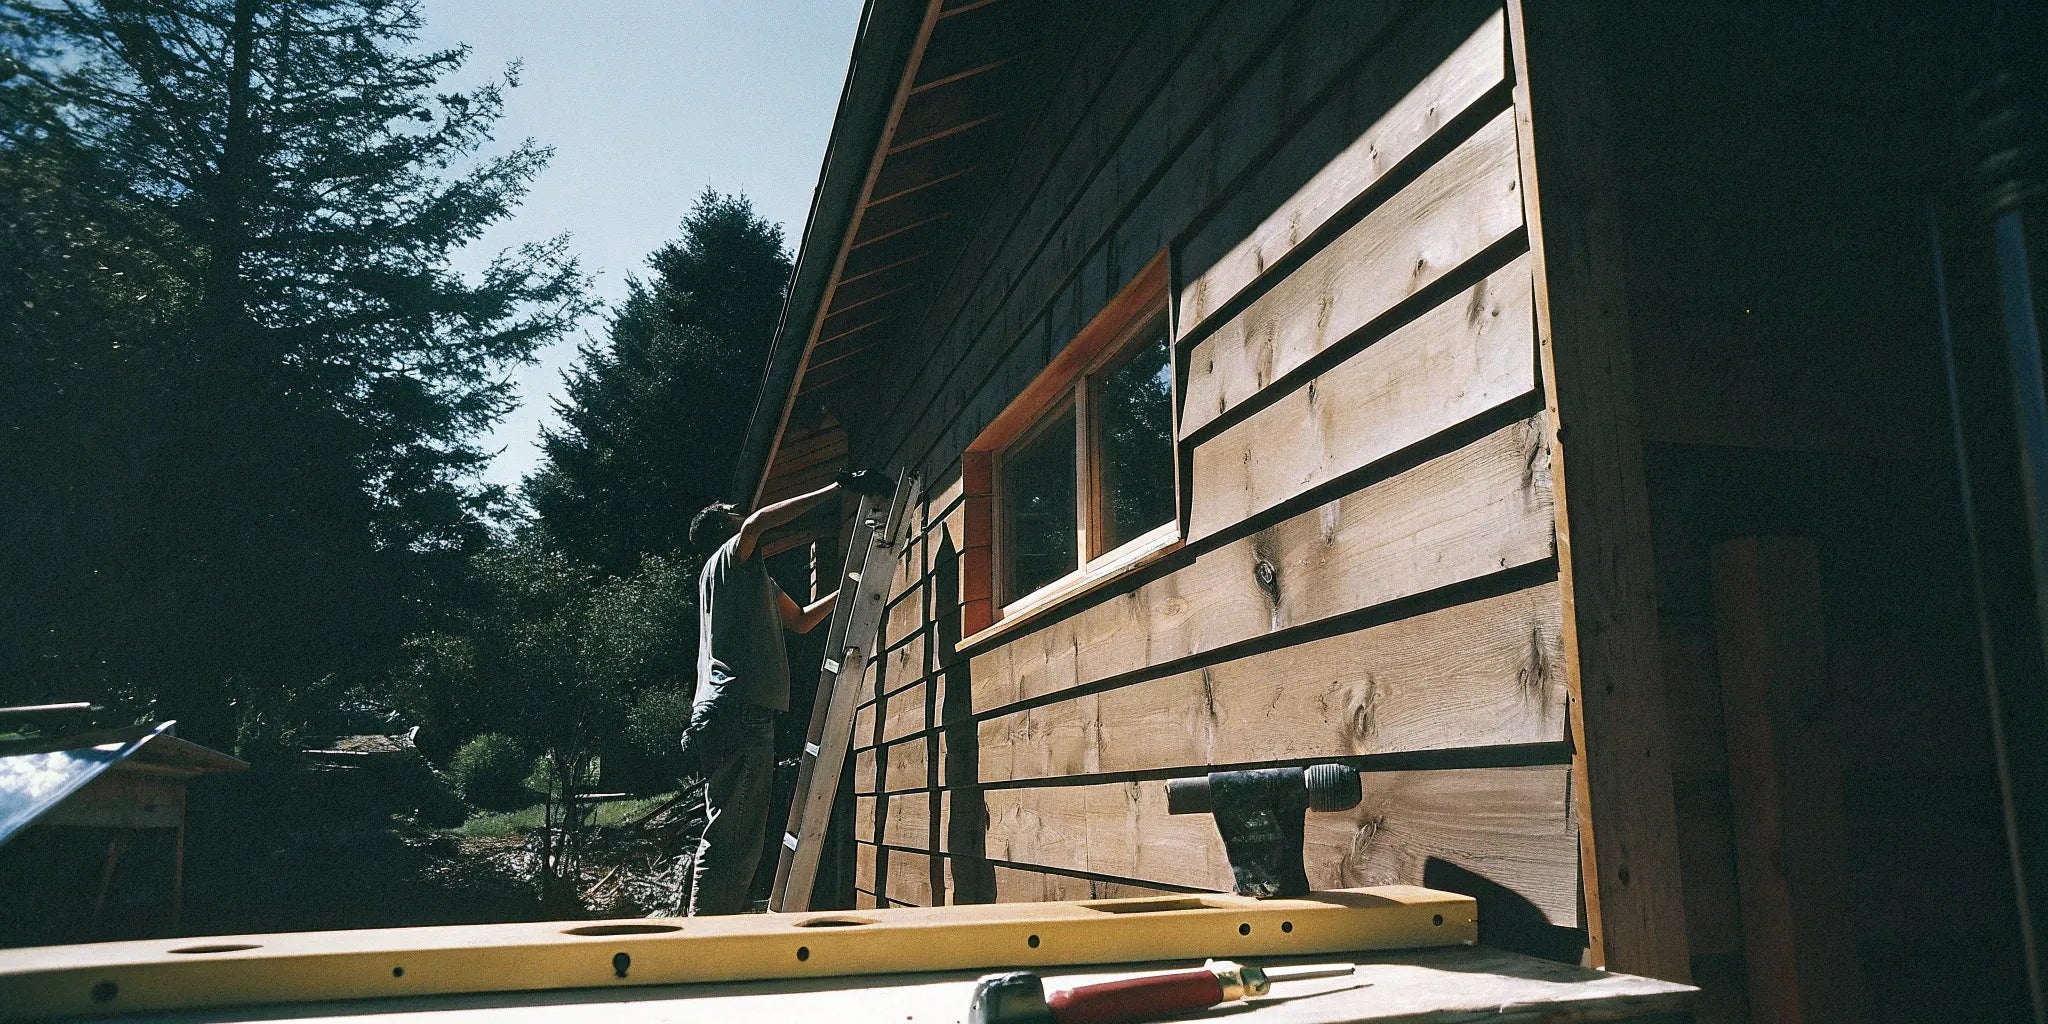
Your Step-by-Step Guide to Installing Exterior Shiplap
With all your prep work complete, you’re ready for the most satisfying part of the project: installing the shiplap. This is where your vision starts to become a reality, board by board. The process is methodical, so take your time and focus on getting each step right. The key to a professional-looking finish is ensuring the first row is perfectly level, as it acts as the foundation for the entire wall. From there, you’ll work your way up, creating the clean lines and weather-resistant barrier that make shiplap so popular.
Before you begin, lay out a few of your Exterior Shiplap Cladding Wall Panels to check for any variations in color or grain. This allows you to arrange them in a way that looks balanced and intentional. Remember to keep your tools organized and within reach. A smooth workflow will help you maintain momentum and avoid simple mistakes. Patience is your best friend during this stage; rushing can lead to uneven gaps or misaligned boards that are difficult to fix later.
Laying the Foundation: The First Board
Your installation journey begins at the bottom of the wall. Starting here ensures that each subsequent board will overlap the one below it, creating a natural shed for water and preventing moisture from getting behind the siding. Before you place the first board, use a level and a chalk line to snap a perfectly straight guideline where the top of that board will sit. This is the most critical step for the entire wall. A slightly crooked first row will become more and more noticeable as you move up. Also, make sure to leave a small gap between the ground and the bottom of the first board to allow for proper drainage and prevent rot.
Maintaining Proper Ground Clearance
This might seem like a small detail, but it's one of the most critical for the long-term health of your siding. Make sure to leave at least six inches of clearance between the bottom edge of your first shiplap board and the ground. This gap is your siding's best defense against moisture, preventing rainwater from splashing up and soaking into the wood—a primary cause of rot. It also stops moisture from wicking up from damp soil. Think of it as a protective buffer for your beautiful Exterior Shiplap Cladding Wall Panels. This isn't just a best practice; it's often a requirement in local building codes to ensure the home's exterior remains durable for years to come. Ignoring this step can lead to costly repairs and compromise the entire installation.
How to Get the First Board Perfectly Level
Place your first shiplap board along the chalk line, making sure it’s perfectly level. To secure it without splitting the wood, you’ll want to pre-drill pilot holes. As a best practice, you should drill a small 1/8-inch hole above each furring strip on the bottom half of the board. Then, drive a 3-inch stainless steel screw through the pilot hole to firmly attach the bottom edge to the wall. Using stainless steel fasteners is essential for exterior work, as they won’t rust and stain your beautiful new siding. For the top edge of the board, you can drive a nail or screw through the top flange, where it will be hidden by the next board.
Installing the Next Rows of Shiplap
Once the first board is secure, the process becomes a satisfying rhythm. Fit the groove of the second board over the top lip of the first one, ensuring a snug fit. Fasten the second board by driving a nail or screw through its top flange into each furring strip. This technique, known as blind nailing, hides the fasteners for a clean, seamless look. You should continue these steps for all the siding boards as you work your way up the wall. Every few rows, use your level to double-check that your lines are still straight. If you need to use multiple boards to span the length of a wall, be sure to stagger the seams so they don’t all line up vertically.
How to Cut Shiplap Around Windows and Doors
When you reach obstacles like windows or doors, precision is key. Carefully measure the opening and transfer those measurements to your shiplap board. It’s always a good idea to measure twice and cut once. A jigsaw is a great tool for making these custom cuts. The goal is to maintain the shiplap’s overlapping design to create a strong seal that protects against wind and rain. After cutting a board, always seal the raw, cut end with a high-quality sealant before you install it. This prevents moisture from wicking into the wood, which is crucial for longevity, especially around custom steel windows and door frames.
Installing Flashing for Water Management
Proper water management is non-negotiable for an exterior that lasts. This is where flashing comes in. Flashing is a thin material, usually metal, that you install to direct water away from vulnerable areas of your walls. Think of it as a raincoat for the seams of your house. You must install horizontal flashing above all windows and doors, as these are common spots where water can try to sneak in. It should also be used where the siding meets the roofline or any other architectural feature. The flashing should be installed over the weather-resistant barrier and under the furring strips, ensuring any moisture that gets behind the siding is guided safely out and away from the wall structure.
Techniques for Vertical Installation
While horizontal shiplap is the classic look, installing it vertically can create a striking, modern aesthetic. The installation principles are largely the same, but with one key difference: the furring strips. For vertical siding, you must install your furring strips horizontally across the wall studs. This creates the necessary attachment points for your vertical boards and, just as importantly, maintains the crucial air gap for drainage. Spacing for the furring strips should be no more than 16 inches apart to ensure the siding is well-supported. This simple switch in orientation allows you to achieve a different style while still following best practices for a durable, weather-resistant exterior.
Dealing with Imperfections like Missing Knots
When you're working with natural wood, you'll inevitably encounter imperfections like missing knots. Don't panic—this is a normal part of the material's character. You have a few options for handling them. According to experts at KY Lumber, you can fill them, cut them out, or simply hide them. To fill a knot, you can create a paste by mixing sawdust with wood glue for a seamless look, or use a paintable epoxy for a durable fix. Alternatively, you can cut the board to remove the section with the missing knot and use that piece where a shorter board is needed. Sometimes, these small imperfections add to the rustic charm and can be left as is, depending on the look you're going for.
How to Fasten Shiplap Siding Securely
This is where the real magic happens. Fastening your shiplap correctly is the difference between a wall that looks amazing for decades and one that starts showing problems after the first season. The goal is to secure each board firmly while still giving the wood room to breathe. Wood naturally expands and contracts with changes in humidity and temperature, and your fastening technique needs to account for this movement. If you don't, you risk boards warping, splitting, or buckling over time.
Proper fastening creates a strong, weather-resistant barrier that protects your home. It involves more than just driving in a nail or screw; it’s about using the right hardware, placing it correctly, and understanding how the boards work together. We’ll cover drilling pilot holes to prevent splitting, how to space your boards to account for natural shrinkage, and why the shiplap design itself is brilliant for managing expansion. Getting these details right ensures your exterior shiplap cladding not only looks professional but also performs beautifully for years to come.
Choosing the Right Nails and Fasteners
The fasteners you choose are just as important as the siding itself, especially for an exterior project. Since your shiplap will be exposed to rain, humidity, and temperature swings, you need hardware that can handle the elements without failing or staining your beautiful new walls. This is why it’s essential to use corrosion-resistant options. Stainless steel nails or screws are the gold standard for exterior work. They won’t rust and leave unsightly streaks down your siding over time. Galvanized fasteners are another option, but stainless steel offers the best long-term protection. Investing in the right hardware from the start will save you from frustrating and costly repairs later on.
Face Nailing vs. Blind Nailing for Exteriors
You have two main options for fastening your shiplap: face nailing or blind nailing. Face nailing involves driving the fastener directly through the face of the board where it’s visible. While straightforward, this method leaves exposed nail heads that can detract from the clean look of shiplap. Blind nailing, on the other hand, is the preferred technique for a professional finish. With this method, you drive the fastener through the top flange, or "tongue," of the shiplap board at an angle. The next board you install slides over it, completely hiding the nail head. This creates a flawless, hardware-free appearance and allows the wood to expand and contract naturally without stress.
Nailing Patterns for Wider Boards
If you’re working with wider shiplap boards—typically those 8 inches or wider—a single fastener per stud isn’t enough to keep them stable. Wider planks have a greater tendency to cup or warp over time if they aren’t secured properly. To prevent this, you’ll need to use two nails per stud. Place the fasteners about 2.5 to 3 inches apart from each other on the face of the board. This two-point connection provides the stability needed to hold the board flat against the furring strips while still allowing for the natural movement of the wood as it responds to changes in the weather.
How to Use a Nail Gun Correctly
A pneumatic nail gun is a huge time-saver for a siding project, but it requires a bit of finesse to use correctly. The biggest mistake is setting the air pressure too high, which drives the nail head too deep and damages the surface of the wood. These small dimples can collect water and compromise the finish. The best practice is to adjust the pressure so the nail head is left sticking out just slightly from the surface. From there, you can finish driving it flush with a final tap from your hammer. This two-step process ensures a secure fit without marring the face of your shiplap.
Drilling Pilot Holes and Placing Screws
Skipping pilot holes is a common mistake that can cause your beautiful shiplap boards to split. To avoid this, always drill a small 1/8-inch pilot hole for each screw. You should place these holes on the bottom half of the board, directly over each furring strip. This placement ensures the top of the board below is securely covered. For fasteners, use 3-inch stainless steel screws, as they won’t rust and stain your siding. If you prefer a clean, hardware-free look, you can drill a larger 3/8-inch hole first, drive the screw, and then cover it with a matching wood plug for a seamless finish.
How to Maintain Consistent Spacing Between Boards
When you install each shiplap board, your instinct should be to fit it as tightly as possible against the one below it. This might seem counterintuitive, but wood siding will shrink slightly as it settles and dries. A snug fit during installation ensures that you won’t end up with noticeable gaps later on. As a general rule, you can expect about 1/8-inch of shrinkage for 4-inch wide boards and up to 1/4-inch for 6-inch wide boards. By installing them tightly, you’re planning for this natural process, which will leave you with perfect, consistent spacing once the wood has fully acclimated.
Creating an Intentional "Nickel Gap"
While installing boards snugly is important to account for shrinkage, the goal isn't to jam them together with zero room to move. Instead, the professional approach is to create a consistent, intentional space known as a "nickel gap." As the name suggests, this is a small gap—roughly the thickness of a nickel, or about 1/8 of an inch—left between each board. This deliberate spacing is the key to managing wood's natural tendency to expand and contract. It gives the boards room to swell in humid conditions without buckling and ensures that when they shrink, the resulting gaps are uniform and clean, maintaining the crisp shadow lines that define the shiplap look. This technique is a widely accepted best practice for a lasting installation.
What to Do About Expansion Gaps
One of the best features of shiplap is how it handles the natural movement of wood. The overlapping joint, or rabbet, is designed to let the boards expand and shrink with temperature and humidity changes without compromising the wall's integrity. This clever design prevents the boards from cracking or warping under pressure. The overlap creates a strong seal that effectively blocks wind and rain while giving each board the flexibility it needs. This built-in tolerance for movement is what makes shiplap such a durable and reliable choice for exterior siding, protecting your home through changing seasons.
How to Finish Your Exterior Shiplap
Once your shiplap boards are up, the final finishing touches are what will protect your work and make it look truly professional. This stage is all about sealing, trimming, and coating your new siding to ensure it stands up to the elements for years to come. Rushing this part can compromise the entire project, so take your time to do it right. A proper finish not only defends against moisture and sun damage but also provides that crisp, clean aesthetic you’re looking for. Think of it as the final layer of armor for your home’s exterior. This is where you transition from a construction project to a finished home feature, so every detail matters. Getting the sealing and coating right ensures your investment in beautiful siding pays off for the long haul, preventing costly repairs down the road.
Sealing Cut Ends and Gaps to Prevent Damage
Anywhere you cut a board, you create a vulnerable point where moisture can seep in. Wood acts like a sponge, and the end grain is especially absorbent. To prevent swelling, cracking, and rot, you need to seal these cuts promptly. A good rule of thumb is to apply an end-grain sealant within 24 hours of making a cut. You should also run a bead of high-quality, paintable exterior caulk along any gaps, especially around windows, doors, and corner joints. This creates a flexible, watertight barrier that keeps moisture out and gives your installation a seamless, integrated look.
Applying Caulk Correctly (and Where to Avoid It)
While sealing gaps is essential, knowing where *not* to caulk is just as important. The goal is to block water from getting in while still allowing any moisture that does get behind the siding to escape. The most important rule to remember is this: never caulk the horizontal gaps between your shiplap boards. These gaps are a feature, not a flaw. They are part of the rainscreen design, allowing the wall assembly to breathe and providing a path for any trapped moisture to drain away. Sealing these horizontal lines will trap water, leading to rot, mold, and peeling paint. Instead, focus your efforts on vertical seams where siding meets trim around windows, doors, and at the corners of the house, as these are the primary points of water intrusion.
When you do caulk, choose a high-quality, paintable exterior sealant that remains flexible over time. This will allow it to accommodate the natural expansion and contraction of the wood without cracking. Applying a smooth, consistent bead requires a bit of practice, but mastering proper caulking techniques ensures a clean, professional finish that provides a durable, watertight seal where it's needed most. This final step protects your work and gives your siding a polished, seamless look that will last for years.
Installing Trim and Corner Pieces
Trim is the secret to a polished, high-end finish. It covers the raw edges of your shiplap boards at corners and around openings, creating clean lines and a cohesive design. For outside corners, you can use dedicated corner trim pieces that cap the siding. For inside corners, a simple square trim piece works perfectly. Adding trim around windows and doors not only looks great but also helps seal the transition between the siding and the frame. This step hides any minor imperfections in your cuts and gives the entire project a deliberate, well-executed appearance that truly completes the look.
Common Options for Finishing Corners
When it comes to finishing corners, you have a few great options that create a clean, professional look. For outside corners, the most common method is to use two pieces of trim board (like a 1x4 and a 1x3) butted together to form an "L" shape that caps the ends of the shiplap. This creates a crisp, defined edge that protects the raw wood. For inside corners, the approach is simpler: a single square or rectangular trim piece is installed vertically in the corner, and the shiplap boards butt up against it from both sides. If you're aiming for a more seamless, modern aesthetic, you can also miter the shiplap boards themselves at a 45-degree angle, though this requires very precise cuts. Whichever method you choose, the goal is to create a weather-tight seal that complements your exterior wall panels.
Choosing and Applying a Protective Finish
The final step is applying a protective finish. This is your siding’s main defense against UV rays, rain, and temperature shifts. Whether you choose paint, stain, or a clear sealant depends on the look you want and the type of exterior shiplap cladding you’ve installed. Always seal unfinished boards with a clear coat to protect them from moisture before applying your final finish. Keep in mind that exterior finishes require maintenance. Depending on your climate and sun exposure, you may need to reapply a fresh coat every few years to keep the wood protected and looking its best. This regular upkeep is key to preserving the beauty and integrity of your siding.
Allowing for Natural Weathering
Wood is a living material, and it will always respond to its environment by expanding and contracting with changes in humidity and temperature. This is completely normal, and the key to a successful installation is working *with* this natural movement, not against it. This is why acclimation is so important. Letting your exterior shiplap cladding sit on the job site for at least a week before installation gives it time to adjust to your local climate. The shiplap design itself is engineered for this reality; the overlapping joint allows each board to swell and shrink slightly without buckling or creating unsightly gaps, ensuring the siding remains stable and weather-tight through every season.
Common Mistakes to Avoid When Installing Shiplap
Installing exterior shiplap is a rewarding project, but a few common missteps can turn a beautiful facade into a future headache. Getting the details right from the start is the key to a durable, professional-looking finish that lasts for decades. It’s not just about putting boards on a wall; it’s about creating a protective and attractive layer for your home. By taking your time and avoiding these frequent errors, you can ensure your hard work pays off and your siding performs exactly as it should, protecting your home from the elements while looking fantastic.
Avoiding the Temptation to Rush Prep Work
It’s tempting to jump straight into nailing up boards, but skipping proper preparation is one of the biggest mistakes you can make. A successful shiplap installation depends on a solid foundation. This means ensuring the wall is clean, dry, and flat, and that you’ve properly installed a weather-resistant barrier. You also need to let your Exterior Shiplap Cladding Wall Panels acclimate to your local climate for the recommended time. Rushing this step can lead to boards that warp, buckle, or cup after installation. Take the extra day or two to prep correctly—measure everything twice, snap level chalk lines for your courses, and plan your layout. A little patience now prevents major fixes later.
Forgetting About Moisture and Warping
Moisture is the number one enemy of any wood siding. Even if you’re using pre-primed boards, every single cut you make exposes a raw end that can soak up water like a sponge. This leads to rot, swelling, and warping that can ruin your entire project. To prevent this, you must seal all cut ends with a high-quality sealant or primer before you nail the board in place. Don’t wait until the end of the day. It’s also crucial to maintain a proper expansion gap between boards and at trim locations to allow for natural movement. Properly managing moisture ensures your shiplap remains stable and beautiful through every season.
Using the Wrong Fastening Techniques
How you attach the shiplap to the wall is just as important as the boards themselves. A common error is failing to nail into the wall studs. Fastening only to the sheathing isn’t strong enough to hold the siding securely over time, especially as it expands and contracts. Always use a stud finder to locate and mark your studs before you begin. Use corrosion-resistant fasteners, like stainless steel or hot-dip galvanized nails, to prevent rust streaks from staining your siding. Make sure your nails are long enough to penetrate at least 1.5 inches into the studs. Finally, avoid over-driving the nails, as this can crack the wood and create an entry point for moisture.
Keeping Your Shiplap Siding Looking Great
Your new shiplap siding looks fantastic, and with a little routine care, you can keep it that way for years to come. Proper maintenance protects your investment from moisture, sun, and pests, ensuring it performs beautifully for its entire lifespan. Depending on the material and your local climate, shiplap can last for decades, but its longevity really comes down to consistent upkeep. Think of it as a simple checklist you run through once or twice a year to catch small issues before they become big headaches. Following these steps will keep your home’s exterior looking sharp and well-protected.
Your Simple Cleaning and Inspection Routine
With the right care, your shiplap siding can last 20 to 30 years, or even longer. The first step is a simple, regular cleaning. At least once a year, gently wash the siding with a soft-bristle brush and a mild soap-and-water solution to remove dirt, pollen, and mildew. Avoid using a high-pressure washer, which can force water behind the boards and damage the wood fibers. While you clean, take the opportunity to inspect the siding up close. Look for any peeling paint, cracked caulk around windows and trim, or signs of moisture damage. Catching these small problems early is the key to preventing costly repairs down the line.
Cleaning the Gaps Between Boards
The small channels between your shiplap boards are part of their classic look, but they can also trap dirt, pollen, and cobwebs. It’s important to clear this debris out during your annual cleaning because it can hold moisture against the wood, creating a perfect spot for mildew or rot to start. A soft-bristled brush is great for gently sweeping out these gaps. For stubborn grime, you can use your soap-and-water solution and a smaller detail brush. Whatever you do, resist the urge to aim a pressure washer into the gaps. This can force water behind your Exterior Shiplap Cladding Wall Panels, which can cause serious damage. Keeping these channels clean is a simple step that goes a long way in preserving the health and beauty of your siding.
Signs It's Time for a New Coat of Finish
The protective finish on your shiplap is its primary defense against the elements, so keeping it fresh is crucial. How often you’ll need to reapply a stain or paint depends heavily on your climate and the siding’s exposure to sun and rain. A good rule of thumb is to plan on reapplying a finish every two to five years. If you notice the color fading or the wood starting to look dry, it’s time for a new coat. Even if you prefer the look of naturally weathered gray wood, it’s smart to apply one protective coat of a clear water-repellent finish right after installation to help the wood acclimate and remain stable.
Making Your Shiplap Siding Last
A few proactive habits can make a huge difference in your siding’s lifespan. Always seal the cut ends of shiplap boards during installation; these exposed grains are prime spots for moisture to seep in. Even if you’re using pre-finished boards, adding a dab of sealant to any cut edges or seams provides valuable extra protection. Each year, check the caulking around windows, doors, and corner trim to ensure it’s intact and creating a watertight seal. Also, make sure your gutters are clean and that sprinklers aren’t spraying directly onto the walls. Minimizing constant water exposure is one of the best things you can do for any type of exterior wood cladding.
Understanding Potential Drawbacks and Difficult Repairs
While shiplap is a durable and beautiful choice, it’s important to know about potential challenges, especially when it comes to repairs. The biggest issue, by far, is moisture damage, which almost always stems from installation errors. If cut ends aren't sealed, they can absorb water, leading to rot, swelling, and warping that can be difficult to fix. Unlike some other siding types, replacing a single damaged board in the middle of a wall is a complex job because of the overlapping joints. This makes the initial installation incredibly important. Getting it right the first time by using quality Exterior Shiplap Cladding Wall Panels and following proper techniques for sealing and fastening is your best defense against future headaches and costly repairs.