

The Ultimate Slat Wall Panel Guide for Your Home

Slat wall panels add a repeated linear pattern to a room. The right selection depends on the panel's construction, finish, intended location and installation system. Similar-looking products can have different uses, so start with the exact product rather than the appearance alone.
Browse our wall panels and compare samples with your paint, flooring and lighting. Use the checklist below to plan the layout, matching accessories and installation before ordering.
Choose the panel type for your project
Confirm the face material, core, backing, dimensions and intended application. Wood veneer, solid wood, felt-backed panels and WPC products should not be treated as the same construction or given the same maintenance instructions.
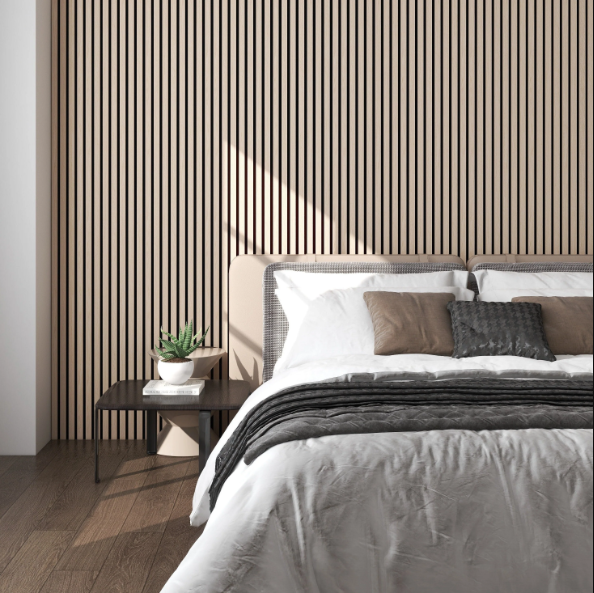
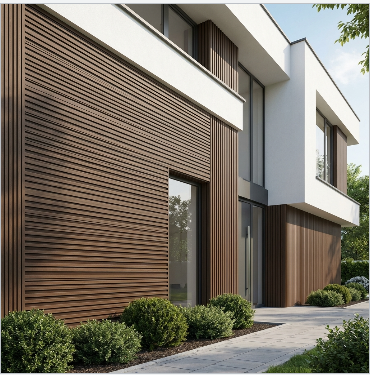
For an interior feature wall, compare our interior panel options. For exterior work, start with exterior panels and obtain the product's exposure and installation requirements. An exterior label does not automatically approve a panel for a shower or another interior wet area.
Decorative slat panels are also different from load-rated retail slatwall systems. Do not assume hooks, shelves or display brackets can be inserted into decorative grooves. Obtain a suitable mounting design for anything the wall needs to support.
Plan the pattern and visible edges
Measure the wall at several points and mark doors, corners, outlets, switches and other interruptions. Confirm whether vertical or horizontal installation is permitted for the selected product. Use a drawing to check where panel joins and cut pieces will fall.
Review the full panel dimensions and usable coverage, including how adjacent panels meet. Work out quantities from the layout rather than dividing wall area alone. Ask your installer to include an appropriate cutting allowance and any spare material.
Place samples beside nearby finishes in daylight and evening lighting. Check the backing color, slat spacing and surface texture as well as the wood tone. Review any expected variation and confirm how exposed ends, corners and top edges will be finished.
Check the documentation behind the appearance
If sound absorption is a project requirement, request applicable test documentation for the exact panel and mounting arrangement. Do not assume all slatted panels provide the same acoustic result or that a felt backing establishes a particular rating.
Use our acoustic panel technical resources to prepare your inquiry. Where a project requires fire, environmental or other performance documentation, confirm it for the selected item before specifying it.
For ceilings, wet locations or commercial applications, obtain the product's written suitability and installation details. A protective coating should not be treated as a way to approve an otherwise unsuitable panel for moisture exposure.
Matching Trim / Accessories
Select accessories by panel family, profile and finish. Similar color names across different collections do not establish compatibility.
- Luxury Acoustic Wall Panel, White Oak & Grey Felt: pair it with the Luxury Acoustic Wall Panel, Classic Oak End Slat. Confirm matching end slats separately for other finishes.
- Natural Veneered Wall Panel: explore the Natural Veneered Corner Trim collection and choose the finish that matches the panel.
- Interior WPC fluted slat panels: confirm the compatible interior panel clips and trim. The Alder corner trim is an Alder finish option, not a universal color match.
For exterior fluted panels, request the matching corner trim, edge trim and specified fixing accessories for the exact color and layout. Consult exterior WPC technical resources before choosing the fastening system.
Acoustic end slats ship free when ordered with full acoustic panels. When ordered separately, the flat shipping fee is $349. Include matching end slats in the panel order when planning your project.
Confirm the installation system before cutting
Provide the installer with the exact product instructions. Check substrate condition, support, fastening or adhesive requirements, storage instructions, movement allowances and edge details. Do not assume a single adhesive or screw schedule suits every panel.
Plan wall-mounted televisions, shelves and other fixtures with suitable structural support. Decorative panels should not be assumed to carry those loads. Have electrical-box depth and access addressed appropriately when adding thickness to the wall.
Confirm the cutting method and protection needed for the actual face and core. Review the layout and cutouts before installation, and inspect delivered panels and accessories before modifying them.
Use the specified cleaning and finishing method
Follow the product's care instructions for both the surface and backing. Ask which cleaners are permitted and whether any coating is needed. Avoid applying wood polish, oil, wax or varnish to a factory-finished panel without approval.
Do not assume a veneer or coated panel can be sanded and refinished like solid timber. For damage, staining or loose panels, request the recommended repair or replacement method for the exact item.
Put the complete project in one inquiry
Send the panel name and finish, wall dimensions, layout, exposed edges, preferred accessories and delivery ZIP code. Include the installation location and any performance requirements, plus your target project date.
Request a quote covering panels, trim, fixings, delivery and installation work where applicable. Confirm current stock, lead time and return terms before ordering. Contact USA Builders Depot for project assistance; showroom visits are by appointment only.