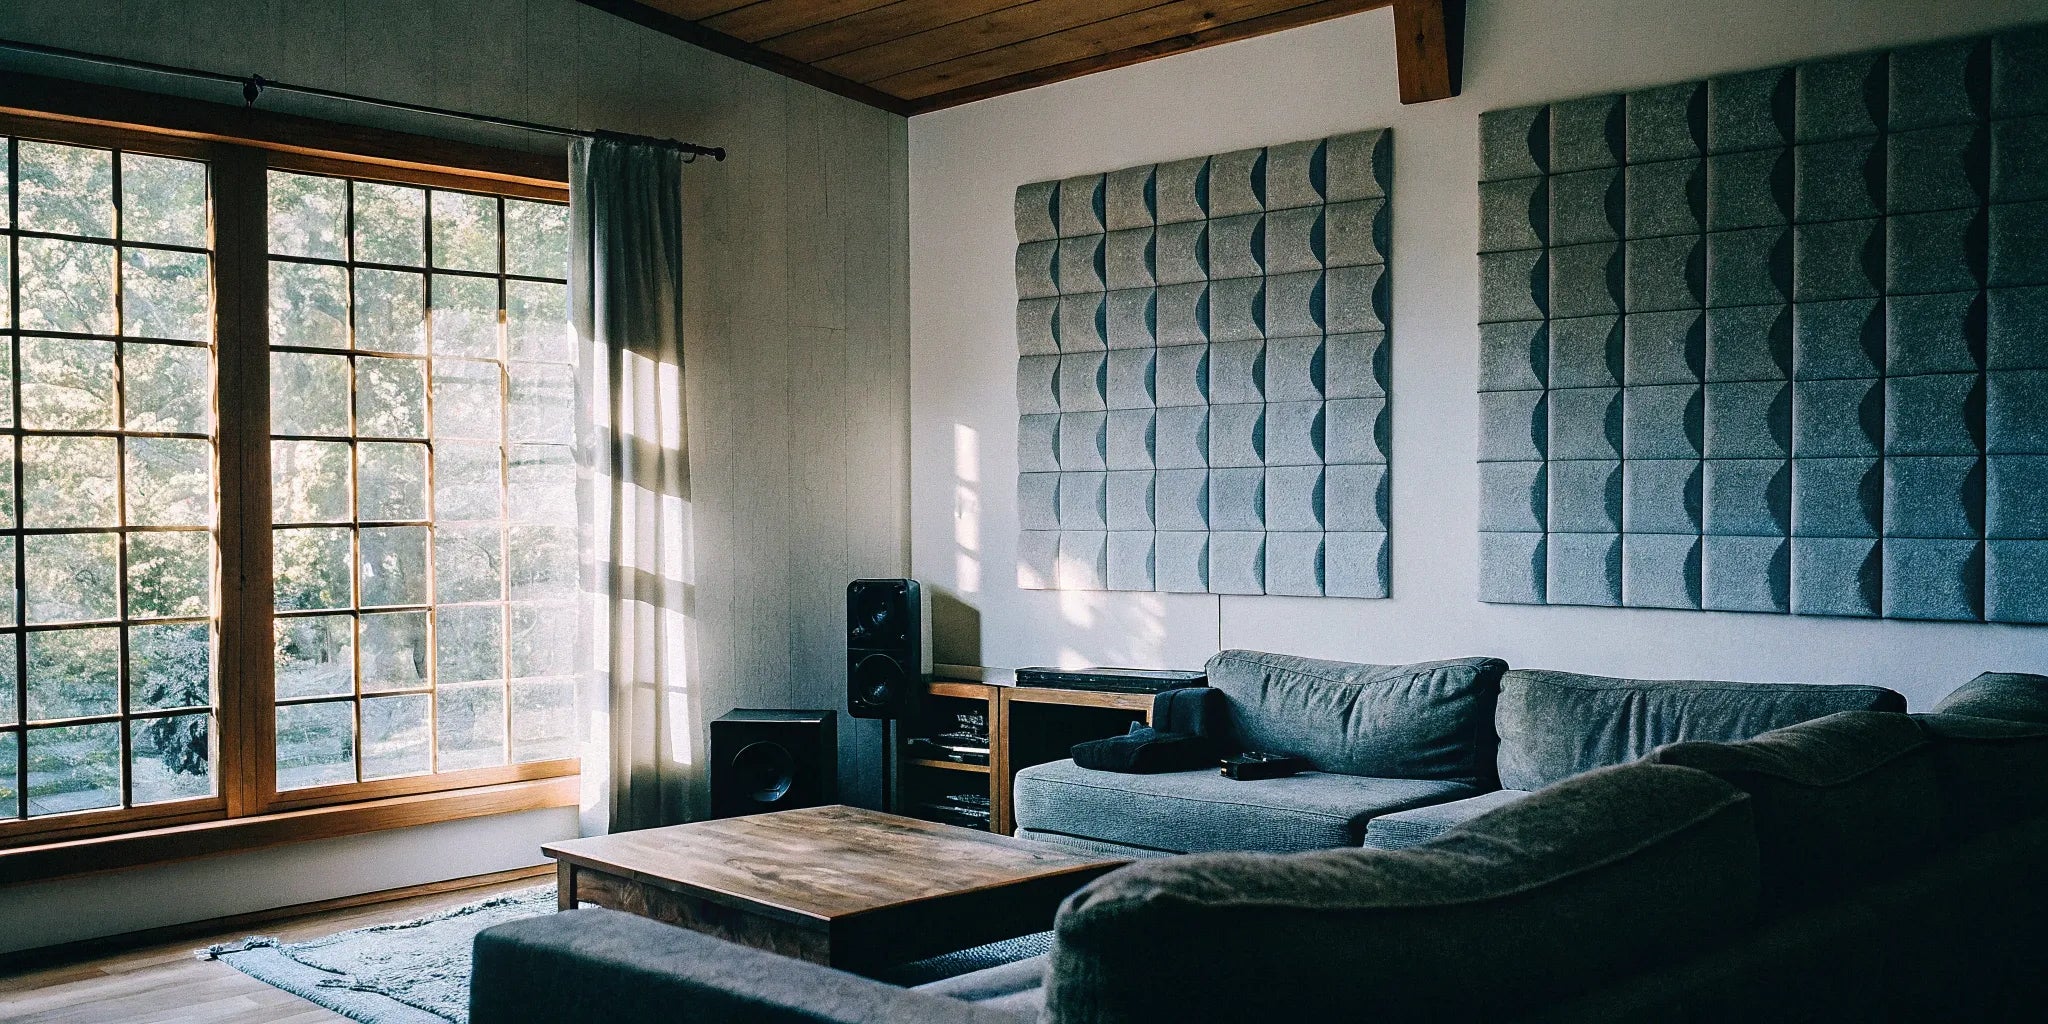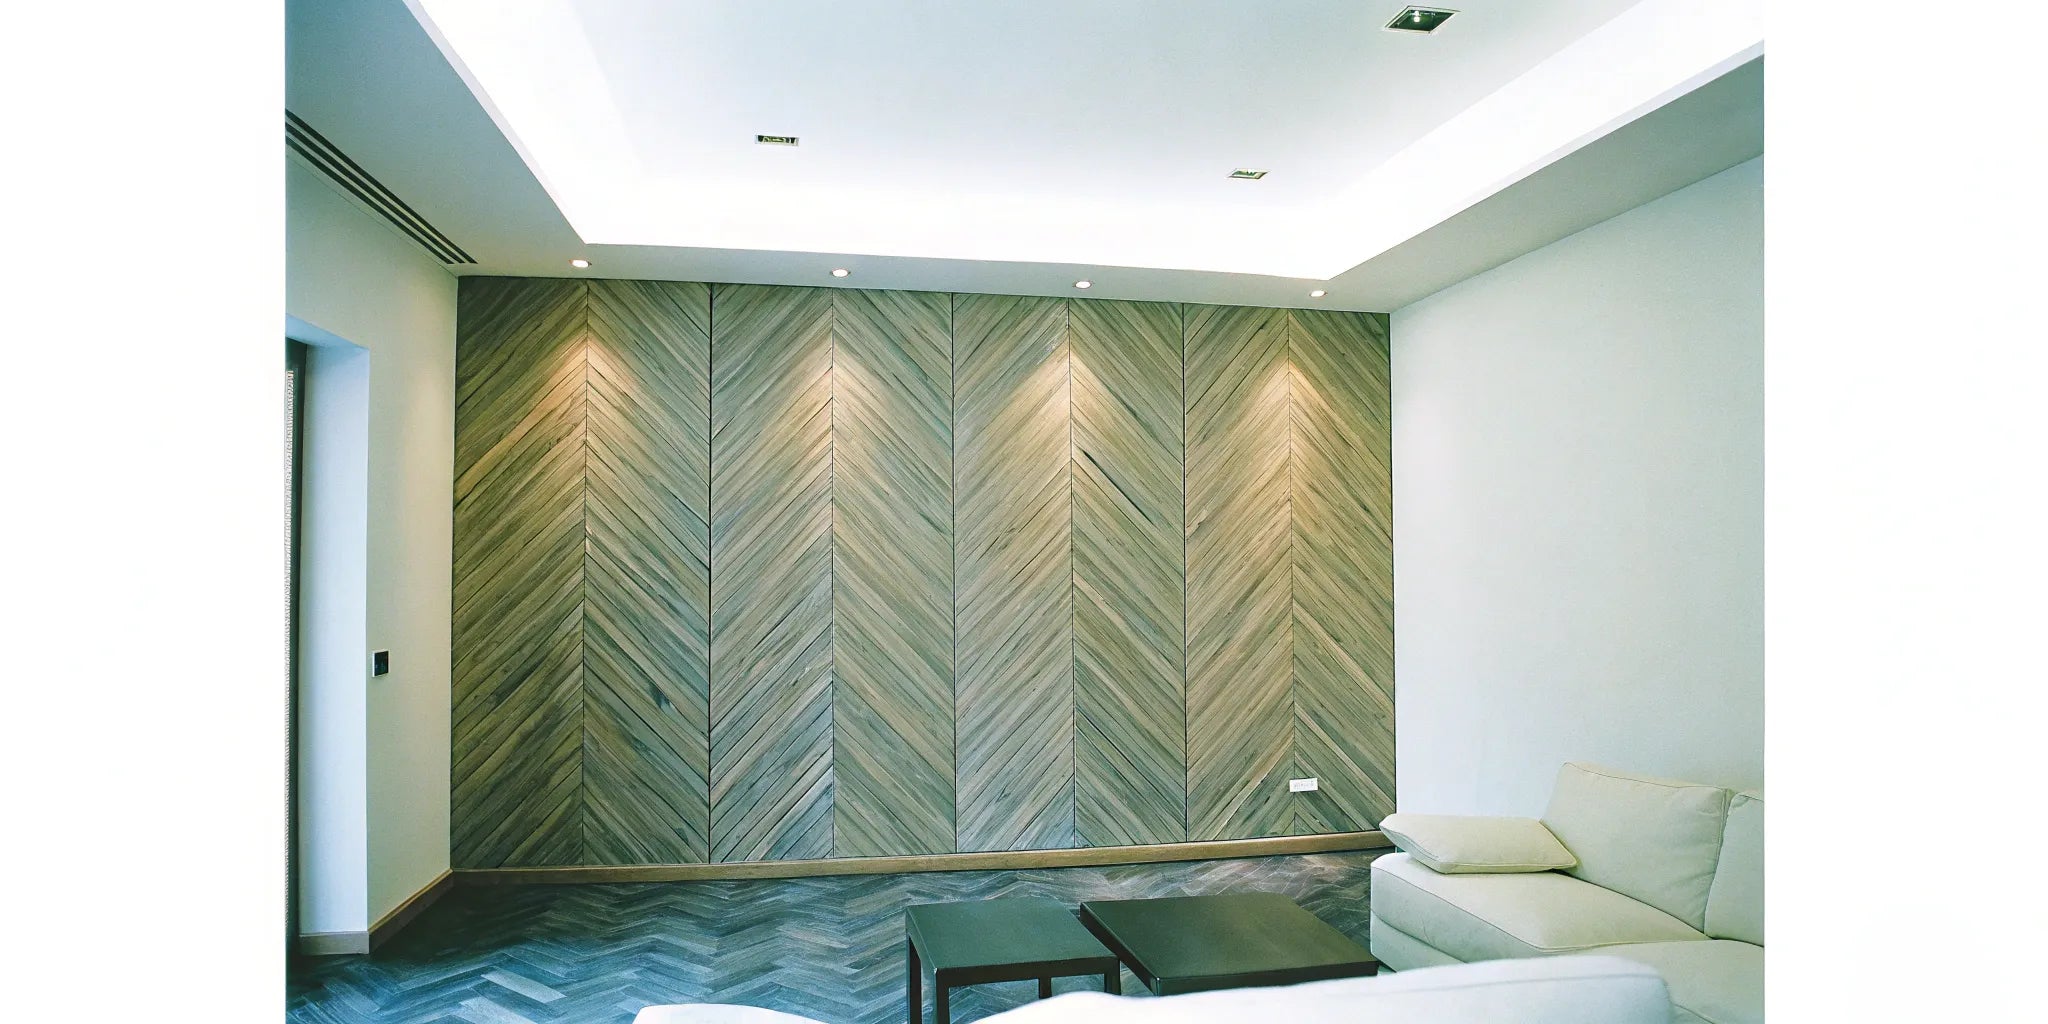
The Ultimate Guide to Walnut Acoustic Panels
Craving a big change for a room but not the chaos of a full renovation? A feature wall is a classic high-impact update, but what if it could do more than just look good? Enter walnut acoustic panels. This is your weekend project solution. The installation is surprisingly straightforward, yet the result looks like a custom, high-end job. They don't just add incredible warmth and texture; they also absorb sound, fixing those annoying echoey spaces. You get a room that both looks amazing and feels calmer and more inviting.
Key Takeaways
- Achieve Both Beauty and Quiet: These panels are a smart design choice because they deliver two key benefits at once: the rich, warm look of real walnut and a significant reduction in echo and background noise for a more comfortable space.
- A Flexible Design Tool for Any Style: Don't limit yourself to a single accent wall. Use these panels vertically to add height, horizontally for width, or even create custom patterns to fit modern, industrial, or commercial designs.
- A Straightforward Project with a Big Payoff: Installation is an achievable DIY project. For the best results, let the panels acclimate to the room, measure your space carefully (and order 10% extra), and choose between a simple glue-on or screw-in method.
What Exactly Are Walnut Acoustic Panels?
So, what's all the buzz about walnut acoustic panels? Think of them as the perfect marriage of style and function. These aren't your grandma's wood-paneled basement walls. Modern Acoustic Wall Panels are engineered to make your space look incredible while also making it sound better. They bring the warmth and texture of natural wood into a room and work hard behind the scenes to absorb sound, reduce echo, and create a more peaceful atmosphere. If you've ever been in a room with high ceilings or hard floors, you know how sound can bounce around, making conversations feel loud and scattered. These panels are the solution. Whether you're designing a cozy home office where you need to focus, a professional recording studio, or a bustling restaurant where you want guests to hear each other, these panels offer a sophisticated fix that addresses both aesthetics and acoustics. They are a smart investment for anyone looking to improve their environment in more ways than one, turning a noisy, flat space into one that feels calm, inviting, and professionally designed.
The Timeless Appeal of Walnut Wood
Walnut is a classic for a reason. Its deep, rich tones and elegant grain patterns bring a sense of warmth and luxury to any interior. These acoustic panels are crafted with real walnut wood, making each one a unique piece of decor. They serve as a stunning feature wall, a subtle backdrop, or an artistic accent. The natural material adds a layer of texture and dimension that you just can't get from paint or wallpaper. It’s a simple way to add a high-end, decorative touch that feels both timeless and completely modern, fitting seamlessly into various design schemes from minimalist to industrial.
How Acoustic Panels Create Quieter Spaces
Here’s where the magic happens. Beyond their good looks, these panels are designed specifically to manage sound. They work by absorbing sound waves that would otherwise bounce around the room, creating echo and unwanted noise. In fact, a well-placed walnut acoustic panel can absorb up to 55% of sound waves. This is measured by something called a Noise Reduction Coefficient, or NRC. With an NRC rating of 0.55, these panels are highly effective at creating a calmer, quieter environment. This makes them perfect for media rooms, open-plan living spaces, or any area where sound control is a priority.
Sound Absorption vs. Soundproofing: What's the Difference?
It’s easy to mix up sound absorption and soundproofing, but they actually tackle two different noise problems. Let's clear it up. Sound absorption is all about improving the sound quality inside a room. Think of how an empty room with hardwood floors echoes—sound waves bounce off hard surfaces, creating a harsh, noisy environment. Materials designed for absorption, like our walnut acoustic panels, work like a sponge to soak up those waves. The combination of the felt backing and the slatted wood design traps and dissipates sound energy, which reduces echo and makes conversations feel clearer. This is what makes a space feel calmer and more inviting, whether it's a home office where you need to focus on calls or a living room where you want to enjoy a movie without the sound feeling scattered.
Soundproofing, on the other hand, is about blocking sound from traveling from one space to another. Its goal is to isolate a room completely, preventing noise from getting in or out. This requires much more intensive construction methods that focus on adding mass and density to walls, floors, and ceilings to stop sound vibrations from passing through. Think of building a room within a room or using specialized materials like mass-loaded vinyl. While acoustic panels are masters of absorption and will make your home theater sound amazing, they aren't designed to be a standalone soundproofing solution. So, if your goal is to stop hearing traffic from outside or noise from an adjacent apartment, you’ll need to explore soundproofing techniques in addition to managing the room's internal acoustics.
What Are These Panels Made Of?
The secret to their dual-purpose design lies in their construction. Each panel is a carefully assembled sandwich of materials. On the surface, you have thin slats of real walnut wood veneer, which provide that beautiful finish. These slats are mounted onto a core of medium-density fiberboard (MDF) for stability and structure. The final layer is a specialized acoustic felt backing, often made from recycled materials. This felt is what does the heavy lifting of trapping and absorbing sound. This layered construction not only makes the wall panels incredibly effective at soundproofing but also ensures they are durable and built to last.
Exploring Veneer and Finish Options
When you choose walnut panels, you're getting the real deal. The surface is a genuine natural wood veneer, which means each panel showcases the deep, authentic grain that makes walnut so sought-after. This isn't a printed pattern; it's a thin layer of actual wood, ensuring every installation has a unique and high-end character. To protect this natural beauty, the panels are typically treated with a professional finish, like a clear satin oil. This coating does more than just add a subtle sheen—it seals the wood, making it more durable and easier to clean while enhancing the richness of the grain. This attention to detail ensures your feature wall not only looks stunning on day one but continues to be a durable and timeless element in your space for years to come.
Understanding Fire Safety Ratings
Whenever you're adding new materials to your walls or ceilings, it's smart to think about fire safety. Acoustic panels are made from a combination of wood, MDF, and felt, so their fire performance is a valid consideration. Many manufacturers design their panels with safety in mind, but fire ratings can vary between products. For residential projects, this is often a smaller concern, but for commercial spaces like offices, restaurants, or studios, meeting specific building codes is essential. Always check the product specifications for a fire safety rating, often listed as Class A, B, or C. If you can't find the information or have strict requirements for your project, it's always best to consult with your supplier to ensure the panels you choose are fully compliant and safe for your intended use.
Why You'll Love Walnut Acoustic Panels
When you're choosing materials for a project, you're often forced to pick between function and style. Walnut acoustic panels are one of those rare finds that deliver both, beautifully. They offer a powerful combination of stunning design, impressive sound control, and sustainable materials, making them a smart choice for almost any space. Whether you're designing a quiet home office, a lively restaurant, or a serene bedroom, these panels bring warmth, texture, and tranquility. Let’s get into the specific reasons why walnut acoustic panels are such a popular and practical choice for homeowners and trade professionals alike.
Reduce Echo and Unwanted Noise
One of the biggest benefits of walnut acoustic wall panels is their ability to create a calmer, more focused environment. If you're tired of echoey rooms or distracting background noise, these panels are a game-changer. They are specifically engineered to absorb sound waves, with some designs soaking up as much as 55% of the sound that hits them. This helps to soften the acoustics in a room, reducing reverberation and making conversations clearer. It’s an ideal solution for open-plan living spaces, home theaters, conference rooms, or any area where sound control is a priority. You get to enjoy a more peaceful atmosphere without sacrificing style.
Upgrade Your Room's Style Instantly
Beyond their acoustic properties, walnut panels are simply gorgeous. The deep, rich tones and natural grain of walnut wood bring an immediate sense of warmth and sophistication to any interior. They are incredibly versatile and can complement a wide range of design aesthetics, from sleek and modern to rustic and traditional. Because they come in a variety of finishes, you can easily find a look that fits your vision. Use them to create a dramatic feature wall behind a bed, add texture to a living room, or bring an organic element into a minimalist office. They effortlessly make any space feel more polished and intentional.
Why They're a Sustainable Style Choice
Making responsible design choices feels good, and with walnut acoustic panels, you can be confident you're using a sustainable product. The wood is typically sourced from responsibly managed forests, ensuring that your design choices support environmental health. Plus, the sound-absorbing felt backing is often made from recycled materials, which further reduces the product's carbon footprint. By choosing these eco-friendly wall panels, you’re investing in a material that is not only beautiful and functional but also kinder to the planet. It’s a great way to align your project with sustainable practices without compromising on quality or aesthetics.
An Investment in Long-Lasting Quality
When you invest in building materials, you want them to last. Walnut acoustic panels are built to withstand the demands of both residential and commercial environments. They are designed to meet high commercial standards, ensuring they hold up well over time while maintaining their acoustic performance. These panels are also crafted with indoor air quality in mind, featuring low VOC (volatile organic compound) emissions. This durability means your feature wall will continue to look great and function effectively for years to come, making it a reliable and long-lasting addition to your space. It’s a practical investment that pays off in both performance and peace of mind.
How to Style Walnut Acoustic Panels in Your Space
One of the best things about walnut acoustic panels is their incredible versatility. Their rich, warm tones and clean lines work beautifully in almost any setting, from a cozy bedroom to a bustling office. Whether you’re aiming for a subtle touch of texture or a dramatic focal point, these panels can adapt to your vision. They’re not just for sound control; they’re a powerful design tool that adds architectural interest and a sense of intention to a room. You can use them to make a large space feel more intimate, add character to a plain wall, or create a seamless, high-end look that ties your entire design together. They are a fantastic way to introduce a natural element that feels both modern and timeless. Let’s explore some popular ways you can incorporate them into your next project.
Achieve a Clean, Modern Look
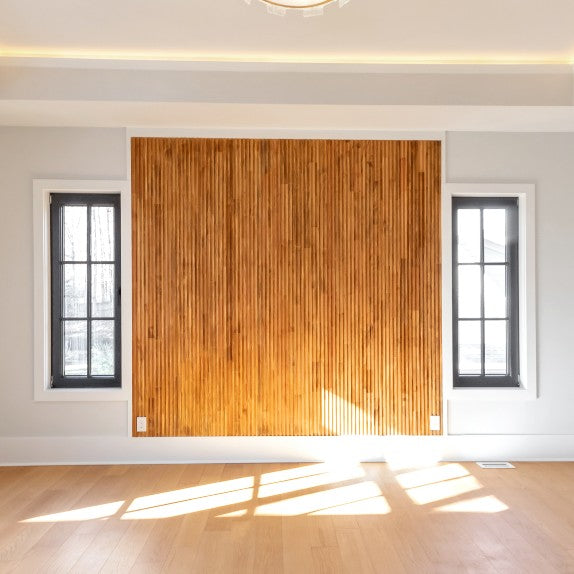
If you love clean lines and uncluttered spaces, walnut panels are a perfect match. In a minimalist room, texture is everything, and the vertical slats of these panels add depth and visual interest without making the space feel busy. Imagine a single accent wall behind a low-profile sofa or a platform bed. The deep, natural wood grain provides a warm, organic contrast to neutral paint colors, concrete floors, or sleek metal finishes. Because they are so elegant, these wall panels can serve as the primary decorative element in the room, allowing you to keep other furnishings simple and functional. They prove that minimalist design doesn’t have to be cold or sterile.
Add Warmth to Industrial Designs
Industrial design often features raw materials like exposed brick, concrete, and steel. While this creates a cool, edgy vibe, it can sometimes feel a bit harsh. Walnut acoustic panels are the perfect way to soften the look and add a layer of sophistication. The warmth of the wood creates a beautiful balance with the cooler tones of metal and stone. In a contemporary home, these panels can define a space, like creating a cozy nook in an open-concept living area or adding a dramatic backdrop to a dining room. They pair exceptionally well with modern lighting fixtures and art, making the whole room feel cohesive and thoughtfully designed.
Get That High-End Commercial Look
Walnut panels instantly signal quality and style, making them a fantastic choice for commercial spaces. In an office, you can use them to create a stunning reception area or as a backdrop for a conference room that will look great on video calls. The acoustic benefits are a major plus here, helping to absorb sound and reduce echo in busy environments. For restaurants, cafes, or retail stores, they can create an intimate and inviting atmosphere that encourages customers to stay longer. If you're a trade professional, incorporating these panels is a surefire way to give your client’s project a high-end, custom feel. You can even apply for a trade account to get access to bulk pricing for larger projects.
Ideas for Every Room in Your Home
You don’t need a massive renovation budget to make a big impact. Walnut acoustic panels are surprisingly easy to install and can transform any room in your house. A popular DIY project is creating a feature wall behind the TV in the living room; it hides cords and makes your entertainment center look sleek and built-in. In the bedroom, installing them behind the bed creates an instant headboard with a cozy, hotel-like feel. Even a small application in a hallway or entryway can add character and make your home feel more custom. They are a simple yet effective way to add architectural detail and warmth to your personal space.
How to Create a Custom Feature Wall
Don’t feel limited to a standard floor-to-ceiling accent wall. You can get creative with how you use walnut panels to design a look that’s uniquely yours. Try installing them horizontally for a different visual effect, or use them to cover only the bottom half of a wall for a modern take on wainscoting. You can also cut the panels to create geometric patterns or frame out specific areas, like an art niche or a fireplace. For a truly custom finish, consider using Unfinished Wood Wall Panels that you can stain to perfectly match your hardwood flooring or other wood furniture in the room. The possibilities are endless.
Ready to Install? Here's How
Installing walnut acoustic panels is a project that can completely change the look and feel of your room in just an afternoon. Whether you’re a seasoned contractor or a weekend DIY warrior, the process is surprisingly straightforward. With a bit of planning and the right tools, you can create a stunning feature wall that also brings a sense of calm to your space. Let’s walk through everything you need to know to get your panels up on the wall perfectly, so you can start enjoying your new, quieter environment.
First Things First: Prepping Your Space
Before you even think about picking up a drill, a little prep work goes a long way. First, let your acoustic wall panels acclimate to the room they’ll be installed in for at least 48 hours. This allows the wood to adjust to the temperature and humidity, preventing any warping later on. Next, make sure your walls are clean, dry, and smooth. Fill any nail holes and sand down any bumps for a flush fit. It’s also a smart idea to check if your walls can handle the weight. If you have any doubts, it's best to consult with a licensed contractor to ensure your walls and ceilings can safely support the slat panels.
Should You DIY or Hire a Professional?
You have two main paths for installation: doing it yourself or hiring a professional. A DIY installation is totally achievable for most people. You can attach the panels directly to the wall using either construction adhesive or screws for a quick and satisfying project. However, if you want to get the absolute best sound-dampening performance, you might want to go the professional route. For maximum sound absorption, a contractor will typically screw the panels into timber batons, leaving a small gap behind them. This space can be filled with insulation material to trap even more sound. If you're a trade professional, you can apply for an account to get access to bulk pricing and project support.
Your Step-by-Step Installation Guide
Ready to tackle this yourself? Here’s a simple guide. First, measure your wall and plan your layout. Decide if you want to cover the entire wall or just create a feature section. If you need to cut any panels to fit around outlets or light switches, do this first with a fine-toothed saw for a clean edge. You can install them quickly and easily by screwing them directly into the wall through the felt backing—use black screws for a seamless look. Alternatively, you can apply a strong construction adhesive to the back of the panel and press it firmly against the wall. A level is your best friend here; use it to make sure everything is perfectly straight before the glue sets.
Gather Your Tools and Materials
You don’t need a workshop full of tools for this project. For a standard installation, you’ll want to have these items on hand:
- A tape measure
- A pencil
- A level
- A fine-toothed saw for any necessary cuts
- A drill with the appropriate bits
- Black screws (if you’re screwing the panels in)
- Strong construction glue or panel adhesive (if you’re gluing them)
Having everything ready before you begin makes the entire process smoother and more enjoyable. Always double-check your measurements before making any cuts—it’s the oldest rule in the book for a reason, and it will save you a lot of headaches.
Method 1: Screwing into Battens for Best Performance
If your main goal is to get the best possible acoustic performance, this is the method for you. For maximum sound absorption, you’ll want to install the panels on timber battens. This involves screwing thin wood strips horizontally onto the wall first, then attaching the acoustic panels directly to the battens. This creates a small air gap between the wall and the panels, which is key for trapping sound waves. To take it a step further, you can fill this space with insulation material to trap even more sound. This approach requires a bit more work, but the payoff in sound quality is significant, making it the preferred method for home theaters, recording studios, or any space where noise reduction is the top priority.
Method 2: Using Construction Adhesive
For a faster, more direct installation, construction adhesive is a fantastic option. This method is perfect for a quick weekend project and is incredibly DIY-friendly. You can attach the panels directly to the wall for a satisfying and immediate transformation. Simply apply a strong construction adhesive in a zigzag pattern to the felt backing of each panel, then press it firmly against the wall, holding it in place for a moment to ensure it bonds. Make sure your wall is clean and smooth before you start. This glue-on method is a straightforward way to get that beautiful wood slat look without the extra step of installing battens, making it a popular choice for creating a simple, stylish feature wall.
Tips for Ceiling Installation and Hiding Wires
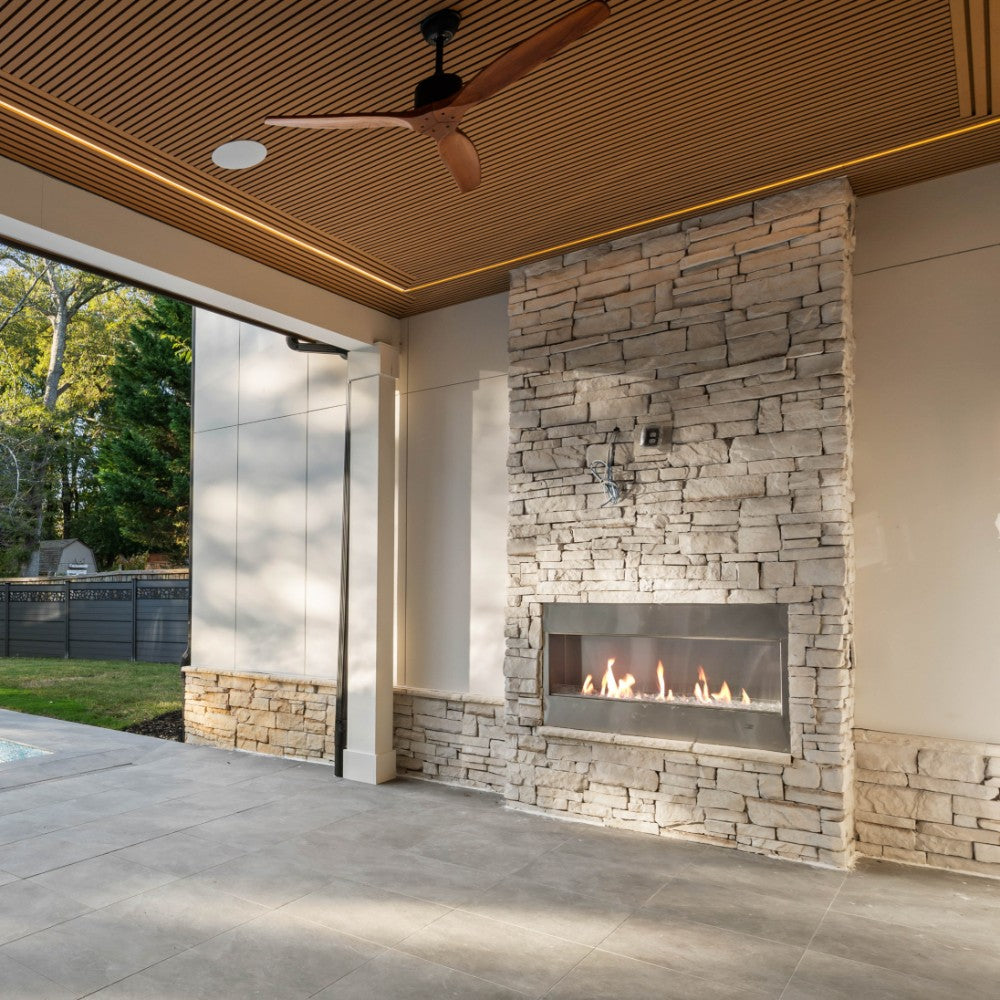
Thinking of taking your design to the ceiling? It’s a great way to add drama and improve acoustics from above. When installing panels on a ceiling, it's crucial to screw them directly into the ceiling beams for secure support—do not rely on adhesive alone for an overhead application. Another great feature of these panels is their ability to create a clean, wire-free look. You can easily hide wires for your TV, speakers, or lighting fixtures behind the panels. This is especially easy if you use the batten installation method, as the gap provides the perfect channel to run cords discreetly, giving your entertainment center or conference room a polished, professional finish.
What Do the Sound Ratings Mean?
So, how well do these panels actually work? The effectiveness of acoustic panels is measured by a Noise Reduction Coefficient, or NRC. This rating, from 0 to 1, tells you how much sound a material can absorb rather than reflect. Our walnut acoustic panels have an excellent NRC rating, absorbing a significant percentage of sound waves that hit them. This helps reduce echo and control background noise, turning sharp, distracting sounds into a softer, more pleasant ambiance. Remember, installing the panels on timber batons with insulation behind them can further improve their sound-absorbing capabilities, giving you even more peace and quiet.
How to Choose the Perfect Walnut Acoustic Panels
Picking the right walnut acoustic panels comes down to balancing your design vision with your practical needs. You’re not just choosing a wall covering; you’re selecting a feature that will define your room’s look and feel. Think about the scale of your project, the level of sound absorption you need, and the overall style you want to achieve. With a clear plan, you can find panels that are both beautiful and functional, turning any wall into a statement piece. Let’s walk through the key factors to consider so you can make a choice you’ll be happy with for years to come.
Choosing the Best Panel Configuration
First, think about what you want your panels to do. Are they purely for looks, or is sound control a top priority? Walnut Acoustic Wall Panels are designed to do both, adding visual warmth while helping to quiet a room. You can install them on walls to create a stunning feature or even on ceilings for a unique architectural touch and enhanced sound dampening. Consider the room's purpose—a home theater needs more acoustic support than a dining room. The right configuration will complement your space while delivering the acoustic performance you need.
Consider Panel Size and Pattern
Walnut acoustic panels aren’t a one-size-fits-all product. They come in various lengths, allowing you to get creative with your design. You can run them vertically from floor to ceiling for a dramatic effect that makes the room feel taller, or you can install them horizontally to create a sense of width. Don’t be afraid to mix and match sizes or cut panels to create custom patterns like herringbone or geometric designs. This flexibility means you can tailor the look to fit your specific wall dimensions and design style perfectly.
Common Panel Dimensions and Packaging
To plan your project accurately, you'll need to know the typical dimensions of these panels. Most acoustic wall panels are designed to fit standard room heights, often coming in lengths around 8 feet. They are usually packaged and sold in boxes containing two panels that are designed to fit together seamlessly. For example, a single box might contain two panels that, when placed side-by-side, cover an area of about 94.5 inches tall by 25 inches wide. This works out to roughly 15.75 square feet of coverage per box, which makes it much easier to figure out how many you’ll need for your wall. Always check the product specifications before you buy, as dimensions can vary slightly between different styles and brands.
Once you know the coverage per box, you can calculate how much material to order. Start by measuring the height and width of your wall to determine the total square footage you need to cover. A crucial pro tip is to always order about 10% more than your final measurement. This extra material acts as a safety net, accounting for any mistakes, tricky cuts you might need to make around outlets or windows, or any damage that could occur during installation. Having a little extra on hand is far less stressful than realizing you’re one panel short right at the end of your project.
How to Spot High-Quality Panels
When you’re comparing panels, look for signs of quality craftsmanship. A high-quality panel will feature a genuine walnut wood veneer on the slats, which gives it that rich, authentic look. The backing material is just as important—it should be made of a thick, high-density felt that effectively absorbs sound. Sturdy construction is another key indicator; the slats should be firmly attached to the felt backing. Reading customer reviews can also give you great insight into a product's durability and ease of installation before you buy.
Setting Your Budget: What to Expect
The cost of walnut acoustic panels can vary depending on the size, brand, and the quantity you need. It’s a good idea to measure your space carefully and set a budget before you start shopping. For larger projects, buying in bulk can often lead to significant savings. If you’re a contractor or designer, it’s worth seeing if you qualify for trade pricing. Many suppliers offer special discounts for professionals, so be sure to fill out a trade application to access the best possible rates for your project.
Typical Costs and Shipping Considerations
When you're planning your budget, it helps to have a clear idea of what to expect. The price for walnut acoustic panels is typically calculated per panel or by the box. For a high-quality panel covering around 15.5 square feet, you can expect the cost to be about $180. This breaks down to just over $11.50 per square foot, making it an affordable way to get a high-end look. Remember to factor in a little extra—it’s a good rule of thumb to order about 10% more than your measurements call for to account for any cuts or mistakes. This small buffer ensures you have enough material to finish the job without any last-minute stress.
Shipping is the other major cost to keep in mind. These fees can vary quite a bit based on how many panels you order and where you’re located. The good news is that costs often become more efficient with larger orders. Many suppliers offer reduced shipping rates for bulk purchases, which is a huge plus for bigger projects. If you’re a contractor or designer, it’s always a smart move to see if you can get access to special pricing. For example, you can fill out a trade application to unlock discounts on both materials and shipping, helping you keep your project on budget while still using premium materials.
Always Check the Warranty and Return Policy
Before you finalize your purchase, always check the warranty and return policy. A reputable supplier will stand behind their product with a clear policy that protects you in case of defects or if the product simply doesn’t meet your expectations. Look for a reasonable return window, like 30 days, for any unused and undamaged items. This gives you a safety net and ensures you have recourse if something isn’t right. Think of it as an extra layer of confidence in your investment, ensuring you’ll be completely satisfied with your new panels.
What to Look for in the Fine Print
When you're choosing your panels, it's smart to think beyond just the color and size. The 'fine print' of your project plan should include how you want the wall to function in your daily life. Are you just looking for a beautiful backdrop, or could it do more? Considering the potential for add-ons and accessories from the start can help you create a feature wall that is not only stunning but also incredibly practical. This is where you can really customize the design to fit your lifestyle, turning a simple wall into a hardworking part of your home's design. Thinking through these details beforehand ensures the final result is perfectly tailored to you.
Explore Available Accessories
Your walnut acoustic panels are the foundation, but the right accessories are what can truly make your feature wall unique. Think of them as the finishing touches that transform a great design into a personalized masterpiece. From adding ambient lighting that sets the mood to incorporating clever storage that keeps your space tidy, accessories allow you to tailor your wall to your exact needs. This is your chance to get creative and add layers of functionality that go far beyond simple sound absorption. Let's look at a couple of popular options that can make your new wall even more impressive and functional for your everyday life.
Integrated LED Lighting
One of the most popular ways to enhance walnut acoustic panels is with integrated LED lighting. By placing LED light strips within the channels between the wood slats, you can create a soft, ambient glow that highlights the rich texture of the walnut. This adds a dramatic, high-end feel to the room and turns your feature wall into a functional light source. It’s perfect for creating a cozy atmosphere in a living room or bedroom, or for adding a touch of modern sophistication to a commercial space. While you're planning, you can also explore complementary lighting fixtures to create a cohesive lighting design throughout the room.
Custom Shelving and Hooks
Why stop at beautiful when you can also have practical? Adding custom shelving and hooks directly to your acoustic panel wall is a brilliant way to blend style with storage. This turns your feature wall into a multi-functional element of your decor. Imagine a small floating shelf in an entryway for your keys, or sleek hooks for coats that blend right into the design. In a home office, you could add shelves for books or decorative items. This approach allows you to keep your space organized and stylish without adding bulky furniture. It’s a fantastic way to personalize your wall panels and make them work even harder for your home.
How to Care for Your Walnut Panels
Your beautiful new walnut panels are up, and your space feels transformed. Now, how do you keep them looking just as stunning for years to come? The good news is that maintenance is surprisingly simple. With just a little bit of regular care, you can ensure your panels remain a beautiful and functional feature in your home or commercial space. A consistent routine will protect the wood, preserve its rich color, and maintain its acoustic properties, so you can enjoy the peace and quiet without any extra fuss.
Think of it less as a chore and more as a way to protect your investment. Whether you're dealing with everyday dust or preparing for long-term durability in a specific room, these straightforward tips will guide you. We’ll cover everything from simple cleaning techniques to applying the right finish, ensuring your panels stay in top-notch condition.
Your Go-To Guide for Regular Cleaning
Keeping your walnut acoustic panels clean is easy and doesn't require any special equipment. For routine upkeep, simply dust the panels once a week with a soft, dry microfiber cloth or a feather duster. This will prevent any buildup on the wood slats and in the felt backing. If you need a slightly deeper clean, you can use a vacuum with a soft brush attachment to gently lift away any persistent dust or debris. For occasional smudges or fingerprints, lightly dampen a clean cloth with water and gently wipe the spot. Just be sure to wring the cloth out thoroughly—too much moisture can harm the wood.
How to Prevent Scratches and Damage
If you choose unfinished panels, you have a fantastic opportunity to customize their look while adding a crucial layer of protection. Applying a finish is a must for raw wood, as it seals the surface from moisture, dirt, and everyday wear. You can choose from several options like oil, wax, lacquer, or varnish, depending on the final look you want. A clear finish will enhance the walnut’s natural grain and deepen its rich, warm tones, truly making the wood’s character pop. Taking this simple step not only safeguards your Unfinished Wood Wall Panels but also ensures they remain a durable and eye-catching feature for the long haul.
Simple Tips for Long-Term Maintenance
A little foresight goes a long way in preserving your panels, especially in certain environments. If you’re installing them in a room with higher humidity, like a bathroom or kitchen, it’s a smart move to apply a water-resistant finish to the front of the wood slats. This creates a barrier against moisture that could otherwise cause damage over time. When installing your wall panels, take a moment to line them up perfectly before securing them in place. They are designed to overlap for a seamless, professional look, and getting the alignment right from the start prevents awkward gaps and ensures a flawless finish that lasts.
Your Planning and Buying Checklist
A little prep work before you buy can make your installation process so much smoother. Running through this checklist will help you get organized, order the right amount of material, and ensure your project turns out exactly as you envisioned.
Step 1: Assess Your Room's Needs
First, think about the room and the wall you have in mind. What’s the goal? Walnut acoustic panels are fantastic because they bring warmth, elegance, and sound control to any space. Are you creating a quiet home office, a cozy living room accent wall, or a sophisticated entryway in a commercial building? Consider the room’s lighting and existing decor to decide how the rich tones of walnut will complement the environment. A clear vision will help you choose the perfect spot to showcase your new Acoustic Wall Panels.
Step 2: Measure and Calculate Your Coverage
Get out your tape measure and find the height and width of the area you plan to cover. Multiply these two numbers to get the total square footage. Our panels come in standard sizes, and each box clearly states how much area it covers—for example, a box might contain two panels that cover about 8 square feet. It’s always a smart move to order about 10% extra material to account for any cuts or mistakes. This little buffer saves you from having to place a second order mid-project.
Step 3: Sketch Out Your Design
Decide how you want the panels to look on the wall. Will they run vertically for a sense of height or horizontally to make the space feel wider? Are you covering the entire wall or creating a smaller feature section, like behind a TV or headboard? Since the panels are designed to overlap, it’s a good idea to line them up on the floor first to see how they fit together. You can even use painter's tape on the wall to outline the placement and get a better visual before you start installing.
Step 4: Order Samples and Match Batches
This might be the most important tip on the list, so listen up. Before you add everything to your cart, order a sample. I know it’s an extra step, but trust me, it’s worth it. A computer screen can’t accurately show you the rich tones and texture of real wood. Seeing a sample in your own room, under your specific lighting, is the only way to know for sure that it’s the perfect fit. Once you’re happy with the sample, the next pro move is to order everything you need in one go. Because walnut is a natural material, slight color variations can occur between different production runs. To get that seamless, high-end finish, you’ll want all of your acoustic wall panels to come from the same batch.
Step 4: Where to Buy Quality Walnut Panels
When you’re ready to buy, you want a supplier you can trust for quality and selection. At USA Builders Depot, we offer a wide selection of beautifully designed and effective Acoustic Wall Panels perfect for any project. Browsing our collection is a great place to start. You can also check out our customer reviews to see how others have used our panels to transform their spaces. We focus on providing high-quality materials that look great and perform even better.
Step 5: Ask About Bulk Pricing
If you’re tackling a large project or are a trade professional, buying in bulk is the way to go. Not only can it save you money, but it also ensures consistency. It’s a good practice to order all the panels you need for a single project at once, as materials from different production batches can have slight color variations. For contractors and designers, our Trade Application offers access to bulk discounts and specialized support to help you get the best materials for your clients at a competitive price.
Related Articles
Frequently Asked Questions
How much sound do these panels actually absorb? They make a noticeable difference in reducing echo and background noise. The panels are designed to absorb a significant portion of sound waves, which helps soften the acoustics in a room. This means conversations become clearer and the space feels much calmer and more focused. While they won't completely soundproof a room, they are highly effective at creating a more pleasant and peaceful environment.
Can I install these panels in a bathroom or kitchen? Yes, you can, but it requires a bit of extra prep. Because these areas have higher humidity, it's a good idea to apply a water-resistant finish to the wood slats before installation. This creates a protective barrier against moisture and ensures the panels stay in great shape. With that simple step, you can confidently bring the warmth of walnut into just about any room.
Are the panels made from solid walnut wood? The panels are constructed with a surface of real walnut wood veneer, which gives them that authentic, rich appearance and natural grain. This veneer is mounted on a sturdy core, and the entire panel is backed with a high-density acoustic felt. This layered design is intentional—it’s what allows the panels to be both lightweight enough for easy installation and incredibly effective at absorbing sound.
How difficult is the installation for a beginner? This is a very manageable DIY project, even for someone without a lot of experience. The panels are designed for straightforward installation. You can either screw them directly into the wall through the felt backing or use a strong construction adhesive. As long as you have a level, a tape measure, and a saw for any necessary cuts, you can achieve a professional-looking result in an afternoon.
Should I choose finished or unfinished panels? This really comes down to your design goals. Finished panels are ready to install right out of the box, offering a beautiful, consistent look with no extra work. Unfinished panels give you the creative freedom to apply your own stain or finish. This is a great option if you want to perfectly match the panels to your hardwood floors, cabinets, or other wood furniture in the room for a truly custom look.


