


When to Glue Engineered Wood: A Complete Guide
You've picked out the perfect engineered hardwood flooring and you're ready for installation. But one critical question can make or break your project: should you glue engineered wood joints? The answer isn't a simple yes or no—it depends entirely on your installation method. Getting this detail right is the difference between a solid, quiet floor that lasts for years and one that develops annoying squeaks or gaps. This guide will show you exactly when to reach for the wood glue and when to leave it on the shelf.
Key Takeaways
- Match Your Gluing Strategy to Your Installation Method: Only glue the tongue-and-groove joints for a floating floor to create a unified surface. For glue-down or nail-down installations, the planks are already secured, making joint glue unnecessary.
- Don't Skip the Foundational Steps: A lasting floor requires a level subfloor, proper acclimation of the wood planks for at least 48 hours, and a perimeter expansion gap to accommodate natural movement.
- Apply the Right Adhesive Correctly: For floating floors, use a quality PVA wood glue. Apply a thin bead inside the groove of the plank, not on the tongue, to create a strong bond without messy cleanup.
What Is Engineered Wood Flooring?
Before we get into the details of glue and joints, let’s make sure we’re all on the same page about what engineered wood flooring is. It looks just like classic solid hardwood, but its construction is completely different—and that difference is key to understanding how to install it correctly. Knowing the fundamentals of your material is the first step to a successful project that will look great for years to come.
How Is Engineered Wood Made?
Think of engineered wood flooring as a high-tech wood sandwich. The top layer, called the veneer, is a thin slice of real, beautiful hardwood—like oak, maple, or hickory. This is the part you see and walk on. Beneath that, there are multiple layers of plywood or high-density fiberboard (HDF) stacked and glued together in alternating directions. This cross-layered core is the secret to its stability. It prevents the planks from expanding and contracting as much as solid wood does with changes in humidity and temperature. This clever design also makes it a more sustainable choice, as it uses less of a precious hardwood tree per plank.
Engineered vs. Solid Hardwood: What's the Difference?
The biggest advantage engineered wood has over solid hardwood is its stability. Because it resists moisture and humidity changes so well, you can install it in places where solid wood isn’t recommended, like basements or directly over concrete subfloors. While it’s more water-resistant, it's important to remember it isn't waterproof, so it's still not the best fit for full bathrooms. Another key difference is refinishing. Solid hardwood can be sanded down and refinished multiple times. With engineered hardwood flooring, you might be able to refinish it once or twice, but only if the top hardwood layer is thick enough. This layered construction also makes it a versatile and often more affordable option.
3 Ways to Install Engineered Wood Flooring
Before we can talk about gluing the joints, it's important to understand the three main ways you can install engineered wood flooring. Each method has its own process, and the one you choose will heavily influence whether you should add glue to the tongue and groove. Your subfloor type, your budget, and your comfort level with DIY projects will all play a role in picking the right path. Let's break down the options so you can make an informed choice for your space.
Installation Method 1: Floating
The floating method is exactly what it sounds like: the floor "floats" over the subfloor. Instead of being fastened down, the planks are connected to each other (usually with a click-lock system or a bead of glue along the joints), and the weight of the assembled floor holds everything in place. This is often the go-to for DIYers because it's fast, straightforward, and requires fewer specialized tools. It works over most existing hard surfaces, but you might notice a bit more flex or sound underfoot compared to other methods. Proper subfloor preparation is still key to preventing any unwanted movement or noise.
Installation Method 2: Glue-Down
For a floor that feels incredibly solid and permanent, the glue-down method is a popular choice. With this technique, you'll spread a special adhesive directly onto the subfloor and set the engineered wood planks into it. This creates a strong bond that eliminates any hollow sounds or sponginess you might get with a floating floor. It’s an excellent option for installation over concrete slabs where nailing isn't possible. The main drawbacks are that it’s a messier process and requires more skill to get right. You also have to factor in drying time before you can walk on your beautiful new hardwood flooring.
Installation Method 3: Nail-Down
The nail-down (or staple-down) method is a traditional technique that provides a secure, long-lasting installation. Using a flooring nailer, the planks are fastened directly to a wooden subfloor through the tongue of each board, hiding the nails from view. This creates a very stable floor with minimal movement. Many professional installers still prefer this method for its reliability. For an even more robust installation, some pros recommend adding a bead of glue to the tongue-and-groove joints before nailing the planks down. This combination helps to prevent any potential squeaks and adds an extra layer of stability over the life of the floor.
Installation Costs: Glue-Down vs. Other Methods
When you're budgeting for your project, the installation method you choose plays a big role in the final cost. The floating method is typically the most wallet-friendly option, especially if you're planning to DIY. It's designed to be straightforward and doesn't require a lot of expensive, specialized tools. On the other end of the spectrum is the glue-down method. While it provides that incredibly solid feel underfoot, it's also a messier and more technical process. This often translates to higher labor costs if you hire a professional, as it takes more time and skill to get it right. The nail-down method falls somewhere in between, also requiring professional expertise and specific tools, which adds to the overall expense. It's all about balancing your budget with the kind of long-term performance you want from your engineered hardwood flooring.
Should You Glue Engineered Wood Joints?
Deciding whether to glue the joints of your engineered wood flooring is one of those questions where the answer is, "it depends." It's not about personal preference; it's about your installation method. The right choice ensures your floor is stable, quiet, and lasts for years, while the wrong one can lead to buckling or gapping.
The key factor is whether you're installing a "floating" floor or a "glue-down" floor. Each method relies on a different source of stability. For a floating floor, the planks aren't attached to the subfloor at all. For a glue-down installation, every plank is fully bonded to the subfloor with adhesive. Understanding which method you're using is the first step to getting this right and achieving a beautiful, long-lasting result with your hardwood flooring. Let's walk through when you should—and shouldn't—reach for that bottle of wood glue.
When to Glue Your Engineered Wood Joints
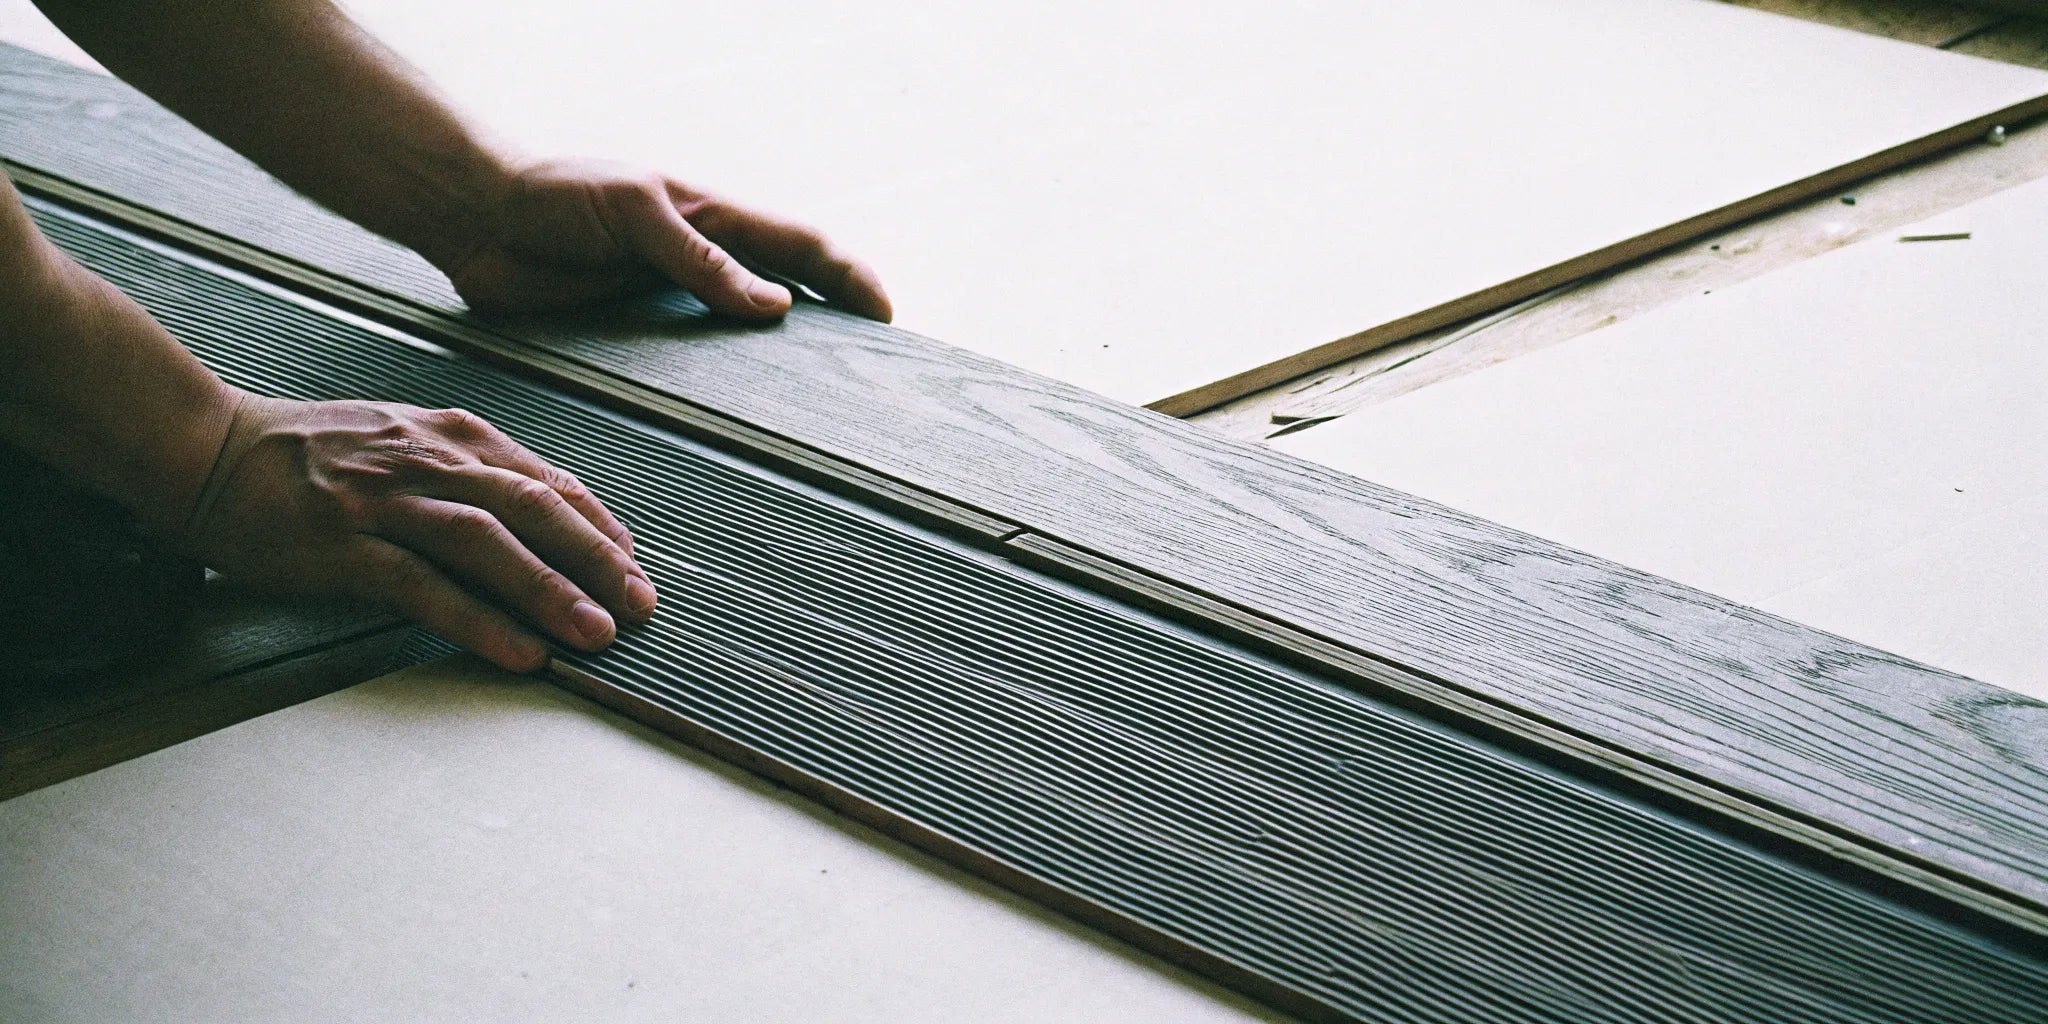
If you're installing your engineered wood using the floating method, then gluing the tongue-and-groove joints is a crucial step. In a floating installation, the planks aren't secured to the subfloor, so they need to be connected to each other to form a single, cohesive surface. By applying a bead of wood glue (a PVA-based glue is a great choice) along the groove of each plank, you effectively lock them together. This prevents individual boards from shifting or separating over time, which can create unsightly gaps. Gluing the joints helps the entire floor expand and contract as one solid unit, giving it the stability it needs to perform well for years.
When It's Better to Skip the Glue
On the other hand, if you are doing a full glue-down installation where each plank is adhered directly to the subfloor, you should not glue the joints. In this scenario, the powerful adhesive bonding the planks to the subfloor is already providing all the stability your floor needs. Adding glue to the tongue and groove would be redundant and could even create problems. It can make the installation process messier and more difficult, and it overly restricts the wood's ability to respond to changes in humidity. The main adhesive is doing the heavy lifting, so you can confidently skip gluing the joints.
Does Your Installation Method Affect the Decision?
Ultimately, your installation method is the only thing that determines whether you glue the joints. It’s a simple rule to follow: glue the joints for a floating floor, and don't glue them for a glue-down floor. With a floating floor, the planks rely on each other for strength, and the glue creates that bond. With a glue-down floor, the planks rely on their connection to the subfloor, making joint glue unnecessary. Getting this detail right is fundamental to a successful installation and ensures your beautiful new engineered wood floors look and perform their best without issues down the road.
The Pros and Cons of Gluing Joints
Deciding whether to glue the tongue-and-groove joints on your engineered wood floor isn't a simple yes or no question. It really comes down to your installation method and what you want to prioritize: long-term stability or future flexibility. Let's walk through the key arguments for and against grabbing that bottle of wood glue so you can make the best choice for your project.
Pro: Get a Quieter, More Stable Floor
The biggest advantage of gluing the joints is that it transforms individual planks into a single, solid surface. When you connect each board to its neighbors, the entire floor moves as one cohesive unit. This is especially beneficial for a floating installation, where the floor isn't attached to the subfloor. A glued floating floor feels more substantial underfoot and significantly reduces the chances of squeaks, creaks, or hollow sounds as you walk across it. If your goal is to get that solid, quiet feel of a traditional hardwood floor, taking the extra step to glue the joints can make a noticeable difference in the final result for your hardwood flooring project.
Con: Harder Repairs and Expansion Risks
On the flip side, creating that single, solid unit has its drawbacks. If a plank gets damaged down the road, you can’t simply pop it out and replace it. The glue creates a permanent bond, meaning a repair often requires cutting out the damaged section and destroying surrounding planks in the process. Furthermore, wood naturally expands and contracts with changes in humidity. A floating floor is designed to accommodate this movement. According to the National Wood Flooring Association's guidelines, restricting this movement by gluing a large expanse of flooring together can create pressure, potentially leading to buckling or lifting over time if proper expansion gaps aren't left around the perimeter.
Con: A More Involved Installation
Gluing joints adds another layer of complexity and time to your installation. You have to be careful and precise, applying just the right amount of glue without creating a mess that seeps onto the surface of your new floors. Too much glue can also interfere with the locking mechanism of the planks, preventing them from fitting together tightly. For many installers, if you're already doing a full glue-down installation to the subfloor, adding glue between the joints is an unnecessary step. The adhesive securing the planks to the subfloor already provides all the stability you need. For complex jobs, it's often best to work with a professional, and contractors can sign up for our trade program for project support.
What's the Best Glue for Engineered Wood Joints?
Choosing the right adhesive is just as important as the flooring itself. When you’re installing a floating engineered floor, your goal is to create a single, solid surface by bonding the tongue and groove of each plank. This unified slab of flooring then "floats" over the subfloor. This method prevents individual boards from separating over time, which is a common cause of annoying squeaks and unsightly gaps. You can’t just grab any all-purpose glue from your toolbox; you need an adhesive specifically formulated for wood that can handle the floor's natural movement.
The ideal glue creates a powerful bond that holds the planks together securely while still allowing for a tiny bit of flexibility. As your home’s temperature and humidity change throughout the year, your hardwood flooring will naturally expand and contract as a single unit. A glue that is too rigid can lead to immense stress on the joints, potentially causing the boards to crack or buckle under pressure. On the other hand, a glue that's too weak won't hold up, and you'll be back to square one with separating planks. The right choice is a crucial step in ensuring your floor remains stable, quiet, and beautiful for years to come.
Why We Recommend PVA Wood Glue
For gluing the joints of engineered wood, your best bet is a high-quality PVA (Polyvinyl Acetate) wood glue. This is the classic woodworker’s glue you’re probably familiar with, and it’s perfect for this job. PVA glue is designed to penetrate wood fibers, creating a bond that is often stronger than the wood itself. It dries relatively quickly but allows enough working time to position your planks perfectly. Most importantly, it cures to a semi-rigid state, providing the strength needed to keep joints tight without being so brittle that it cracks under the floor’s natural movement.
How to Apply Glue the Right Way
Proper application is key to getting a secure, clean finish. First, run a thin, continuous bead of PVA glue along the bottom of the groove on the plank you are installing. Avoid applying it to the tongue, as this can create a mess and lead to excess glue squeezing out onto the floor’s surface. Once you’ve applied the glue, fit the next plank into place, using a tapping block to ensure a snug fit. If any glue does squeeze out, wipe it away immediately with a damp cloth. Dried glue is much harder to remove and can leave a hazy film on your new flooring.
Choosing the Right Adhesive for a Full Glue-Down Installation
When you opt for a full glue-down installation, you're choosing a method known for its solid, permanent feel. But the success of this approach hinges almost entirely on the adhesive you use. This isn't the place to cut corners; the right glue does more than just stick your beautiful hardwood flooring to the subfloor. It acts as a moisture barrier, a sound dampener, and a flexible bond that moves with your home. Think of it as the unsung hero of your flooring project. Choosing the wrong product can lead to hollow spots, board separation, or even moisture damage down the line. Let's break down the types of adhesives available and the modern features that can make your installation a lasting success.
Types of Adhesives and Their Properties
Walking down the adhesive aisle can feel overwhelming, with tubs and tubes all promising the best results. In reality, most high-performance flooring adhesives fall into a few key categories. Understanding the differences between them will help you select the perfect match for your specific subfloor and environment. Whether you're dealing with a concrete slab in a humid climate or a plywood subfloor in a dry one, there's an adhesive engineered to handle the job. The main players are urethane, modified silane polymer (MSP), and hybrid polymer adhesives, each with its own unique strengths and characteristics.
Urethane Adhesives
Urethane adhesives have long been a top choice for professional installers, and for good reason. Products like Bostik's BEST® are known for their incredible bonding strength and moisture control. This type of adhesive creates a powerful, permanent bond while also forming a barrier that helps prevent moisture vapor from migrating up through a concrete subfloor. This is a huge benefit, as it protects your wood flooring from potential warping or damage. Urethane glues are also known for their elasticity, allowing them to move with the natural expansion and contraction of the wood, which helps prevent cracks and gaps over time.
Modified Silane Polymer (MSP) Adhesives
Modified Silane Polymer (MSP) adhesives are another excellent option, offering a strong bond with some added benefits. These adhesives, sometimes called modified silicon polymers, are known for their versatility and superior elasticity. They adhere well to a variety of subfloors and are often easier to clean up than traditional urethane glues when wet. A key advantage of many MSP adhesives is their sound-deadening quality. They can help reduce impact noise and sound transmission between floors, making for a quieter home. This makes them a great choice for multi-level homes or condos where acoustic performance is a priority.
Hybrid Polymer Adhesives
Hybrid polymer adhesives combine the best features of different technologies to create a multi-purpose product. These advanced formulas often provide the strong bonding power of urethanes with the flexibility and ease of use found in silane-based glues. Many hybrid polymers are marketed as "all-in-one" solutions that offer a strong bond, moisture protection, and sound reduction in a single application. This can save you time and money by eliminating the need for separate moisture barriers or underlayments. If you're looking for a high-performance adhesive that can handle multiple jobs at once, a hybrid polymer is definitely worth considering.
Special Features of Modern Flooring Adhesives
Today's flooring adhesives are much more than just simple glues. They are advanced chemical systems designed to solve multiple problems at once, protecting your investment and making your home more comfortable. From blocking moisture to dampening sound, these special features can make a huge difference in the long-term performance and feel of your new floor. When you're comparing products, look beyond the basic bonding strength and consider these value-added benefits that can save you from headaches and extra expenses down the road. These innovations are what separate a good installation from a great one.
All-in-One Moisture Barriers
One of the biggest threats to any wood floor is moisture, especially when installing over a concrete subfloor. Many modern adhesives now include a built-in moisture barrier. These "all-in-one" products are designed to block moisture vapor from rising through the concrete and reaching the wood. Using an adhesive with an integrated moisture barrier can save you the significant time and expense of applying a separate damp-proof membrane. It streamlines the installation process and gives you peace of mind knowing your beautiful engineered hardwood floors are protected from below.
Soundproofing and Acoustic Control
If you've ever lived below someone with hard-surface floors, you know how easily sound can travel. Some advanced adhesives are formulated with sound-deadening properties to help with this. These products create a flexible membrane that absorbs impact sound, reducing the noise of footsteps and other sounds that would normally transfer through the floor to the room below. This is an especially valuable feature for installations in apartments, condos, or second-story rooms. Choosing an adhesive with acoustic control can contribute to a quieter, more peaceful living environment for everyone.
Crack Bridging Capabilities
Subfloors, especially concrete ones, can develop small cracks over time. A standard, rigid adhesive might transfer that stress directly to your flooring, potentially causing a plank to crack or a joint to fail. High-end adhesives with crack bridging capabilities remain flexible after curing. This elasticity allows the adhesive to stretch and move with the subfloor, effectively "bridging" minor cracks without compromising the bond or damaging the flooring above. This feature adds a layer of durability to your installation, ensuring it can withstand the minor imperfections and movements of the subfloor over the long term.
Low-VOC and Water-Free Formulas
Indoor air quality is a growing concern for many homeowners. Volatile Organic Compounds (VOCs) are chemicals that can be released into the air from various building materials, including adhesives. Many modern flooring glues are formulated to be low-VOC, meaning they release fewer harmful chemicals, making them a healthier choice for your home. Additionally, water-free formulas are important because introducing water during a wood floor installation can cause the planks to swell or warp. Using a 100% solids, water-free adhesive ensures a stable and reliable installation from the start.
Critical Subfloor Preparation for Glue-Down Installation
You can buy the best flooring and the most advanced adhesive on the market, but if your subfloor isn't properly prepared, your project is destined for problems. The subfloor is the foundation of your new floor, and any issues with it—like moisture, unevenness, or debris—will eventually show through. Taking the time to get the subfloor right is the most important investment you can make in your flooring project. A clean, flat, and dry subfloor is non-negotiable for a successful glue-down installation. This foundational work ensures the adhesive can create a permanent, unyielding bond, giving you a floor that looks and feels solid for decades.
Checking Subfloor Moisture Levels
Before you even think about opening a bucket of adhesive, you must check the moisture level of your subfloor. This is especially critical for concrete slabs, which can hold a surprising amount of water. You can use a professional moisture meter to get an accurate reading. For wood subfloors, the moisture content should generally be between 6-9%. For concrete, you'll need to follow the specific requirements laid out by the adhesive manufacturer. Skipping this step is a huge gamble; excessive moisture is the number one cause of flooring failure, leading to cupping, buckling, and adhesive breakdown.
Applying a Damp Proof Membrane (DPM) to Concrete
If your concrete subfloor has a high moisture reading, you'll need to address it before proceeding. One common solution is to apply a liquid Damp Proof Membrane (DPM). A DPM is a coating that you roll onto the concrete to create a waterproof barrier, preventing moisture from rising up and reaching your flooring. It's crucial to let the DPM dry completely according to the manufacturer's instructions before you begin applying the flooring adhesive. If you've chosen an all-in-one adhesive with a built-in moisture barrier, you may be able to skip this step, but only if the subfloor's moisture level is within the adhesive's specified limits.
Ensuring Your Subfloor is Suitable
Beyond being dry, your subfloor must be perfectly flat and clean. Use a long straightedge to check for high and low spots. Any variations greater than 3/16 of an inch over a 10-foot span should be corrected. You can grind down high spots and use a self-leveling compound to fill in low spots. Finally, the subfloor needs to be completely free of dirt, dust, paint, drywall compound, or any other contaminants that could interfere with the adhesive's bond. A thorough sweep and vacuum is the final step before you can start laying your beautiful new hardwood flooring.
Key Steps for a Flawless Glue-Down Installation
With your subfloor prepped and your adhesive selected, you're ready for the main event. A successful glue-down installation is all about precision and following a methodical process. Unlike a floating floor, you don't get a second chance once a plank is set in the adhesive, so working carefully and deliberately is key. From understanding the product specifications to planning your layout and keeping things clean, every step plays a role in the final outcome. Following these essential guidelines will help you achieve a professional-quality finish that is strong, stable, and looks absolutely stunning.
Always Read the Technical Data Sheet (TDS)
Every adhesive product comes with a Technical Data Sheet (TDS), and reading it is the most important step you can take. This document is your instruction manual, and it contains critical information you won't find on the side of the bucket. The TDS will tell you the correct trowel size to use to achieve the right spread rate for proper adhesion and moisture protection. It will also specify the "open time"—the amount of time you have to install planks before the glue starts to set. Ignoring the TDS is a recipe for failure, so make sure you read and understand it before you begin.
Leave the Correct Expansion Gap
Even though you are gluing the floor down, wood is a natural material that will still expand and contract with changes in temperature and humidity. To accommodate this movement, you must leave an expansion gap around the entire perimeter of the room. A gap of about 7-10 mm (around 3/8 of an inch) between the flooring and the walls, cabinets, and any other vertical obstructions is standard. This space will be covered by baseboards or quarter-round molding after the installation is complete, so you won't see it. This gap is crucial for preventing the floor from buckling under pressure.
Stagger Planks for a Professional Look
To achieve the classic, natural look of a hardwood floor, you need to stagger the end joints of the planks from one row to the next. Avoid lining up the seams, which can create a repetitive and unnatural "H" pattern. A good rule of thumb is to ensure the end joints in adjacent rows are at least 6 inches apart. This not only looks better but also adds structural integrity to the entire floor. Starting each new row with the piece you cut off from the end of the previous row (as long as it's a reasonable length) is an easy way to create a random, staggered appearance.
Clean Up Excess Adhesive Immediately
No matter how careful you are, some adhesive will likely squeeze up between the planks or get onto the surface of the floor. It is absolutely essential to clean this up immediately while it's still wet. Once the adhesive cures, it can be extremely difficult to remove without damaging the floor's finish. Most adhesive manufacturers sell specific wipes or removers designed for their products. Keep a supply of these on hand and be vigilant about cleaning as you go. A clean installation is a professional installation, and this final detail will ensure your new floors look perfect.
Gluing Engineered Wood? Avoid These Common Mistakes
Gluing the tongue and groove of your engineered wood flooring can create a solid, seamless surface, but a few common missteps can turn a dream project into a headache. Getting the details right is what separates a professional-looking installation from one that fails down the road. Whether you’re a seasoned contractor or a hands-on homeowner, avoiding these key mistakes will ensure your new floor is stable, beautiful, and built to last. Let’s walk through what not to do, so you can get it right the first time.
Mistake #1: Using Too Much Glue
It’s tempting to think that more glue means a stronger bond, but the opposite is often true. Applying too much adhesive is one of the most frequent mistakes in a floating installation. Excess glue gets squeezed out of the joints, creating a sticky mess on the surface of your beautiful new planks that’s a pain to clean up. More importantly, that overflow can prevent the planks from locking together tightly, leading to a weaker bond and potential gaps over time. The goal is a thin, continuous bead of glue right in the groove—just enough to secure the joint without the messy overflow. A little goes a long way here.
Mistake #2: Skipping Subfloor Prep
Your finished floor is only as good as the foundation it’s built on. Skipping subfloor preparation is a critical error that can undermine your entire installation. Before you even think about laying the first plank, your subfloor must be perfectly clean, dry, and level. Any debris, moisture, or uneven spots will cause problems, from hollow-sounding areas to planks that won’t lie flat. This isn’t the place to cut corners. Taking the time to properly prepare your subfloor ensures your engineered wood has a stable base to rest on, which is essential for its long-term performance and durability. A smooth start guarantees a smooth finish.
Mistake #3: Forgetting Acclimation and Expansion Gaps
Wood is a natural material that breathes—it expands and contracts with changes in temperature and humidity. That’s why two of the most important steps are acclimation and leaving an expansion gap. Before installation, you need to let your engineered hardwood flooring sit in the room for at least 48–72 hours. This allows the planks to acclimate to the home’s environment. When you install the floor, you must also leave a small gap (usually about ¼ to ½ inch) around the perimeter of the room. This expansion gap gives the floor space to move naturally without buckling or warping. Skipping either of these steps is a recipe for a floor that could bubble or separate over time.
How Your Home's Climate Affects Your Floor
Your home isn't a static environment. Factors like humidity, temperature, and the condition of your subfloor create a unique setting that directly influences how your new flooring will perform over time. Before you decide whether to glue the joints of your engineered hardwood flooring, you need to take a close look at the room where it will be installed. Ignoring these environmental factors is one of the most common reasons for flooring issues down the road, like buckling, gapping, or annoying squeaks. It's a detail that can make or break the entire project.
Think of it as setting your project up for success from the very beginning. By assessing your home’s moisture levels and the state of your subfloor, you can choose an installation method that works with your environment, not against it. This proactive approach ensures your floor not only looks beautiful on day one but also remains stable and quiet for years to come. It’s a critical step that protects your investment and gives you peace of mind, saving you from costly repairs and headaches later. A little prep work here goes a long way in guaranteeing a floor you'll love for a lifetime.
First, Check for Humidity and Moisture
Wood is a natural material that breathes, meaning it expands when it absorbs moisture and contracts when it dries out. High humidity can cause your engineered wood planks to swell, creating pressure between the boards. If you’re installing flooring over a concrete slab, you also need to check for dampness. Moisture from the concrete can slowly work its way into the wood, compromising the adhesive and the planks themselves. Before you begin, use a hygrometer to check the room's relative humidity and a moisture meter for the subfloor to ensure they are within the manufacturer's recommended range.
Next, Consider Your Subfloor Type
The foundation of your new floor is the subfloor, and it needs to be in excellent condition—specifically, it must be clean, flat, and stable. An uneven subfloor is a recipe for problems, causing planks to flex and make noise when you walk on them, even if the joints are glued. As a rule of thumb, your subfloor shouldn't have any dips or peaks greater than 1/8 of an inch over a 6-foot span. Whether you have a plywood or concrete subfloor, take the time to level any high spots and fill in any low spots. This preparation is non-negotiable for a professional-quality result that lasts.
When to Consider a Different Installation Method
Gluing the joints of your engineered wood floor can create a solid, seamless surface, but it’s not the only path to a beautiful result. Sometimes, a different installation method is a better fit for your project, your timeline, or your comfort level with DIY tasks. If you're looking for a simpler approach or if your subfloor conditions aren't ideal for a full glue-down application, exploring other options is a smart move. Let's look at two key considerations: the popular floating floor method and when it makes sense to call in a professional for the job.
Floating Floors: The DIY-Friendly Option
If you’re tackling your flooring project yourself, the floating method is your best friend. With this technique, the engineered wood planks connect to each other but aren't glued or nailed to the subfloor. The floor's own weight holds it in place. This is one of the fastest and easiest ways to install hardwood flooring because you don't have to mess with adhesives or wait for anything to dry. You might notice a little bit of flex underfoot, but for many homeowners, the speed and simplicity are well worth it. It’s a straightforward approach that delivers great results without the complexity of other methods.
Why It's Sometimes Best to Hire a Pro
While a DIY installation is tempting, some situations really benefit from a professional touch. A trained wood floor fitter has the experience to handle tricky layouts and ensure a flawless finish. More importantly, they know how to properly prep the site. Before any flooring is installed, the building should be sealed from the weather, and messy jobs like painting or plastering must be completely finished and dry. If you have a concrete subfloor, a pro will test for moisture—a critical step, as dampness can ruin your beautiful new floors over time. For complex jobs or peace of mind, hiring trusted trade professionals is a wise investment.
Related Articles
- How to Install Engineered Hardwood Flooring Like a Pro
- How to Install an Engineered Hardwood Floor
- Engineered Wide Plank Hardwood Flooring: A Buyer's Guide
- How to Install Engineered Hardwood: A DIY Guide
