


How to Install Fiber Cement Siding: A Pro Guide
A siding project can feel like a huge undertaking, but getting it right is totally achievable. Fiber cement is a fantastic choice for its durability and good looks, but a flawless installation comes down to the details. This guide is here to help. We break down exactly how to install fiber cement siding into simple, actionable steps. We’ll cover everything from prepping your walls and making clean cuts to avoiding the common mistakes that can compromise your work. The result? A professional-grade finish that protects your home for decades.
Key Takeaways
- Prep Work Is Your Best Defense Against Moisture: Your siding is only as good as the wall behind it. Take the time to repair the sheathing, install a continuous weather-resistant barrier, and properly flash all openings to prevent water damage before it can start.
- Handle, Cut, and Fasten with Precision: Avoid common installation errors by using the right blade for clean cuts, carrying panels vertically to prevent cracks, and driving fasteners flush with the surface—never too deep or too shallow—while leaving proper expansion gaps.
- Sealing Is a Two-Step Process: For a truly durable finish, you must seal the siding twice. First, paint all raw, cut edges before you install the panel. Second, apply a high-quality exterior caulk to all joints around windows, doors, and trim after installation.
What Exactly Is Fiber Cement Siding?
So, what exactly is fiber cement siding? Think of it as a super-durable, low-maintenance shield for the outside of a building. It’s a composite material made from a straightforward mix of cement, sand, water, and cellulose fibers. This simple recipe creates a siding material that’s incredibly tough and resilient, offering a fantastic alternative to traditional wood or vinyl siding.
Because of its strength, fiber cement is a popular choice for both new home construction and renovation projects. It’s designed to protect your home’s exterior from the elements for decades without the constant upkeep that wood requires. Unlike vinyl, it’s thicker and more substantial, giving it a more premium look and feel. You get the best of both worlds: a material that can mimic the classic charm of wood grain but performs with the strength of concrete. Whether you’re a contractor looking for a reliable product or a homeowner planning a forever home, fiber cement boards provide a dependable and attractive solution.
Why Is Fiber Cement a Smart Choice?
The real question is, why should you choose it for your project? One of the biggest advantages of fiber cement siding is its exceptional durability. It’s built to withstand just about anything nature throws at it, from heavy rain and high winds to freezing temperatures. Unlike wood, it won’t rot, warp, or fall victim to termites and other pests. It’s also non-combustible, which can provide peace of mind and may even help with homeowner’s insurance. You get the classic, beautiful aesthetic of wood siding without the constant scraping, staining, and sealing. It’s a smart, long-term investment in your property’s protection and curb appeal.
Drawbacks and Considerations of Fiber Cement Siding
While fiber cement is an incredible material, it's important to look at the full picture before making a final decision. No siding option is perfect for every single project, and understanding the potential downsides helps you plan better and ensure you get the long-term results you want. Being aware of these factors doesn't mean you shouldn't use fiber cement; it just means you can go into the installation process with your eyes open, ready to address them. From its thermal properties to its maintenance needs, here are a few key things to keep in mind as you weigh your options for your home’s exterior.
Poor Energy Efficiency
When we talk about how well a material prevents heat transfer, we use a measurement called an R-value—a higher number means better insulation. Fiber cement has a relatively low R-value of about 0.15, meaning it doesn't offer much insulation on its own. For comparison, wood siding sits around 0.81, and some insulated vinyl siding options can reach an R-value of 2.0 to 3.5. This means that with fiber cement, heat can escape or enter your home more easily. To counteract this, it's essential to pair it with a high-quality continuous insulation system installed behind the siding to keep your home comfortable and manage energy costs effectively.
Moisture Absorption
One of the most critical things to know about fiber cement is that, despite its durability, the material itself can absorb and hold moisture. If water gets behind the panels or soaks into unsealed edges, it can lead to damage, rot, and mold over time. This is precisely why a meticulous installation is non-negotiable. Every single cut edge must be sealed, and all gaps around windows, doors, and trim must be properly caulked and flashed. Following the manufacturer’s instructions to the letter is the only way to create a water-tight barrier, protect your home, and ensure you don’t accidentally void the warranty.
High Maintenance Requirements
Fiber cement is often marketed as a low-maintenance product, and compared to wood, it certainly is. However, it is not a "no-maintenance" material. To keep it protecting your home and looking great, it will require some upkeep. The siding will need to be repainted periodically to maintain its protective finish. Even factory-painted products with 15-year finish warranties can fade or peel sooner depending on the climate and sun exposure. You will also need to regularly inspect the caulk joints and re-apply sealant as needed to prevent moisture intrusion and keep the siding system performing as it should.
Environmental Impact
Finally, it’s worth considering the environmental footprint of fiber cement. Although it’s made from natural and sustainable materials like wood pulp and cement, the manufacturing process is quite energy-intensive. It’s also an incredibly heavy and dense material. Because of its weight, transporting fiber cement boards from the factory to the job site requires more fuel than lighter alternatives like vinyl. While its exceptional longevity means you won't be replacing it anytime soon, the upfront energy consumption and shipping emissions are factors to be aware of when making an environmentally conscious choice.
Exploring Your Panel and Style Options
One of the best parts about fiber cement is that you aren’t stuck with just one look. It comes in a variety of styles, so you can find the perfect fit for your home’s architectural design. You can choose traditional horizontal lap siding for a timeless look, or go with sleek vertical panels for a more modern feel. There are also options that mimic the look of shingles or shakes, which are perfect for adding character to gables or entire homes. These wall panels can come with a smooth finish for a clean, contemporary style or a textured wood-grain finish that looks remarkably like real wood. This versatility allows you to achieve your desired aesthetic without compromising on performance.
Your Siding Installation Checklist: Tools & Materials
A smooth installation project starts long before you hang the first panel. Think of it like gathering your ingredients before you start cooking—having everything you need within arm’s reach makes the entire process easier, safer, and more efficient. Taking the time to organize your tools, materials, and safety equipment now will save you from frustrating interruptions later. You’ll want to make sure you have the right saw blade for clean cuts, the correct fasteners for a secure hold, and the proper safety gear to protect yourself from dust and debris. A little preparation goes a long way in achieving that professional, long-lasting finish you’re looking for. Below is a complete checklist of what you’ll need to get the job done right.
The Tools You'll Absolutely Need
You don’t need a workshop full of fancy equipment, but a few key tools are non-negotiable for working with fiber cement. The most important is a circular saw fitted with a polycrystalline diamond-tipped blade, which is designed to cut through this dense material cleanly without creating excess dust. You’ll also need a quality measuring tape, a level, and a caulk gun for sealing joints. For fastening the panels, have a hammer or a pneumatic nailer ready. These basic tools will help you measure accurately, cut precisely, and install your siding securely for a flawless result that stands the test of time.
Specialty Tools: Siding Nailers and Gauges
While you can install fiber cement by hand-nailing, a pneumatic siding nailer is a game-changer for both speed and precision. This tool ensures every fastener is driven perfectly flush with the panel's surface. Why does that matter so much? An improperly driven nail—either too deep or left sticking out—can compromise the siding's seal and create an uneven finish. Leading manufacturers recommend using a pneumatic tool as a best practice to get a consistent, secure attachment every time. Investing in or renting a siding nailer will save you a ton of time and help you achieve that clean, professional look.
Now, let's talk about one of the cleverest tools for this job: siding gauges. If you've ever tried to hold a long, heavy panel level while also trying to nail it, you know it’s practically a two-person job. Siding gauges, like the popular Gecko Gauge, solve this problem completely. These simple tools clamp onto the siding course below, creating a perfect ledge to support the next panel for hands-free nailing. This not only makes a one-person installation possible but also guarantees a consistent overlap and perfectly straight lines. Using a siding gauge is one of those pro tips that makes a huge difference in the final quality of your work.
Must-Have Materials and Fasteners
Beyond the tools, you’ll need the right materials to ensure your siding is properly installed and weatherproof. First, of course, are your fiber cement boards. For fasteners, choose corrosion-resistant options like galvanized or stainless steel nails or screws. This is critical for preventing rust stains from appearing on your siding down the road. Screws specifically designed for cement boards, often called Durock screws, are an excellent choice because they create their own holes and sit flush with the panel surface. You will also need a weather-resistant barrier (house wrap), flashing for windows and doors, and high-quality exterior-grade caulk.
Safety First: Your Essential Gear
Working with fiber cement siding requires putting safety first, especially when cutting. The dust created contains crystalline silica, which can be harmful if inhaled. Always wear a well-fitting N95 dust mask or respirator to protect your lungs. Safety glasses or goggles are also essential to shield your eyes from dust and flying debris. Finally, a good pair of work gloves will protect your hands while handling the heavy, sometimes sharp-edged panels. Using fiber cement shears or a saw with a dust-collecting vacuum attachment can also significantly reduce airborne particles, creating a much safer work environment for everyone on site.
How to Prep Your Walls for Installation
A beautiful, long-lasting siding job starts with what’s underneath. Before you even think about hanging the first panel, you need to give your exterior walls some serious attention. This prep work is the single most important factor in preventing moisture damage, ensuring the siding lies flat, and making sure your hard work lasts for decades. Skipping these steps can lead to costly repairs down the road, so think of this as setting the foundation for a successful project. A properly prepared wall provides a stable, dry, and even surface that allows your new fiber cement siding to perform exactly as it should. It’s a bit of upfront effort that pays off big time in the long run. It's the difference between a professional-grade finish and one that looks uneven or fails prematurely. Taking the time to inspect, repair, and waterproof the walls creates a perfect canvas for your new siding, giving you peace of mind that your home is protected from the elements.
Choosing Between Primed vs. Prefinished Siding
One of the first decisions you'll make is whether to use prefinished or primed fiber cement siding. Prefinished siding comes from the factory with a durable, baked-on coat of paint, saving you a ton of time and labor on-site. The finish is incredibly consistent and often comes with a warranty. On the other hand, primed siding arrives ready for you to paint any color you choose, offering unlimited design flexibility. While it might be slightly less expensive upfront, remember to factor in the cost and time of painting. No matter which option you go with, there’s one rule you can’t ignore: you must seal every single cut edge with a high-quality latex paint before you install the panel. This crucial step protects the board’s core from moisture and is essential for a long-lasting installation.
Planning Your Layout with a Story Pole
For a truly professional-looking finish, you need a solid plan. This is where a story pole comes in. A story pole is simply a long, straight board (like a 1x2) that you use as a template for your siding layout. Mark the locations of your windows, doors, and soffits on the pole. Then, lay out your siding courses to see how they line up with these features. This simple tool helps you avoid awkward, thin strips of siding above or below windows. By making small adjustments to the exposure of each row, you can create a balanced and visually appealing layout across the entire wall. Taking ten minutes to create a story pole can save you hours of frustration and prevent mistakes that are difficult to fix later.
How to Properly Store Your Siding On-Site
How you store your siding before installation is just as important as how you install it. Fiber cement panels are heavy and can be damaged if not handled correctly. Always store your fiber cement boards flat on a level surface—never on uneven ground, which can cause them to warp or bow. It’s best to keep them elevated off the ground on pallets or scrap lumber to prevent moisture from wicking up from below. Make sure to keep the stack covered with a waterproof tarp to protect it from rain, dirt, and direct sunlight. Proper storage ensures your materials remain clean, dry, and in perfect condition, so they’re ready to go when you are. This simple step protects your investment and prevents installation issues caused by damaged panels.
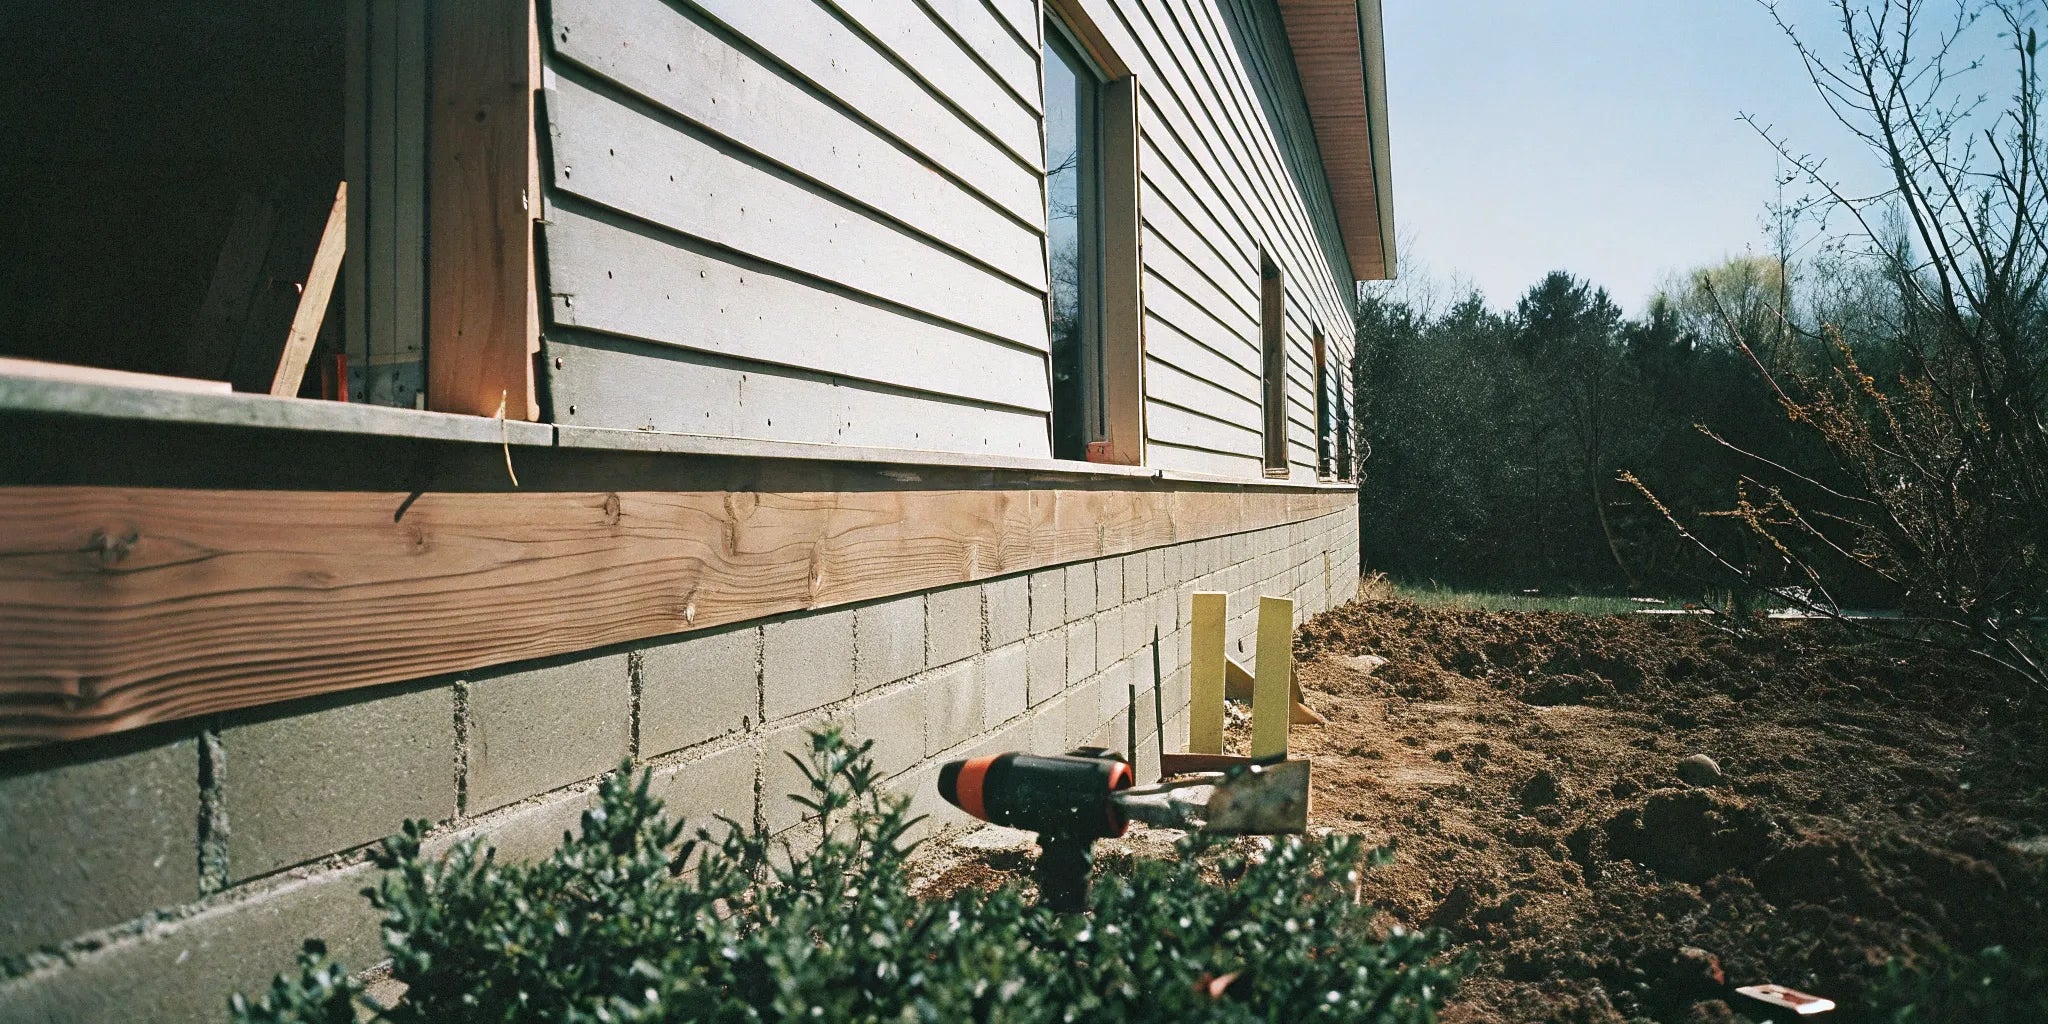
Check and Prepare the Wall Sheathing
First things first: you need a clean slate. Start by removing all the old siding to get a clear view of the wall sheathing underneath. This is your chance to play detective. Carefully inspect every square foot for signs of trouble—look for soft spots, water stains, or any indication of rot. If you find any damaged sections, you must repair or replace them before moving forward. Once you’ve addressed any issues, check that the sheathing is securely fastened to the wall studs. A solid, stable base is essential for supporting the weight of the new fiber cement boards and ensuring a perfectly flat finish.
How to Install the Moisture Barrier
With your sheathing in top shape, the next step is to wrap your home in a protective layer. A weather-resistant barrier (WRB), often called house wrap, acts like a raincoat for your house. Its job is to block liquid water from getting into the wall cavity while still allowing water vapor to escape, which helps prevent mold and rot. Make sure the wall surface is completely dry before you begin. Install the barrier according to the manufacturer’s guidelines, overlapping the seams correctly and sealing them with the recommended tape. This continuous barrier is your home’s primary defense against moisture intrusion.
Properly Flashing Windows and Doors
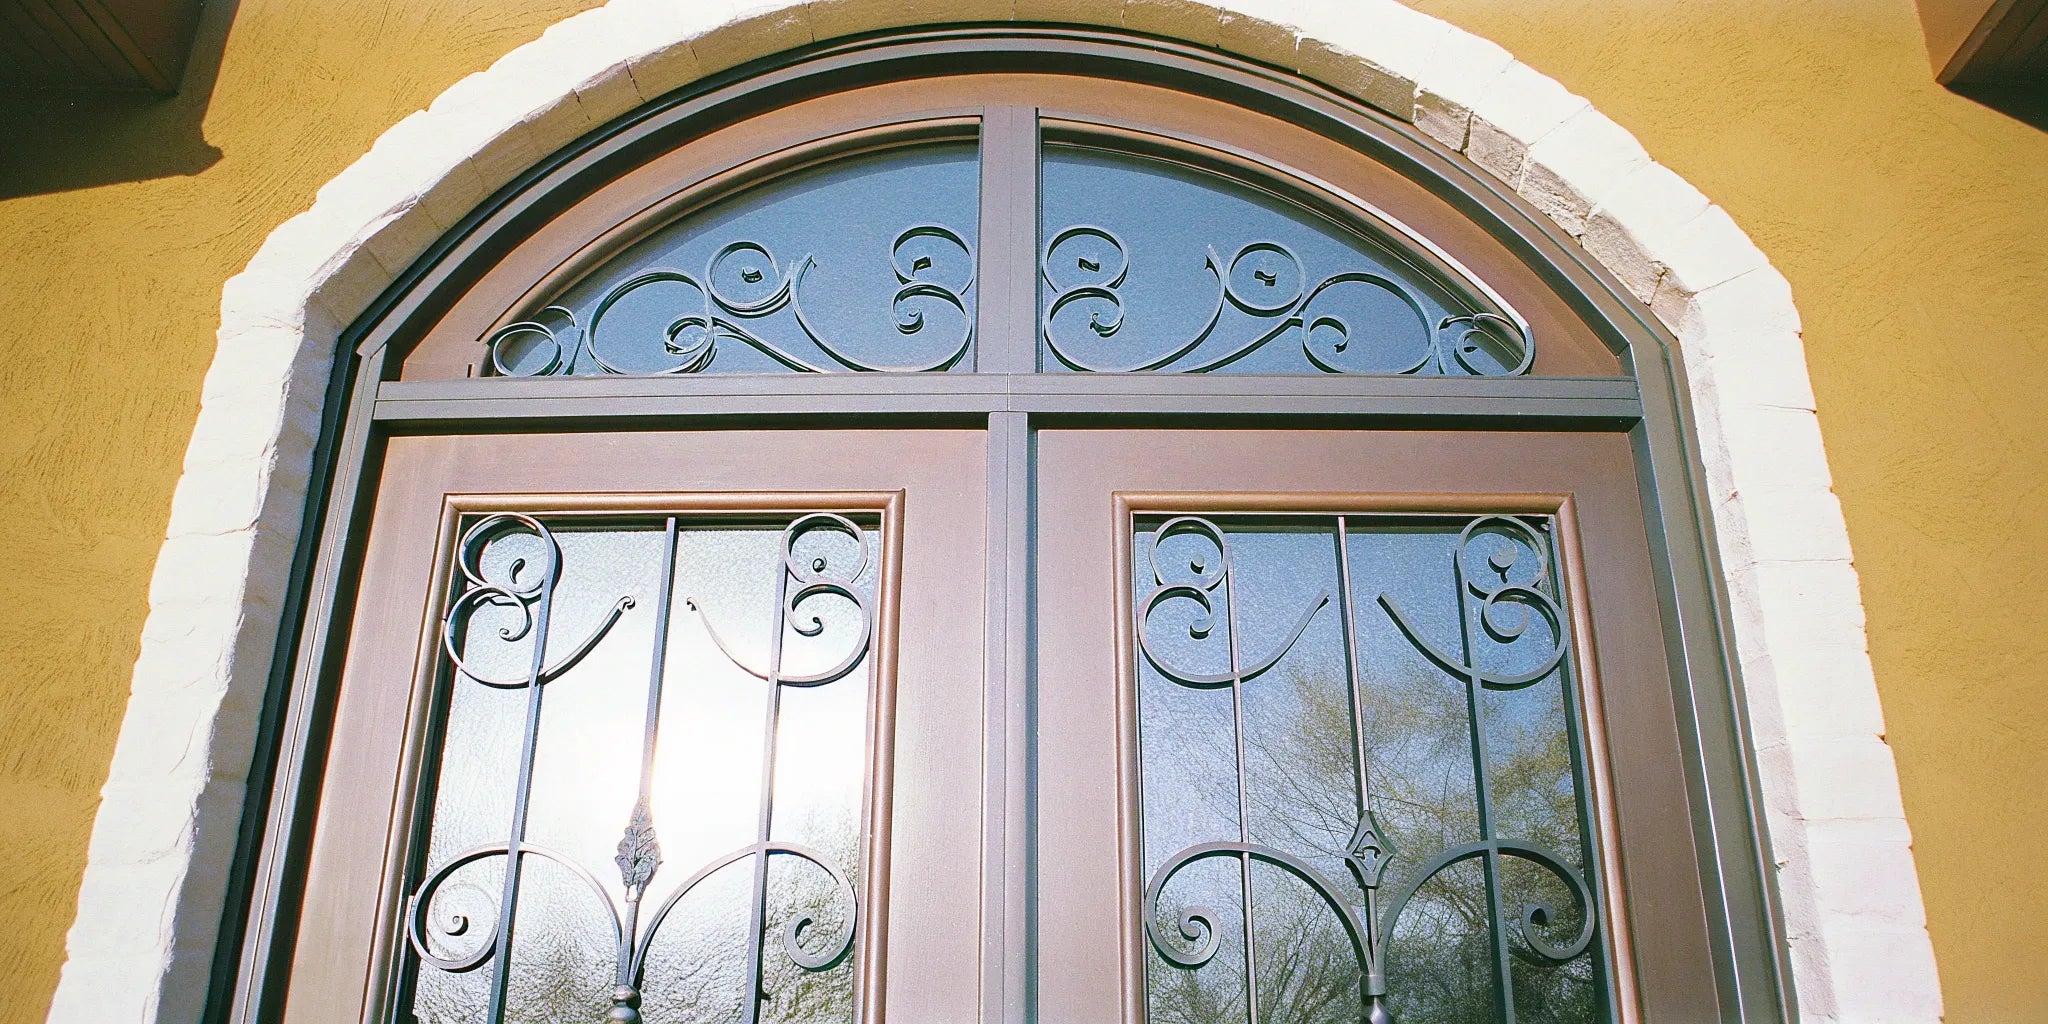
Water is persistent, and it loves to sneak in around windows, doors, and vents. That’s where flashing comes in. Flashing is a thin, waterproof material that directs water away from these vulnerable points. It’s absolutely critical to install flashing correctly around all wall openings. This includes running it along the tops of window and door trim to channel water over the front of the siding, not behind it. Properly installed flashing is a key part of a complete weatherproofing system that protects your steel doors and windows, and it’s a detail you can’t afford to get wrong.
Don't Forget Kick-Out Flashing
When installing your siding, one crucial detail that often gets overlooked is the kick-out flashing. This small component is a powerhouse when it comes to water management, especially at the tricky junction where a roof meets a wall. Its sole purpose is to direct water away from the wall and into the gutter, preventing moisture from ever getting a chance to seep behind your beautiful new fiber cement siding. To ensure a perfect fit, it’s a good idea to install the flashing loosely at first. This allows you to easily adjust it as you fit the siding panel around it, creating a seamless and effective barrier. Taking the time to get this right protects your home from potential water damage and is a key part of a complete weatherproofing strategy.
Cutting and Handling Fiber Cement Siding
Working with fiber cement is straightforward, but it requires a different approach than wood or vinyl. These panels are incredibly durable once installed, but they can be heavy and brittle during handling. Getting your cutting and handling technique right is the key to a smooth installation process and a flawless, professional finish. Before you begin, make sure you have a clear, safe space to work and that you’re prepared to manage the dust that cutting creates. This isn't a step you want to rush, as a little prep here saves a lot of headaches later.
Properly handling your fiber cement boards from the moment they arrive until they’re fastened to the wall will prevent chips, cracks, and wasted material. Think of it like this: the strength of fiber cement comes from its composite nature, but that also means it doesn't flex like wood. Dropping a panel or carrying it improperly can cause it to snap. Similarly, using the wrong cutting blade can lead to ragged edges that are difficult to seal and look unprofessional. Let’s walk through the best practices for getting clean cuts, staying safe, and moving panels without damaging them, so your project looks great from start to finish.
How to Get a Clean, Precise Cut Every Time
For the cleanest edges, you’ll want to use a circular saw fitted with a polycrystalline diamond-tipped blade made specifically for fiber cement. This combination minimizes chipping and powers through the dense material for a smooth, straight line. When you’re ready to cut, place the panel face-down on a stable surface and cut from the back to ensure any minor chipping occurs on the non-visible side. Clamping a straightedge to the panel as a guide will help you achieve perfectly straight cuts every time. For smaller cuts or notches around outlets, you can also use fiber cement shears, which offer a quieter, lower-dust alternative.
Making Curved Cuts and Holes
Inevitably, you'll need to make cuts that aren't perfectly straight, like fitting a panel around a pipe or vent. For these curved or circular cuts, a jigsaw is your go-to tool. Just be sure to use a blade with carbide or diamond tips to handle the dense material cleanly. For standard-sized holes needed for new outdoor lighting fixtures or plumbing, a hole saw attached to your drill will give you a quick, perfect circle. If you need a larger or custom-sized opening, you can trace your circle, drill a series of small holes just inside the line, and then use the jigsaw to carefully connect them for a smooth, custom cutout.
Managing Dust for a Safer Workspace
Safety first—always. Cutting fiber cement siding creates fine dust containing crystalline silica, which is a respiratory hazard. It’s essential to protect yourself and anyone nearby. The best way to control silica dust is to minimize its creation and spread. Whenever possible, cut the panels outdoors in a well-ventilated area. Always wear a NIOSH-approved respirator, like an N95 mask, along with safety glasses. To further reduce airborne particles, you can use a saw with a dust collection port attached to a HEPA vacuum or have a partner spray a stream of water on the blade as you cut.
Tips for Moving and Handling Panels
Fiber cement panels are heavy and can be awkward to manage, so it’s a good idea to have a helper. Always carry the panels on their edge (vertically), as this prevents them from flexing and potentially snapping under their own weight. Carrying them flat is a common mistake that can easily lead to cracks. Be careful not to bump the corners or edges, as they can chip before installation. When you’re storing the panels on-site, lay them flat on a level surface and keep them off the ground to protect them from moisture and prevent warping. A couple of 2x4s work great for this.
How to Install Fiber Cement Siding: A Step-by-Step Guide
With your walls prepped and your tools ready, it’s time for the main event: installing the fiber cement boards. This process is methodical, so take your time and focus on getting each step right. The key is to work from the bottom up, ensuring every panel is level and securely fastened. We’ll walk through the core four steps to get your siding up, from the foundational starter strip to navigating tricky corners. Following these guidelines will help you achieve a durable, professional-looking finish that protects your home for years to come.
Key Techniques for a Professional Finish
Getting the big steps right is important, but the small details are what truly separate an amateur job from a professional one. These key techniques focus on the finer points of installation that ensure your siding not only looks fantastic but also provides maximum protection against the elements. Paying attention to how you handle joints, insulation, and flashing will make a huge difference in the longevity and performance of your fiber cement boards. Mastering these simple but crucial steps is the secret to a finish that stands up to weather, prevents moisture issues, and maintains its clean appearance for years to come.
Installing Over Foam Insulation
Adding a layer of rigid foam insulation under your siding is a great way to improve your home's energy efficiency. The good news is that you can absolutely install fiber cement siding over foam, but there are rules to follow. Generally, it is permissible to place siding over foam insulation that is up to one inch thick. Anything thicker can create an unstable surface and may not hold fasteners securely. Before you begin, it is absolutely essential to check with your local building codes and the siding manufacturer’s specific installation guidelines, as requirements can vary. This ensures your project is not only energy-efficient but also structurally sound and compliant.
Staggering Butt Joints for Strength and Appearance
When you’re installing horizontal siding, the places where two panels meet end-to-end are called butt joints. A critical technique for a professional look is to stagger these joints so they don't line up vertically from one row to the next. Think of it like laying bricks—you’d never stack them in perfect columns. Staggering the joints creates a much more visually pleasing, random pattern that looks natural and intentional. More importantly, it also enhances the structural integrity of the siding system, distributing weight and stress more evenly across the wall. This simple step prevents weak points and is a hallmark of a high-quality installation.
How to Treat Butt Joints with Flashing
Your first instinct at a butt joint might be to fill the gap with caulk, but for fiber cement siding, that’s a mistake. Caulk can shrink and crack over time, creating a maintenance issue and potentially trapping moisture. The correct, professional method is to place a small piece of weather barrier behind every butt joint. A 6- to 8-inch wide strip of felt paper or house wrap works perfectly. This flashing sits behind the seam, creating a drainage plane. If any water gets into the joint, it hits the flashing and is safely directed down and out, never reaching the wall sheathing. This small, simple step is a crucial defense against water intrusion.
Step 1: Position the Starter Strip
Think of the starter strip as the foundation for your entire siding project. This small piece of metal or PVC does two critical jobs: it kicks out the bottom of the first siding panel to match the angle of the overlapping panels above it, and it helps with water drainage. You’ll want to install this strip along the very bottom of the wall where your siding will begin. Use a level to ensure it’s perfectly straight—any errors here will be magnified as you move up the wall. Secure it according to the manufacturer’s instructions, and you’ll have a solid, level base to build upon for a flawless first row.
Step 2: Install the First Course of Siding
With your starter strip perfectly level, it’s time to install the first course of siding. This row sets the standard for the entire wall, so getting it right is crucial for a professional finish. The starter strip provides the correct angle and a solid base for your first panel. As the experts at Allura USA advise, you should "Begin with a starter strip that has holes for water to drain. Leave enough space between the siding and the ground, following building codes or instructions." This small gap is key for preventing moisture from wicking up into the panels over time and ensures proper drainage from the start.
Carefully place your first fiber cement board, leaving about a 1/4-inch gap above the starter strip. When it comes to fastening, precision is everything. The team at Family Handyman highlights the correct technique: "Nail the siding into the wall studs 1 inch from the top edge." Make sure the nail heads are driven flush with the panel's surface. If they’re driven too deep, they can crack the siding, and if they stick out, they’ll interfere with the next course, creating an uneven look. This careful placement and fastening technique is what separates a DIY job from a professional one.
By carefully setting this first course, you create a straight, secure baseline for the rest of the installation. Every panel that follows will reference this row, so any mistakes here will become more obvious as you move up the wall. Getting this step right ensures the rest of your project goes smoothly and results in a durable, attractive finish that you can be proud of for years to come. It’s the kind of detail work that really pays off in the final look.
Step 2: Measure and Cut Your First Panels
Precision is your best friend when it comes to cutting fiber cement. Always remember the classic rule: measure twice, cut once. When you’re ready to cut, place the panel face down on your work surface to get the cleanest lines and reduce chipping on the visible side. To minimize airborne silica dust, it’s best to use fiber cement shears or a circular saw equipped with a special blade designed for fiber cement. No matter which tool you use, always wear a dust mask or respirator for safety. A clean, accurate cut not only looks better but also ensures the panels fit together snugly and securely.
Step 3: Fasten Panels with the Right Spacing
How you attach the panels to the wall is crucial for their longevity. You’ll be nailing the siding directly into the wall studs, so it’s a good idea to mark their locations beforehand. For a clean look, use the blind nailing technique by driving fasteners about one inch from the top edge of the panel; the next course of siding will hide them. Use corrosion-resistant galvanized or stainless steel nails, and make sure they penetrate at least 1-1/4 inches into the studs. Be careful not to drive the nails too deep or leave them sticking out. The nail head should sit perfectly flush with the surface of the siding panel.
Step 4: Fitting Siding Around Openings and Corners
Working around obstacles like steel windows and doors is what gives your project a polished, professional look. It’s best to install all your trim pieces first—around windows, doors, and at inside and outside corners. As you install siding panels that meet up with this trim, cut them to size, leaving a small, consistent gap (typically 1/8 inch, but check your product’s guidelines) between the siding and the trim. This gap isn’t a mistake; it’s an expansion joint that allows the materials to expand and contract with temperature changes. Later, you’ll fill this gap with a flexible, paintable caulk to create a weatherproof seal.
Assembling and Attaching Corner Trim
Here’s a pro tip that will save you a lot of frustration: assemble your corner trim pieces on a flat surface, like a workbench or the floor, before you attach them to the wall. This allows you to create a perfect, tight corner without fighting gravity. Once your corner piece is built, use a 15-gauge trim nail gun with 2-1/4 inch galvanized nails to secure it. It’s really important to use the right tool here. A powerful framing nailer or even hand-nailing can easily apply too much force and crack the trim boards, forcing you to start over. The lighter touch of a trim nailer ensures a secure fit without damaging the material.
Using Mounting Blocks for Fixtures
When you get to areas with exterior lighting fixtures, electrical outlets, or pipes, you’ll need a flat, stable surface to mount them on. This is where mounting blocks are essential. While you can find blocks made from fiber cement, a smarter and more budget-friendly choice is to use vinyl mounting blocks. They are specifically designed to integrate with siding and provide a clean, waterproof base for your fixtures. Vinyl blocks are also much easier to cut and handle than fiber cement, which simplifies the installation process around these tricky spots and helps you achieve a polished, professional finish without the extra hassle.
Common Installation Mistakes to Avoid
Installing fiber cement siding is a straightforward process, but a few common missteps can compromise the final result. Getting the details right is what separates a good-looking finish from a durable, long-lasting exterior that protects your home for years. By paying close attention to how you fasten, space, and seal the panels, you can easily sidestep the most frequent installation errors. Let’s walk through what to watch for so your project is a success from start to finish.
Are Your Fasteners Driven Correctly?
Getting the fastener depth just right is crucial for a secure installation that doesn’t damage the siding. If you drive a nail too deep, it can crack the panel and create a weak spot. If the nail is too shallow, it won’t hold the siding firmly against the wall. The goal is to drive the fastener so its head is perfectly flush with the surface of the fiber cement boards. For the best hold, make sure each nail penetrates at least 1-1/4 inches into the wood studs. A good rule of thumb is to place your nails about one inch down from the top edge of the panel.
Did You Leave Proper Expansion Gaps?
All exterior materials expand and contract with changes in temperature and humidity, and fiber cement is no exception. Forgetting to leave room for this natural movement is a mistake that can lead to warped or buckled siding down the road. It’s essential to leave a small, specific gap where siding panels meet trim around windows, doors, and at the corners. You also need to maintain proper clearance from the ground. Always check the manufacturer’s installation guide for the exact spacing requirements for your specific product. This small step is one of the most important for ensuring your siding performs as it should for decades.
Forgetting Required Clearance Gaps
This is one of those details that seems small but makes a huge difference. Forgetting to leave proper gaps is a fast track to siding that buckles or warps. You need to leave a slight space—usually about 1/8 of an inch—wherever a siding panel meets a piece of trim. This applies to the trim around your steel doors, windows, and at all inside and outside corners. This tiny gap gives the siding room to breathe, expanding and contracting with temperature shifts without causing problems. It’s a non-negotiable step for ensuring your siding lays flat and looks great for years.
Just as important is the clearance between the bottom edge of your siding and the ground. You need a minimum of six inches of space to prevent moisture from wicking up from the soil, which can damage your fiber cement boards over time. This also applies to any horizontal surfaces the siding meets, like decks, patios, or rooflines. Skipping this step can invite moisture-related issues that compromise your entire siding system. Think of it as creating a "splash zone" that keeps your siding safe, dry, and durable from the bottom up.
Why You Can't Skip Sealing and Caulking
Proper sealing is your siding’s best defense against moisture. A common oversight is failing to caulk the vertical joints where the siding meets corner trim, window frames, and door frames. These gaps can allow water to get behind the panels, potentially leading to damage to your home’s structure. After installation, carefully apply a high-quality, paintable exterior-grade caulk to seal these vulnerable areas completely. It’s also a good idea to inspect the caulking every year or so to make sure it’s still intact. A well-sealed exterior is key to protecting your investment and keeping your home dry and secure.
Applying the Finishing Touches
With the main panels up, you’re in the home stretch. These final steps are all about creating clean lines and a durable, weather-tight finish that will protect your home for years to come. It’s the attention to detail in this phase that separates an amateur job from a professional one. Taking the time to properly seal joints, install trim, and touch up edges ensures your siding not only looks fantastic but also performs its best against the elements.
How to Caulk Joints and Trim
A clean caulk line is the secret to a professional-looking job and a weather-tight seal. As you install your siding, be sure to leave a small, consistent gap at all trim locations, including around windows, doors, and corners. After all the panels are in place, you’ll go back and fill these vertical gaps with a high-quality exterior caulk. This simple step is your best defense against moisture getting behind the panels, preventing potential water damage down the road and giving your project a crisp, finished appearance.
Adding Corner Trim and Accessories
For a seamless installation, it’s often best to install your corner and window trim first. This creates a solid framework to butt your siding panels against, making the fitting process much smoother and more precise. Another critical detail is adding flashing above all horizontal trim pieces. This is especially important over your home’s steel doors and windows. The flashing acts as a tiny, angled roof that directs rainwater away from the top of the opening, protecting the structure from moisture intrusion and rot.
Painting Cut Edges for a Flawless Finish
The raw, cut edge of a fiber cement panel is its most vulnerable point for moisture absorption. To protect it, you should always seal these cuts with a coat of latex paint before you install the panel. This is a non-negotiable step for a long-lasting finish. Whether you’re working with pre-colored fiber cement boards or planning to paint the entire wall later, sealing every cut edge ensures the material remains stable and durable. Once everything is installed, do a final walk-around to touch up any scuffs or scratches.
Maintaining Your New Fiber Cement Siding
One of the best things about fiber cement siding is how little work it requires. Unlike wood, you won’t spend your weekends scraping and repainting. But "low-maintenance" doesn't mean "no-maintenance." A little care will protect your investment and keep your home looking fantastic for decades. Following a simple routine for cleaning, painting, and long-term upkeep will keep your siding in top condition. It’s all about simple, proactive steps that make a huge difference.
Your Simple Cleaning and Inspection Routine
To keep your siding looking fresh, plan to give it a gentle wash once or twice a year. This simple step removes dirt and prevents mold or mildew from getting a foothold. You don’t need fancy equipment—a soft cloth or brush and a garden hose will do the trick. Avoid using a high-pressure washer, as it can damage the finish. Start at the top of your walls and work your way down, using a mild cleaner if needed. This is also the perfect time to give your fiber cement boards a quick visual check for any issues.
When and How to Repaint Your Siding
While you won’t need to paint fiber cement nearly as often as wood, it will eventually need a fresh coat. You can typically expect to repaint every 10 to 15 years, depending on your climate. When the time comes, use a high-quality, 100% acrylic latex paint for the best adhesion and durability. For any small nicks or scratches that happen, it’s a good idea to touch them up promptly. Sealing these spots prevents moisture from seeping behind the paint and protects the integrity of your exterior wall panels.
Long-Term Care for a Lasting Look
A few other small tasks will ensure your siding lasts a lifetime. Periodically inspect the caulking around windows, doors, and corner trim. Over time, caulk can shrink or crack, creating gaps where water can get in. If you see damage, remove the old caulk and apply a fresh bead. It’s also smart to keep your gutters clean. Clogged gutters can cause water to overflow and run down your siding, leading to stains. Finally, try to keep landscaping trimmed back a few inches from your home to allow for proper airflow and prevent scratches.