


Fluted Wood Panel: What It Is & How to Use It
When you think of fluted panels, your mind probably goes to a stunning accent wall. And while that’s a fantastic use, their potential goes so much further. A fluted wood panel can upgrade furniture, wrap a kitchen island, or even create a unique room divider in an open-concept space. Its real beauty lies in adding instant texture and a bespoke feel to almost any surface. If you're ready to think beyond the accent wall, you're in the right place. We’ll show you creative and unexpected ways to use this design element in your projects.
Key Takeaways
- Add Instant Depth and Style: Fluted panels are a simple way to introduce texture and architectural interest. Installing them vertically can make a room feel taller, turning any plain surface into a sophisticated feature wall.
- Choose the Right Material for the Job: Your project's location and budget should guide your choice. Use natural wood for a warm, premium feel, select paint-grade MDF for custom colors, and opt for durable WPC in high-moisture areas like bathrooms.
- Get Creative with Applications: Don't limit fluted panels to just walls. Use them to give a custom look to kitchen islands, media consoles, and headboards, or even build stylish room dividers for an open-concept space.
What Are Fluted Wood Panels?
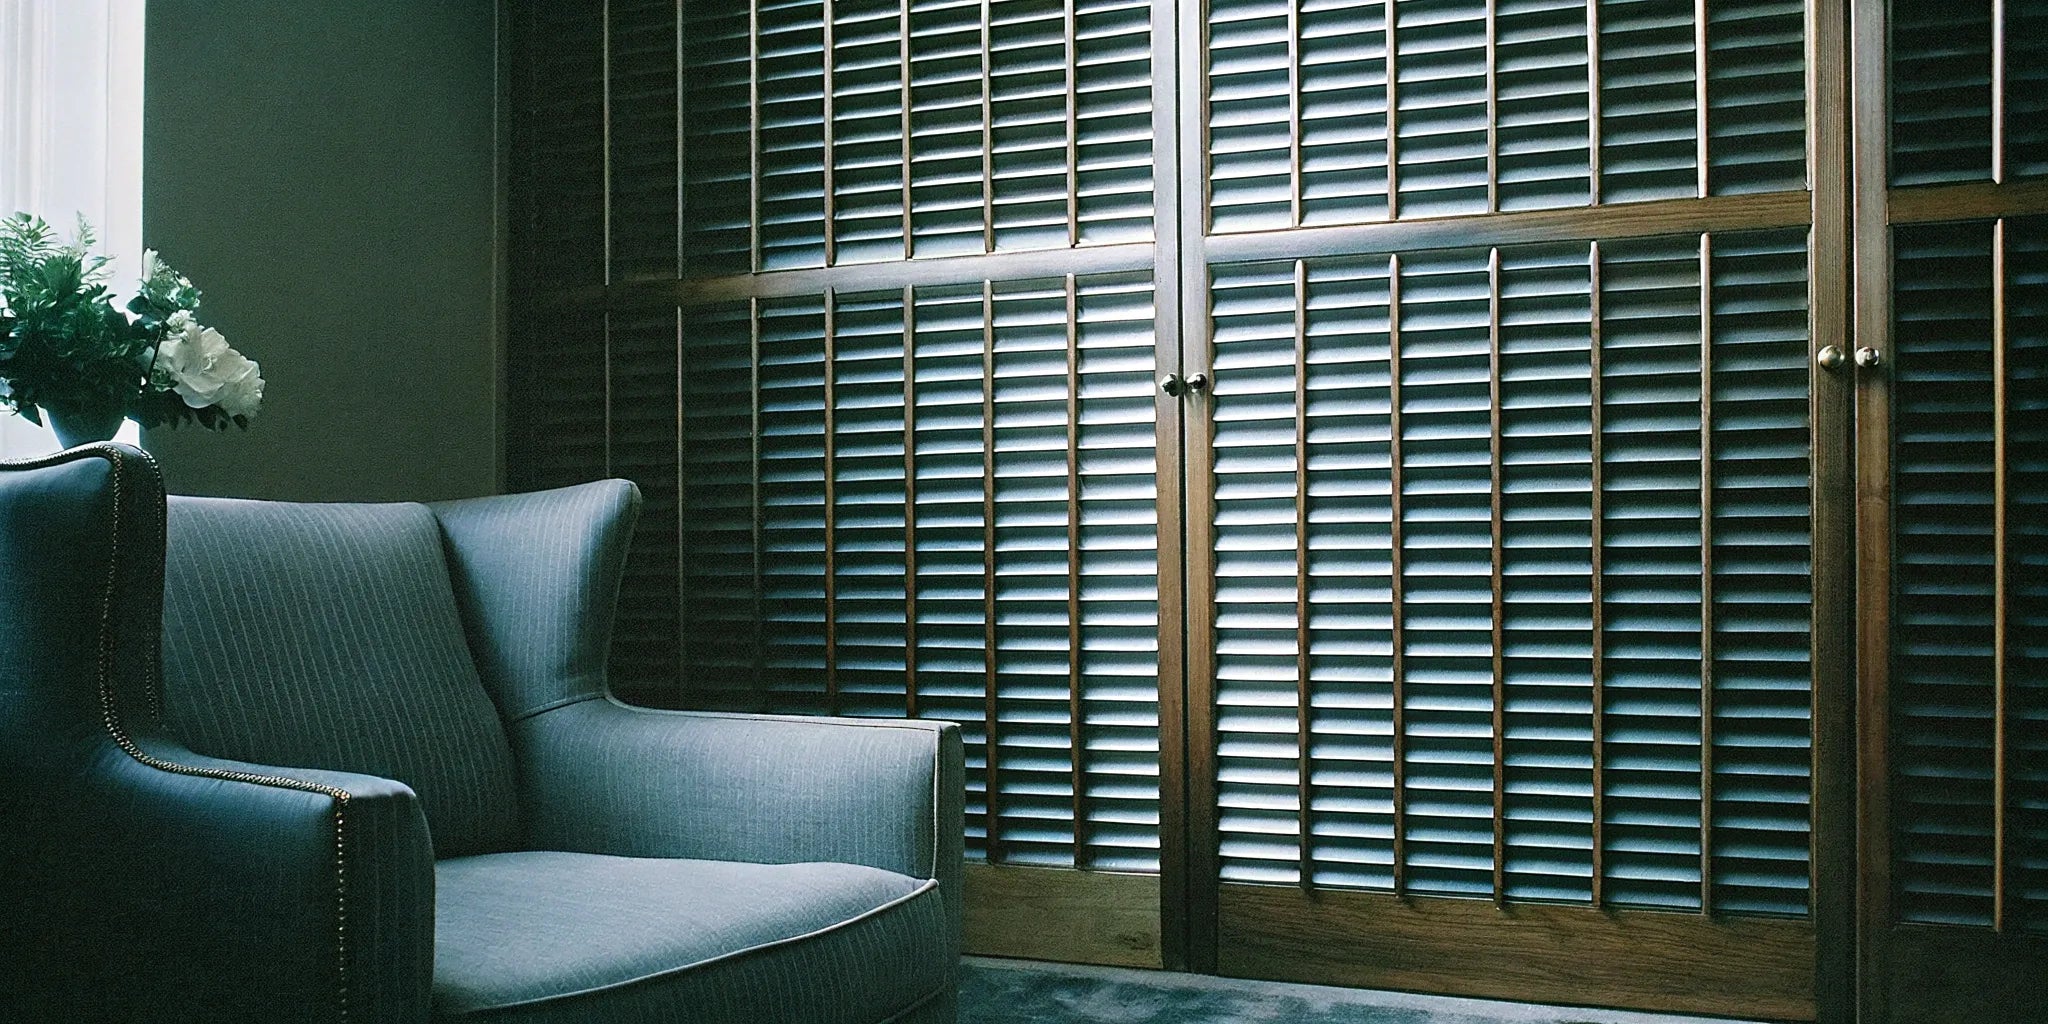
If you’ve been scrolling through design inspiration lately, you’ve probably seen them: walls with beautiful, repeating vertical grooves that add instant sophistication to a room. These are fluted wood panels, and they’ve become a go-to for designers, contractors, and homeowners looking to add texture and character to a space. Unlike a simple coat of paint or flat wallpaper, fluted panels create a dynamic interplay of light and shadow that makes any wall a focal point. They offer a clean, linear look that works with many styles, from minimalist and modern to warm and rustic.
But they're more than just a trend; they're a smart architectural element that can solve design challenges, like making a room feel taller or adding visual interest without clutter. The three-dimensional quality of the panels brings a sense of depth and movement to a room that flat surfaces simply can't match. This makes them an excellent choice for breaking up large, monotonous walls or for adding a touch of luxury to smaller spaces. Whether you're aiming for a bold statement or a subtle textural background, fluted panels provide a versatile and impactful solution. In this section, we'll cover exactly what they are, how they stack up against traditional options, and some of the most popular ways to incorporate them into your projects.
What Makes a Panel "Fluted"?
So, what exactly makes a panel "fluted"? It’s all about the texture. Fluted panels are decorative surfaces featuring a series of concave grooves, or "flutes," that run parallel to each other. Think of the classic look of a Greek column—that’s fluting. When applied to wall panels, this design creates a ribbed, three-dimensional effect. These panels are engineered to add architectural detail and visual interest to otherwise flat surfaces. They can be used to cover an entire wall, create a feature accent, or even wrap around columns and fixtures for a seamless, high-end finish.
Common Flute Styles and Patterns
Not all fluted panels are created equal, and the specific style you choose can dramatically change the feel of your space. The primary difference comes down to the width and shape of the grooves. Narrow flutes, often called "ribbed" or "reeded," create a fine, delicate texture that adds subtle detail without overwhelming a room. This style is perfect for adding a touch of sophistication to smaller areas or for creating a backdrop that complements other design elements. On the other hand, wide flutes make a bolder, more contemporary statement. Their deep, broad channels create dramatic shadows and highlights, turning a wall into a true architectural feature that stands on its own.
The material also plays a huge role in the final look. You can find different styles of fluted panels in natural wood veneers, which bring warmth and organic texture to the pattern. For ultimate creative control, paint-grade panels allow you to match your wall color for a seamless, tone-on-tone effect or choose a contrasting shade for a bold pop. For areas like bathrooms or exteriors, durable materials like WPC (Wood Plastic Composite) or fiber cement offer the same great look with added resistance to moisture and wear, ensuring your design lasts.
Fluted vs. Flat Paneling: What's the Difference?
Fluted panels offer a distinct alternative to traditional wall coverings like drywall or flat beadboard. While drywall is a functional standard, it requires multiple steps—mudding, taping, sanding, and painting—to achieve a finished look. Fluted panels, on the other hand, arrive ready to install, saving significant time and labor for contractors and DIYers alike. Their primary advantage is aesthetic; the texture and depth they provide are impossible to replicate with paint or wallpaper alone. This built-in dimension adds a layer of luxury and modern style that instantly transforms a room’s atmosphere, making it feel more intentional and professionally designed.
Inspiring Ways to Use Fluted Panels
The versatility of fluted panels is one of their biggest draws. You can install them vertically to make a ceiling feel higher or horizontally to make a room appear wider. They are perfect for creating a stunning accent wall in a living room, bedroom, or office. Many people also use them to build custom media centers, upgrade kitchen islands, or design unique headboards. Beyond homes, these panels are a popular choice in commercial settings like hotels, restaurants, and retail stores to create a memorable and inviting environment. With options like Interior WPC Fluted Slat Wall Panels, you can achieve this look in almost any space.
Are Fluted Wood Panels a Good Choice?
Fluted wood panels are having a major moment in interior design, and for good reason. They bring texture, depth, and a sophisticated architectural element to any room, instantly making a space feel more custom and thoughtfully designed. You’ve probably seen them creating stunning feature walls in high-end homes or adding a touch of warmth to sleek commercial spaces. But like any design choice, they come with their own set of pros and cons. Deciding if they’re the right fit for your project means weighing their incredible visual impact against a few practical considerations. It's not just about how they look, but also how they'll fit into your lifestyle, budget, and the overall vision for your space. Let's break down the advantages and potential downsides to help you figure out if this beautiful trend is the perfect choice for you.
Why You'll Love Fluted Wood Panels
The biggest draw of fluted panels is their incredible aesthetic appeal. The vertical grooves create a beautiful play of light and shadow, adding dimension and making a room feel taller and more dynamic. This texture can turn a plain, boring wall into a stunning focal point without overwhelming the space. They bring a sense of warmth and organic elegance that works well in styles from minimalist and Scandinavian to modern and classic. Plus, certain acoustic wall panels with a fluted design can also help dampen sound, making them a functional choice for living rooms, home offices, or commercial settings where noise is a concern.
What to Consider Before You Buy
While they look amazing, fluted panels do have a couple of potential downsides to keep in mind. First, the grooves that create their signature look can also collect dust more easily than a flat surface. This just means they might require a bit more attention during your cleaning routine—a quick pass with a duster or vacuum brush attachment usually does the trick. Second, high-quality wood panels can be more of an investment upfront compared to a simple coat of paint. However, the dramatic transformation and lasting style they provide often justify the cost for many homeowners and designers.
Usage in Damp Areas
One of the most common questions we get is whether fluted panels can handle moisture-prone spaces like bathrooms and kitchens. The answer is a definite yes, as long as you choose the right material. While you wouldn't want to install natural wood veneer panels inside a shower, many modern options are engineered specifically for damp environments. For instance, Interior WPC Fluted Slat Wall Panels are an excellent choice. WPC, or Wood Plastic Composite, is highly resistant to moisture and humidity, so it won’t warp or swell from steam. This makes it perfect for a bathroom accent wall outside the shower or as a stylish kitchen backsplash, provided it doesn't have constant, direct contact with water.
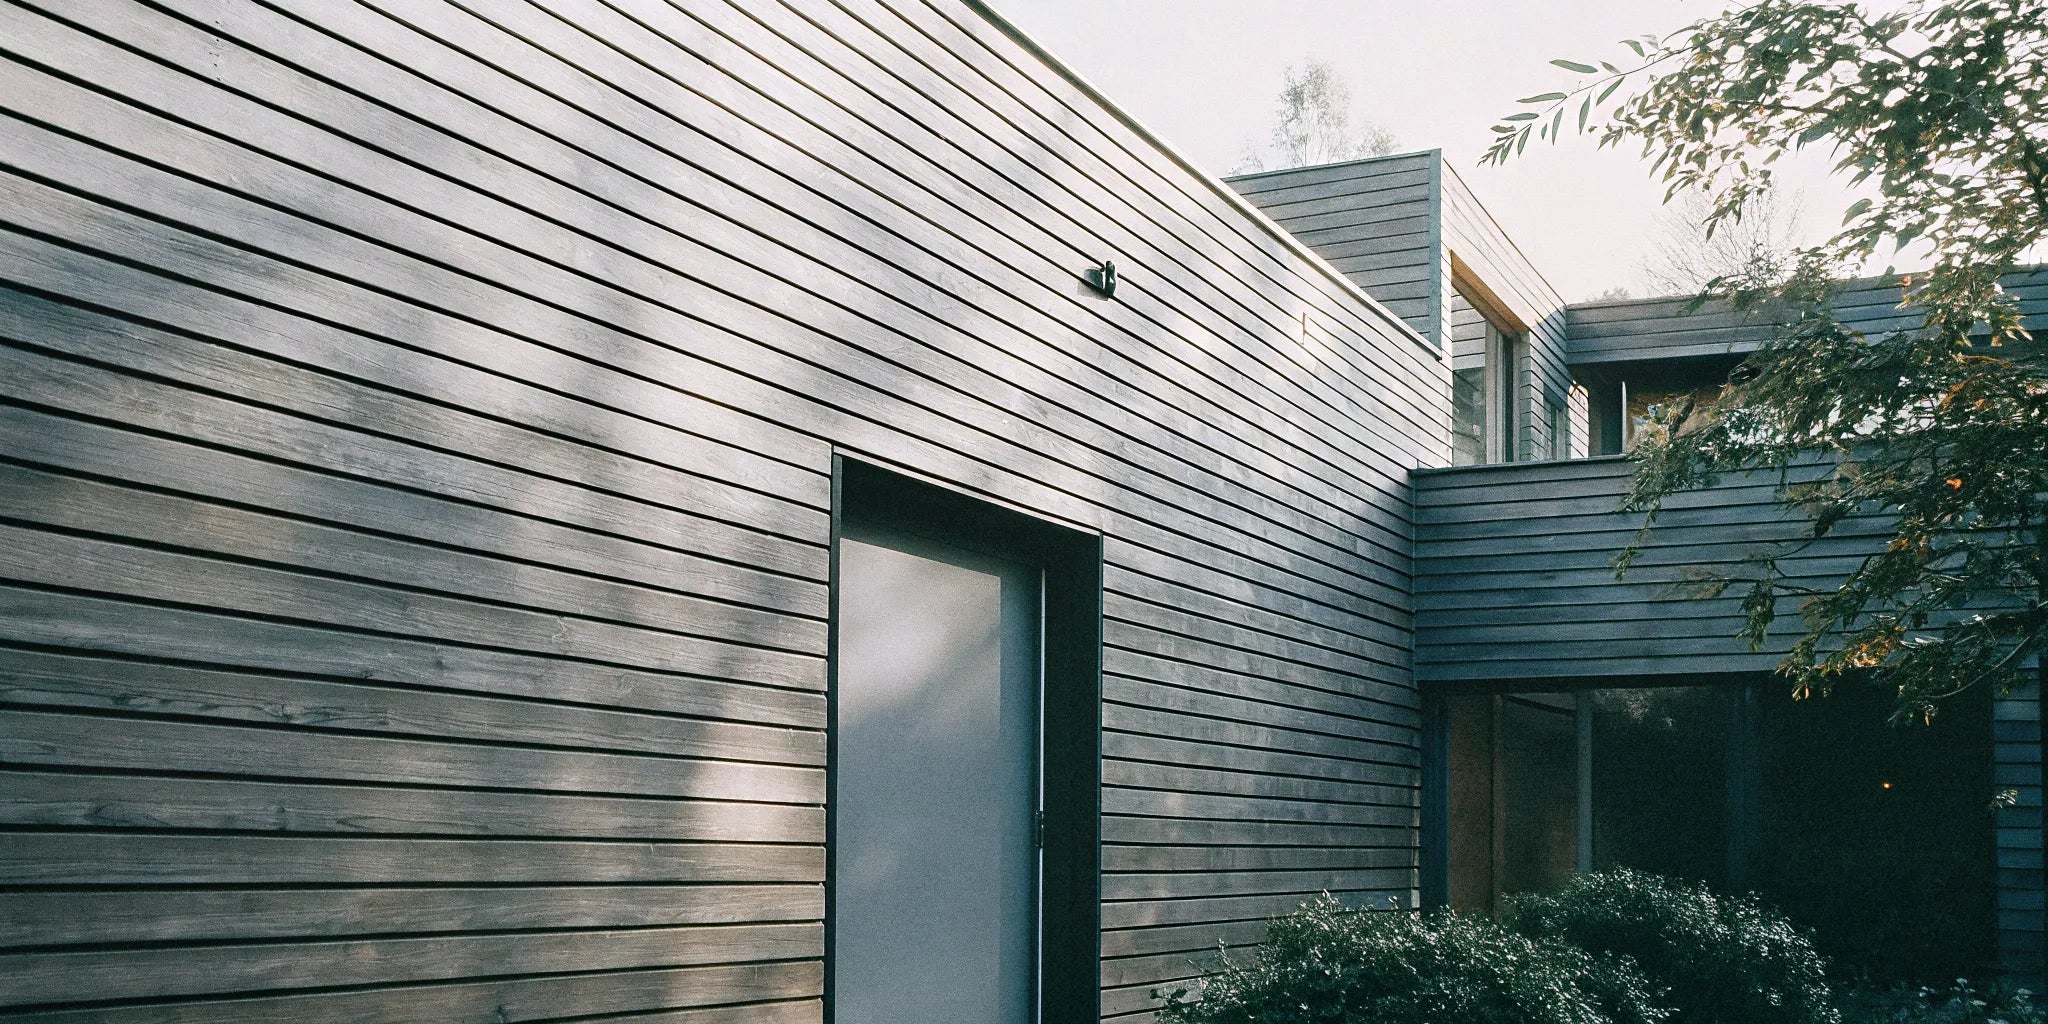
Indoor vs. Outdoor Use
It's crucial to know that most fluted panels, especially those made from natural wood or standard MDF, are designed for indoor use only. Exposure to the elements—rain, direct sunlight, and extreme temperature changes—can cause them to warp, fade, or deteriorate quickly. However, that doesn't mean you can't achieve a similar look for your home's exterior. If you want that beautiful linear texture for an outdoor project, you need to use products specifically rated for that purpose. Options like Exterior Fluted Slat Wall Panels are built to withstand the outdoors, giving you that high-end look without compromising on durability. Always check the product specifications to ensure you're choosing the right panel for the right environment.
Are They Right for Your Space?
So, are fluted panels the right move for you? If you’re looking to add character, warmth, and a high-end feel to a room, the answer is likely yes. They are incredibly versatile and can be used to create an accent wall, upgrade a kitchen island, or even build a custom headboard. Consider the lighting in your space—fluted panels look especially dramatic when lit from the side. For areas with higher moisture or a need for lower maintenance, you might consider Interior WPC Fluted Slat Wall Panels, which offer the same great look with added durability. Ultimately, they are a fantastic choice for anyone wanting to make a memorable design statement.
What Materials and Finishes Are Available?
Fluted panels are incredibly versatile, and a big part of that comes from the wide range of materials and finishes you can choose from. Your decision will likely come down to three things: the look you want, where you’re installing the panels, and your budget. If you love the authentic, warm feel of real wood, options like oak and walnut bring a timeless, high-end look to any room. For projects that need more durability or a specific color, engineered materials like MDF or WPC (Wood Plastic Composite) are fantastic alternatives. These often come pre-primed and ready for paint, giving you total creative control.
The finish is just as important as the material. You can get panels with natural wood veneers, durable laminates that mimic stone or metal, or simple paint-grade surfaces. This flexibility means you can find a fluted panel that fits perfectly with your design, whether it’s a rustic living room or a sleek, modern office. For example, WPC is especially useful in spaces with moisture, like bathrooms or even as exterior shiplap cladding. Ultimately, the variety ensures you don't have to compromise on style or function. You can achieve the exact texture, color, and durability your project demands.
Understanding Panel Construction
To choose the right fluted panel, it helps to know how they’re made. Think of them as a layered sandwich, with each component playing a specific role in the panel's look, feel, and durability. On the outside, you have the finish or veneer, which is what you see and touch. This is the decorative layer that gives the panel its color and texture. Beneath that is the core material, which provides structure and stability. Finally, some panels have a backing material that helps with installation and flexibility. Understanding this basic construction will make it much easier to compare different types of panels and select the one that best suits your project’s needs, whether you prioritize authentic wood grain, a custom paint color, or moisture resistance.
Core Materials and Veneers
The heart of most fluted panels is a core made from Medium-Density Fiberboard (MDF). MDF is an engineered wood product that’s valued for its stability and smooth surface, making it an ideal base that won't warp or crack. A thin layer of real wood veneer, like oak or walnut, is then applied to the MDF core to create an authentic, high-end wood look without the cost of solid timber. For projects requiring different properties, you can find panels with other cores. For instance, Interior WPC Fluted Slat Wall Panels use a wood-plastic composite core that is highly resistant to moisture, making it perfect for bathrooms or kitchens. You can also find unfinished or paint-grade panels designed for custom finishes.
Standard Sizes and Connection Systems
Once you’ve chosen your material, the next step is figuring out the logistics of your installation. This is where understanding standard panel sizes and how they connect becomes essential for planning your project. Manufacturers design these panels to be modular, allowing you to cover walls of any height or width with a clean, professional result. Knowing the common dimensions helps you calculate how many panels you’ll need, minimizing waste and keeping your budget on track. The connection system is equally important, as it determines how easily the panels fit together and contributes to the final seamless appearance of your feature wall or accent piece.
Common Dimensions
Fluted panels typically come in standard widths to make project planning straightforward. A common width is just over 11 inches, with a slim profile of about a third of an inch thick. The height is where you’ll find the most variation, tailored to different applications. You can often find half-length panels around 44 inches tall, which are perfect for wainscoting, kitchen islands, or reception desks. For full wall coverage, panels are available in heights like 94.5 inches (just under 8 feet) and 106.3 inches (almost 9 feet) to accommodate standard ceiling heights. Always measure your space and check the specific product dimensions before ordering to ensure a perfect fit for your project.
Tongue and Groove Assembly
One of the best features of modern fluted panels is their tongue and groove assembly system. This clever design makes installation much simpler and more precise. Each panel has a protruding edge (the "tongue") on one side and a recessed slot (the "groove") on the other. To install, you simply slide the tongue of one panel into the groove of the next. This interlocking system ensures the panels are perfectly aligned and spaced, creating a flawless, continuous look with no visible gaps. It’s a game-changer for both professional contractors and DIY enthusiasts, as it speeds up the installation process and helps achieve a high-quality finish with ease.
Solid Wood Choices: From Oak to Walnut
For a look that’s warm, authentic, and completely unique, nothing beats natural wood. Each panel has its own distinct grain pattern, adding character and depth that can’t be replicated. Popular choices like White Oak and Walnut offer a classic, inviting aesthetic that works well in both modern and traditional spaces. While natural wood is often a premium choice, its timeless appeal makes it a worthwhile investment for creating a standout feature. These panels can be left in their natural state with a clear coat or stained to enhance their color and protect the surface. The result is a rich, organic texture that brings a touch of nature indoors.
Beyond Solid Wood: MDF and WPC Panels
Engineered options offer a practical and versatile alternative to solid wood. Materials like MDF (Medium-Density Fiberboard) provide a smooth, stable base that’s perfect for painting. For added durability and realism, many panels feature a strong core covered in a 3D laminate that can convincingly mimic wood, stone, or even fabric. Another popular choice is WPC (Wood Plastic Composite), which combines wood fibers and plastic. This makes it highly resistant to moisture and an excellent choice for bathrooms, basements, or even exterior applications. Engineered panels are often more budget-friendly and provide consistent color and texture from one panel to the next.
Finding the Perfect Finish for Your Panels
The finish you choose is where you can truly personalize your fluted walls. If you have a specific color in mind, paint-grade panels are the way to go. They typically come pre-primed, giving you a perfect blank canvas to match your room’s color palette exactly. For natural wood panels, stains are a great way to deepen the color while letting the beautiful grain show through. From light, natural tones to rich, dark shades, a stain can completely change the mood of the wood. Finally, a protective topcoat like a clear lacquer or polyurethane is essential for sealing the surface, adding durability, and giving it a subtle sheen.
Pre-Finished and Ready-to-Install Options
For anyone who values efficiency—whether you're a contractor on a tight schedule or a homeowner tackling a weekend project—pre-finished panels are a game-changer. These options arrive at your door ready to install, completely eliminating the need for on-site painting, staining, or sealing. This not only saves a huge amount of time and labor but also avoids the mess and fumes that come with finishing work. You get a consistent, factory-quality finish that’s often more durable than what can be achieved by hand. With choices like Interior WPC Fluted Slat Wall Panels or natural wood veneers, you can achieve a polished, high-end look right out of the box, turning a multi-day job into a much simpler installation.
How Much Do Fluted Wood Panels Cost?
The cost of fluted wood panels can vary quite a bit, but understanding the key components helps you set a realistic budget. Think of it as an investment in your home’s style and texture. The final price tag depends on the material you choose, the total square footage you need to cover, and whether you hire a professional for installation. High-quality panels and expert installation can be a significant expense, but the result is a durable and visually stunning feature. Let's break down what you can expect to spend.
How Material Choice Impacts Your Budget
The material is the biggest factor in your paneling cost. MDF (Medium-Density Fiberboard) panels are the most budget-friendly option, typically running from $5 to $12 per square foot—a great choice for painted applications where the texture is the main focus. If you want the authentic warmth and grain of real wood, natural wood panels are the premium choice, costing anywhere from $20 to $40 per square foot. For areas with moisture concerns like bathrooms, options like Interior WPC Fluted Slat Wall Panels offer durability and water resistance, generally priced between $10 and $25 per square foot.
What Else Influences the Final Cost?
Beyond the base material, a few other details influence the price. For natural wood, the species makes a difference—walnut will cost more than oak, for example. The thickness and width of the slats also play a role. Pre-finished panels that are already stained or painted might cost more upfront but save you time and labor later, while unfinished panels offer more creative control. Custom designs will also increase the price. Exploring a wide collection of wall panels can help you compare these different factors side-by-side.
Calculating Your Needs: Coverage and Tools
Getting your measurements right is the first step to a flawless installation. Start by measuring the height and width of the wall you plan to cover, then multiply them to get the total square footage. Be sure to account for any windows or doors by measuring their area and subtracting it from your total. I always recommend adding an extra 10% for a "waste factor"—this buffer is a lifesaver for angled cuts or mistakes. With your final number, you can easily determine how many wall panels you’ll need by checking the coverage area on the product specifications.
Having the right tools makes all the difference. You’ll need a measuring tape, a level, and a miter or circular saw with a fine-tooth blade for clean cuts. To install the panels, use a strong construction adhesive on the back and a brad nailer to secure them while the adhesive cures. Gathering these essentials before you begin will help you achieve a professional-looking result without any last-minute hiccups.
Factoring Installation into Your Budget
Don't forget to factor in installation costs. If you're a confident DIYer, you can save 30% to 40% on labor costs by handling the installation yourself. For a flawless finish, hiring a contractor is the way to go. Professional costs vary by location and job complexity—a simple accent wall is less expensive than one with intricate cuts around windows or outlets. Contractors and designers should check for trade programs, as many suppliers offer bulk discounts. You can often find a trade application on the supplier's website to help manage project costs.
Get Inspired: Creative Fluted Panel Ideas
Fluted panels are incredibly versatile, offering design possibilities that go far beyond a simple wall covering. Their unique texture can transform furniture, define spaces, and create stunning focal points in both homes and commercial settings. If you’re looking for inspiration, here are a few creative ways to incorporate them into your next project.
Create a Stunning Accent Wall or Ceiling
The most popular way to use fluted panels is to create a stunning accent wall. Whether you install them vertically to make a ceiling feel higher or horizontally to make a room seem wider, their texture instantly adds depth and character. Think beyond the living room—a fluted panel wall behind a headboard creates a luxurious, hotel-like feel in a bedroom. You can also use them in an entryway to make a memorable first impression or on a ceiling to draw the eye upward. With options ranging from natural wood to paint-ready finishes, you can customize the look to perfectly match your style. Explore different wall panels to find the right material and finish for your project.
Upgrade Furniture and Define Your Space
Fluted panels aren't just for walls. You can use them to give standard furniture a high-end, custom look. Try wrapping the front of a kitchen island, the doors of a plain media console, or the face of a built-in cabinet. This simple upgrade adds texture and a bespoke feel without the cost of custom millwork. For open-concept spaces, you can even construct freestanding room dividers using fluted panels. This approach defines different zones, like separating a living area from a home office, while adding an architectural element that feels both modern and functional. It’s a creative way to add dimension and purpose to any room.
Design Ideas for Commercial Spaces
In commercial spaces, creating an inviting and memorable atmosphere is key. Fluted panels are a fantastic tool for designers and business owners looking to make an impact. They bring a sense of sophistication to hotel lobbies, restaurant dining rooms, and high-end retail stores. Use them to build a striking reception desk, line the walls of a hallway, or create a branded feature wall behind a logo. The vertical lines add a sense of grandeur and order, while the texture provides visual interest that flat paint can’t match. For contractors and designers working on these projects, our trade program offers bulk pricing and support.
Add Drama with Backlighting
To really make your fluted panels pop, consider adding backlighting. The grooves and ridges are perfect for catching light, creating a beautiful interplay of light and shadow that enhances their three-dimensional quality. By installing LED strip lights along the top, bottom, or sides of a paneled section, you can create a soft, ambient glow. This technique works especially well for media walls, home bars, or any feature you want to highlight. The light accentuates the texture and turns a simple wall into a dynamic piece of art, adding a modern and dramatic flair to your interior design.
How to Install Fluted Wood Panels
One of the best things about fluted panels is that they are designed for straightforward installation. Whether you’re a seasoned contractor or a weekend DIY warrior, you can achieve a professional-looking result with careful planning and the right tools. The key is precision—taking your time with measurements and alignment will ensure your new feature wall looks stunning. Let’s walk through the essential steps to get your panels up perfectly.
Preparing Different Wall Surfaces
A great finish starts with a great foundation. Before you even think about grabbing the adhesive, take a moment to prep your wall. No matter what your wall is made of, it needs to be clean, dry, and as smooth as possible. This simple step ensures the panels adhere properly and sit flush, giving you that seamless, professional look. The good news is that fluted panels are incredibly adaptable and can be installed over most common surfaces, from standard drywall to more textured materials like brick or concrete. A little bit of prep work goes a long way in making the installation process smoother and guaranteeing your new feature wall looks flawless for years to come.
Installing on Drywall, Concrete, and Brick
For drywall, your job is pretty straightforward. Just fill any holes or cracks with spackle, sand everything smooth once it's dry, and wipe away the dust with a damp cloth. This gives the adhesive a clean surface to bond to. When you're working with concrete or brick, the prep is a bit different. You'll want to use a stiff brush to remove any loose mortar, dust, or grime. The surface needs to be relatively flat for the panels to sit correctly. If your brick or concrete wall is particularly uneven, you might need to install thin wood strips, called furring strips, directly onto the wall first. This creates a perfectly level frame to which you can attach the panels, ensuring a perfect finish on a less-than-perfect surface.
Step 1: Get Your Wall Ready
Before you even think about opening a box of panels, your wall needs to be ready. A clean, smooth, and dry surface is non-negotiable for a lasting installation. Start by wiping down the wall to remove any dust or grime. Next, inspect it for imperfections. You’ll want to fill any nail holes or cracks with spackle, then sand the patches until they’re flush with the rest of the wall. If you’re installing panels in a bathroom or another area with moisture, make sure the wall is completely dry. This prep work ensures your adhesive or fasteners will have a solid, even surface to grip.
Step 2: Gather Your Tools and Supplies
Having everything you need on hand makes the process much smoother. You’ll obviously need your fluted wall panels, but you’ll also want a measuring tape, a pencil, and a level—a laser level can be a huge help here. For cutting panels to size, a miter saw or a circular saw with a fine-toothed blade will give you the cleanest edges. When it comes to attaching the panels, you have a few options. A strong construction adhesive is the most common method for a seamless look. For extra security, especially with heavier wood panels, you can also use a brad nailer or trim-head screws.
Step 3: Nailing the Spacing and Alignment
This is where your patience will pay off. With fluted panels, even small errors in spacing or alignment are noticeable, so precision is everything. Before you apply any adhesive, use your level to draw a perfectly vertical plumb line where your first panel will go. This line is your guide for the entire wall. As you place each subsequent panel, check that it’s level both vertically and horizontally. A great tip is to dry-fit a few panels on the floor first to see how they lock together and to plan your layout around outlets or light switches.
Advanced Installation Techniques
Once you've mastered the basics of installing fluted panels on a flat wall, you can start exploring more creative and functional applications. These advanced techniques can solve unique design challenges and add an extra layer of customization to your projects. Whether you're working with an unconventional architectural feature or looking to enhance a room's acoustics, there are smart ways to adapt your installation process. Let's look at a couple of methods that take your fluted panel skills to the next level, helping you tackle curved surfaces and improve sound insulation for a truly professional finish.
Installing on Curved Surfaces
Don't let a curved wall or column stop you from adding incredible texture to a space. Many fluted panels, especially those with a flexible backing, are perfect for wrapping around curved surfaces. This technique opens up a world of design possibilities, allowing you to create seamless features on rounded reception desks, kitchen islands, or architectural columns. The key is to use a strong, flexible construction adhesive and take your time, pressing each section firmly into place until it holds. This method transforms challenging architectural elements into stunning focal points, proving just how versatile modern wall panels can be.
Improving Sound Insulation
Fluted panels can do more than just look good—they can also help make a room quieter. To enhance their sound-dampening properties, you can install a layer of soundproofing material like mineral wool behind them. This is most effective when you mount the panels on wooden strips, or batons, which creates a small cavity between the wall and the panel. Simply fill this gap with your chosen insulation before attaching the panels. This is an excellent solution for home theaters, offices, or bedrooms. For an even simpler approach, you can start with specialized Acoustic Wall Panels that come with a sound-absorbing felt backing already built-in.
DIY or Hire a Professional?
Deciding whether to install the panels yourself or hire a pro comes down to your comfort level, budget, and timeline. Tackling the installation yourself can save you a significant amount on labor costs—often 30% to 40% of the total project price. It’s a rewarding project if you have an eye for detail and the right tools. However, if you’re short on time or aiming for an absolutely flawless finish on a complex wall, hiring a professional is a smart investment. For contractors, USA Builders Depot offers a trade program to help you get the best materials for your clients’ projects.
How to Maintain Fluted Wood Panels
One of the best things about fluted wood panels is that they’re relatively low-maintenance. But like any beautiful feature in your home, a little bit of care will go a long way in keeping them looking pristine for years to come. The key is to be consistent with simple cleaning and to understand how your panel’s material reacts to its environment, especially when it comes to moisture. With the right approach, you can easily protect your investment and ensure your fluted walls remain a stunning focal point.
Your Simple Cleaning Routine
The beautiful grooves that give fluted panels their texture can also be a prime spot for dust to settle. To keep them looking fresh, regular light cleaning is all you need. The easiest method is to use a vacuum with a soft brush attachment to gently lift dust from the channels. You can also use a microfiber duster or a soft, dry cloth. For any smudges or fingerprints, simply wipe the area with a slightly damp cloth, followed immediately by a dry one to prevent any moisture from sitting on the surface. This simple routine prevents buildup and keeps the wood’s natural finish looking its best.
How to Prevent Moisture Damage
When choosing wall panels, it’s important to consider the room’s humidity levels. Materials like MDF can swell if they’re not properly sealed, making them less ideal for bathrooms or basements unless they have a protective finish. Natural wood also needs a quality sealant to prevent warping. For areas with high moisture, consider a material designed to handle it. Our Interior WPC Fluted Slat Wall Panels are an excellent choice because they are water-resistant and prevent mold growth, making them perfect for kitchens, bathrooms, and laundry rooms without sacrificing style.
Fixing Scratches, Dents, and Dings
Accidents happen, but it’s good to know that fluted panels can be harder to fix than a simple flat wall. The texture makes seamless patching a bit of a challenge. For minor scratches or scuffs, a wood repair marker or a bit of wood putty in a matching color can often do the trick. However, for deeper gouges, cracks, or significant damage, it’s usually best to consult a professional. They have the tools and expertise to repair the section without disrupting the continuous look of the flutes. Starting with durable, high-quality panels from the beginning is always the best way to minimize the risk of damage.
Where to Buy Quality Fluted Panels
Finding the right fluted panels for your project starts with finding the right supplier. With so many options out there, it’s easy to feel overwhelmed. The key is to look for a company that not only offers beautiful products but also stands behind them with great service and clear policies. A reliable supplier will be transparent about their materials, provide detailed specifications, and have a track record of happy customers. Think of it as building a partnership—you want someone who can provide the materials you need to bring your vision to life, without any headaches along the way.
What to Look for in a Supplier
When you start your search, look for suppliers who specialize in architectural products and offer a diverse collection of wall panels. A wide selection means you’re more likely to find the perfect material, finish, and size for your project, whether you’re interested in the warmth of natural veneer or the durability of WPC. A specialized supplier will also have the expertise to answer your questions and guide you toward the best choice for your specific application. They should provide clear product descriptions and high-quality images so you know exactly what you’re getting before you place an order.
Customer Support Availability
When you're investing in materials for a project, you want to know that help is available if you need it. Unlike a simple online purchase, you might have questions about installation, shipping logistics, or which panel is best for a high-moisture area. A trustworthy supplier makes it easy to get answers. Look for a company with clear contact information and a support team that can assist with everything from order tracking to technical questions. This is especially important for contractors and designers who are managing tight timelines and client expectations. Responsive and knowledgeable support, often reflected in customer reviews, is a clear sign that a company values its customers and stands behind its products.
Company Values and Sustainability
It’s also worth considering the company behind the products. In the home improvement world, there's a growing focus on making thoughtful, sustainable choices. A great supplier will not only offer beautiful materials but also provide options that align with modern building practices. This includes offering engineered materials like MDF or WPC, which are often a practical and versatile alternative to solid wood. These materials provide durability and design flexibility while making efficient use of resources. Choosing a supplier who is transparent about their products and offers a range of sustainable material choices helps you create a space you can feel good about.
How to Judge Product Quality and Reviews
Quality should be at the top of your checklist. Well-made fluted panels are precisely milled for easy installation and have a consistent, durable finish. The best way to gauge a product’s quality before buying is to see what other customers have to say. Look for detailed reviews that include customer photos or videos. These real-world examples give you an unfiltered look at how the panels appear in different lighting and settings. Pay attention to comments about the ease of installation, the product’s durability over time, and the overall customer service experience. Consistent positive feedback is a strong indicator that you’re dealing with a reputable company.
Decoding Warranties and Return Policies
Before you click "buy," take a moment to read the fine print on warranties and returns. Even the most carefully planned project can hit a snag—maybe the color isn’t quite right in your space, or a box arrives damaged. A supplier with a clear and fair return policy provides peace of mind. Find out what the return window is, if there are any restocking fees, and who is responsible for return shipping costs. Understanding these details upfront can save you from a major hassle later. A company that is confident in its products will make this information easy to find and understand.
Ordering Samples Before You Commit
Photos and videos are great for inspiration, but they can’t replace seeing a material in your own space. The way light hits a surface can completely change its color and texture, which is why ordering samples is a non-negotiable step. A sample allows you to see how a panel looks next to your furniture, against your wall color, and under your home’s unique lighting at different times of day. You can feel the quality of the finish and confirm that it has the premium, substantial feel you’re looking for. This is the best way to ensure the final product will match your vision and avoid any expensive surprises after you’ve placed a full order for wall panels.
Understanding Shipping and Delivery Times
Once you’ve made your selection, it’s crucial to get a clear idea of the shipping and delivery timeline. This is especially important for contractors and trade professionals who are managing tight project schedules. While many suppliers keep popular panels in stock for quick delivery, often within 5 to 10 days, some items may require a new production run, which could extend the wait to a few weeks. Always confirm the estimated delivery date before finalizing your purchase. Planning for this lead time helps you schedule your installation accordingly and keeps your project moving forward without any unexpected delays while you wait for materials to arrive.
