


Flexible MDF Fluted Panels: A Project Guide
Great design solves problems. How do you make a room feel taller? How do you add character to a plain space? Or handle that awkward curved wall? Flexible MDF fluted panels offer an answer to all three. Their vertical lines draw the eye upward, the texture adds instant visual interest, and their ability to bend makes them perfect for non-traditional surfaces. They are a designer’s secret weapon for creating sophisticated spaces that feel custom-built. Let's cover why these panels are so popular and the practical steps to use them in your own home.
Key Takeaways
- Transform Awkward Curves: Flexible MDF fluted panels are the ideal solution for adding texture to curved walls, columns, and kitchen islands, turning challenging architectural features into seamless, high-end focal points.
- Achieve a Custom Look with Paint: These panels provide a smooth, unfinished surface that acts as a blank canvas, giving you the freedom to paint them any color to perfectly match your room's design scheme.
- Prioritize Proper Installation: For a successful project, always start with a clean, dry wall, use a quality construction adhesive for a secure bond, and measure carefully to ensure the fluted lines align perfectly.
What Are Flexible MDF Fluted Panels?
Flexible MDF fluted panels might sound technical, but they're one of the most exciting materials in modern interior design. They offer a simple way to add texture, dimension, and sophisticated curves to any space. To really understand what makes them so special, let's break down the name. It’s a combination of three key elements: the material (MDF), the design (fluted), and the game-changing feature (flexibility). Each part plays a crucial role in making these panels a go-to for designers, contractors, and ambitious DIYers.
First, What Exactly Is MDF?
Let's start with the basics. MDF stands for Medium-Density Fiberboard, an engineered wood product created by pressing fine wood fibers with resin and wax. Unlike solid wood, MDF has no knots or grain, giving you a perfectly smooth and stable surface that’s ideal for paint. This consistency makes it a reliable choice for everything from custom cabinetry to decorative wall panels. It's strong, easy to work with, and provides a flawless canvas for your design ideas, ensuring a professional finish every time.
MDF vs. Plywood and Particle Board
When you're looking at engineered wood, you'll often hear MDF, plywood, and particle board mentioned in the same breath. While they might seem similar, they have key differences that make them suitable for different jobs. Think of particle board as the most budget-friendly option, made from compressed wood chips and sawdust. It works for low-moisture, low-stress applications, but its surface is rougher and it's the least durable of the three. Plywood, on the other hand, is known for its strength. It's constructed from thin layers of wood veneer glued together, which gives it great structural integrity and better moisture resistance than its counterparts. You'll often see it used for subfloors, roofing, and structural framing.
So, where does MDF fit in? It strikes a perfect balance between cost and quality, offering a superior finish that the others can't match. Because it's made from fine wood fibers, MDF has a consistently smooth, dense surface without any grain or knots. This makes it the absolute best choice for projects that require a flawless paint job, which is why our Unfinished Wood Wall Panels are made from it. While plywood is stronger structurally, MDF is denser and more stable than particle board, providing a durable surface for decorative applications. For creating high-end interior features like fluted walls, MDF gives you that seamless, professional look that's ready for the perfect coat of paint.
And What Does "Fluted" Mean?
The term "fluted" describes the panel's decorative surface, which features a series of clean, vertical grooves and ridges. This repeating pattern adds instant texture and rhythm to a flat wall, creating beautiful plays of light and shadow that give the surface depth. While fluting has ancient roots in classic architecture, it has made a major comeback in contemporary design. It’s incredibly versatile, fitting in with styles from sleek and modern to warm and traditional. It’s a simple yet effective way to add character to any room.
Common Fluted Panel Styles
When you hear "fluted," don't just picture one specific design. The beauty of this style is its variety. The profile of the flutes—how wide, deep, and shaped they are—can completely change the feel of a room. Tightly spaced, narrow flutes create a delicate, modern texture, while wider, bolder flutes make a more dramatic architectural statement. Some panels feature soft, rounded grooves for a gentle look, while others have sharp, V-shaped channels that create crisp shadow lines. The most versatile option is often an unfinished paint-grade panel. This gives you a blank canvas to match any color palette perfectly. For a different aesthetic, you can also find panels with natural wood veneers that add warmth or durable Interior WPC Fluted Slat Wall Panels for high-traffic areas.
The "Flexible" Part: Why It's a Game-Changer
This is where things get really interesting. While standard MDF is rigid, flexible MDF is engineered to bend. This is usually done by cutting grooves, or kerfs, into the back of the panel, allowing it to curve smoothly without cracking. This single feature opens up a world of creative possibilities. You can wrap these panels around curved walls, columns, kitchen islands, or reception desks—places where flat materials just won't work. This ability to follow contours lets you create seamless, high-end architectural features that were once complex and expensive to build.
Exploring Different Finishes and Materials
Beyond its incredible flexibility, one of the best things about MDF fluted paneling is the variety of finishes and materials available. The surface you choose not only defines the final look but also determines where you can install it. Whether you’re aiming for the warmth of natural wood or need something durable enough for a high-moisture area like a bathroom, there’s a panel that fits the bill. Understanding the differences between these options is key to selecting the right product for your project. Let's look at a couple of popular choices that can help you achieve a polished, professional result that lasts.
Wood Veneers and 3D Laminates
If you love the look of real wood but need a more consistent and budget-friendly option, panels with wood veneers or 3D laminates are a fantastic choice. A wood veneer is a thin slice of actual hardwood bonded to the MDF core, giving you the authentic grain and texture of oak, walnut, or other species. 3D laminates are high-tech films that can convincingly mimic wood, stone, or even fabric textures. These pre-finished options save you time on painting or staining and deliver a flawless, durable surface right out of the box. They are perfect for creating a stunning feature wall or custom furniture piece. For a truly authentic feel, you can explore natural veneer wall panels that bring organic warmth into any space.
Moisture-Resistant Options
For projects in bathrooms, kitchens, or basements, standard MDF isn't always the best choice due to its susceptibility to moisture. That’s where moisture-resistant (MR) options come in. These panels are engineered with special resins that prevent them from swelling or warping in humid environments. Another excellent alternative is WPC (Wood Plastic Composite) fluted paneling, which combines wood fibers and plastic polymers to create a material that is completely waterproof and incredibly durable. This makes WPC panels ideal for spaces that see a lot of moisture, ensuring your beautiful fluted design remains pristine for years without any risk of water damage. It’s the perfect way to add texture without compromising on practicality.
Why Choose Flexible MDF Fluted Panels?
Flexible MDF fluted panels are a game-changer for interior design, offering a unique combination of style, versatility, and function. They provide a simple yet impactful way to transform a room, whether you're a homeowner tackling a weekend project or a contractor looking for a reliable design solution. These panels go beyond being just a decorative element; they solve common design challenges by adding texture, improving sound quality, and giving you complete creative control over your space. Let’s look at a few reasons why they’ve become such a popular choice.
Create Instant Texture and Depth
Plain, flat walls can feel uninspired. Flexible MDF fluted panels are the perfect fix, instantly adding depth and visual interest to any room. The vertical grooves create a subtle, rhythmic pattern that catches the light and draws the eye. This wavy, lined texture gives walls a modern yet classic look that feels both sophisticated and welcoming. Instead of a flat surface, you get a dynamic feature that can serve as a stunning focal point or a complementary background. It’s an easy way to introduce architectural detail without committing to a major renovation.
Your Ticket to Creative Freedom
One of the best things about MDF is that it’s a perfect canvas for your creativity. Our Unfinished Wood Wall Panels provide a smooth, consistent surface that’s ready for paint. This gives you the freedom to choose any color imaginable, allowing you to perfectly match your existing decor or introduce a bold, new accent shade. Whether you envision a soft, neutral tone for a calming bedroom or a vibrant color for a dramatic entryway, these panels give you complete control to bring your vision to life. You aren’t limited by pre-set finishes, so your design possibilities are truly endless.
Soften Sound and Reduce Echo
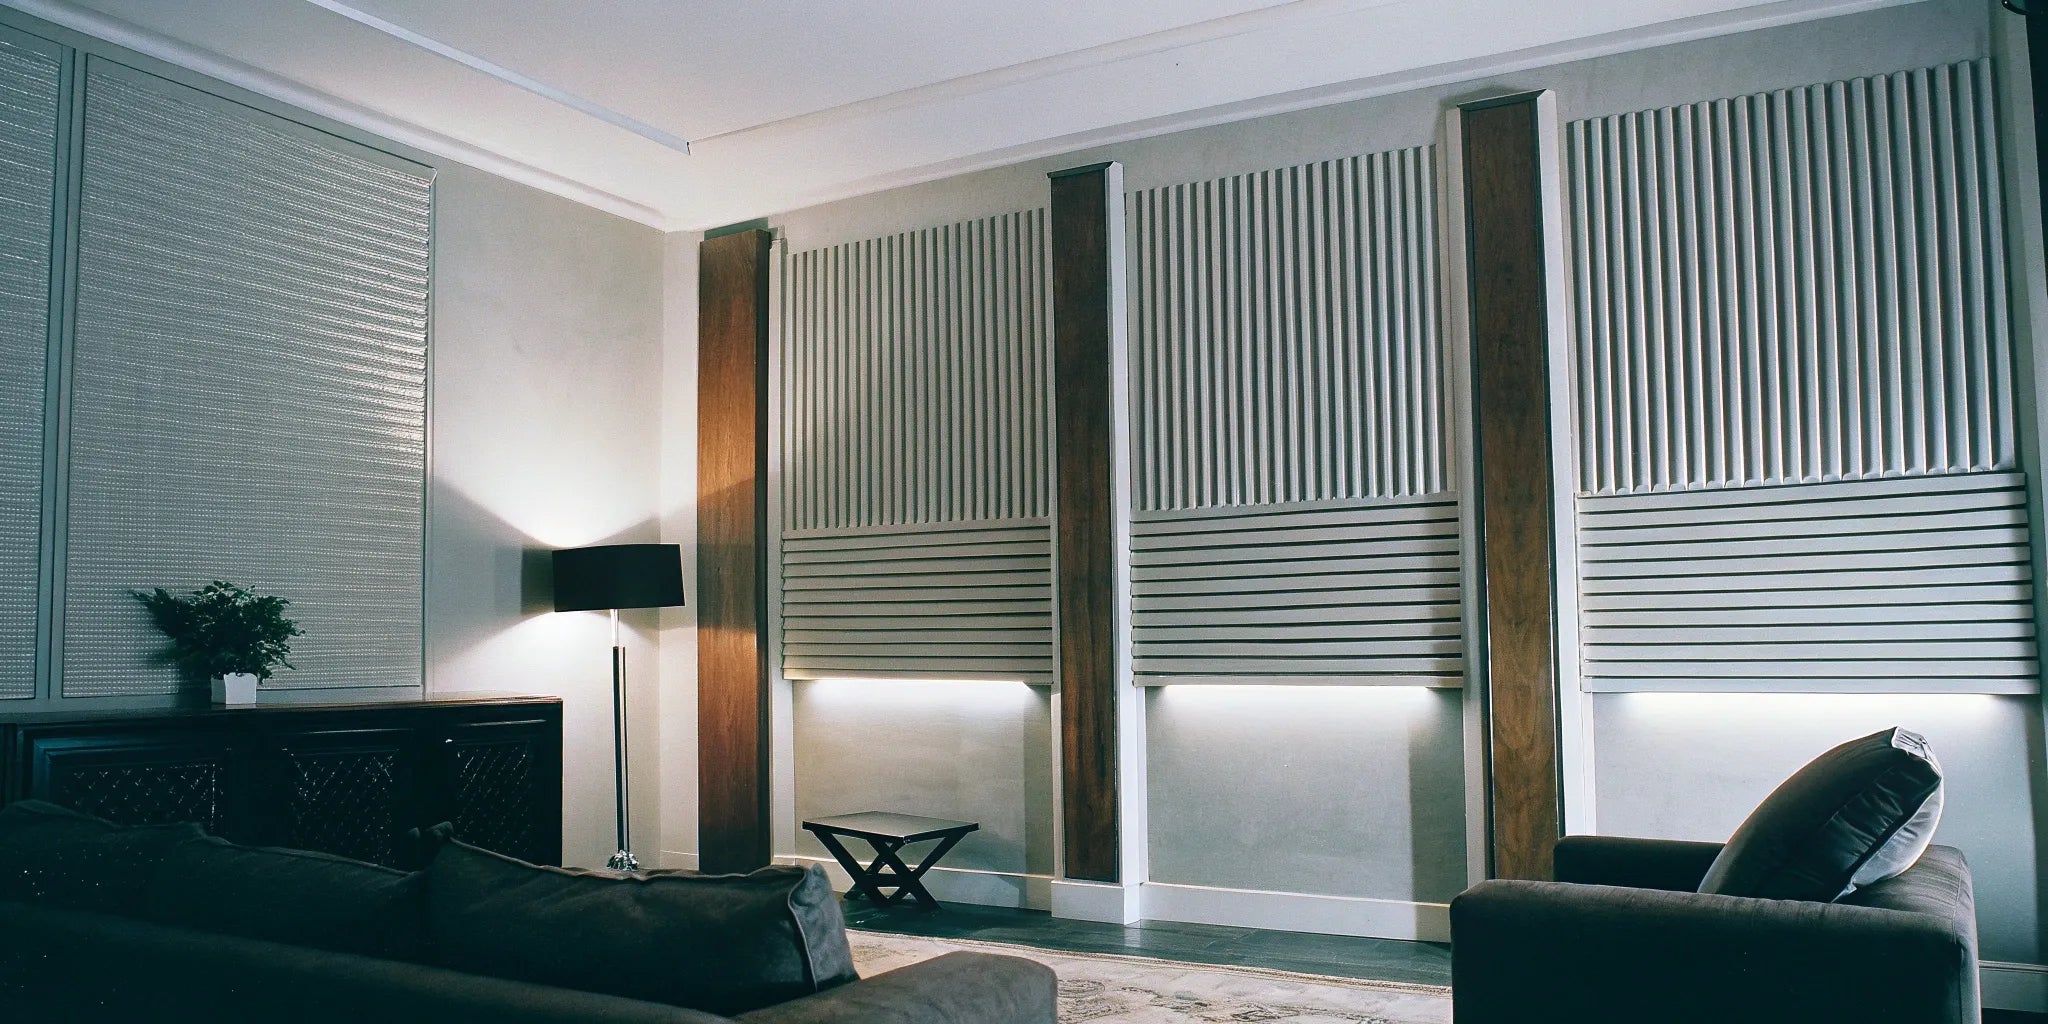
Have you ever noticed how sound seems to bounce around in rooms with lots of hard surfaces? Fluted panels can help with that. The grooved texture does more than just look good—it also helps break up sound waves, reducing echo and improving the overall acoustics of a space. This makes them a practical choice for living rooms, home offices, or media rooms where sound quality matters. By addressing both aesthetic and acoustic needs with a single material, you can create a space that is not only beautiful but also more comfortable and serene.
Achieve a Luxe Look on a Budget
Fluted panels deliver a luxurious, high-end look without the hefty price tag. They are perfect for creating an impressive focal point, like an accent wall behind a sofa or a statement headboard in a bedroom. This simple addition can make an entire room feel more custom and professionally designed. Because they are so effective at creating visual impact, you can achieve a dramatic transformation on a reasonable budget. It’s a smart way to add value and style to your home, giving you that bespoke architectural feel for a fraction of the cost.
How Do Flexible Panels Compare to Traditional Options?
When you’re planning a project, choosing the right material is half the battle. Flexible MDF fluted panels and traditional wall panels can both create stunning results, but they serve different purposes and have unique strengths. Understanding the key differences in flexibility, installation, and design potential will help you decide which option is the perfect fit for your space. While traditional panels are the go-to for flat surfaces, flexible MDF opens up a whole new world of creative possibilities for curved architecture and custom features. Let's break down how they stack up against each other.
Curves vs. Straight Lines: The Flexibility Factor
The most significant difference is right in the name. Flexible MDF is engineered with special grooves cut into the back, allowing it to bend smoothly around curves without cracking or distorting. This makes it ideal for wrapping columns, creating arched entryways, or designing wavy accent walls. In contrast, traditional wall panels—whether they’re made of standard MDF, solid wood, or WPC—are rigid. They are designed for installation on flat surfaces and provide a clean, structured look. If your design involves anything other than a straight line, flexible MDF is the clear winner.
Comparing the Installation Process
Installing traditional panels on a flat wall is a relatively straightforward process of measuring, cutting, and securing. Flexible MDF, however, requires a bit more finesse. Working with it on curved surfaces can be tricky, as you need to ensure the panel follows the contour perfectly without any gaps. It’s often helpful to have an extra set of hands to hold the panel in place while you secure it. Proper surface preparation and a strong adhesive are critical for a successful installation that lasts. While it demands more precision, the stunning final result is well worth the extra effort.
More Creative Possibilities for Your Space
Both panel types offer great design potential, but flexible MDF gives you more creative freedom. It allows you to introduce soft curves and organic shapes into a space, which is difficult to achieve with rigid materials. Because flexible fluted panels come unfinished, they provide a perfect canvas for customization. The smooth surface is ready for paint, giving you the freedom to choose any color to match your decor. This means you can create a bold, dramatic feature or a subtle, textured backdrop. Many of our Unfinished Wood Wall Panels offer this same paint-grade versatility for flat surfaces.
Which Option Lasts Longer?
When it comes to durability, both flexible MDF and traditional panels are excellent choices for interior applications. A common misconception is that the intricate look of fluted panels means they require a lot of maintenance, but that’s not the case. They are designed to be low-maintenance and typically only need occasional dusting or a wipe-down with a soft cloth to stay looking fresh. As with any wood-based product, it’s important to install them in areas without excessive moisture. For flat walls in high-traffic areas, a rigid panel might offer slightly more impact resistance, but both materials are built to last.
Where Can You Use Flexible MDF Fluted Panels?
One of the best things about flexible MDF fluted panels is their incredible versatility. Because they can bend and curve, they open up a world of design possibilities that are often too complex or expensive to achieve with traditional, rigid materials. You’re no longer limited to flat surfaces. These panels invite you to think creatively about adding texture, depth, and architectural interest to almost any part of a room. From grand, sweeping walls to the smallest furniture details, flexible MDF can transform a space with its clean lines and modern aesthetic. Whether you’re a homeowner looking for a weekend project or a contractor planning a large-scale renovation, these wall panels provide a straightforward path to a high-end, custom look. Let’s explore some of the most popular and innovative ways to use them.
Perfect for Curved Walls and Columns
Do you have a curved staircase wall, a rounded entryway, or structural columns that feel more like an obstacle than a feature? Flexible MDF panels are the perfect solution. Thanks to special grooves cut into the back, these panels can smoothly wrap around curves without warping or cracking. This allows you to turn an awkward architectural element into a stunning focal point. Imagine a basement support column transformed into a sophisticated, fluted pillar or a curved hallway wall that guides the eye with its elegant texture. It’s a professional-grade finish that adds a layer of detail and luxury that was once difficult and costly to create.
Design a Show-Stopping Accent Wall
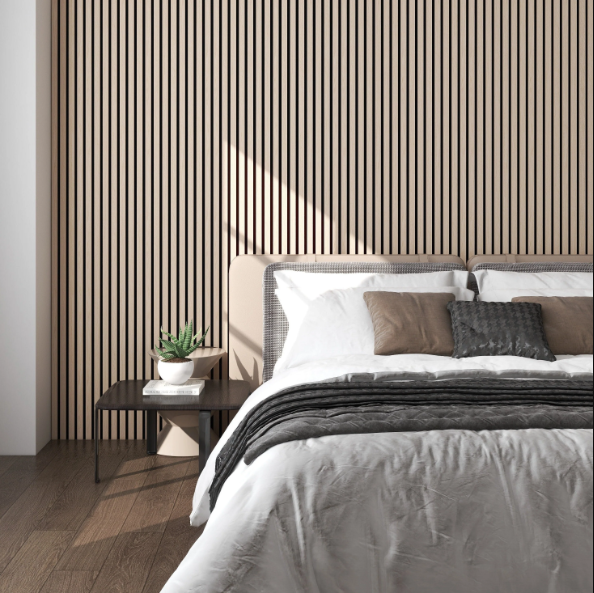
Of course, flexible MDF panels also shine on flat surfaces. A fluted accent wall is a fantastic way to add dimension and character to any room. The vertical lines create a sense of height, making ceilings feel taller, while the texture adds visual interest that paint or wallpaper alone can’t match. Use them behind a headboard to create a cozy, hotel-like primary suite, or apply them to a living room wall to frame a fireplace or entertainment center. Because our Unfinished Wood Wall Panels arrive ready for your choice of paint or stain, you have complete creative control to match your existing decor or introduce a bold new color.
Give Furniture a Modern Facelift
Think beyond the walls! Flexible MDF is a game-changer for custom furniture and built-in projects. You can easily upgrade a plain kitchen island by wrapping the base in fluted panels, giving it a high-end, custom-built appearance. It’s also perfect for refacing cabinet doors, building a unique media console, or designing a curved home bar. This is a great way for DIYers to give existing furniture a modern refresh or for contractors to add value with bespoke details. The flexibility allows you to work with rounded corners and unique shapes, creating pieces that look truly one-of-a-kind.
Transform Commercial Spaces with Style
For business owners and commercial designers, flexible MDF fluted panels offer a durable and stylish way to make a lasting impression. Use them to create an unforgettable feature wall in a hotel lobby, a chic backdrop in a retail boutique, or a textured front for a restaurant bar or reception desk. The clean, modern look adds a touch of sophistication that can improve any brand’s environment. Because they are so easy to customize with paint, you can perfectly match your company’s color scheme. If you’re a trade professional, you can apply for an account to access exclusive pricing for your commercial projects.
Your Pre-Installation Checklist
Jumping into a new project is exciting, but a little prep work goes a long way. Before you start transforming your space with flexible fluted panels, there are a few key things to consider. Thinking through the details of your specific application—from curves and moisture to finishes and measurements—will set you up for a smooth installation and a result you’ll love for years to come.
Tips for Handling Curved Surfaces
The main appeal of flexible panels is their ability to wrap around curved surfaces, but this feature requires a careful approach. Applying panels to a curved wall or column can be tricky, and it’s often a good idea to have an extra set of hands to help hold things in place. Take your time to measure the curve’s arc and plan your cuts accordingly. A thoughtful layout is the key to a seamless application, ensuring the flutes align perfectly and the panel adheres smoothly without any buckling or gaps. This planning stage is where you can really map out your design before making the first cut.
Using Support Structures for a Perfect Curve
To get that flawless, smooth curve you're picturing, you can't just rely on adhesive alone. The secret to avoiding flat spots or an uneven bend is to create a support structure behind the panel. Think of it as a simple skeleton made of horizontal and vertical ribs that guides the flexible MDF into the perfect shape. This framework provides consistent pressure along the entire curve, ensuring the panel follows the contour exactly as you intended. While it might seem like an extra step, building this support system is what separates a good result from a great one, especially for larger applications like columns or reception desks. It’s the key to achieving that seamless, professionally built look.
What About Moisture? A Quick Guide
It’s crucial to remember that standard MDF (Medium-Density Fiberboard) is an indoor-only material. It acts like a sponge and will absorb moisture, which can cause it to swell, warp, or degrade over time. This makes it unsuitable for bathrooms with high humidity, basements prone to dampness, or any outdoor applications. For spaces exposed to the elements, you’ll want to explore materials specifically designed for that purpose, such as our Exterior Shiplap Cladding Wall Panels. Always check the product specifications to ensure you’re using the right panel for the right environment.
How to Pick the Perfect Finish
One of the best things about MDF fluted panels is that they provide a perfect blank canvas. Their smooth surface is ideal for paint, giving you the freedom to match your walls to any color scheme. The finish you choose—whether matte, eggshell, satin, or semi-gloss—will impact both the final look and the panel's durability. A higher-gloss finish is typically easier to clean and more resistant to scuffs, making it a practical choice for high-traffic areas. A matte finish, on the other hand, offers a more modern, sophisticated look that hides imperfections. Consider taking home a few paint samples to see how they look in your space.
Why Measuring Twice is Non-Negotiable
The old saying "measure twice, cut once" has never been more true than when installing wall panels. Start by getting accurate measurements of your entire surface area. Be aware of common challenges like uneven walls, which might require you to use shims or packers for a level finish. Awkward corners and cut-outs for outlets or light switches demand extra attention. Mark these spots carefully on the panel before you cut. Taking the time for precise measurements is the single most important step for achieving a professional-looking installation and avoiding wasted material.
How to Install Flexible MDF Fluted Panels
One of the best things about flexible MDF wall panels is how straightforward they are to install. With a few basic tools and a little patience, you can completely transform a space in an afternoon. Whether you’re creating a statement wall or wrapping a curved surface, the process is manageable for a confident DIYer. Here’s how to get it done right.
Step 1: Get Your Surface Ready
A great finish starts with a great foundation. Before you even think about opening the adhesive, make sure the wall is clean, smooth, and dry. Any dust, grease, or bumps can prevent the panels from sticking properly and creating a seamless look. Take a few minutes to wipe down the surface with a damp cloth, patch any holes or cracks with spackle, and lightly sand any rough spots. A smooth surface ensures the panels lie perfectly flat, which is especially important for achieving a flawless paint or stain finish later on. This simple prep work is crucial and makes a huge difference in the final look.
Step 2: Pick the Best Adhesive
For the cleanest, most professional look, a high-quality construction adhesive is your best friend. It creates a strong, lasting bond without any visible fasteners cluttering up the design. When you’re ready to install, apply the adhesive to the back of the panel in a wavy “S” pattern to ensure even coverage. While you can install them quickly using screws or nails, glue is often sufficient. For extra peace of mind on ceilings or very tall walls, you can add a few brad nails along the top and bottom edges. Always check the adhesive’s instructions for specific application tips and cure times.
Step 3: Measure, Cut, and Test the Fit
Here’s where the classic advice, “measure twice, cut once,” really pays off. Precise cuts are key to getting those fluted lines to match up perfectly from one panel to the next. Use a saw to cut the panels to the right size—a circular saw or miter saw with a fine-toothed blade will give you a clean edge. For the best results, cut from the back side of the panel to minimize any potential splintering on the visible surface. Before applying any glue, do a “dry fit” by placing the cut panel against the wall to make sure everything lines up exactly as you planned.
Step 4: Apply and Secure Your Panels
Once your panel is cut and you’ve applied adhesive, it’s time for the main event. Attach panels using strong wall glue by pressing the panel firmly against the wall, starting from one end and working your way across. Use a J-roller or a clean, dry cloth to apply even pressure and eliminate any air bubbles. Work methodically, ensuring each panel is snug against the last one to keep the fluted pattern consistent. To keep everything in place while the adhesive cures, you can use painter's tape. For extra strength, you can also use small nails or screws along the edges.
Finishing Seams for a Flawless Look
Achieving that professional, seamless finish is all about the details. The most important step is to ensure the fluted lines align perfectly as you install each panel. The goal is to create a continuous, uninterrupted pattern that flows across the entire wall. Even with careful placement, you might notice a tiny gap where two panels meet—and that’s perfectly okay. This is where a high-quality, paintable wood filler or caulk becomes your secret weapon. Apply a thin bead directly into the seam, then smooth it out with a putty knife or your finger. This simple trick is what helps you hide the transition between panels, creating a single, solid surface.
Once the filler has completely dried (be sure to check the manufacturer's instructions), it’s time for the final touch-up. Lightly sand the filled seam with fine-grit sandpaper until it’s perfectly smooth and flush with the panel surface. This ensures you won’t see any bumps or ridges after you paint. Now for the fun part. Applying a fresh coat of paint is what truly unifies the wall, making those seams completely disappear. Because our Unfinished Wood Wall Panels are primed and ready for paint, you’ll get a flawless finish that brings your vision to life. This final step is what transforms a series of individual panels into one cohesive, stunning architectural feature.
How to Finish and Customize Your Fluted Panels
Once your flexible MDF panels are installed, the real fun begins. Think of the raw panels as a blank canvas waiting for your personal touch. Because MDF is engineered for a smooth, consistent surface, it’s incredibly easy to finish. A good coat of paint not only brings your design vision to life but also adds a protective layer that helps the panels last. This is your chance to perfectly match your room’s color scheme or create a bold, contrasting feature that makes a statement. With the right finish, you can transform a simple architectural detail into the centerpiece of your space.
To Paint or To Stain?
When it comes to finishing MDF, paint is definitely the way to go. Standard MDF is like a sponge—it absorbs moisture, which makes it unsuitable for staining and a poor choice for outdoor use. Paint, on the other hand, seals the surface and protects the material. This is why flexible MDF fluted panels are designed specifically for indoor applications where you can control the environment. If you love the look of natural wood grain, consider our collection of Unfinished Wood Wall Panels, which are designed to be stained. For MDF, however, grab a paintbrush and get ready to add some color.
Finding the Right Paint Color
The smooth surface of MDF fluted panels is perfect for painting, allowing you to choose from an endless spectrum of shades. This flexibility gives you the freedom to match your interior design perfectly. You could opt for a neutral tone that adds subtle texture without overwhelming the room, or go for a deep, dramatic color to create a focal point. Think about the mood you want to set. Soft blues and greens can create a calm, serene atmosphere, while warm terracottas or bold jewel tones can make a space feel more energetic and luxurious. Don’t be afraid to explore color palettes that complement your existing furniture and decor.
Matte, Satin, or Gloss?
The paint sheen you choose has a big impact on the final look. A matte finish offers a modern, velvety look that’s great at hiding minor surface imperfections. Satin is a popular middle-ground option; it has a slight sheen that reflects a little light and is easier to wipe clean than matte. For a high-impact, dramatic effect, a gloss or semi-gloss finish is an excellent choice. It’s highly durable and reflects a lot of light, making the fluted texture really pop. The great news is that many MDF panels come pre-primed, so you can get straight to painting with your chosen color and finish right away.
Don't Skip This Step: Always Test a Sample
Before you commit to painting an entire wall, always test your color choices. How a color looks on a tiny paint chip can be very different from how it appears on a textured, three-dimensional surface under your room’s specific lighting. We highly recommend ordering panel samples to see and feel the product in your space. Paint a few samples with your top color contenders and place them on the wall. Observe how they look throughout the day as the natural light changes. This small step ensures you’ll be happy with the final result and helps you move forward with your project confidently.
Time-Saving Finishing Techniques
Working smarter, not harder, is the key to any successful project. When it comes to fluted panels, the detailed grooves can make painting on the wall a bit tedious. A pro-level tip is to do most of the finishing work *before* the panels are installed. This approach not only saves you a significant amount of time but also helps you achieve a cleaner, more professional result. By finishing the panels while they are flat, you can avoid the hassle of taping off surrounding walls and ceilings and prevent drips or uneven coverage in the flutes.
Painting or Finishing Before Installation
One of the best things about our Unfinished Wood Wall Panels is that they provide a perfect blank canvas. Their smooth surface is ideal for paint, giving you the freedom to match your walls to any color scheme. Instead of painting the panels once they’re on the wall, lay them flat on a pair of sawhorses. This allows you to use a roller for quick coverage on the flat surfaces and a brush or sprayer to get into the grooves without worrying about drips. You can apply a smooth, even coat of primer and your chosen paint color, let it dry completely, and then simply touch up any nail holes after installation.
Applying Veneers Before Bending
If you’re aiming for a natural wood look on a curved surface, applying a wood veneer is an excellent technique. The key to success here is to laminate the board while it is still flat, *before* you bend it into place. This allows you to apply even pressure across the entire surface, ensuring a strong bond without any air bubbles or wrinkles. Trying to apply a veneer to an already curved panel is incredibly difficult and often leads to a flawed finish. This method gives you far more flexibility in your design, letting you achieve a high-end, custom wood look on columns, islands, and curved walls with precision and ease.
What to Look for When Buying Flexible Panels
Before you add those gorgeous fluted panels to your cart, let's walk through a few key considerations. Thinking about these details upfront will ensure your project goes smoothly from start to finish and that you absolutely love the final result. A little planning now saves a lot of headaches later, so let’s make sure you have all the information you need to choose the perfect panels for your space.
Understand the Specs: Size, Thickness, and Weight
Not all panels are created equal, so it’s important to check the specifications. Flexible MDF panels come in various lengths, often ranging from shorter pieces for wainscoting to full-height options for floor-to-ceiling accent walls. Choosing the right length helps minimize seams and reduces waste. Also, pay attention to the thickness and weight. Thicker panels can offer better sound insulation, but they’ll also be heavier and may require more support and a stronger adhesive. Make sure you can comfortably handle the panels and that your wall is ready to support them. You can explore different sizes in our wall panels collection to find the perfect fit.
Common Panel Dimensions and Thicknesses
When you start shopping for flexible MDF, you’ll notice they typically come in a few standard thicknesses, most commonly 6mm and 9mm. The secret to their flexibility lies in the grooves, or kerfs, cut into one side of the panel, which allow the board to bend without distorting. The thickness you choose will affect how tightly the panel can curve. While these are common sizes, it's always a good idea to check the specific product details, as dimensions can vary between manufacturers. The best way to get a feel for the material is to test a small sample first to see how it handles the specific curve you have in mind.
Choosing the Right Thickness for Your Curve
So, how do you decide between 6mm and 9mm? It all comes down to the radius of your curve. As a general rule, the 6mm panels are more pliable and better suited for tighter curves—think wrapping a narrow column or creating a sharp, rounded corner on a custom desk. For larger, more gradual curves, like a sweeping accent wall or a gently rounded reception counter, the 9mm thickness is often the better choice. It’s a bit stiffer, which helps it hold a broad shape more consistently without any unwanted flexing. Choosing the right thickness ensures your finished project is both beautiful and structurally sound.
Bending Radius and Grain Direction Explained
This might sound a bit technical, but it’s a simple concept that will save you a lot of headaches. When you order flexible MDF, you’ll often see options for "long grain" or "short grain." This doesn't refer to a wood pattern but to the direction the panel can bend. A standard sheet is typically 1220mm x 2440mm. "Long grain" means the panel bends along its shorter side, making it ideal for creating tall, curved structures. "Short grain" (sometimes called cross grain) bends along its longer side, which is perfect for wide, shorter applications like the front of a curved bar. Understanding this helps you plan your project and order the right orientation to minimize waste.
Consider Your Room's Climate and Use
Think about where you plan to install the panels. Standard MDF is incredibly sturdy and resists warping in stable, dry conditions, making it perfect for living rooms, bedrooms, and offices. However, if you’re designing for a space with high humidity, like a bathroom or a basement, you’ll want to look for moisture-resistant MDF. This specialized material is designed to hold up against dampness and prevent swelling or damage over time. Taking a moment to assess your room’s conditions will ensure your beautiful new walls last for years to come.
How to Budget for Your Fluted Panel Project
Flexible MDF panels are a cost-effective way to get a high-end look, but it’s still important to plan your budget. Panel prices can vary based on size, thickness, and finish. Beyond the panels themselves, remember to account for other materials like a quality construction adhesive, primer, paint or stain, and any tools you might need to buy or rent. If you’re a trade professional, you can also apply for our pro pricing program to get access to bulk discounts. By mapping out all potential costs, you can avoid surprises and keep your project on track financially.
Typical Price Ranges
When you're planning your project, it helps to have a general idea of the cost. Flexible MDF fluted panels are a surprisingly affordable way to achieve a high-end, custom look, with prices generally ranging from about $170 to $265 per panel. Of course, this cost can vary depending on the panel's specific size, thickness, and the supplier you choose, so it’s always a good idea to browse different options to see what fits your budget. To get a precise idea of what your project will cost, you can explore our full collection of wall panels and compare the different styles and dimensions available for your space.
Ordering Samples Before You Commit
Before you place a full order, I can't stress this enough: get samples. Computer screens can be deceiving, and the way a panel looks online might be completely different from how it appears in your home’s unique lighting. Ordering a sample allows you to see the true color and feel the texture firsthand. You can hold it up to your wall, compare it with your paint swatches, and make sure it’s the perfect fit for your vision. This small step is one of the most important in the design process, as it helps you avoid costly mistakes and ensures you’ll be completely happy with the final result.
How Panel Style Affects Your Room's Vibe
MDF is an engineered wood product with a smooth, consistent surface that makes it an ideal alternative to solid wood for many applications. It’s free of knots and grain patterns, which allows for a flawless finish when painted. Some people have questions about the materials used in MDF, particularly formaldehyde. It’s reassuring to know that modern manufacturing follows strict regulations, like those set by the Environmental Protection Agency, to limit emissions and ensure the material is safe for indoor use. Choosing quality MDF means you’re getting a durable, reliable, and safe product for your home or commercial space.
Special Requests and Customizations
While flexible MDF panels offer a ton of creative freedom right out of the box, some projects have unique requirements that go beyond the standard options. Whether you're a designer working on a large commercial space or a contractor with very specific client needs, it's good to know that custom solutions are often available. From special dimensions to materials engineered for enhanced performance, don't hesitate to ask what's possible. Many suppliers are equipped to handle special requests, especially for trade professionals who need to meet particular building codes or design specifications. It’s always worth a conversation to see how a product can be tailored to fit your project perfectly.
Fire-Rated MDF for Commercial Projects
When it comes to commercial spaces like offices, restaurants, and hotels, safety is the top priority. Building codes are strict, and for good reason. This is where fire-rated MDF becomes an essential option. This specialized material is treated to slow combustion and reduce the spread of flames, helping you meet stringent fire safety standards without sacrificing your design vision. You can still achieve that beautiful, textured look of fluted panels while ensuring the space is compliant and safe for public use. It’s the perfect example of how modern materials can solve practical challenges, allowing you to create stunning interiors that are both stylish and responsible.
Ready to Start? Find Your Panels at USA Builders Depot
Once you have a vision for your project, the next step is finding high-quality materials that can bring it to life. At USA Builders Depot, we provide the products and support you need to create beautiful, dynamic spaces. Our flexible fluted panels are designed for durability, ease of installation, and incredible design versatility, making them a perfect choice for homeowners and trade professionals alike. We simplify the process with a curated collection, straightforward pricing, and a commitment to getting you what you need, when you need it. Let’s look at how we can help you get your project started.
Browse Our Flexible Fluted Panel Collection
Our flexible wall panels offer a cost-effective and stylish way to add dimension to your interiors. They arrive unfinished, giving you a blank canvas to paint or stain in any color that fits your design scheme. These panels are perfect for creating stunning focal points, whether you’re designing a dramatic accent wall in a living room or adding a unique texture to a commercial lobby. Because they are so easy to customize, you can achieve a high-end look that feels completely personal. Browse our collection to find the perfect profile and size for your next project.
Get Pro Pricing and Fast Shipping
We know that for professionals, time and budget are everything. That’s why we offer a trade program with exclusive pricing and bulk discounts for contractors, designers, and builders. You can apply for a trade account to access these benefits and streamline your purchasing process. We also understand that project timelines are tight, which is why we offer fast, reliable nationwide shipping. While working with flexible panels on curved surfaces can be tricky, getting your materials delivered directly to your job site quickly and efficiently makes the entire process much smoother from the start.
Why Quality Matters to Us (and You)
Your reputation is built on the quality of your work, and our reputation is built on the quality of our products. We stand behind every panel we sell, ensuring you receive materials that are durable, well-crafted, and ready for installation. Our customers consistently praise the quality of our products and the smoothness of the delivery process. You can read our customer reviews to see what others have to say. We’re dedicated to being your trusted partner for not just wall panels, but for all your building material needs, from start to finish.
Keeping Your Fluted Panels Looking New
Your new fluted panels look incredible, and keeping them that way is easier than you might think. With just a little routine care, you can ensure your accent wall or custom furniture piece remains a stunning feature for years to come. Proper maintenance starts with understanding the material and taking a few simple, proactive steps to protect your investment. From regular dusting to handling minor scuffs, here’s everything you need to know to keep your panels in pristine condition.
Your Go-To Cleaning Routine
The key to maintaining your fluted panels is consistent, gentle cleaning. Dust is the most common culprit, so it’s a good idea to dust often using a soft cloth or a vacuum with a brush attachment to get into the grooves without scratching the surface. If you notice a smudge or a spill, act quickly. You can wipe them promptly with a damp cloth and a mild soap to prevent stains from setting. Just be sure to avoid harsh chemical cleaners or abrasive sponges, as these can damage the finish and the MDF core.
Handling Spills and Moisture
One of the most important things to remember is that standard MDF and moisture don't mix well. For installations in bathrooms, basements, or kitchens, it's best to choose moisture-resistant MDF from the start. For all other areas, the best defense is a good offense. Wipe up any spills immediately and avoid installing panels where they might have direct contact with water. A quality paint or sealant also provides an excellent barrier against ambient humidity. Exploring different types of wall panels can help you find the right material for your specific room's environment.
Tips for Long-Term Maintenance
The longevity of your fluted panels depends heavily on proper installation and ongoing care. Every step, from sealing and fastening to choosing the right grade, plays a role in extending the life of your MDF applications. Make sure your panels are properly sealed with a quality primer and paint or stain before or immediately after installation. Periodically check for any signs of wear, especially in high-traffic areas. Addressing small scratches or chips early will prevent them from becoming bigger problems down the road and keep your installation looking flawless.
Troubleshooting Common Issues
Even with the best care, accidents can happen. If you notice a dent or a scratch, don't panic. Minor impact damage can often be repaired with a bit of wood filler and some touch-up paint. For moisture-related issues like swelling, the solution depends on the severity. The key is to identify and manage common problems as soon as they appear. Being proactive will help you maintain the structural integrity and beautiful appearance of your fluted wall panels for the long haul.