

Natural Veneer Wall Panels: How to Plan Grain, Seams, Corners & Lighting
Natural veneer wall panels can transform a room without making the space feel overly heavy or rustic.
They bring something synthetic wood-look finishes cannot fully duplicate: real variation.
Natural grain changes from panel to panel. Color shifts slightly. Figure and texture move across the surface. Light reacts differently throughout the day.
Those characteristics are exactly what make natural veneer attractive. They are also why the layout should be planned before installation.
A beautiful veneer wall is not simply a matter of attaching panels from one side of the room to the other.
The installer and designer should think about grain direction, panel sequencing, wall proportions, seams, corners, lighting, outlets, TVs, doors, transitions, and matching trims.
When these details are considered early, natural veneer can look like a fully integrated architectural finish rather than a collection of individual panels.
This guide explains how to plan the wall before the first panel is cut.
What Is Natural Veneer?
Natural wood veneer is a thin layer of real wood applied to a supporting panel or substrate.
That allows the finished panel to show authentic wood grain while using the structural core to provide stability and usable panel dimensions.
Depending on the product, the veneer may feature species or visual characteristics such as oak, walnut, ash, smoked wood tones, light natural wood, darker brown grain, or figured wood.
The exact construction varies by product.
Before ordering, confirm veneer species or finish, panel dimensions, core material, overall thickness, intended application, installation requirements, edge treatment, and available matching accessories.
Natural veneer should not automatically be treated the same as solid lumber. Likewise, one veneer panel system should not automatically be installed using the requirements of another.
Why Natural Veneer Looks Different From Printed Wood-Look Panels
Wood-look panels can provide excellent visual consistency.
Natural veneer behaves differently.
Because the face is made from real wood, two neighboring panels may contain different grain lines, lighter or darker areas, small tonal shifts, natural figuring, and changes in grain density.
Those differences are not necessarily defects. They are part of the natural material.
The design question becomes: How do you arrange those natural differences so the entire wall looks intentional?
The answer starts with panel sequencing.
Do Not Install Natural Veneer Panels Straight From the Box
One of the easiest mistakes is opening the cartons and installing panels in whatever order they are removed.
That may place two dramatically different panels directly beside each other.
Instead, unpack or review the panels according to the product handling instructions and examine the visible faces before permanent installation.
Look for overall color, dominant grain direction, grain density, lighter panels, darker panels, highly figured pieces, and quieter pieces.
Then decide how the panels should flow across the wall.
This simple step can make a major difference in the finished appearance.
What Is Panel Sequencing?
Panel sequencing means deciding the order in which the veneer panels will appear across the wall.
For example, you might arrange five panels so the color gradually moves:
lighter → medium → medium → medium-dark → darker
rather than:
dark → light → dark → medium → light
Neither sequence is automatically correct. The right layout depends on the design.
But random installation can make tonal variation more noticeable. A planned sequence can make the same natural variation feel intentional.
Lay the Panels Out Before Installation
For important feature walls, create a dry layout before fastening.
Depending on available space, that may mean placing the panels flat on a protected floor, upright against a protected wall, digitally photographed and arranged, or numbered according to installation order.
Label the backs rather than marking the visible veneer face.
For example: A1 – A2 – A3 – A4 – A5.
This creates a clear installation sequence.
Grain Direction: Vertical or Horizontal?
Natural veneer panels can create very different effects depending on grain direction.
Vertical grain
Vertical grain tends to emphasize ceiling height.
It can work especially well in entry foyers, living rooms, double-height spaces, hallways, behind beds, dining rooms, and office reception areas.
Vertical lines naturally pull the eye upward.
Horizontal grain
Horizontal grain can visually stretch the room.
It can work well for long TV walls, built-in cabinetry walls, bedroom feature walls, wide living-room walls, and hospitality interiors.
The final choice should also reflect the actual panel dimensions and approved installation orientation.
Do not assume every product can be rotated in every direction without checking the product requirements.
Should the Grain Continue Across Multiple Panels?
A continuous-looking grain can create a very luxurious effect.
But whether true grain matching is possible depends on how the panels were manufactured and supplied.
Some natural veneer products may come from sequential veneer leaves. Others may not.
Do not assume two cartons contain consecutively matched veneer.
If continuous grain is critical to the project, confirm that requirement before ordering.
For standard decorative installations, the more realistic goal may be visual coordination rather than exact grain continuation.
What Is Bookmatching?
Bookmatching is a veneer arrangement where neighboring veneer leaves are opened like the pages of a book.
The grain creates a mirrored pattern.
This can produce dramatic architectural effects.
However, not every natural veneer wall-panel product is bookmatched.
Do not advertise or specify a bookmatched appearance unless the exact product is manufactured that way.
If the project specifically requires bookmatching, request confirmation before placing the order.
What Is Slip Matching?
Slip matching places sequential veneer leaves in the same orientation rather than flipping every other leaf.
This often creates a more repetitive grain flow than bookmatching.
Again, whether this applies to a particular wall-panel product depends on the actual veneer fabrication.
“Natural veneer” does not automatically describe the matching method.
Start With the Focal Point of the Wall
Do not always begin the layout at the left corner.
First identify the visual focal point.
That might be a television, fireplace, bed, console table, artwork, reception desk, doorway, kitchen island, or architectural centerline.
Then organize the veneer layout around that focal point.
For example, on a TV wall, you may want the panel joints to align symmetrically around the TV rather than ending with a narrow cut on one side.
On a fireplace wall, the fireplace may establish the centerline.
On a bedroom wall, the bed can establish the layout.
The room should determine the panel composition.
Avoid Very Narrow Panels at One Edge
Suppose the wall width does not divide evenly by the panel width.
If installation simply begins with a full panel at the left side, the final piece might be only a few inches wide.
That can make the wall look poorly planned.
Instead, consider balancing the layout.
For example:
Balanced Cut | Full | Full | Full | Balanced Cut
The exact approach depends on the wall, panel pattern, trim, and installation method.
Seams Should Be Part of the Design
Panel seams are not necessarily something to hide.
They can become part of the architectural rhythm.
A seam may be handled through tight manufacturer-designed joints, shadow gaps, decorative reveals, trim, slat transitions, intentional alignment with furniture, or alignment with lighting.
The important thing is consistency.
A planned seam looks architectural. An unexpected seam through the middle of a focal feature looks accidental.
Coordinate Seams With the Television
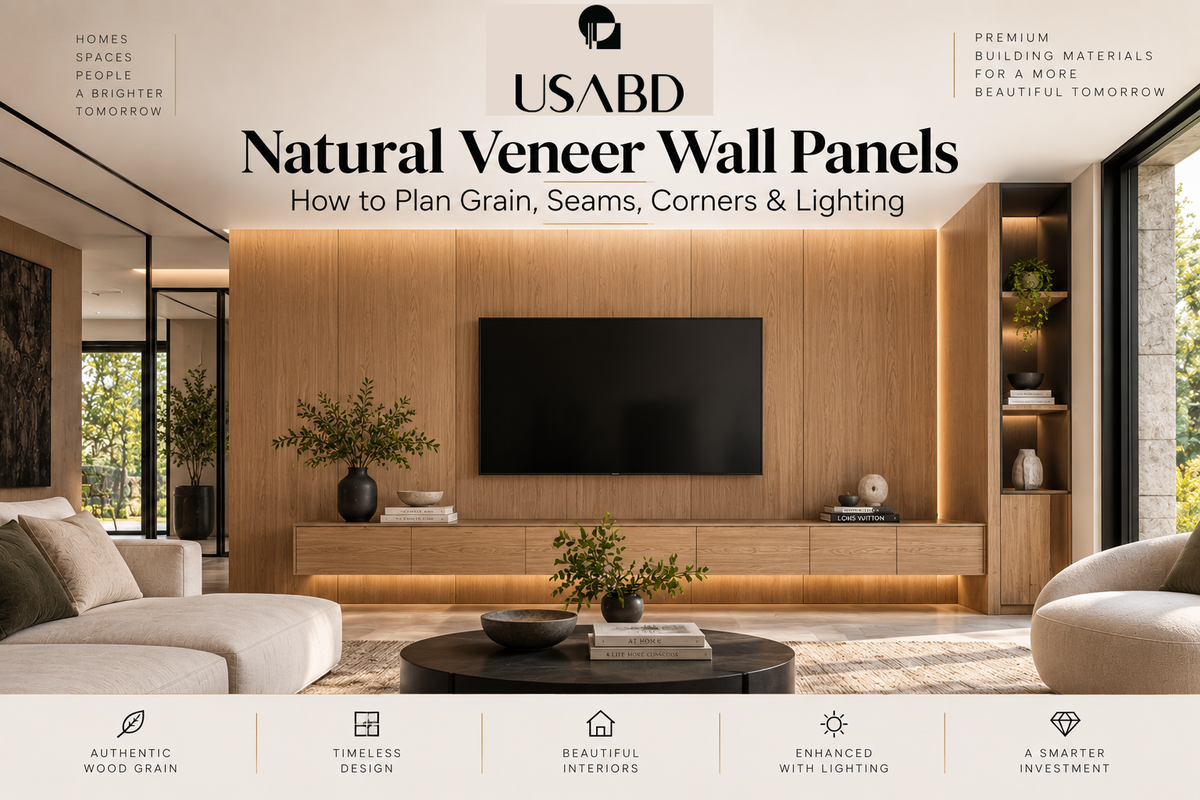
Natural veneer panels are especially effective on TV walls.
Before cutting the panels, identify TV width, TV height, mounting bracket, outlet location, low-voltage wiring, soundbar, media cabinet, recessed box, and access requirements.
Do not allow a critical panel seam to fall directly behind the edge of a TV bracket if that creates installation difficulty.
Also think about what will happen if the TV is replaced later with a larger model.
A clean veneer wall should remain functional.
Plan Electrical Before Installing the Panels
Outlets and switches should not be treated as afterthoughts.
Mark all locations before the wall is covered.
This includes electrical outlets, light switches, thermostats, data ports, TV connections, speakers, control panels, and security keypads.
Decide whether each device will sit on the panel face, inside a recessed box, within a trim detail, or adjacent to the feature wall.
The electrical box must remain properly accessible.
Do not permanently cover required electrical access.
Lighting Can Completely Change Natural Veneer
Natural veneer responds beautifully to light because the grain has real variation.
The same wall can look different in daylight, under warm LED lighting, under cool lighting, with grazing light, or under recessed downlights.
This means lighting should be chosen with the wall material—not after it.
Grazing Light Highlights Texture
Grazing light means placing light close to the wall so it travels across the surface.
This can emphasize grain, panel joints, relief, texture, and small surface variations.
That can create a dramatic effect.
But it can also make installation imperfections more visible.
If strong grazing light is planned, the substrate and panel alignment should be particularly precise.
Wall-Washing Light Creates a Softer Effect
Wall washing places light farther from the wall and distributes illumination more evenly.
This can soften the appearance of seams, grain differences, and tonal variation.
It can be useful when the goal is a calm, uniform veneer backdrop.
Warm Light vs. Cool Light
Lighting temperature affects how wood color appears.
Warm lighting can intensify honey tones, amber tones, warm oak, walnut, and brown finishes.
Cooler lighting can make the same veneer appear grayer, less saturated, and more contemporary.
Always review the actual veneer sample under the intended room lighting.
Natural Veneer and LED Lighting
LED strips can be incorporated into feature-wall designs around veneer panels.
Common locations include panel edges, behind floating shelves, around TV recesses, inside reveals, ceiling transitions, and behind cabinetry.
The lighting channel and wiring should be planned before the panel installation.
How Should Natural Veneer Meet an Outside Corner?
An outside corner deserves special attention because the panel core may become visible if the edge is left unfinished.
Possible solutions depend on the system and may include matching corner trim, wood trim, metal trim, mitered return, adjacent panel return, or manufacturer-specific edge profile.
Do not assume the raw cut edge should remain exposed.
Inside Corners
Inside corners may be visually easier, but they still require planning.
Decide which wall runs through, which panel terminates, whether a trim is used, how the grain direction relates between walls, and whether the walls will use the same finish.
Door Openings
Natural veneer surrounding a doorway can create a custom millwork appearance.
But the layout needs to coordinate with door casing, jamb, concealed frames, baseboards, headers, and panel joints.
If the goal is a very minimal look, the panel and door details should be resolved before installation rather than improvised around existing trim.
Baseboards
Before starting the wall, decide how the veneer meets the floor.
Common approaches may include veneer stopping above an existing baseboard, baseboard installed over the veneer, flush base detail, shadow reveal, or matching trim.
Ceiling Transitions
At the top of the wall, the veneer may meet drywall ceiling, wood ceiling, crown molding, shadow reveal, recessed lighting, or acoustic ceiling treatment.
Again, this edge should be planned.
Can Natural Veneer Be Used on Ceilings?
Do not assume a wall panel is automatically suitable for overhead installation.
If a project calls for a veneer ceiling, confirm that the exact panel and fastening system are approved or appropriate for ceiling use.
Overhead applications introduce gravity loads, mechanical fastening requirements, lighting penetrations, HVAC, speakers, access, and fire requirements.
Can Natural Veneer Be Used in Bathrooms?
Natural veneer should not automatically be treated as a wet-area wall covering.
Moisture can affect wood-based materials and substrates.
For bathrooms, confirm room humidity, splash exposure, ventilation, product application limitations, edge sealing requirements, and substrate.
A dry vanity wall is a very different environment from the interior of a shower.
Natural Veneer in Kitchens
Natural veneer can work beautifully in kitchens when used as an architectural finish.
Potential locations include breakfast-area feature walls, island backs, dining walls, pantry entries, and integrated millwork walls.
However, keep the product’s application limits in mind around cooktops, direct heat, water, grease, and high moisture.
Fireplace Applications Need Special Review
Wood-based decorative panels should not automatically be installed directly beside or above a fireplace.
Clearance requirements depend on fireplace type, manufacturer instructions, fuel type, surface temperatures, local code, and noncombustible requirements.
If natural veneer is part of a fireplace wall, maintain the required clearances and use appropriate noncombustible materials where required.
Natural Variation Should Be Expected
A natural veneer wall should not be expected to have the identical color repetition of a printed panel.
Variation can occur in grain, knots, figure, color, and tone.
The amount of variation depends on the product.
That is why ordering enough material at one time is important.
Order Enough Material From the Beginning
The quantity calculation should include net wall area, cuts, corner conditions, outlets, openings, damaged-piece contingency, and future replacement allowance if desired.
Do not order only the exact square footage.
A feature wall often requires selective cutting to achieve the best visual layout.
Keep Offcuts
Useful offcuts may later serve as small repairs, color references, sample pieces, trim material, or replacement sections.
Label and store them after installation.
Wall Preparation Matters
A premium panel cannot hide every substrate problem.
Before installation, check the wall for flatness, moisture, loose drywall, damaged areas, protruding fasteners, uneven trim, and electrical conflicts.
Do Natural Veneer Panels Need Adhesive or Mechanical Fasteners?
That depends on the exact product.
Some panel systems may use adhesive, concealed screws, clips, mechanical fasteners, or a combination.
Do not automatically use the attachment method from another wall-panel system.
Follow the installation instructions for the selected natural veneer panel.
Cutting Natural Veneer Panels
Cutting technique matters because chipping can damage the visible veneer face.
The exact cutting method depends on the panel construction.
Before beginning, use the recommended blade, support the panel properly, mark the finished face carefully, and test on scrap material when possible.
Protect the Panels During Construction
Natural veneer should generally be treated as a finish material.
Avoid installing it too early in a construction project if it will then be exposed to drywall dust, paint, wet trades, heavy traffic, ladders, tools, or uncontrolled humidity.
Cleaning and Care
Natural veneer should be maintained according to the exact finish and product instructions.
A general maintenance approach may involve regular dusting, soft cloths, gentle cleaning, and prompt removal of spills where applicable.
Natural Veneer vs. Wood-Look Panels
Neither is automatically better.
Natural veneer can provide authentic wood grain, natural variation, and premium architectural character.
Wood-look products can offer greater visual consistency, different moisture-performance options depending on material, repeatable finishes, and potentially easier matching.
Natural Veneer vs. Solid Wood Paneling
Natural veneer uses real wood on the visible surface but does not necessarily use solid wood throughout the entire panel.
That can provide advantages in panel format and material efficiency.
Do not describe a veneer product as solid wood unless its actual construction supports that claim.
Natural Veneer vs. Acoustic Slat Panels
Natural veneer wall panels and acoustic slat panels may both use authentic-looking or real-wood surfaces, but their purposes can differ.
A flat veneer panel may primarily serve as architectural finish + visual texture.
An acoustic slat panel may combine slat design + absorptive backing + tested acoustic behavior.
Do not assume every veneer panel provides meaningful acoustic absorption.
Best Rooms for Natural Veneer Wall Panels
Living rooms
Use it behind a TV, fireplace-adjacent area where permitted, console, or seating group.
Dining rooms
A veneer wall can create warmth without occupying floor space.
Bedrooms
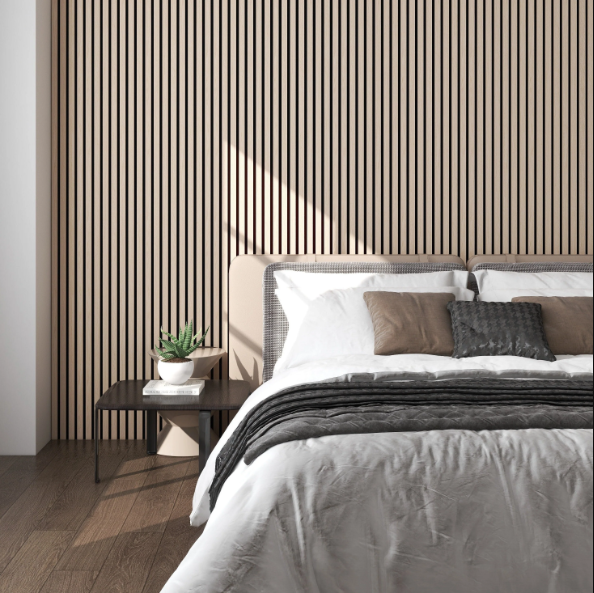
Use it behind the headboard for a built-in architectural effect.
Home offices
Veneer can make an office feel more tailored and less institutional.
Entry foyers
Natural wood can soften stone, metal, and glass used elsewhere in the entry.
Conference rooms
A controlled veneer layout can create a polished commercial interior.
Hospitality interiors
Lobby, reception, lounge, and corridor applications can benefit from the warmth of natural wood grain.
A Simple TV-Wall Layout Example
Imagine a 14-foot-wide wall with a centered television.
Instead of beginning with a full panel at the left corner, establish the centerline of the TV first.
Lay out the panels symmetrically around the center.
Then determine where the outer cuts occur, where seams fall, how the media console aligns, where LED lighting sits, and how outlets are concealed.
A Bedroom Example
For a bedroom feature wall, establish bed centerline → panel centerline → lighting → nightstands.
If the bed is centered, the veneer wall should generally reinforce that geometry.
Natural Veneer Planning Checklist
- Exact panel construction.
- Finish or veneer species.
- Panel dimensions.
- Grain direction.
- Installation orientation.
- Panel sequence.
- Wall centerline.
- Required cuts.
- Seam locations.
- Outside-corner detail.
- Inside-corner detail.
- Baseboard transition.
- Ceiling transition.
- Door and window conditions.
- TV and mounting locations.
- Electrical outlets and switches.
- Lighting type and placement.
- Attachment method.
- Required trims.
- Total quantity and waste allowance.
Frequently Asked Questions
Are natural veneer wall panels real wood?
Natural veneer uses a thin layer of real wood on the visible surface. The full panel construction may include a separate supporting core, so check the specification for the exact product.
Will every natural veneer panel look identical?
No. Natural grain and tonal variation should be expected.
Should I match the grain before installation?
For prominent feature walls, reviewing and sequencing the visible panels before installation is strongly recommended.
Should wood grain run vertically or horizontally?
Both can work. Vertical grain tends to emphasize height, while horizontal grain can visually widen a wall. Confirm that the selected product permits the intended orientation.
Can natural veneer be used behind a TV?
Yes, where the exact product and installation allow it. Plan the TV mount, wiring, outlets, ventilation, and panel seams before installation.
Can veneer panels go around a fireplace?
Only where applicable clearance and material requirements are satisfied. Do not assume decorative wood-based panels are permitted inside required noncombustible zones.
Can natural veneer panels be installed in bathrooms?
It depends on the exact product and exposure. Do not assume veneer is suitable for wet or high-humidity areas without product-specific confirmation.
Is natural veneer the same as solid wood?
No. Veneer uses real wood at the face but may use a different core beneath it.
Are veneer panels acoustic?
Not automatically. Acoustic performance should only be claimed when supported by testing for the exact panel assembly.
Can I install veneer panels directly over drywall?
Possibly, depending on the panel and its required attachment method. The wall must also be suitable, flat, and properly prepared.
Should I order extra panels?
Yes. Cuts, layout selection, and natural variation can create additional material requirements. Order a realistic project allowance rather than only the exact net wall area.
Can replacement panels match later?
Natural material varies, so an exact future match cannot always be guaranteed. Keeping useful offcuts or extra original material can help.
Shop Natural Veneer Wall Panels
USA Builders Depot offers architectural wall-panel options designed to bring warmth, texture, and natural material character into modern interiors.
For a natural veneer project, confirm the exact finish, panel dimensions, construction, installation method, matching trim, quantity, and layout before ordering.
The best results come from treating the veneer wall as part of the room’s architecture—not simply as a surface covering.
For additional planning guidance, see our Veneer Wall Panels Buyer’s Guide, Natural Wood & Wood-Look Wall Panels Guide, White Oak Paneling Guide, Interior Wood Wall Panels Guide, TV Wall Panel Ideas, and Lighting and Wall Materials Guide.