


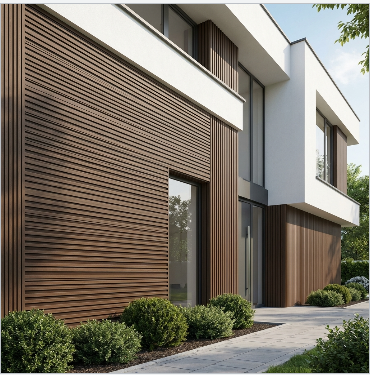
Article: How to Install Exterior WPC Cladding Around Windows & Doors
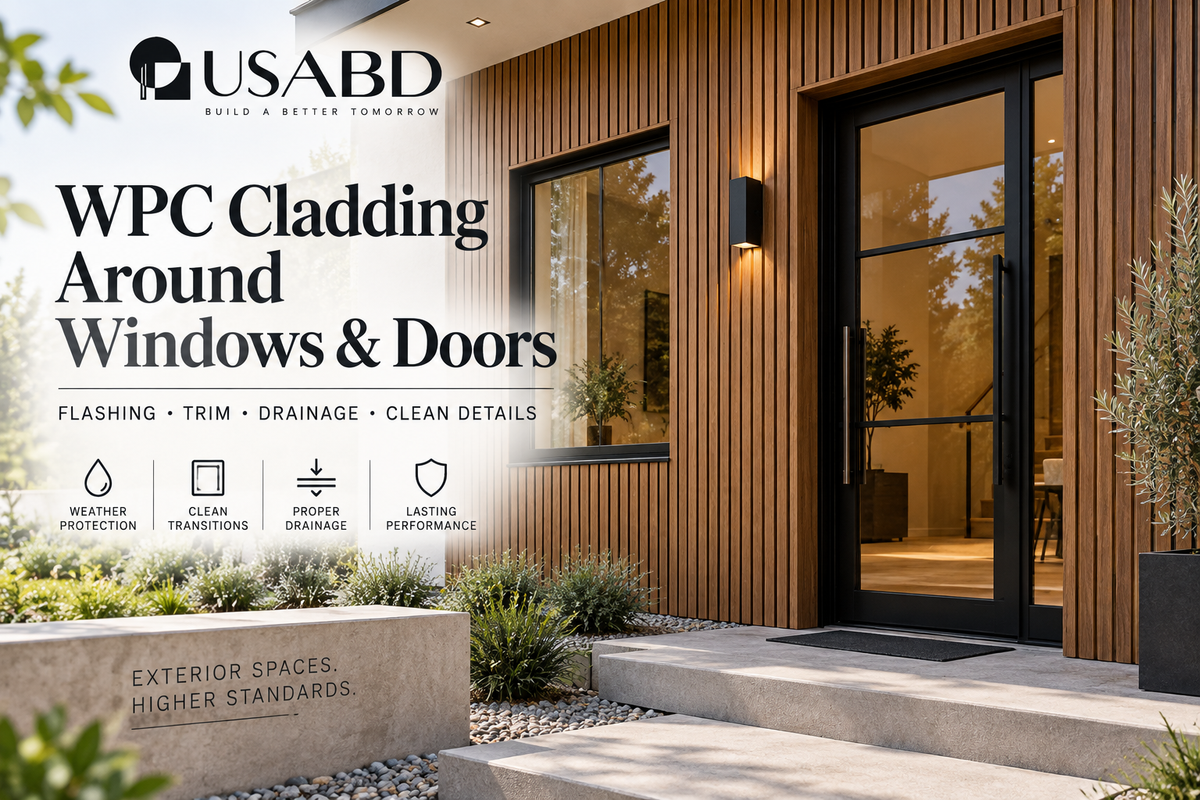
How to Install Exterior WPC Cladding Around Windows & Doors
Large uninterrupted walls are usually the easiest part of an exterior-cladding project.
Windows and doors are where the real detailing begins.
A modern façade may look simple in a rendering: vertical WPC fluted panels, a black steel door, narrow windows and clean shadow lines.
But every opening interrupts the exterior wall.
That means the cladding has to coordinate with several systems at once:
- the window or door
- structural opening
- water-resistive barrier
- flashing
- sill or threshold
- drainage plane
- furring or support system
- insulation
- exterior trim
- panel movement
- sealant joints
- finished interior and exterior surfaces
If those elements are treated separately, even an expensive façade can end up with awkward trim, trapped water, exposed panel cores, misaligned slats or drainage problems.
The safest approach is to treat the window or door as part of the entire wall assembly before the first WPC panel is cut.
This guide explains what builders, installers, architects and homeowners should coordinate when exterior WPC or fluted cladding meets a window or door.
The Short Answer
- Confirm the exact WPC panel and installation system.
- Confirm the window or door frame position.
- Understand the wall’s drainage and water-control layers.
- Complete the required opening flashing before hiding it with cladding.
- Determine where the WPC support system terminates.
- Plan edge trims, corner trims or reveals before cutting panels.
- Preserve required window weeps, door drainage and sill paths.
- Allow material movement according to the exact panel instructions.
- Cut panels to the opening only after the final layout is established.
- Test-fit the complete detail before permanently fastening the finish.
The most important principle is simple:
The WPC panel is the visible finish. It should not be asked to perform the entire job of the flashing and drainage system behind it.
Why Windows and Doors Are Different From a Flat Wall
A flat wall allows water to move downward along relatively continuous layers.
A window or door interrupts those layers.
The exterior wall must now transition around the head, both jambs, the sill or threshold, corners of the opening, trim, penetrations and frame projections.
Water reaching the wall above the opening still needs a path toward the exterior. Water that reaches the sides of the opening still needs to drain safely. Water near the bottom should not become trapped behind the cladding or beneath a threshold.
That is why detailing around openings deserves more attention than simply cutting the WPC to fit.
Understand the Wall Assembly First
Before installing the cladding, identify the layers of the wall.
A project may include:
Interior finish → framing → sheathing → WRB → exterior insulation → furring/rainscreen cavity → WPC cladding
Another project may have masonry, concrete or stucco behind the cladding instead.
The exact order varies.
What matters is understanding where the primary water-control layer is located and how the window or door flashing connects to it.
Exterior WPC cladding should not hide a poorly coordinated wall assembly.
What Is the WRB?
WRB means water-resistive barrier.
Depending on the project, this might be housewrap, fluid-applied membrane, self-adhered membrane or another approved exterior water-control system.
Its job is different from the decorative WPC surface.
The cladding can help shed direct weather, but the underlying wall still needs a properly designed water-management strategy.
Why the Cladding Should Not Be the Only Water Barrier
Imagine rain entering a small joint between two WPC panels.
That water should not immediately encounter vulnerable sheathing with nowhere to go.
A properly planned exterior assembly anticipates the possibility that some moisture may move behind the visible finish.
That is one reason many exterior-cladding assemblies include drainage or ventilation space behind the finish.
The exact cavity, furring and attachment requirements depend on the selected WPC system and wall design.
Do not invent a universal cavity dimension.
Use the current instructions for the actual panel being installed.
Start With the Window or Door — Not the Cladding
The window or door opening should be coordinated first.
Before cutting WPC, confirm exact frame dimensions, frame projection, rough opening, jamb depth, sill or threshold condition, head condition, exterior trim strategy, flashing, drainage, cladding thickness, furring thickness, trim depth and exterior finish plane.
This prevents a common field problem: installing the door or window first, installing the WPC second, and discovering afterward that the two finish planes do not align.
Frame Projection Matters
A window frame can sit close to the exterior sheathing, toward the center of the wall, closer to the exterior finish plane, or within a deep recessed opening.
A steel door can also project differently depending on the frame, jamb depth and wall assembly.
Those positions change how much return is visible around the opening.
Before the WPC layout begins, decide whether the finished appearance should create a flush transition, recessed window, projected frame, narrow reveal, trimmed return or deeper architectural recess.
The design should be intentional.
WPC Cladding Around a Window: Think in Three Zones
1. Head
The head is the top of the window.
Water running down the wall above the opening needs to be directed over or around the window rather than behind it.
Depending on the wall system, the head condition may involve flashing, cap flashing, drip detail, trim, WRB integration and cavity drainage.
The WPC panel should terminate in a way that does not block the intended head drainage.
2. Jambs
The jambs are the sides of the window.
The cladding termination here needs to coordinate with the window frame, flashing, furring, trim, panel edges and expansion or movement requirements.
Do not depend on a decorative edge trim to replace the actual jamb flashing.
The trim finishes the appearance. The flashing protects the opening. Those are different jobs.
3. Sill
The sill is the bottom of the window.
This is a critical drainage area.
Many windows include intentional drainage features or weep paths.
Do not cover them with WPC panels, trim, sealant, foam or flashing installed in the wrong location.
Before finishing beneath a window, identify exactly where water is designed to exit.
Do Not Block Window Weep Holes
Some window systems include visible or concealed weeps.
Their function is to allow water that reaches portions of the window system to drain outward.
If the WPC return, trim or sealant blocks those openings, the wall may look cleaner while performing worse.
Never assume that a small slot in a window frame should be caulked.
Confirm the window manufacturer’s drainage design first.
Head Flashing Should Be Planned Before the Panels
One of the easiest mistakes is installing all of the WPC first and then trying to add a piece of flashing above the window afterward.
That can make correct integration with the layers behind the cladding difficult.
The opening detail should be established before the decorative finish closes the wall.
A useful project sequence is:
Wall drainage strategy → window installation → window flashing → support/furring → opening trim → WPC panels
The exact sequence still needs to follow the selected window, wall and cladding instructions.
Should WPC Touch the Window Frame?
Do not automatically install WPC tightly against a window.
Composite products can move as temperatures change.
Windows and their surrounding assemblies can also experience movement.
The selected cladding system should determine perimeter clearance, trim configuration, joint treatment, sealant requirement if any, and fastener positioning.
Do not copy the gap dimension from another WPC brand.
Edge Trim Around Windows
A compatible edge trim can create one of the cleanest window details.
It can conceal a cut panel edge, create a straight termination, protect the visible edge, provide a consistent transition and help maintain the intended architectural line.
USA Builders Depot currently offers coordinating edge trims for selected exterior fluted panel finishes.
Before ordering, confirm that the trim matches the exact panel profile and finish.
Why Edge Trim Should Be Ordered With the Panels
A surprisingly common mistake is ordering the wall panels first and assuming the edge can be solved later.
That creates several risks.
The installer may discover the exposed core is visible, the finish does not wrap the edge, the trim color does not match, the opening requires more trim than expected, or a substitute metal profile changes the visual design.
Count exposed edges during the takeoff.
Do not wait until installation day.
Outside Corners Near Windows
A window near a building corner can create a very narrow strip of cladding.
That can look awkward and may complicate fastening.
Before installation, draw the elevation.
Determine where the building corner lands, the window jamb lands, panel modules land, corner trim lands and edge trim lands.
The objective is to avoid creating an accidental-looking sliver of material simply because installation started from the wrong end of the wall.
Plan the Slat Rhythm
Fluted WPC cladding creates a strong repeating pattern.
That pattern makes layout especially important.
If the panels are installed vertically, the flutes create visual lines that can emphasize door edges, window edges, building corners and roof lines.
A small layout shift at the start of the wall can determine whether the window ends with a full-looking module or an awkward partial flute.
Dry-layout the elevation before fastening.
Centering Is Not Always the Best Layout
It is tempting to center every opening within the panel pattern.
That may not produce the best overall elevation.
Instead consider the entire façade.
Ask where the wall begins and ends, where the windows and front door are, which elements are visually dominant, whether there are outside corners, whether the soffit uses the same finish, and whether the pattern continues across another wall.
The best layout balances the whole elevation rather than one opening.
WPC Around Exterior Doors
Doors add another level of complexity because the bottom of the opening is a walking transition.
An exterior door interacts with threshold, sill, sill pan, interior flooring, exterior landing, flashing, jambs, weatherstripping, door sweep, paving and drainage.
The WPC termination must respect all of those conditions.
Do Not Treat the Door Threshold Like Ordinary Wall Trim
The threshold is not just the bottom edge of the door frame.
It may participate in drainage, air sealing, weather sealing, thermal performance and floor transition.
Exterior cladding should not block the threshold’s intended operation.
Do not bring a WPC panel, tile, stone or exterior paving up against the threshold simply because it creates a flush visual line.
Verify the complete sill detail first.
Steel Doors and WPC Cladding
This is one of the most visually effective combinations in modern residential architecture.
A black steel-and-glass door against teak, walnut or charcoal fluted cladding creates a strong contrast between narrow steel lines, large glass areas, warm wood-look texture and deep vertical shadow lines.
But this combination works best when the frame and cladding are coordinated together.
Before the steel door is ordered or installed, verify jamb/frame depth, cladding build-out, furring depth, flashing location, edge trim, threshold, finished exterior plane, door swing, handle clearance and lighting locations.
A wall section through the entrance can resolve most of those conditions before construction begins.
Jamb Depth and Cladding Depth Are Not the Same Thing
A thicker exterior cladding assembly does not automatically mean the steel-door jamb must extend to the outer face of the WPC.
The correct frame position depends on the door system and wall detail.
A steel door may sit within the structural wall while the WPC forms a deeper exterior return.
Or the frame may align closer to the outer finish plane.
Do not determine jamb depth solely from the cladding thickness.
Coordinate the complete wall section.
Door Head Details
The top of an exterior door needs the same water-management attention as a window head.
Water arriving from above needs to be directed outward.
Depending on the design, this area may include head flashing, cap flashing, trim, exterior canopy, overhang, WRB integration and WPC edge trim.
An overhang can reduce direct exposure.
It does not eliminate the need for a properly designed opening.
Door Jamb Returns
Modern designs often wrap WPC into the sides of the entrance.
This can create a deep, premium-looking portal.
But the return needs to be planned.
Check door swing, pull handle, lever handle, hinges, lighting, doorbell, smart-lock clearance, trim thickness, WPC fastening, flashing and drainage.
A beautiful deep return is not useful if the door handle strikes the wall.
Cladding Returns Into Recessed Openings
Some architects carry the exterior material into the window or door recess.
That can create a very clean monolithic look.
But the return pieces are often narrower than the full field panels.
That means the installer may need to coordinate cut width, cut edge, trim, corner condition, attachment, drainage and movement.
Do not assume a narrow cut strip will behave exactly like a full panel.
Do Not Cover Flashing Outlets
Some wall systems intentionally discharge water at window heads, window sills, base-of-wall locations, door thresholds or flashing ends.
Do not hide those outlets with decorative trim unless the approved detail specifically allows it.
The purpose of a drainage system is to let water leave the wall.
A visually seamless finish should never eliminate that function.
The Support System Must Also Stop Correctly
WPC cladding may be installed over furring strips, battens, clips or another support framework.
That support system also needs to be coordinated around windows and doors.
Do not let furring block flashing, bridge a drainage path, block a window weep, interfere with trim or create a water trap.
At the same time, the panel edges still need adequate support.
That is why the opening detail should show both the cladding and its substructure.
Do Not Fasten Blindly Around Openings
Windows and doors can contain hidden flashing, membranes and frame components.
Avoid drilling or fastening randomly beside an opening.
Know what is behind the panel.
The approved cladding attachment plan should coordinate with structural backing, furring, window or door fasteners, membranes and utility lines.
Cutting Exterior WPC Around Windows
The visible quality of the opening depends heavily on the cut.
A typical workflow is:
Measure → mark → support → cut → clean edge → test-fit → trim → fasten
Use cutting equipment appropriate for the exact panel construction.
A fine, controlled cut is particularly important where the panel edge will align with narrow trim.
Measure From Installed References
Do not cut every opening piece from the architectural drawing alone.
Once the window or door is installed, verify the actual field dimensions.
Check left jamb, right jamb, head, sill, squareness and frame projection.
Construction tolerances mean the real condition may differ slightly from the drawing.
Measure More Than Once
An opening may not be perfectly square.
The top width can differ from the bottom.
A jamb can be slightly out of plumb.
A large door can sit a fraction differently from the adjacent framing.
Measure each important cut at its actual location.
Horizontal vs. Vertical WPC Around Openings
The correct orientation depends on the selected product and approved installation system.
Vertical fluted cladding naturally emphasizes height.
Horizontal shiplap-style boards emphasize width.
Around windows, each creates different joint conditions.
Do not rotate a product simply because the alternate orientation makes one detail easier.
Confirm that the profile supports the intended orientation.
Window Sills With Projecting Trim
Some exterior windows include a projecting sill or sill trim.
In that case, the WPC may terminate beneath or around it.
Plan the overlap visually and functionally.
The finish should not direct water back toward the wall.
Sealant Is Not a Substitute for Flashing
Sealant is useful in many exterior details.
But a bead of sealant around a window should not automatically be treated as the complete water-management strategy.
Sealants can age, move, crack or lose adhesion.
A durable exterior detail typically relies on multiple coordinated layers rather than one exposed joint doing everything.
Use sealant where the approved window, door or wall detail requires it.
More Sealant Is Not Always Better
Do not seal every visible opening simply because it looks vulnerable.
Some gaps or slots may be intentional drainage paths.
If a system includes weeps, drainage channels, pressure-equalization openings or sill outlets, blocking them can create a worse condition.
Understand the system before caulking.
Expansion and Temperature Movement
WPC is a composite material.
Like many exterior materials, it can experience dimensional movement with temperature changes.
That makes fixed boundaries important.
Windows, doors, masonry corners and metal trims can become locations where movement is restricted.
Follow the exact product requirements for end clearances, perimeter clearances, fastener conditions, panel joints and temperature at installation.
Do not use one generic expansion-gap number for every WPC profile.
Dark Colors Deserve Extra Attention
Charcoal and black exterior surfaces can experience higher surface temperatures in direct sun than lighter finishes.
That does not automatically make them unsuitable.
It means thermal movement and installation requirements deserve careful attention.
Follow the current instructions for the exact dark-colored panel system.
Exterior Lighting Beside the Door
A wall light installed through WPC cladding is another penetration.
Plan it before installing the panels.
Determine electrical box position, mounting block or support, waterproofing, cladding cutout, trim and fixture clearance.
Do not depend on the WPC panel alone to structurally support a heavy fixture unless the installation system specifically permits it.
Doorbells, Cameras and Keypads
The same principle applies to video doorbells, cameras, access-control readers, keypads and intercoms.
Mounting should coordinate with proper backing and the wall’s water-control layers.
The device should not create an uncontrolled hole through the façade.
Mixing WPC With Stone, Stucco or Brick
Many modern elevations combine WPC with other exterior finishes.
Windows and doors often sit directly at those material transitions.
Before construction, determine where WPC ends, masonry begins, stucco terminates, flashing crosses the joint, trim is used and control or movement joints occur.
A clean rendering should become a buildable detail before materials arrive.
When WPC Meets Steel Window Frames
Black steel windows and WPC cladding create the same design opportunity as steel doors.
The narrow frame can look especially clean against vertical fluting.
Coordinate rough opening, window frame depth, sill condition, head flashing, jamb flashing, WPC edge trim, support system, movement and drainage.
The window should be installed and flashed as an opening first.
The WPC should then finish the surrounding architecture.
Common Mistake: Starting the Wall Without Planning the Openings
An installer begins at the building corner and works toward the window.
When the final panel reaches the opening, only a narrow strip remains.
The result may require awkward cutting, extra trim, weak attachment or visible partial flutes.
Lay out the entire wall first.
Common Mistake: Treating Trim as Flashing
A decorative trim can conceal the edge.
It does not automatically waterproof the rough opening.
Coordinate the actual flashing behind it.
Common Mistake: Blocking Sill Drainage
Do not bring cladding, trim or sealant across an intended drainage location.
Water that enters the assembly needs an exit.
Common Mistake: Installing WPC Before the Window Detail Is Finished
Once panels cover the wall, correcting the flashing behind them becomes much harder.
Complete concealed work first.
Common Mistake: Forgetting Panel Thickness
The WPC finish and furring system create depth.
That can affect window recess, door return, exterior casing, lighting, handles and sill projection.
Model or draw the finished wall depth before construction.
Common Mistake: Ordering Panels Without Trim
Count the opening perimeter.
If the design requires edge trim around several windows and doors, the quantity can add up quickly.
Include the accessory takeoff in the original material order.
Common Mistake: Using Interior WPC Outside
Fluted interior wall panels and exterior WPC cladding can look similar in photographs.
They should not automatically be treated as interchangeable.
Use products identified for the intended exterior application.
A Better Pre-Installation Workflow
1. Identify the exact cladding product
Confirm profile, finish, dimensions, exterior suitability, orientation, fasteners, trims and current instructions.
2. Verify the opening
Confirm window or door model, dimensions, frame location, sill or threshold, jamb depth and handing or operation.
3. Review the wall section
Identify framing, sheathing, WRB, insulation, furring, cladding, flashing and finish plane.
4. Resolve water management
Confirm head condition, jamb condition, sill or threshold drainage, flashing integration, weep paths and base drainage.
5. Plan the visual layout
Determine starting panel, panel joints, flute alignment, opening returns, trim and corner conditions.
6. Complete concealed work
Do not cover unfinished flashing or unresolved water-control details.
7. Dry-fit the finish
Test panel cuts, trim, reveals, clearances and edge conditions.
8. Install according to the exact product requirements
Do not substitute generic fastening, gap or flashing dimensions from another system.
What Architects Should Show on the Detail
A useful exterior wall detail should identify window or door frame, structural opening, sheathing, WRB, insulation, furring/subframe, WPC panel, edge trim, head flashing, jamb condition, sill or threshold, drainage direction and exterior finish plane.
A small section detail can prevent significant field improvisation.
What Builders Should Verify Before Ordering
Before ordering WPC for a façade containing several openings, verify total field-panel quantity, cut plan, edge-trim quantity, corner-trim quantity, panel orientation, opening dimensions, frame projection, WPC support system, exterior exposure and project-specific installation requirements.
Measure first.
Build the takeoff second.
Order after the opening strategy is understood.
Frequently Asked Questions
Can WPC cladding be installed directly against a window frame?
Do not assume so. The required clearance and termination depend on the exact WPC profile, window system, trim and wall detail.
Should I caulk between WPC cladding and the window?
Use sealant only where required by the approved opening and cladding details. Do not seal intentional window weeps or drainage paths.
What trim should I use around an exterior WPC window opening?
Compatible edge trim is commonly useful for finishing exposed cut panel edges. Confirm the trim matches the exact panel profile and color.
Can I use corner trim around a window?
Corner trim and edge trim perform different visual functions. Use the accessory intended for the exact termination condition.
Should the WPC go behind the window flange?
The correct relationship depends on the window type and wall assembly. Do not use the decorative cladding as a substitute for the window’s approved flashing and installation detail.
Can I install WPC before the windows?
The complete construction sequence depends on the wall system, but the opening and its water-management strategy should be established before the cladding conceals the surrounding wall.
How do I finish WPC around a steel door?
Coordinate the steel frame, jamb depth, flashing, threshold, WPC build-out, furring, edge trim and finished wall plane before installing either finish.
Should WPC touch the door threshold?
Do not assume it should. The threshold and sill area may require drainage, flashing, movement clearance or another transition detail.
Can I wrap WPC into the door jamb?
A WPC return can create an architectural recessed entry when properly designed. Verify door swing, handle clearance, attachment, flashing, trim and frame position first.
How do I prevent narrow pieces beside a window?
Lay out the complete wall before installation. Adjust the starting point or module layout so the final pieces around openings are intentional and workable.
Can exterior fluted WPC run horizontally?
Only if the exact profile and installation system permit the proposed orientation. Confirm current product instructions before rotating the panel.
Does WPC cladding waterproof the wall?
Do not treat decorative WPC cladding as the entire waterproofing system unless the exact engineered wall system expressly establishes that function. Exterior walls generally require coordinated flashing, drainage and water-control layers.
The Bottom Line
Exterior WPC cladding can create one of the cleanest modern façade finishes available.
But the real quality of the installation is usually revealed at the openings.
A window surrounded by perfectly aligned fluted panels looks effortless only because the hidden conditions were solved first.
A steel door framed in wood-look cladding looks simple only because someone coordinated:
frame + flashing + threshold + drainage + furring + trim + panel layout
before installation began.
Treat windows and doors as part of the wall assembly—not as holes to cut around afterward.
Plan the drainage.
Plan the trim.
Plan the panel rhythm.
Confirm the exact product requirements.
Then install the finish.
That approach produces a façade that looks intentional because the construction behind it was intentional too.
Explore our exterior WPC wall panels and cladding, review the WPC exterior wall cladding installation guide, and see our WPC substrate and rainscreen guide.
For coordinated openings, see our steel door rough opening guide, steel door jamb depth guide, steel door threshold and sill guide, and Architect & Specifier Center.
Written by USA BUILDERS DEPOT