
Thermally Broken Steel Windows vs. Insulated Jambs: What’s the Difference?
Steel windows are a defining feature of contemporary architecture, bringing refined profiles and distinctive glass divisions to luxury homes. But for exterior installation, appearance is only part of the decision. Homeowners and builders must also evaluate heat transfer, condensation, energy ratings and climate. Are insulated steel windows the same as thermally broken steel windows? Not necessarily. An insulated jamb, insulating glass and a thermal-break frame are different features. Understanding them helps buyers make an informed decision before placing a custom order.
Quick Answer: Are Insulated Steel Windows Thermally Broken?
Not always. An insulated jamb or double-pane glass does not automatically make the steel frame thermally broken. A true thermal break incorporates a lower-conductivity separator that interrupts the relevant direct metal heat-transfer path in a frame or sash profile. An insulated jamb may contain insulating material while other metal parts remain continuous. Double-pane glazing improves performance through the glazing system, not necessarily the steel frame. Evaluate the complete frame, sash, glazing, spacers, seals, installation and applicable ratings.
1. Why Thermal Performance Matters for Steel Windows
Steel offers architectural strength but conducts heat efficiently. A continuous metal path between exterior and interior can act as a thermal bridge. Heat can flow outward during cold weather and inward during hot weather. This may influence indoor surface temperatures and heating or cooling loads. If an interior surface cools below the dew point of adjacent humid air, condensation can form. The outcome depends on the whole assembly and indoor conditions, which is why thermally improved metal windows are an important design option.
2. What Is a Thermally Broken Steel Window?
A thermally broken steel profile contains a purpose-designed lower-conductivity component between relevant exterior and interior metal portions. In a conventional continuous profile the metal provides a conductive pathway; in a thermally broken profile a separator reduces that flow. Different manufacturers use engineered polymers or other suitable separating materials and structural joining methods. The precise section must be confirmed from documentation. A thermal break reduces heat movement through its separated portion; it cannot eliminate all heat transfer through glass, spacers and other components.
3. What Is an Insulated Steel Window Jamb?
A jamb forms part of the surrounding window frame. Some steel window jambs incorporate insulating material inside a cavity. That insulation may improve thermal characteristics of the particular area, but it does not prove full thermal separation through the complete frame or sash. One product might have a deeper insulated jamb with continuous steel components; another may use a dedicated separator between exterior and interior metal sections. They should not be described as equivalent without reviewing construction drawings and rated performance.
4. Thermal Break vs. Insulated Jamb vs. Insulated Glass
Thermal-break profile: Interrupts a specified conductive metal pathway.
Insulated jamb: Incorporates insulation within a jamb area, without necessarily separating the steel.
Double-pane insulated glass: Reduces heat flow through the glazing, not necessarily the frame.
Low-E coating: Changes radiant heat transfer through glass.
Argon-filled glazing: May improve insulating glass performance.
Warm-edge spacer: Can reduce edge-of-glass heat transfer.
Weatherstripping: Helps limit air leakage at operable joints.
Several features can work together in one product. No single feature automatically establishes the overall thermal rating.
5. Does Double-Pane Glass Make Steel Windows Energy Efficient?
Double-pane glazing often performs better thermally than comparable single-pane glazing. Two panes are separated by a sealed space that may contain air or specified gas, and some products include Low-E coatings. However, insulated glass does not remove an uninterrupted thermal bridge through the steel frame. A thermally broken frame with unsuitable glazing can also miss a project’s requirements. Evaluate the frame and glazing as a complete product.
6. Understanding U-Factor for Steel Windows
U-factor describes the rate of heat transfer through a fenestration assembly, typically expressed in the United States as Btu/(h·ft²·°F). In general, lower values indicate less heat transfer. But verify what is rated. A center-of-glass U-factor concerns the central glazing, while a frame-only value concerns the frame. Whole-window U-factor reflects the evaluated complete assembly under the applicable rating procedure. Comparing a center-of-glass value from one supplier against a whole-window value from another is misleading. Request clear product-specific documentation.
7. What Is SHGC, and Why Does It Matter?
Solar Heat Gain Coefficient (SHGC) represents solar energy admitted through a fenestration product. A lower SHGC generally means less solar heat gain, potentially useful for strongly sun-exposed windows in a cooling-dominated climate. U-factor measures heat transfer and SHGC measures solar gain; they are not interchangeable. Visible transmittance (VT) describes how much visible light enters. Balance all three with daylight, orientation, shading, climate and the home’s design.
8. Do Thermally Broken Steel Windows Prevent Condensation?
Thermally improved frames may reduce the chance of condensation in some conditions by maintaining warmer interior frame surfaces during cold weather. They do not guarantee a condensation-free window. Condensation occurs where surfaces are below the indoor air’s dew point and is affected by humidity, outdoor temperature, glass edges, frame design, circulation and installation. If condensation is a critical concern, ask for applicable product documentation and consider indoor moisture conditions as part of the design.
9. Are Thermally Broken Steel Windows Better for Cold Climates?
Reducing metal-frame conduction can be especially valuable in cold climates, where low whole-window U-factor, air sealing and condensation control matter. Hot climates can also benefit from lower conductive heat flow, but glazing solar-control properties may deserve substantial attention. An interior steel partition between conditioned spaces is a different application from an exterior window. Select the system based on actual climate and use, not a one-size-fits-all label.
10. What About Steel Windows in Georgia, Texas, and California?
In Georgia, heating and cooling conditions make whole-window performance, air leakage and solar orientation important. In many Texas locations, summer sun, window direction and glazing SHGC can drive the design. In California, applicable projects must meet the state’s current energy-code requirements, with the 2025 California Energy Code effective for relevant permit applications beginning January 1, 2026. A description such as “insulated jamb” is not proof of code compliance. In colder regions, lower whole-window U-factor and condensation management may be priorities. The project-specific code and documented configuration control in all locations.
11. Understanding USA Builders Depot’s Steel Window Options
USA Builders Depot offers selected fixed, single-casement, double-casement, awning, push-out and specialty steel-window designs. Certain product listings identify 2-inch, 4-inch and 6-inch jamb options, including a 6-inch jamb described as containing thermal-injected insulation. That description should not be taken as confirmation that the complete steel-window frame is thermally broken. Ask for the exact profile construction, glass specification and available performance documentation when your project requires a thermal break, particular U-factor or SHGC, or NFRC certification. Some custom configurations have estimated production and shipping lead times of approximately 8–12 weeks, subject to order confirmation. Resolve performance requirements before approving production drawings.
12. How to Tell Whether a Steel Window Has a True Thermal Break
Request a manufacturer-provided frame cross-section identifying a dedicated thermal separator and which metal parts it separates. Review the insulated-glass makeup and edge spacer. Clarify whether insulation is in a jamb cavity, another frame cavity or a thermally separated profile. Request the exact whole-window performance documentation required by the project and verify that it applies to the proposed size and configuration. Coordinate the surrounding air barrier, water-resistive barrier, insulation, flashing and frame installation so unintended thermal bridges or moisture problems are not introduced.
13. How to Compare Two Steel Window Quotes
Compare exact steel profile and frame construction; whether a thermal break is present; jamb depth and insulation; pane count, glass thickness, coatings and fill; spacers; the rating basis for U-factor and SHGC; available air-leakage information; operable hardware, seals and finish; applicable certification and test documentation; installation requirements; and confirmed lead times. Price alone is not a sufficient technical comparison. Neither a higher price nor a claim of “thermal improvement” establishes compliance with a project’s requirements.
14. Common Mistakes When Buying Thermally Broken Steel Windows
Do not assume double-pane glass automatically means a thermally broken frame. Do not confuse injected jamb insulation with a purpose-designed thermal separator. Do not compare a center-of-glass U-factor with another product’s whole-window number. Do not assume a performance document for one model applies to every size, sash type or glazing variation. Finally, do not approve a custom order before verifying the project-specific energy requirements and necessary documentation.
15. Questions to Ask Before Ordering Custom Steel Windows
Confirm whether the window serves an interior or exterior opening; its precise dimensions and configuration; fixed or operable type; jamb depth and cross-section; whether the relevant metal profile is thermally separated; the glass package, seals and finish; and any required whole-window U-factor, SHGC, air leakage, NFRC or other documentation. Coordinate the specifications with the architect, energy consultant, builder and installer before fabrication.
Frequently Asked Questions
Are all steel windows thermally broken? No. Products differ in construction.
Is an insulated steel window the same as a thermally broken one? Not necessarily. The insulation may be in a jamb or glass without separating frame metal.
Does a 6-inch insulated jamb mean the frame is thermally broken? No. Review the actual profile.
Can steel windows be energy efficient? Yes, when the complete system and its documented performance meet the application’s needs.
Does Low-E glass replace a thermal break? No; they address different heat-transfer mechanisms.
Can a thermally broken steel window develop condensation? Yes, depending on temperature, humidity and other factors.
Can thermally broken windows work in hot climates? Yes, subject to the complete system and solar-control needs.
Are fixed steel windows always more efficient? Not automatically; compare rated assemblies.
Does every steel window require NFRC certification? Requirements vary by application and jurisdiction; confirm project needs.
Can non-thermally-broken steel windows be used in homes? Sometimes, subject to application and code.
Does USABD offer insulated steel-window configurations? Selected listings describe optional thermal-injected jamb insulation; confirm product construction and documentation.
Final Thoughts: Know What You’re Ordering
Thermally broken steel windows and insulated steel-window jambs are related but distinct. Thermal breaks interrupt a conductive pathway; jamb insulation may reduce heat transfer through a particular cavity without doing so. Double-pane glazing, Low-E coatings, spacers and weather seals provide further functions. Evaluate the whole-window design and ratings, not marketing shorthand.
Explore USA Builders Depot steel windows and contact our team with your window schedule, dimensions, quantities, glazing preferences, jamb depth, project location and required technical documentation for review.
USA BUILDERS DEPOT — Build a Better Tomorrow.
How Far Above the Ground Should Exterior WPC Cladding Be Installed? A Guide to Ground Clearance, Drainage & Bottom-of-Wall Details
Exterior WPC (wood-plastic composite) cladding creates contemporary façades with wood-inspired texture and clean architectural lines. But the lower termination of an exterior cladding wall deserves just as much attention as its appearance. How far above the ground should exterior WPC cladding be installed? There is no verified universal clearance for every WPC product. The correct distance depends on the exact manufacturer instructions, finished grade, wall assembly, drainage and applicable building requirements.
Why ground clearance matters
At the bottom of a wall, rainwater can splash from soil, concrete, pavers or gravel. Irrigation and wet landscaping introduce additional exposure. Mulch, soil and debris can accumulate against the cladding. Some wall assemblies also require drainage or ventilation openings near their base. An attractive finish is only one part of a complete wall system, which may include sheathing, a water-resistive barrier (WRB), furring, fasteners, flashing and trims.
How much clearance does exterior WPC cladding need?
Follow the required clearance for the exact selected WPC profile and installation system. Fluted and shiplap panels, horizontal and vertical applications, and different manufacturers may use different mounting and termination details. Do not automatically adopt a clearance published for wood, fiber cement or a different composite. Establish the required separation from the final finished ground or paving elevation, not the temporary bare soil level during construction.
Can exterior WPC cladding touch the ground?
Do not assume so. “Exterior grade” is not a universal approval for direct soil contact, burial in mulch or standing-water exposure. WPC formulations differ, and even a panel that tolerates moisture could obstruct drainage at the base of a wall if installed incorrectly. Obtain product-specific documentation before specifying ground contact.
Why siding guides list different numbers
General exterior siding resources may show ground-clearance measurements for wood siding, fiber cement or particular wall assemblies. Those examples illustrate approaches to splashback and moisture protection; they are not automatically requirements for every exterior WPC product. If a drawing, code provision and product instruction appear to differ, have the relevant project professional resolve the approved detail before installation.
Exterior WPC cladding above soil
Soil elevations can change during landscaping, grading and irrigation installation. If cladding is positioned before the final grade is established, subsequent fill can diminish its clearance. Coordinate the final height with the landscape contractor, ensure water drains appropriately away from the wall, and avoid burying bottom trims or intended water outlets.
Cladding above concrete patios
A concrete patio may generate rain splashback and concentrated runoff at the door or wall. Verify the final slab elevation and its drainage. Water that flows toward the façade may repeatedly wet the termination. Consider the relationship of the wall to adjacent doors, patio slopes, flashing and any required separation. Do not assume a narrow visible gap automatically meets the cladding specifications.
Cladding above pavers
Pavers and their bedding layers may be installed after the wall finish. Their final height must be established early. Pavers can settle or be reset, and drainage depends on the overall hardscape design. Ensure paving does not cover the lower cladding edge, base flashing, required vents or drainage openings.
Cladding above gravel
Decorative gravel can provide an elegant transition beside vertical walnut or charcoal WPC. However, gravel by itself does not guarantee suitable foundation drainage. Subsurface grading and drainage still matter. Loose aggregate can move over time, so the detail should preserve the manufacturer’s clearance and any designed wall outlet.
Can mulch touch WPC wall panels?
Mulch retains water and is often replenished in layers. Even where the panel material tolerates moisture, direct mulch contact can conceal the termination and obstruct drainage or ventilation. Coordinate the final mulch depth with the designed wall section. Do not cover required inspection zones or assume the panel is approved for burial.
What is base flashing?
Base flashing helps direct incidental water that reaches the wall’s drainage plane toward the exterior. Exterior cladding should not be assumed to be the building’s only waterproofing layer. Depending on the design, the complete assembly may include WRB, a drainage cavity, base flashing, starter profiles and compatible trim. The components must function together. The U.S. Department of Energy Building America Solution Center provides general building-envelope guidance at basc.pnnl.gov.
Can base flashing be concealed?
Some details conceal most of the flashing; others show an intentional metal or finish transition. Appearance should not compromise the route through which water leaves the wall.
Can sealant replace flashing?
No. Sealants may be part of an approved assembly, but simply caulking a bottom joint is not a substitute for integrated flashing. A continuous bead across a required drain outlet could trap moisture.
Does exterior WPC cladding need a drainage gap?
Many systems use a drained or ventilated space behind the panels, sometimes referred to as a rainscreen cavity. The correct depth and support configuration vary by product. Furring strips, rails, clips or other accessories should be selected only as approved for the chosen profile. If a cavity is part of the design, its lower outlet must remain functional.
What happens if the bottom opening is blocked?
Water reaching the cavity may no longer have an adequate discharge path. Mulch, paving, sealant, debris or an incorrect trim may cause the obstruction. The effects depend on wall materials and water exposure but may include staining and concealed moisture problems. Review the complete drainage detail rather than simply sealing over a visible gap.
What trim should finish the bottom edge?
Some WPC systems use starter strips, base profiles, termination trims or other compatible accessories. A vertical fluted panel and a horizontal shiplap board may require different treatment. A good termination should look deliberate while preserving approved fasteners, movement space, flashing and drainage. Confirm trim-to-panel compatibility before ordering.
WPC above a stone or masonry base
A stone plinth below walnut or charcoal cladding can add architectural depth. But the interface introduces another building-envelope transition. Stone veneer, masonry and WPC may have different movement and water-management needs. Detail flashing and supports so water draining behind one finish does not enter the other assembly.
Clearance near lower roofs
A roof-to-wall junction differs from a ground-level condition. Step flashing, counterflashing, kick-out flashing and roofing requirements may determine the correct treatment. Do not transfer a soil-clearance dimension automatically to roofing surfaces. Coordinate the cladding, roof membrane, roof flashing and wall water-control layers.
Vertical versus horizontal WPC panels
Panel orientation changes visual composition and may change supports, joints and edge profiles. Vertical fluted boards emphasize façade height; horizontal shiplap boards create a layered appearance. Use only orientations approved for the product, and preserve the required bottom drainage and movement details.
Cladding near decks and raised platforms
Decks may introduce ledger connections, penetrations, changes in height and difficult-to-access lower wall areas. Do not rely on decorative WPC cladding as the structural support for a deck. Coordinate deck flashing, drainage, structural attachments and maintenance access separately from the decorative finish.
How rain splashback influences the design
Rain striking hardscape can carry dirt and minerals onto the wall. Exposure varies with rainfall intensity, wind, roof drainage, surface geometry and landscaping. Managing roof runoff and site drainage may reduce splashback, but these improvements do not replace the cladding manufacturer’s clearance instructions.
What if the ground level changes later?
New mulch, added soil, a raised patio or renovated paving can reduce the original clearance. Before changing grades, inspect the lower wall termination and determine whether the new surface would cover flashing, drainage outlets or maintenance access. Correct the design rather than burying the cladding edge.
How to plan a professional bottom termination
Start by selecting the exact exterior WPC profile and obtaining its current installation instructions. Then establish final site elevations, identify the underlying wall assembly and locate the WRB and drainage route. Coordinate the support system, appropriate base flashing and compatible starter or edge trim. Confirm expansion provisions and cut the panels only after the intended finished height is established.
USA Builders Depot exterior WPC options
USA Builders Depot offers exterior fluted and shiplap-inspired WPC finishes in contemporary wood tones and dark colors. Product dimensions, accessories, applications and installation methods vary by SKU. Before ordering, check the selected profile, intended orientation, substrate, packaging, drainage provisions and current instructions. For budgeting context, see our WPC cladding cost guide; for ongoing care, see how to clean exterior WPC cladding.
Ground-clearance planning checklist
- Confirm exact model and manufacturer-required clearance.
- Measure to final soil, concrete, gravel, mulch or paver elevation.
- Evaluate rain splashback, irrigation and runoff.
- Check WRB, furring, base flashing and water outlets.
- Use compatible starter and termination accessories.
- Preserve ventilation, drainage and movement allowances.
- Coordinate roof, deck, patio, stone and foundation transitions individually.
- Plan for future landscaping and maintenance access.
Frequently asked questions
How far above ground should exterior WPC cladding be installed?
Use the exact manufacturer’s clearance and the approved wall assembly requirements; no single universal dimension applies to all WPC panels.
Can WPC cladding touch concrete?
Only if the exact product and assembly permit that condition. Verify final elevations, drainage, flashing and clearance.
Can WPC cladding touch soil?
Do not assume exterior decorative panels are approved for direct ground contact.
Can mulch cover the bottom trim?
Do not obstruct the system’s required clearance, drainage, ventilation or inspection access.
Does a WPC rainscreen need a bottom opening?
A drained or ventilated cavity needs whatever outlets the approved wall design requires.
Can I caulk the bottom of the cladding?
Only as directed by the approved system; never block intentional drainage openings.
Can panels be installed above pavers?
Potentially, after coordinating finished paving height and the product’s permitted clearance.
Is the clearance the same for vertical and horizontal panels?
Not necessarily. Different orientations and systems may have distinct support and termination requirements.
Can I use WPC above a stone base?
Yes, with an appropriately designed material transition, flashing and drainage strategy.
Does an exterior WPC panel replace waterproofing?
No. The building envelope’s water-management layers must still function as intended.
What about clearance above a roof?
Roof-wall flashing and roofing requirements must be evaluated separately from ground clearance.
Final thoughts
The lower edge of an exterior WPC installation affects appearance, durability planning and wall drainage. Carefully coordinate finished grade, adjacent surfaces, the cladding system and the supporting wall before cutting or fastening panels. Rather than relying on generic distances, use verified requirements for the exact product and project.
USA Builders Depot — Better Materials. A More Beautiful Tomorrow.
Can You Add Screens to Steel Casement Windows? Types, Fit & Installation Guide
Steel casement windows bring elegant narrow-looking profiles, architectural glass divisions, and fresh-air ventilation to contemporary and transitional homes. But homeowners often ask: can steel casement windows have insect screens? Yes, many can accommodate compatible screening systems, although the correct screen depends on the window’s opening direction, frame, handles, hinges, available mounting area, and intended use. This USA Builders Depot guide explains screen types, fit, measurement, operation and safety considerations.
Quick Answer: Can Steel Casement Windows Have Screens?
Yes. Compatible fixed, removable, retractable, or magnetic insect screens may work with some steel casement windows. An outward-opening sash often makes an interior screen worth considering; inward-opening windows may require a different arrangement. Before ordering, verify whether a screen is included, which way the sash swings, mounting space, handle clearance, dimensions, removability, drainage, and emergency escape considerations. Do not assume every operable steel window ships with a screen.
1. Why Screen Compatibility Matters for Steel Windows
A beautiful window must work comfortably in daily use. A screen that blocks the handle, prevents sash movement, or interferes with cleaning can undermine the design. Some systems stay visible while others retract or can be removed. Windows that look identical while closed may have different hinges, handles and swings, so their screen requirements can differ. Coordinate screening during product selection rather than as an afterthought.
2. Outward-Opening vs. Inward-Opening Steel Casement Windows
Outward-opening casements: Because the sash swings outward, an interior screen may be feasible. But handles, locks and other hardware may project into the interior screen plane, and some designs require moving or removing a screen to operate the sash.
Inward-opening casements: A screen across the interior opening can interfere with the sash. An exterior or separately designed system might be considered, subject to weather exposure, maintenance access and window drainage.
Confirm actual sash direction and operating hardware on the approved drawing before ordering a screen. For a broader introduction, see our steel casement window guide.
3. Four Screen Options for Steel Casement Windows
Fixed-frame insect screens: Mesh sits in a framed assembly attached in an approved location. They offer a straightforward appearance but must not obstruct window operation, cleaning or emergency access.
Removable screens: Designed to be taken out for maintenance or seasonal use. Confirm convenient removal and secure attachment during normal operation; emergency escape requirements may impose further constraints.
Retractable screens: A housing or cassette stores mesh when not in use, usually with guide tracks. This can preserve a cleaner view when retracted, but requires space and hardware compatibility.
Magnetic screens: Certain products use magnetic strips or attachments for removal. Steel construction by itself does not guarantee secure compatibility. Verify the actual mounting surface, coating, seal and opening details.
None of these screen types is universally compatible with all USABD steel-window models.
4. Which Screen Type Is Best for Black Steel Windows?
If minimal visual interruption is the priority, a compatible retractable screen may appeal, though its housing and guides can remain visible. For seasonal use, consider a conveniently removable screen. A framed screen may suit a straightforward installation where hardware and emergency access are unaffected. Unusually large or custom openings may benefit from a coordinated screen-and-window design. Choose the operating window first, then have screen compatibility evaluated before approving fabrication.
5. Do USA Builders Depot Steel Windows Come With Screens?
Screen inclusion must be confirmed for the exact product and written quotation. USA Builders Depot offers selected fixed, casement, awning, push-out and combination steel-window configurations, each with different accessory considerations. Do not assume that an operable window includes an insect screen or that a third-party screen fits automatically. Request written confirmation of screen availability, inclusion, placement and compatible hardware before production.
6. How to Measure a Steel Casement Window for a Screen
Rough opening means the structural opening prepared for the window. Overall window size means the specified complete window dimensions. Screen mounting opening means the specific space where the chosen screen will attach. They are not interchangeable.
Step 1: Identify whether the screen mounts inside, outside, in a frame recess or on a separate surface.
Step 2: Confirm the exact screen system and measuring instructions.
Step 3: Measure the required mounting opening at the points specified by its manufacturer.
Step 4: Identify handles, locks, hinges, stays and hardware projections.
Step 5: Measure the available depth for housings and tracks if a retractable screen is being considered.
Step 6: Have the final dimensions verified before manufacturing.
Do not automatically subtract a generic quarter-inch or half-inch allowance. See our steel window measuring guide for broader window measuring principles.
7. Can Retractable Screens Work With Steel Casement Windows?
Potentially, when the window configuration and opening dimensions are compatible. Retractable screen systems use a housing, mesh, tracks and an operating mechanism. They may retract vertically or horizontally depending on design. Homeowners may value their unobstructed appearance when not in use. However, housing and tracks must not interfere with sash movement, handles, trim, seals, drainage or required escape operation. Follow manufacturer instructions for wind and weather; do not assume an extended screen is intended for severe conditions. The existence of custom retractable screen products does not establish compatibility with a particular USABD window.
8. Can Magnetic Screens Be Installed on Steel Windows?
Maybe. Some magnetic screens adhere to suitable metal surfaces; others depend on separate adhesive magnetic strips. These attachment systems differ. Verify frame profile, protective finish, hardware movement and the completeness of the insect seal. A magnetic product should not scratch or damage a factory-applied coating. Do not drill into or modify the steel frame without manufacturer permission. Check emergency access where relevant.
9. What About Double Casement Steel Windows?
Double casements may have two independently operable leaves, meeting details and multiple handles. A compatible screen might cover the full opening or use another tailored configuration. Confirm sash operation, central meeting geometry, mounting surface, maximum screen span and support requirements. A design that works for a small single casement may not perform the same way over a much wider double-casement opening.
10. Can Steel Casement Windows With Screens Be Used Over a Kitchen Sink?
Yes, when the window and screen system work with the sink location. A deep countertop may make window or screen handles hard to reach. A high-arc faucet can interfere with sash movement or removal of the screen. A retractable handle near the sill may be inconvenient if blocked by the faucet. Confirm cleaning access and exterior swing clearance as well. Review an elevation or section showing the finished counter, faucet, frame, operating sash, screen and controls before approving the order. Also see our steel windows over kitchen sinks guide.
11. Are Screens Safe for Bedroom Egress Windows?
Some bedroom windows must provide emergency escape and rescue openings under the locally adopted code. An insect screen on a required opening must not improperly obstruct operation or reduce the usable clear opening below applicable limits. Requirements may address screen release or removal from inside without keys or tools. A nominal window dimension does not equal the clear escape opening. Confirm the actual sash operation and complete screen assembly with a qualified installer or design professional and the authority having jurisdiction.
12. Important: Insect Screens Are Not Child-Fall Protection Devices
An ordinary insect screen is primarily intended to exclude insects while allowing airflow. Never rely on an insect screen to prevent a child from falling through an open window. Where fall protection is needed, consider appropriate window stops or guards that comply with applicable requirements while preserving any required emergency escape. Even a mesh advertised as pet-resistant should not be treated as a child-safety barrier.
13. Choosing the Right Screen Mesh
Mesh affects visibility, airflow, wear and maintenance. Fiberglass insect mesh is a common option. Metal mesh has different durability and appearance characteristics. Fine insect mesh may help exclude smaller insects but can affect airflow and visibility. Pet-resistant mesh is intended for certain kinds of abrasion, not child-fall protection. High-visibility mesh aims to reduce visual interruption compared with some traditional meshes. Compare actual manufacturer specifications rather than assuming that finer or stronger mesh always performs better in every way.
14. Will Screens Affect the Appearance of Black Steel Windows?
A screen can change the perceived glass clarity and sightlines. Dark screen frames may visually blend with black steel, although finish colors are not automatically identical. Mesh material and light conditions influence visibility. Retractable housings and tracks can remain visible even when the mesh is concealed. For multiple windows on the same elevation, coordinate screen types and frame colors to maintain a consistent appearance. Physical samples may help on high-end projects.
15. What Should Builders and Architects Specify?
A useful window schedule should identify exact window model, overall dimensions, operating style, inward or outward swing, handing, handle type and projection, screen type, interior or exterior mounting position, frame or recess mounting details, mesh specification, screen-frame finish, cleaning access, relevant emergency escape requirements, any separate child-fall protection, and written supplier confirmation of inclusion or compatibility. Add screen details to the approved custom window drawings before fabrication.
16. Common Mistakes to Avoid
Avoid assuming a screen is included; choosing a screen before confirming sash swing; measuring only the rough opening; overlooking handle projection; assuming magnets work on every steel finish; drilling the window frame without approval; ignoring emergency opening requirements; treating ordinary insect screens as fall protection; or buying a screen solely for appearance while compromising usability. Confirm the actual window and screen pairing.
Frequently Asked Questions
Can you put insect screens on steel casement windows? Many can accommodate a compatible design, subject to hardware, frame and swing requirements.
Do USABD steel windows include screens? Confirm the exact model and written quotation; do not assume inclusion.
Where does a screen go on an outward-opening window? An interior location may work if handles and other hardware permit it.
Can magnetic screens work on steel windows? Potentially, if the actual mounting surface and attachment design are compatible.
Are retractable screens suitable for black steel windows? They can be attractive where housing, tracks and operation fit properly.
Can a fixed screen obstruct operation? Yes, if positioned without accounting for handles or the sash.
Can double casement windows have screens? Possible, but evaluate meeting details, total span and both opening leaves.
Can screens be added after window installation? Sometimes, depending on the existing opening and attachment possibilities.
May I drill the steel window frame? Only when the manufacturer’s instructions expressly permit it.
Do screens restrict airflow? Mesh can affect airflow; results vary by product.
Can screened windows satisfy bedroom egress? Potentially, if the complete arrangement meets applicable requirements.
Can insect screens prevent children from falling? No. They are not child-fall protection devices.
Can all windows use the same screen? Verify compatibility separately for each size and operating style.
Final Thoughts: Plan Your Screens Before Ordering Steel Windows
Steel casement windows combine architectural style with natural ventilation. Compatible insect screens can make open-window use more pleasant, but they must be coordinated with frame geometry, sash movement, hardware, mounting dimensions, cleaning access and safety requirements. For custom windows, resolve the screen during design and incorporate requirements in approved drawings. For existing windows, measure the actual mounting area and confirm compatibility before buying.
Explore steel windows at USA Builders Depot, including selected fixed, single-casement, double-casement, awning and push-out configurations. For custom inquiries, provide dimensions, swing, glass, jamb depth, project location and your screen requirements so available options can be reviewed.
USA BUILDERS DEPOT — Build a Better Tomorrow.
Can You Install a Steel Entry Door Without an Overhang? Rain Exposure, Flashing & Weather Protection
Modern architecture often features dramatic black steel entry doors, expansive glazing, and minimalist entrances without a traditional porch. That raises a practical question: can an exterior steel door be installed without an overhang?
Yes, some exterior steel door systems may be suitable for an uncovered entryway, but that must be confirmed for the exact model and project. Exterior labeling alone does not establish unlimited resistance to direct rain, wind-driven water, standing water, or corrosive environments. Product design, documented performance, flashing, threshold construction, and the surrounding wall assembly all matter.
Why exterior doors benefit from an overhang
A roof projection, covered porch, or recessed entrance can reduce rainfall reaching a door and its threshold. It can also reduce splashback, direct exposure to hardware, and, depending on orientation, solar heating. Protection varies with roof geometry and wind direction. Even a covered entrance still needs properly detailed flashing and seals; an overhang is an additional protective measure, not a substitute for weatherproofing.
Does an exterior steel door need a covered porch?
Not necessarily. A steel entry door may be installed on a deep porch, in a recessed opening, or directly on an exposed façade. The amount of weather exposure changes considerably between these arrangements. A recess may intercept some rainfall, while wind-driven rain can still enter it. Confirm the door manufacturer’s permissible installation conditions before selecting a model for an uncovered opening.
What happens when rain hits a steel entry door?
Rain can contact the steel profiles, glass, glazing seals, hinges, handles, lock hardware, weatherstripping, sweep, and threshold. Water may also travel down the surrounding exterior wall. That creates two separate challenges: how the door assembly handles exposure and how the building opening directs water outward. A well-manufactured door cannot compensate for defective wall flashing or poor drainage.
Is a steel door waterproof?
“Waterproof” is not a useful blanket promise for every exterior door. Weather resistance depends on the complete assembly and conditions of exposure. Ordinary rainfall and severe wind-driven rain are not equivalent. Where the project requires a particular water-penetration performance level, request documented results for the exact door model and configuration. Ratings from other products should not be transferred to a selected door.
Wind-driven rain versus ordinary rainfall
Wind can drive rain horizontally into frame joints, door corners, glazing interfaces, and sill assemblies. Exposure also depends on the entrance orientation, neighboring buildings, landscaping, and local storm conditions. Highly exposed projects may require evaluation of water-penetration, structural, and wind-performance requirements. These are product- and site-specific matters, not features established simply by a black steel finish.
Do steel French doors need extra weather protection?
Steel French doors feature broad glazed areas and often have a center joint between operating leaves. That meeting joint may use an astragal, overlapping profiles, gaskets, or another sealing arrangement. The specific construction varies. Confirm how the selected door handles the meeting stile, threshold, glazing seals, and perimeter weatherstripping rather than assuming all double doors perform alike.
Does inswing or outswing matter?
Inswing doors open toward the interior; outswing doors open outward. Neither swing is automatically weatherproof or unsuitable for exposed applications. Their threshold geometry, seal locations, hardware, landing clearances, and installation requirements can differ. Confirm that the complete product and the chosen handing and swing direction are approved for the intended conditions.
Why the threshold is critical
Rainwater that reaches the door travels toward the bottom seal and sill. The threshold interacts with the exterior landing, interior floor, weatherstripping, and water-control materials. A threshold alone is not the entire waterproofing system. The installation may also require sill-pan flashing, head and jamb flashing, sealants, drainage provisions, and a properly integrated water-resistive barrier. See our steel door threshold and sill guide for additional planning considerations.
What is sill-pan flashing?
A sill pan is a water-management component beneath an exterior opening that helps collect incidental water and direct it toward a suitable exterior drainage path. Depending on the wall and door, it can involve rigid pans, flexible membranes, liquid-applied systems, or other manufacturer-approved details. A membrane placed under a threshold is not automatically sufficient: its connections, drainage route, and integration with adjacent flashing determine whether the assembly functions as intended.
Why head and jamb flashing also matter
Water can enter around the top and sides of a rough opening, not just its bottom. A coordinated exterior wall typically uses a water-resistive barrier (WRB), with head, jamb, and sill flashing arranged to move water outward. The correct method varies by the door and wall design. Follow the actual installation instructions rather than borrowing an unrelated manufacturer’s detail. The U.S. Department of Energy’s Building America Solution Center provides general guidance on moisture management and flashing.
Can you install a steel door without flashing?
Do not assume an exposed entryway is suitable without a planned drainage and flashing system. Certain assemblies may contain integrated components; others require field-installed flashing. The objective is a complete opening that meets the project’s applicable water-management requirements. Confirm the exact documentation for the selected steel door.
Can you seal the entire frame with caulk?
Sealant can be essential, but it cannot replace flashing. Some door and threshold assemblies include intentional water outlets, and sealing these indiscriminately may trap water. Only apply compatible sealants in locations prescribed by the approved design. Persistent water intrusion should be diagnosed at its source rather than repeatedly treated with more caulk.
Will rain damage a black steel door?
Rain does not automatically damage a properly specified exterior steel door. Corrosion risk depends on steel preparation, coatings, environmental exposure, and maintenance. Scratches, chipped coatings, and exposed metal can increase risk. Hinges, fasteners, locks, and handles may have their own material specifications. Clean and maintain finishes according to product instructions, and verify the warranty before refinishing a factory-coated surface.
Black steel doors in sunlight and rain
Dark surfaces may become hotter than lighter finishes under comparable sunlight. Heat exposure and water penetration are separate design considerations. A system appropriate for direct sun is not automatically rated for wind-driven rain, and water-resistance does not establish thermal performance. Assess each criterion independently.
Do thermally broken steel doors resist rain better?
Not automatically. Thermal-break construction aims to reduce heat conduction through frame components. It does not itself establish the water-penetration resistance of a door. Compare thermal properties, glazing, frame seals, threshold design, and any documented testing separately. When a project requires a particular U-factor or water-performance rating, request evidence for the exact configuration.
What about large glass panels?
Large glazed steel doors can offer abundant daylight, but the glazing seals and the completed assembly need evaluation for the intended exposure. Insulated glass and Low-E coatings address certain thermal characteristics, while tempered glass addresses safety glazing; none alone proves a door’s water resistance or impact certification. Do not assume a glass-heavy design has any specialized storm rating without exact documentation.
Maintenance for uncovered steel entrances
An exposed entrance merits periodic inspection. Review the coating, glazing seals, hinges, hardware, weatherstripping, sill, and visible joints. Clean with methods approved for the finish, inspect scratches or coating damage, and ensure designed drainage paths are free of debris. Look for moisture on adjacent walls and finishes. Investigate recurring leaks in the complete opening assembly.
Does a recessed entry count as protection?
A recess can provide partial shelter, but its effectiveness depends on depth, wall geometry, and weather direction. A shallow recess is not always equivalent to a covered porch. The architectural layout should account for how water reaches the opening and where it drains.
Can WPC cladding be installed around an exposed steel door?
Potentially, if the selected exterior WPC system is approved for the project. Black steel doors can pair elegantly with vertical fluted WPC cladding, but cladding drainage cavities, trims, WRB, and door flashing must be coordinated. Water traveling behind decorative panels should not discharge into the door opening; trims should not block intentional outlets.
Concrete patios and exterior landings
The slope, height, and drainage of a concrete, stone, or paver landing affect exposure at the threshold. Newly added paving may alter the relationship between the sill and finished grade. Establish elevations and an appropriate drainage strategy in advance while meeting any applicable accessibility and building-code requirements.
How to verify suitability before ordering
Identify the exact door manufacturer, model, swing, size, glass, threshold, hardware, and intended environment. Review installation instructions, weatherstripping details, finish information, exposure limitations, and any relevant performance documents. If a project requires specialized wind, water, energy, impact, or structural evidence, do not assume a certificate for another door or configuration applies. Review the USA Builders Depot residential steel door collection and request model-specific documentation where needed.
Does a warranty cover direct rainfall?
Coverage depends on the written warranty. Manufacturing defects, coating limitations, environmental exposure, incorrect installation, and maintenance obligations may be treated differently. A warranty is not proof of a particular test rating or unlimited exposure suitability. Confirm technical and warranty terms before ordering.
Should you add an overhang to an existing entry?
Adding shelter can reduce direct exposure, but it may require structural attachments, roof flashing, drainage planning, permitting, and careful waterproofing. It should not be treated as a cosmetic fix for a leak whose cause has not been determined. For new construction, consider entry protection early in the design process.
Steel entry door rain-exposure checklist
- Confirm the exact door model and approved exterior application.
- Evaluate rain, wind direction, solar exposure, and corrosion environment.
- Check covered, recessed, or fully exposed entrance conditions.
- Verify glass, weatherstripping, center seals, and threshold.
- Coordinate head, jamb, and sill flashing with the wall’s WRB.
- Confirm landing elevations, drainage, and required clearances.
- Review hinges, handles, locks, finish, and maintenance requirements.
- Obtain applicable thermal, water, wind, impact, or structural documentation when required.
- Review manufacturer installation instructions and warranty terms.
Frequently asked questions
Can a steel front door be directly exposed to rain?
Potentially, if the exact system is suitable for that exposure and the opening is installed as required.
Do all exterior steel doors need an overhang?
No universal overhang rule applies to every steel entry door. Additional shelter can reduce exposure, but product suitability and project requirements determine the proper design.
Will rain make a steel entry door rust?
Not necessarily. Corrosion risk depends on the finish, protection, environmental conditions, and maintenance.
Can steel French doors be used in uncovered entries?
Some can, subject to their actual documented configuration and intended use.
Does Low-E glass make the door waterproof?
No. Low-E glazing addresses thermal characteristics, not the water-penetration rating of the complete door.
Can caulk alone prevent leakage?
No. Sealant must work together with appropriate flashing, seals, and drainage.
Are thermally broken steel doors better against rain?
Not by definition. Thermal-break and water-penetration performance are distinct properties.
Do I need sill-pan flashing?
Follow the exact door and wall assembly’s approved water-management requirements.
Can I install a steel door without a porch?
Potentially, after confirming model suitability and designing the complete opening correctly.
Explore exterior steel doors at USA Builders Depot
USA Builders Depot offers contemporary single, double, and French-style residential steel entry doors. Before ordering for an uncovered or partially sheltered location, confirm rough-opening dimensions, swing, glazing, hardware, threshold, finish, and documented exposure suitability. Browse Residential Steel Doors & Frames and request details for the selected model.
Final thoughts
An exposed steel entry door can create a distinctive architectural look. Whether it is appropriate depends on documented product capabilities, rainfall and wind conditions, and the complete installation. A porch or overhang helps reduce exposure, but does not replace flashing, drainage, and proper sealing. Thoughtful material selection and detailed construction planning create more beautiful, better-performing entrances.
USA Builders Depot — Better Materials. A More Beautiful Tomorrow.
Do Black Steel Front Doors Get Hot in the Sun? Heat, Shading & Thermal Performance Guide
A black steel front door can transform a home with slim architectural profiles, a dramatic dark finish and expansive glass. But owners planning a sunny entrance often ask: will a black steel door become too hot in direct sunlight? The short answer is yes: the exterior surface can get hot. How that affects interior comfort depends on the finish, door construction, glazing, thermal breaks, insulating core, orientation and shading. This guide explains those distinctions so homeowners, architects and builders can specify a suitable entrance before ordering.
Quick Answer: Do Black Steel Doors Get Hot in Direct Sunlight?
Yes. A black steel door in strong sunlight may become substantially hotter than the outdoor air and can be uncomfortable or unsafe to touch. Dark finishes tend to absorb more solar energy than comparable light-colored finishes. However, a hot exterior surface does not automatically mean that the interior face reaches the same temperature. Insulating cores, thermally separated profiles, appropriate glazing, weather seals and architectural shading address different pathways for heat and air movement. The appropriate combination depends on the exact product and project conditions.
1. Why Black Steel Doors Absorb Heat From the Sun
Solar radiation striking a door is partly reflected and partly absorbed. Many black surfaces absorb more of the incoming energy than otherwise comparable light-colored surfaces, causing the outer finish to warm. This occurs with other dark building materials too. Steel is also an effective heat conductor: continuous metal components can move heat between exterior and interior. Two black doors may behave differently because of coating, construction, thickness, glazing area and exposure. A shaded porch and a west-facing entrance in full afternoon sun present very different conditions.
2. Exterior Surface Heat vs. Interior Comfort
Separate three effects. Exterior solar absorption raises the temperature of sunlit metal. Conduction transfers some heat through metal components and surrounding assemblies. Solar gain through glazing occurs when sunlight passes through glass and contributes heat indoors. A door can be hot to touch outside while its inside remains substantially more comfortable, depending on its construction. Likewise, a highly glazed door can admit unwanted solar energy even if its metal frame has a thermal break. Each effect requires an appropriate response.
3. Why the Direction Your Front Door Faces Matters
An east-facing entrance may receive morning sunlight. A west-facing entrance can receive low-angle afternoon sun when ambient temperatures are already elevated, making it important to evaluate in hot climates. A south-facing entrance may receive substantial seasonal sunlight, with shading effectiveness influenced by latitude and roof geometry. A north-facing entrance may receive less direct exposure in many Northern Hemisphere settings, but conditions still vary. Surrounding trees, nearby homes, porch depth and the season all matter. Observe the actual entry at different times of day; compass direction alone does not determine the final heat exposure.
4. Can a Thermal Break Help Reduce Heat Transfer?
A thermal break interrupts part of the direct heat-conducting pathway through a metal door or frame. In a continuous steel profile, exterior and interior metal can provide a conductive route. In a thermally separated profile, a lower-conductivity section helps reduce that flow. An insulated door and a thermally broken door are not automatically the same thing. A door may have an insulating core while still retaining metal paths across the assembly. A thermal break does not prevent the exterior black surface from heating in direct sun; its role is to reduce heat transfer through the relevant profile. USA Builders Depot offers selected custom-crafted thermally broken steel-door designs. Confirm exact construction, availability and documentation for the chosen model. For additional background, see our thermal break steel door guide.
5. Does Polyurethane Foam Inside a Steel Door Help?
Some steel doors contain polyurethane foam or another insulating core. Such a core can reduce heat flow through insulated areas, but does not automatically eliminate conduction through metal frames, edges or other continuous components. It also does not correct unwanted airflow at door edges. Think of three distinct elements: an insulating core reduces heat flow through relevant sections; a thermal break reduces conductive transfer through metal profiles; and weatherstripping helps limit airflow at moving joints. Overall performance depends on the complete door system.
6. Does Low-E Glass Help Keep an Entryway Cooler?
Low-emissivity, or Low-E, glass has a coating that influences radiant heat transfer. Different glass packages have different design objectives, and not every Low-E unit provides identical solar control. Solar Heat Gain Coefficient (SHGC) describes the fraction of incident solar energy transmitted or admitted through a fenestration product; a lower SHGC generally means less solar heat gain. U-factor describes heat-transfer performance of the complete evaluated assembly; generally, a lower value represents less heat transfer. The two ratings answer different questions. Double-pane glass alone does not establish either a particular SHGC or U-factor. On a heavily glazed sun-facing entrance, request verified documentation for the exact configuration. Read the steel door glass guide for glazing background.
7. Does a Door With More Glass Get Hotter?
Not necessarily, but glazing proportion strongly influences which performance properties matter. A mostly solid steel entry door emphasizes the construction, insulating core, frame, and finish. A full-lite French door introduces a larger area through which solar heat can enter. Double doors with sidelights or a transom create a complete assembly whose glazing and framing should be evaluated together. Choose the desired amount of glass and the glass specification during design rather than treating energy performance as an afterthought.
8. How to Reduce Heat Exposure on an Existing Black Steel Door
Consider shading. A suitable canopy, deeper recess, approved architectural screen or thoughtfully positioned landscaping may reduce direct sunlight. For west-facing entries, low-angle afternoon sun may pass beneath a shallow horizontal overhang, so actual geometry matters. Check air sealing. If the concern is warm air coming through gaps, inspect weatherstripping, threshold and alignment; shading alone will not repair drafts. Review the glazing. If direct sunlight through glass creates interior heat gain, verify the current glazing before considering replacement or aftermarket film. Some films can cause thermal stress or affect warranties. Maintain the finish. Follow the door manufacturer’s cleaning and maintenance guidance; do not apply unapproved coatings or repaint a factory-finished product as an improvised heat solution.
9. Can Direct Sunlight Damage a Black Steel Door?
The complete entrance includes coatings, gaskets, glazing seals, insulation, hardware and other parts in addition to steel. Materials have different environmental limits. Heat causes thermal expansion in steel as it does in other building materials; properly designed assemblies account for anticipated movement. Persistent sticking, scraping or visible distortion deserves investigation, but sunlight should not automatically be assumed to be the cause. Finish durability depends on the exact coating and maintenance conditions. Avoid unauthorized repairs or modifications that might damage a protective finish or affect warranty terms.
10. Can You Use Black Steel Doors in Hot Climates?
Yes, when the complete selected system is suitable for the installation. In Georgia and other humid southeastern locations, solar exposure, air sealing and glazing should be considered alongside moisture control. In hot Texas locations, afternoon sun and thermal performance may be priorities. In Arizona and other desert climates, intense exposure can make shade and material selection particularly valuable. Florida projects can additionally require special wind or impact approvals depending on location and building requirements. A thermal or insulated-glass specification is not proof of hurricane or impact certification. USA Builders Depot does not currently represent its steel doors as hurricane-rated products; projects requiring that certification must use adequately documented products.
11. What to Look for When Buying a Sun-Exposed Black Steel Front Door
Review the exterior finish and its maintenance instructions; dimensions and door configuration; solid versus glazed area; any insulating core; verified thermal-break design; glazing and solar-control properties; required U-factor and SHGC documentation; weatherstripping and meeting-stile details; threshold and drainage requirements; approved swing and installation instructions; and relevant project codes. No single feature guarantees comfort or suitability. Choose a specification for the complete installed assembly rather than relying on appearance or an isolated marketing claim.
12. Example: Planning a West-Facing Steel Entry Door
Imagine a contemporary west-facing entrance with oversized black double doors, a limestone façade and a shallow porch. First, assess when and how long the entrance receives afternoon sunlight. Second, determine the glazing area and required solar-control performance. Third, review whether the leaf and frame profiles are thermally separated and whether an insulating core is present. Fourth, coordinate weather seals, double-door meeting details, threshold and installation. Finally, identify the applicable project energy or performance requirements and obtain the exact supporting documentation. This process produces a more informed specification than choosing by appearance alone.
13. Should You Choose a Thermally Broken Steel Door?
Thermally broken steel doors are worth considering when reducing conduction through the metal system is important, particularly in demanding climates or projects with specific thermal requirements. But a thermal break is not a universal fix for all sun-related problems. If the concern is solar radiation through glass, glazing and shading deserve attention. If the issue is a hot exterior touch surface, finish and solar exposure are relevant. If the problem is airflow, seals and installation matter. Select the combination appropriate for the project.
14. Questions to Ask Before Ordering
Before approving a sun-exposed black steel entry door, confirm the entrance orientation and actual direct-sun exposure; porch and shading conditions; door dimensions and configuration; solid-to-glass ratio; insulating core and thermal-break construction; glazing package; documented U-factor and SHGC if required; finish care instructions; threshold and weather-seal details; applicable energy, structural and local code requirements; and whether the product is in stock or custom-crafted. Have the product drawings and specifications approved before fabrication.
Frequently Asked Questions
Do black steel doors get hotter than white doors? Dark finishes commonly absorb more solar energy under otherwise comparable conditions, although actual temperatures vary.
Can a black steel door become too hot to touch? Yes. Avoid prolonged contact with sun-heated metal, especially around children and pets.
Will a thermally broken steel door stay cool outside? No guarantee; a thermal break reduces conductive heat transfer but cannot prevent exterior solar absorption.
Does foam insulation stop the outside from heating? No. It helps reduce heat flow through insulated areas, but cannot keep the sunlit finish cool.
Does Low-E glass matter? Yes, particularly on heavily glazed entrances; evaluate the exact system’s documented properties.
Is a west-facing black door a bad idea? Not automatically. Carefully consider shading, glazing, construction and finish suitability.
Will sunlight warp the door? Thermal movement is normal, but persistent operational problems need diagnosis rather than an assumed cause.
Can I apply aftermarket film? Only after checking compatibility and any warranty restrictions for the specific glass.
Are all black steel doors thermally broken? No. Verify each model.
Can USABD doors work in hot climates? Selected configurations may be suitable depending on exact specifications and project requirements.
Does USABD offer thermally broken steel doors? Yes, in selected custom configurations; verify specifications and lead time.
Insulated or thermally broken? They address different heat paths and may be combined in certain assemblies.
Final Thoughts: Black Steel Doors Can Work Beautifully in Sunny Locations
Black steel doors offer striking architectural proportions and work well with limestone, natural wood and contemporary façades. Direct sunlight is a design consideration, not an automatic reason to reject them. Distinguish hot exterior surfaces from conductive transfer and solar gain through glazing. Consider shading, insulating construction, thermal separation, properly selected glass, effective seals and correct installation as a complete system.
Explore residential steel doors at USA Builders Depot and request information about selected thermally broken custom configurations. When requesting a quote, include your door dimensions, preferred design, project location, orientation, glazing preferences and applicable thermal requirements.
USA BUILDERS DEPOT — Build a Better Tomorrow.
How to Install WPC Fluted Wall Panels Around Electrical Outlets & Light Switches
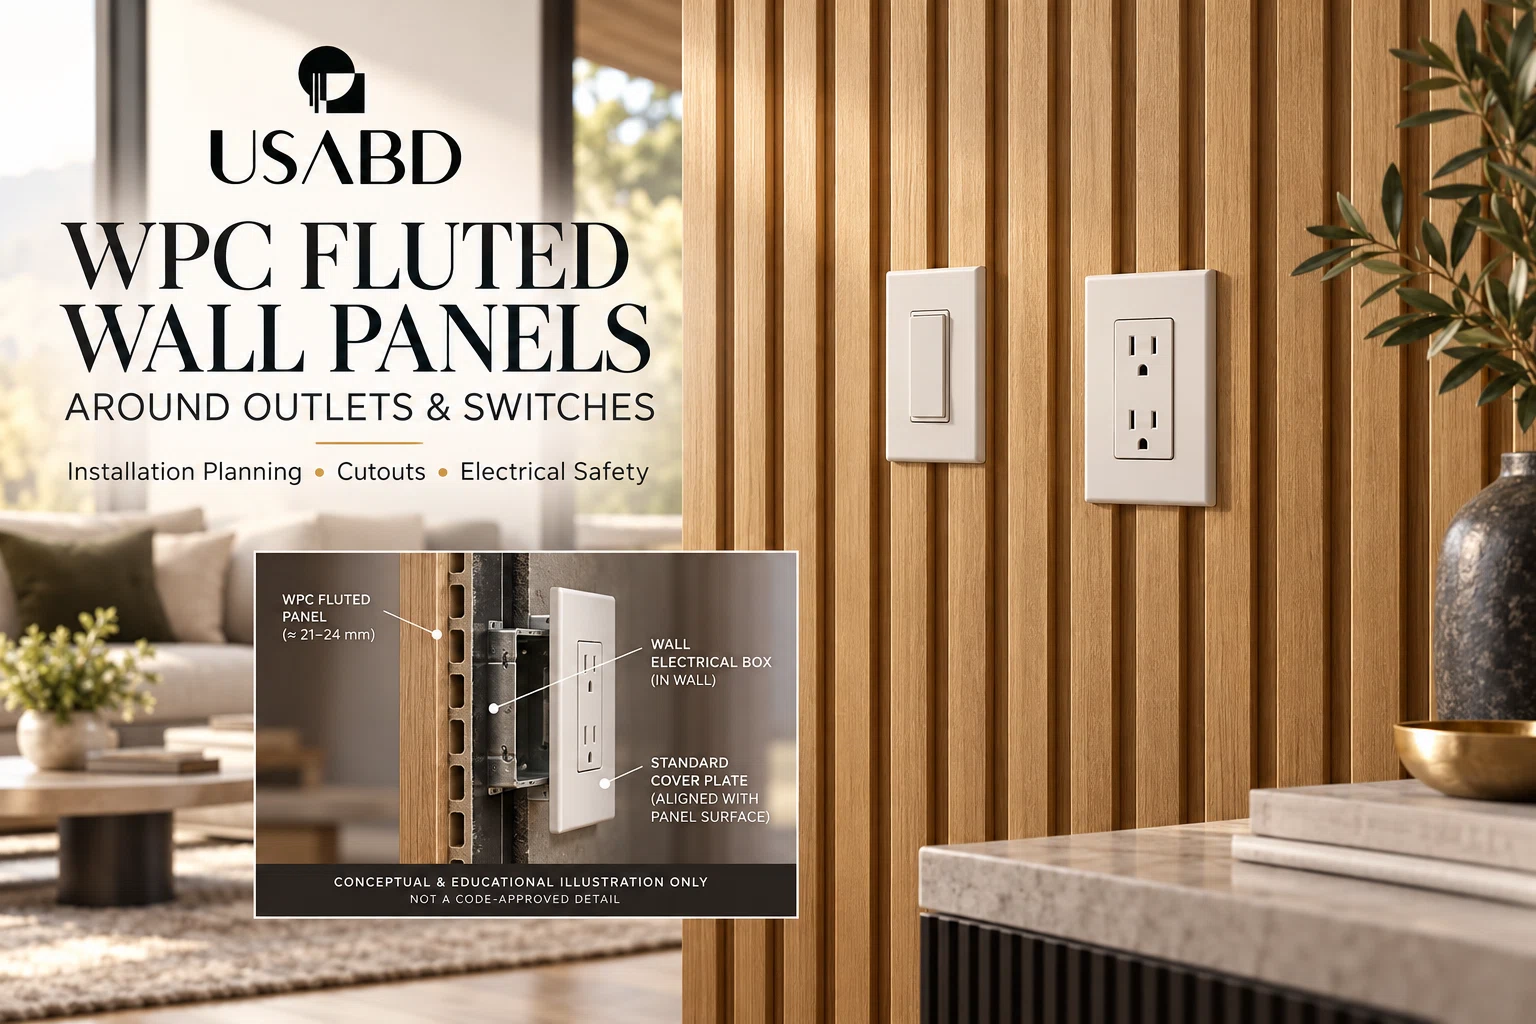
Interior WPC fluted wall panels bring architectural texture to living rooms, offices and hallways. But receptacles and switches interrupt the profile, and decorative cladding changes the finished wall thickness. Can you install WPC fluted wall panels around electrical outlets and switches? Yes, when the product is suitable and the device installation remains code-compliant. This guide explains how to coordinate cutouts, electrical boxes, cover plates, and safe installation planning.
Can WPC Fluted Wall Panels Be Installed Around Outlets?
Yes, where the exact decorative panel is suitable for the wall and the finished electrical installation complies with applicable electrical requirements. Adding panel thickness can change the relationship between the electrical box, device, finished surface, and cover plate. Making a cutout alone does not establish a safe installation. Plan the work with a qualified electrician.
Why Panel Thickness Matters
Interior WPC panels have a finished profile that may stand proud of the original drywall. Because fluted faces have raised ribs and recesses, the visible face may also be uneven around a device. A recessed electrical box may require an appropriate listed box extension or other code-compliant arrangement. The correct detail depends on the surface, box, device and governing code; do not improvise using only longer screws or a larger cover plate.
Step 1: Record Electrical Locations Before Panel Installation
Identify each receptacle, switch, dimmer, data outlet and access point. Measure locations from fixed references such as the floor, neighboring wall or door casing. Record panel direction, joint positions and finished wall thickness. Make an elevation drawing so device positions and panel cuts are coordinated before ordering material.
Step 2: Confirm the Exact WPC Panel Profile
Check the selected SKU’s full thickness, usable coverage, hollow or solid construction, installation orientation, allowable cuts and compatible trims. Raised flutes and grooves may prevent an ordinary cover plate from seating properly. Never assume specifications for a different WPC profile also apply to your product.
Step 3: Coordinate Box Positioning With an Electrician
Before cladding, have a qualified electrician evaluate whether each existing box will remain appropriately positioned relative to the new finished wall surface. The electrician should select any needed approved extensions, supports or device mounting details and safely de-energize and modify wiring where necessary. Never conceal an outlet, junction box or live connection behind decorative cladding. Changes to required receptacle locations must also comply with applicable electrical rules.
Step 4: Mark and Cut the Panel Carefully
Once the approved electrical configuration and panel layout are established, mark the cutout from verified measurements. Follow the WPC manufacturer’s cutting instructions and avoid damage to visible faces. Check behind the intended cutting area for wiring, plumbing and other services before cutting. The electrical circuit must be safely isolated and electrical components handled by appropriately qualified personnel. Do not cut blindly into a finished wall.
Step 5: Finish Cover Plates and Cut Edges
A well-planned installation should leave accessible electrical devices correctly mounted and supported. A compatible flat finishing detail or other approved arrangement may be required where the fluted surface is uneven. Do not fill an electrical box with adhesive, trap a device behind panel material, or use decorative cladding as an improvised electrical component. Exposed panel edges should be finished as specified by the panel manufacturer.
Step 6: Inspect the Completed Wall
Confirm that the WPC panels are securely attached, cover plates and devices seat correctly, boxes remain accessible, and appliance or service openings have not been obstructed. Any required electrical inspection should be completed. The illustration accompanying this guide is conceptual, not a code-approved construction drawing.
Should You Move Outlets Before Installing Fluted Panels?
Relocating a device may help maintain uninterrupted decorative grooves, especially on an accent wall. But required receptacle locations, accessibility, service needs, and wiring restrictions must be considered. Only a qualified electrician should make the necessary electrical changes; a decorative design preference cannot override applicable code.
Can WPC Panels Be Installed Behind Switch Plates?
Potentially, if the wall finish, box positioning, device support and cover-plate arrangement are compatible and compliant. A cover plate should not be expected to bridge deep grooves without an appropriate solution. Verify the specific product and approved finish detail before cutting.
Common Mistakes to Avoid
Common problems include installing panels before planning electrical locations, leaving a box improperly recessed, using long screws instead of a required box extension, covering unused outlets without compliant electrical work, cutting near unidentified wiring, applying adhesive inside box openings, and using oversize cover plates to conceal inaccurate cuts. Coordination with an electrician and the panel manufacturer prevents many of these errors.
Frequently Asked Questions
Can you install WPC fluted panels around outlets?
Yes, with suitable panel construction, accurate cutouts, and a compliant electrical installation.
Do electrical boxes need extensions?
Possibly. A qualified electrician should assess finished thickness, box position, material and applicable code.
Can a cover plate sit on fluted panels?
Only where the chosen finished detail provides appropriate device mounting and safe plate fit.
Can you cover an unused outlet?
No, not simply by hiding it behind panels. The wiring and box must be addressed through approved electrical work.
Should an electrician be involved?
Yes, for evaluation and all required electrical modifications.
Can every WPC panel be cut the same way?
No. Follow the manufacturer’s instructions for the exact profile.
Explore Interior WPC Fluted Panels at USA Builders Depot
USA Builders Depot offers decorative interior WPC fluted wall panels in contemporary colors and wood-inspired finishes. For installations containing receptacles or switches, confirm the selected product’s dimensions, substrate, cutting instructions and approved accessories. Explore our interior WPC wall-panel collection and related corner and edge-finishing guidance. The acoustic panel outlet-cutting guide covers a different material category and should not be used as an installation specification for WPC.
Final Thoughts
Fluted WPC panels can create striking architectural features, but electrical outlets and switches must be planned before cladding begins. Confirm panel thickness, cutouts, device positioning, compliant electrical box details and appropriate finishing methods. Good planning creates a cleaner appearance without sacrificing safety. USA Builders Depot — Better Materials. A More Beautiful Tomorrow.
Can Steel Casement Windows Meet Bedroom Egress Requirements? Clear Opening, Sill Height & Sizing
Steel casement windows bring clean lines, narrow-looking profiles and expansive glass to modern bedrooms. Yet when a bedroom requires an emergency escape and rescue opening, beauty is only one part of the specification. An operable steel window is not automatically a qualifying emergency escape window. A large-looking unit may offer less usable space than its catalog dimensions suggest. This guide explains net clear opening, typical residential-code dimensions, sill height, operating hardware, and the details to verify before ordering.
Quick Answer: Can Steel Casement Windows Be Used for Bedroom Egress?
Yes, potentially. A properly configured steel casement can serve as an emergency escape and rescue opening when its actual unobstructed opening, operating arrangement, height above the floor, location, and complete installation satisfy the applicable building requirements. Nominal unit size is not the same as net clear opening. Request clear-opening measurements for the exact design before purchasing. Applicable code editions, exceptions and local amendments must be confirmed for the project.
1. What Is a Bedroom Egress Window?
An emergency escape and rescue opening provides an additional route for occupants to escape and rescuers to enter when ordinary routes are unavailable. Depending on the adopted code, sleeping rooms and certain basement spaces may require one, subject to exceptions. An exterior door can satisfy the requirement in certain situations. A fixed glass window provides daylight but cannot itself serve as an operable emergency escape opening. A ventilating window may still be too small or difficult to operate for the required purpose.
2. What Are the Minimum Egress Window Dimensions?
Under commonly referenced International Residential Code provisions, ordinary qualifying emergency escape and rescue window openings generally have a minimum 5.7 square feet net clear area, with a 5.0-square-foot exception for qualifying grade-floor openings; at least 20 inches net clear width and 24 inches net clear height; and a maximum 44-inch height from the floor to the bottom of the clear opening. The 2024 IRC addresses emergency escape and rescue openings in Section R319, while the 2021 edition addressed them under R310. These are model-code reference provisions, not a determination for any particular jurisdiction or building. Always confirm the locally adopted edition, amendments, exceptions and exact measurement rules.
3. What Is Net Clear Opening?
Net clear opening is the unobstructed passage through a window when it is operated normally. A useful rectangular-opening calculation in inches is net clear area (square feet) = clear width × clear height ÷ 144. An actual 30-by-30-inch unobstructed opening provides 900 square inches, or 6.25 square feet. That exceeds the common 5.7-square-foot area criterion and the individual 20-inch width and 24-inch height thresholds. But area alone does not establish complete code compliance: operating hardware, sill elevation, exterior access and the installed arrangement also matter. A window advertised as 30 × 30 inches does not necessarily provide a 30 × 30-inch clear opening because framing, sash and hardware occupy space.
4. Why Meeting Minimum Width and Height Is Not Enough
A hypothetical clear opening measuring 20 × 24 inches has 480 square inches, or only 3.33 square feet, despite meeting the individual minimum width and height figures. Compare illustrative actual unobstructed openings: 18 × 48 inches yields 6.00 sq. ft. but is too narrow for the common 20-inch threshold; 20 × 36 inches yields 5.00 sq. ft. and may satisfy only the qualifying grade-floor area exception; 24 × 36 inches yields 6.00 sq. ft.; and 30 × 30 inches yields 6.25 sq. ft. These examples address dimensions only, not a specific product or installed window’s compliance. The grade-floor exception does not automatically apply to every first-floor or basement window.
5. Can a Steel Casement Window Provide Enough Clear Opening?
Potentially. Casement sashes are generally hinged vertically, opening inward or outward according to the system. Different hinges, opening angles, stops and restrictors change the actual available passage. A limited-angle sash may produce less space than another unit with identical nominal dimensions. Steel frame members and operating hardware also occupy part of the opening. Request manufacturer-specified net clear opening width and height for the exact window and hardware combination. Do not estimate from product photography or outside-frame dimensions.
6. Fixed Steel Windows vs. Operable Steel Windows for Bedrooms
Fixed steel windows can provide beautiful views and daylight but do not open, so cannot themselves serve as required operable escape openings. A single steel casement may qualify if its actual clear opening and operating characteristics meet the requirements. Double casements can provide broader compositions, but performance depends on the meeting detail and sashes. Combination units often include fixed center glass and operable side sections; the overall unit width must not be mistaken for one unobstructed escape opening. See our fixed versus operable steel windows guide for general design comparisons.
7. Can a Double Steel Casement Window Meet Egress Requirements?
Yes, potentially. A double casement may contain two operating leaves, but their effective clear opening depends on hinges, center meeting members, hardware, and any fixed framing. Do not add together widths separated by fixed mullions or glass panels as though they form one continuous clear passage. A window with two opening side casements and a fixed center section must be evaluated through an actual unobstructed operating opening. Request approved clear-opening geometry and technical drawings before treating the unit as a required escape opening.
8. Can an 18-Inch-Wide Steel Casement Window Be Used for Egress?
An 18-inch nominal casement should not be presumed to deliver the common 20-inch minimum clear width. If the actual opening is only 18 inches wide, it would fail that width requirement even if it were very tall. For example, 18 × 48 inches yields 6.00 square feet but remains less than 20 inches wide. Both area and individual dimensions must meet the applicable thresholds.
9. Is a 24 × 36-Inch Steel Casement Window Large Enough for Egress?
A hypothetical actual unobstructed opening measuring 24 × 36 inches provides 6.00 square feet, exceeding the commonly cited width, height and 5.7-square-foot area thresholds. But a manufactured window sold with nominal outside dimensions of 24 × 36 inches can have a substantially smaller passage. Obtain the real clear opening dimensions, swing, hardware details and any needed project approval before treating it as suitable.
10. How High Can an Egress Window Be Above the Floor?
Common IRC provisions limit the height from the floor to the bottom of the required clear opening to 44 inches. This is not necessarily the rough-framing sill, exterior trim level or overall frame bottom. Account for the finished flooring and the exact clear-opening position. A window seat or architectural feature should not automatically be assumed to satisfy the measurement requirement; verify any proposed alternative with the appropriate authority.
11. Can Steel Egress Windows Be Installed in Basements?
Potentially, but below-grade installations also require exterior escape access. When the opening is below surrounding grade, a properly designed area well may be necessary, with applicable requirements for minimum area, width, projection, drainage and, for deeper wells, ladders or steps. The well must allow the sash to operate as required. An outward-opening casement can be obstructed by a narrow well or nearby landscaping. Coordinate the complete system, including foundation water management and flashing, rather than assuming a larger window alone establishes compliance.
12. Do Window Screens Affect Egress Requirements?
Screens, security grilles, covers and other devices may affect escape operation. Emergency escape and rescue openings generally must be operable from inside without keys, tools or special knowledge, subject to applicable provisions. Confirm whether a screen is inside or outside, how it releases or removes, and whether it interferes with sash movement or the required passage. Review the window and screen as one operating arrangement.
13. Why Steel Window Handing Matters
Casement handing determines which side is hinged and how the sash swings. For outward-opening steel windows, nearby masonry returns, exterior WPC cladding, walls, porches, decking, railings, planting and window wells can restrict movement. For inward-opening windows, furniture, draperies and interior walls may create obstructions. Review the window in plan and elevation with its sash shown fully open and confirm the unobstructed passage required by the project.
14. What About Steel Windows With Multiple Glass Lites?
One-lite, two-lite, four-lite and other patterns describe glazing appearance, not automatically the usable escape opening. Decorative divisions within a moving sash differ from structural mullions that divide fixed and operable sections. Determine net clear opening through the actual operating arrangement. Choosing fewer lites is not a substitute for measured clear-opening documentation.
15. What Builders and Architects Should Verify Before Ordering
Specify each window’s designation and room location; operating style and handing; nominal product size; outside frame size; rough-opening dimensions; actual net clear width, net clear height and area; height of the bottom of the clear opening above finished floor; hinges, restrictors and locking operation; screens; exterior obstructions and well requirements; applicable adopted code; and approved drawings and technical documentation. Resolve these before approving custom fabrication.
16. Common Steel Window Egress Mistakes to Avoid
Avoid assuming every operable window qualifies; confusing nominal size and actual passage; checking area without width and height; neglecting the sill elevation; combining divided openings mathematically; ignoring hinges or restrictors; overlooking exterior obstruction or well dimensions; ordering before obtaining detailed drawings; and assuming the same adopted code applies nationwide. Architectural appearance does not establish egress suitability.
17. A Better Pre-Order Workflow
1. Determine whether this particular room needs an emergency escape and rescue opening. 2. Confirm the applicable jurisdictional requirements and exceptions. 3. Select a preferred steel window style and approximate size. 4. Request actual clear-opening measurements from the manufacturer. 5. Verify width, height and area. 6. Check the bottom of the clear opening above finished floor. 7. Review handing, screens and hardware. 8. Check exterior access and any window well. 9. Coordinate rough opening, jamb depth, flashing and installation. 10. Obtain appropriate project approval before authorizing fabrication. This helps prevent late changes after custom manufacturing.
Frequently Asked Questions
Can steel casement windows meet bedroom egress requirements? Yes, potentially, when their actual clear opening and full installation meet the applicable rules.
What is the minimum egress window size? Common IRC references include 5.7 sq. ft. net clear area (or 5.0 sq. ft. for qualifying grade-floor openings), 20 inches clear width and 24 inches clear height, subject to local adoption and exceptions.
Can a fixed steel window be used? Not as the required operable emergency escape opening.
Does a nominal 24 × 36-inch window qualify? Not necessarily. Its actual unobstructed opening may be smaller.
Is the rough opening the same as net clear opening? No. The rough opening is the construction opening for the window frame.
Does an 18-inch-wide opening qualify? It does not meet the commonly referenced 20-inch clear-width minimum.
Are double casements better? They can be, but only actual unobstructed clear-opening dimensions determine eligibility.
Must a bedroom casement open outward? Not universally; check the selected system and applicable requirements.
Can screens be present? Potentially, if the entire opening and screen arrangement meet the applicable provisions.
What about sill height? A common model-code limit is 44 inches to the bottom of the clear opening.
Can steel windows be used in basement bedrooms? Potentially, with compliant opening and exterior access, including any required window well.
Does USA Builders Depot sell certified egress windows? USA Builders Depot offers selected custom operable steel windows. No blanket egress-compliance or certification claim is made. Verify the exact configuration against the project requirements.
Final Thoughts: Design the Window Around the Required Opening
Steel casement windows can add exceptional architectural character to bedrooms, but a required emergency escape opening must be selected using documented clear-opening measurements and operating details. Window size is not the same as net clear opening size. Before ordering, verify the width, height, area, sill elevation, hardware, and external clearances for the exact window and jurisdiction. Browse USA Builders Depot steel windows and contact USA Builders Depot with your drawings, desired configuration and applicable project requirements. Request fabrication and operating documentation before production.
USA BUILDERS DEPOT — Build a Better Tomorrow.
Fluted Kitchen Island Panels: WPC vs. Wood, Design Ideas & Installation Planning
A kitchen island is a natural focal point for modern interiors, and vertical fluted paneling brings texture, depth and architectural shadow lines to its visible faces. But decorative island cladding must work with actual cabinetry, stool traffic, corners, toe kicks and appliance details. This guide compares WPC, wood, veneer and MDF fluted panels and explains how to measure, plan and specify the right finish before installation.
What Are Fluted Kitchen Island Panels?
Fluted panels are decorative surfaces with repeating grooves or raised linear profiles, installed on seating-facing sides, ends, or other approved surfaces of a kitchen island. The geometry introduces texture, light and shadow. Materials may include WPC, solid wood, veneer, MDF or flexible decorative systems, each with different installation and care requirements.
Why Use Fluted Panels on a Kitchen Island?
Fluting can give an island architectural depth and a distinct identity within an open-plan kitchen. Walnut-look profiles can complement pale natural stone; darker surfaces add contrast to cream cabinetry. Selective fluting on an island face can achieve an intentional focal point without covering every cabinet surface.
WPC vs. Wood, Veneer and MDF
| Material | Main consideration |
|---|---|
| Interior WPC | Manufactured composite with decorative wood-look finishes; verify cabinet application approval |
| Solid wood | Natural variation and custom woodworking; account for movement and finishing |
| Wood veneer | Real-wood surface over substrate; review edges and moisture exposure |
| MDF fluted panels | Consistent manufactured profiles; confirm finish and moisture limitations |
| Flexible profiles | May suit curved applications only within approved bending limitations |
None is universally superior. Actual moisture, scratch, chemical, heat and impact tolerance are product-specific. USABD’s decorative WPC interior wall panels should not automatically be assumed approved for cabinetry.
Where Should the Fluting Go?
Seating-facing side
Offers a broad decorative area, but consider shoes, stools and cleaning equipment.
End panels
Creates continuity when combined with a carefully planned corner detail.
Full wrap
Extends across multiple faces but requires additional trims and joints.
Partial accent
Restrains texture to one feature section and can simplify surrounding cabinet detailing.
How to Measure the Island
Record each intended decorative surface separately. Measure finished face length, height beneath the countertop, and each end return. Do not equate countertop overhang with cabinet face length. Mark corners, toe kicks, outlets, appliances, access panels and ventilation openings. Produce a simple elevation drawing before calculating quantities.
How Many Fluted Panels Are Needed?
Multiply the length and height of each cladding surface to establish an approximate area, then plan cuts using the exact SKU’s usable panel coverage and installation orientation. An 8-foot by 3-foot face has a nominal area of 24 square feet, but square footage alone does not determine panel count. Selected USABD WPC products list nominal dimensions of 114 by 8 inches, approximately 1 inch thick, and are sold in full boxes of ten. Confirm effective coverage, quantity increments, cutting waste, trims and product availability before ordering.
Vertical vs. Horizontal Fluting
Vertical grooves visually emphasize height and provide a familiar sculptural rhythm. Horizontal grooves accentuate island length. Follow the selected manufacturer’s approved orientation; it affects joints, material yield and trim locations.
How to Finish Island Corners
Outside corners require compatible corner profiles or another expressly permitted finishing technique. Do not assume a hollow-core WPC panel can be mitered. Finish exposed ends next to plain cabinetry using compatible trims. Coordinate under-countertop terminations and toe-kick transitions before cutting material. See the USABD guide to WPC fluted panel corners and edges.
Can Fluted Panels Wrap a Curved Island?
Only if the exact product and its instructions allow that curve. Rigid composite panels should not be forced to bend. Curved island construction may require specifically flexible material, a manufactured curved component, or a designed segmented solution. Obtain the minimum approved bending radius and verify the attachment substrate.
Do Not Overlook the Toe Kick
Decorative panel thickness changes the finished front plane and can reduce a recessed toe-kick area. Check the island’s leveling and support system, cabinet access, floor junction and any applicable clearance or accessibility requirements. Do not block removable access panels.
Can WPC Panels Go on Existing Cabinet Backs?
Potentially, subject to product approval and substrate stability. Finished plywood, engineered-wood cabinetry, and other surfaces require compatible attachment methods. While certain USABD interior WPC products list clips or glue as installation options, that does not demonstrate universal approval for cabinet faces. Follow the exact product’s requirements and avoid covering service access.
Water, Heat and Appliances
At a sink, verify whether the decorative material, cut edges and finishes tolerate expected splashes. Near a dishwasher, preserve the appliance’s heat, ventilation, moisture and service-access requirements. Near an oven or cooktop, comply with the appliance’s clearances and panel manufacturer’s limitations. Do not present a decorative WPC panel as a substitute for a required fire-protective material. Electrical boxes must remain accessible and appropriately fitted.
Coordinating Countertops and Cabinets
Walnut-look fluting paired with light limestone or quartz can warm up modern kitchens. Black fluting against light cabinetry establishes stronger contrast, while natural oak tones work well with soft neutral finishes. Matching the island to a separate feature wall can create continuity; repeating the pattern everywhere may overwhelm the composition. Review samples under actual kitchen lighting.
How Lighting Changes the Look
Pendant lighting, daylight and under-cabinet illumination create highlights and shadow lines on a fluted surface. Darker finishes often appear more pronounced. Inspect physical samples in the intended room and lighting before finalizing color.
Cleaning and Maintenance
Follow the exact product’s maintenance directions. Recessed grooves can accumulate dust, crumbs and residue. Do not assume steam cleaning, abrasive pads, bleach or aggressive detergents are acceptable. Clean spills using approved methods and regularly inspect exposed edges and high-contact areas near stools and footwear.
Common Installation Mistakes
Frequent errors include ordering before confirming the finished cabinet dimensions, overlooking the panel’s projection into the toe kick, failing to plan trim and corners, assuming wall-installation adhesive is suitable on cabinetry, bending a rigid panel, and obstructing appliance airflow or access. Resolve each issue on the drawing and in product documentation before ordering.
Kitchen Island Project Checklist
| Review | Verify |
|---|---|
| Dimensions | Each face, end return, and height |
| Material | Exact WPC, wood, veneer or MDF SKU |
| Application | Documented suitability for island surface |
| Profile | Depth, spacing and orientation |
| Coverage | Usable width, cuts, boxes and waste |
| Trims | Outside corners, edges and transitions |
| Cabinet | Substrate and compatible attachment |
| Toe kick | Recess and foot clearance |
| Services | Outlets, plumbing, access and appliances |
| Care | Approved cleaning and finish maintenance |
Frequently Asked Questions
What are fluted kitchen island panels?
Decorative grooves or raised-profile panels installed on selected island surfaces.
Can USABD WPC wall panels be used on an island?
Only where the exact product is suitable for the cabinet-facing application and installation.
Is WPC better than solid wood?
Neither is universally better. Evaluate the actual finish, construction and intended use.
Can panels go over existing cabinetry?
Potentially, with a suitable substrate and manufacturer-approved fastening method.
How do you finish outside corners?
Use compatible trims or specifically approved edge-finishing details.
Can rigid panels bend around an island?
Not unless the manufacturer expressly permits the proposed radius.
Can panels be installed near a dishwasher?
Only if all panel and appliance exposure and clearance requirements are met.
Are they easy to clean?
That depends on profile and finish; follow product-specific care instructions.
Should the fluting match the cabinets?
It can complement or contrast depending on the overall design.
How many panels should I buy?
Create a cutting layout from usable coverage and account for full-box purchasing quantities.
Do decorative WPC panels soundproof an island?
Do not assume any soundproofing rating without applicable test evidence.
Explore USABD Interior WPC Fluted Panels
USA Builders Depot offers decorative interior WPC fluted wall panels in contemporary wood-look and darker finishes, along with selected accessories. Browse the interior WPC collection, review installation guidance, and request the exact product documentation before specifying a kitchen-island application. Provide island drawings, measurements, preferred finish and installation conditions when requesting assistance.
Final Thoughts
A fluted island can add carefully considered texture to a modern kitchen. But the finished appearance depends on correct material selection, measurements, corners, toe kicks, substrate, appliance clearances and maintenance. Verify that the exact decorative product is suitable for the intended location before ordering. USA Builders Depot — Better Materials. A More Beautiful Tomorrow.
How to Measure Arched Steel Entry Doors: Arch Rise, Radius, Rough Openings & Custom Ordering
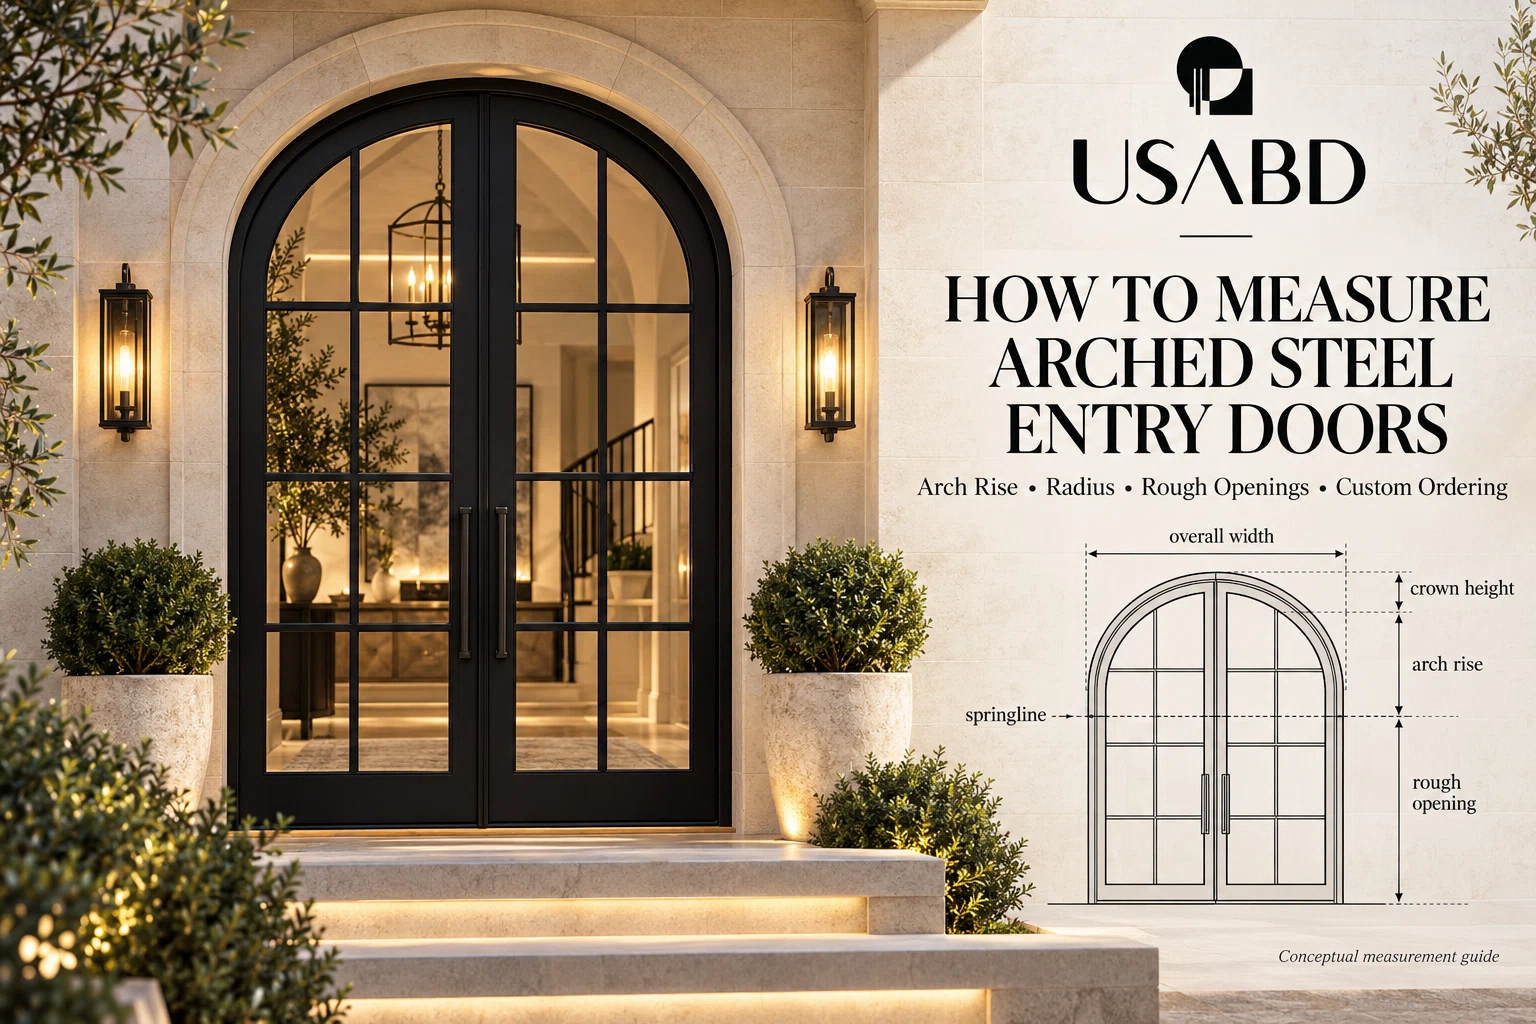
An arched steel entry door creates an elegant architectural focal point, but ordering one requires more than a width and overall height. Curved frames must coordinate with the arch’s exact shape, masonry, threshold and structural opening. To measure an arched steel door correctly, identify the crown, springline, rise, profile, frame dimensions and manufacturer-required rough opening. This guide explains how to document those details for a custom order.
What Is an Arched Steel Entry Door?
An arched steel entry door has a curved upper profile incorporated into its leaf, frame, or designed entrance assembly. Single and double configurations may have full-lite or divided-lite glazing. The complete arch geometry must coordinate with surrounding masonry, structural framing, finishes, and installation details.
Understanding Different Arch Shapes
Semicircular
A true semicircle has a radius equal to half its span, but not every round-top door is a mathematically exact semicircle.
Segmental
A segmental circular arch is shallower than a semicircle and may be described using span and rise.
Elliptical
An elliptical arch does not have a single circular radius.
Pointed or custom
Compound and irregular curves often need accurate templates or shop drawings. Confirm fabrication capabilities before finalizing the opening.
Essential Arched-Door Measurements
| Measurement | Meaning |
|---|---|
| Overall width | Horizontal opening or frame width at the stated reference |
| Overall height | Bottom reference to crown |
| Springline height | Height where the curved arch begins |
| Arch rise | Springline to crown distance |
| Arch span | Width across the curved arch at its springline |
| Radius | Radius for a circular arch |
| Jamb depth | Required frame/wall depth |
| Frame dimensions | Overall completed door-frame size |
| Rough opening | Required structural opening |
| Threshold elevation | Bottom datum aligned with finished floors |
Step 1: Measure the Overall Width
Determine whether the measurement refers to the finished opening, existing frame, or structural rough opening. Measure near the bottom, middle of the straight jamb section, and springline. Record variations rather than assuming the jambs are parallel. Nominal advertised width is not necessarily the needed rough-opening width.
Step 2: Measure the Overall Height
From a clearly identified bottom reference, measure vertically to the crown, the arch’s highest point. Account for finished flooring, sill and threshold. Measuring only to the springline omits the curved upper portion. Clearly indicate whether heights begin at finished floor, slab, or another datum.
Step 3: Identify the Springline
The springline marks the height where straight jambs transition into the curved head on a typical symmetrical arch. Two openings with identical overall width and height may have different springline heights and therefore different arch profiles. Record this dimension from the same bottom datum used for crown height.
Step 4: Measure the Arch Rise
The rise is the vertical distance from springline to crown: Arch rise = crown height − springline height. For example, a crown at 100 inches and springline at 80 inches gives a 20-inch rise. This illustrative example is not a USABD product measurement or installation allowance.
Step 5: Understand Arch Radius
For a semicircular arch, radius equals half the span. For a symmetrical segmental circular arch, the radius is R = span²/(8 × rise) + rise/2. This formula does not describe elliptical, pointed, compound, or irregular openings. Mathematical geometry cannot substitute for manufacturer-approved dimensions and actual field verification.
Step 6: Confirm the Rough Opening
The structural opening must accommodate the complete arched frame and its installation requirements. Clearance varies by model and manufacturer; no universal added dimension works for every arched steel door. Request the specified frame dimensions, curvature and rough-opening instructions before framing or fabrication.
Does a 72 × 96 Arched Door Need a 72 × 96 Rough Opening?
Not necessarily. A nominal 72 × 96 designation may describe the product, while the rough opening also depends on the actual frame and installation clearances. For USABD custom 60 × 96 and 72 × 96 models, confirm the shop drawings and the exact dimensions before preparing masonry or framing. Never equate nominal product size with structural opening size without verification.
Arched Opening vs. Arched Frame
The visible stone or stucco arch may differ from the load-bearing or frame-receiving opening. Finishes may overlap the steel frame or be detailed to reveal its edges. Coordinate steel frame dimensions, structural opening, sealant joints, waterproofing, and interior/exterior trim. An attractive façade rendering alone does not communicate all installation dimensions.
Should You Make a Template?
For an irregular existing arch, a properly prepared full-size template or detailed survey drawing may be necessary. The template must represent the correct fabrication reference, not just the outside decorative trim. Ask the manufacturer which surface and measurements should be captured. A qualified installer or survey professional can help verify complex existing openings.
Replacing an Existing Arched Door
Determine whether the existing frame will be removed. Check for nonparallel jambs, uneven masonry, settlement, different crown dimensions and concealed structural opening edges. If hidden dimensions cannot be established without demolition, identify that uncertainty before ordering. Never convert preliminary guesses into approved fabrication dimensions.
New Construction Planning
Coordinate the arch geometry with the manufacturer before framing. The architect should establish intended style and proportional dimensions; the manufacturer should provide the approved unit and opening details. Construction teams should coordinate curved stone returns, stucco finishes, drainage, flashing, and interior trim with the approved frame.
Single vs. Double Arched Steel Doors
A single entry has one primary operable leaf; a double entry includes two leaves sharing an upper architectural profile. Double doors require coordination of active and inactive leaves, meeting-stile geometry, locking hardware, hinges and seals. The arch, glazing and center joint must be designed as one complete assembly.
Glass Choices for Arched Steel Doors
Full-lite designs emphasize larger glass areas, while divided-lite patterns create a more structured look. Confirm exact glazing specifications, safety glazing, insulation, privacy options and applicable performance documentation for the final configuration. Available options are product-specific; renderings do not replace approved fabrication specifications.
Door Handing and Swing
Confirm whether the door is inswing or outswing and identify the active leaf on double doors. Coordinate landing, steps, furniture, wall clearances, and hardware. Manufacturers may differ in handing terminology; review the USABD steel-door handing guide before approving shop drawings.
Jamb Depth Matters
Wall depth depends on framing, sheathing, masonry, interior finishes and cladding. Select the actual door-frame depth appropriate for the specific opening. Confirm available jamb-depth options and finishing details, rather than assuming one standard dimension fits every project. See the jamb-depth guide.
Threshold and Finished Floors
Coordinate the sill and exterior landing with anticipated finish-floor height, drainage, required access, and weatherproofing details. An unfinished slab and finished interior floor are different measuring references. Confirm the proposed threshold construction before approving door height. See the threshold and sill guide.
Can Arched Steel Doors Have Smart Locks?
Potentially, if compatible with the exact door’s hardware preparation. Provide the selected lock’s detailed dimensions, backset, door thickness and bore/mortise requirements before fabrication. A product photograph is not adequate for preparing steel hardware openings.
Common Measurement Mistakes
Errors include recording only overall width and height, assuming a perfect semicircle, measuring decorative masonry instead of the structural opening, confusing nominal size with rough opening, overlooking floor elevations, and failing to finalize swing, jamb depth, glazing, lock preparation, or threshold. Detailed drawings and preproduction confirmation reduce these risks.
Arched Steel Door Ordering Checklist
| Item | Confirm before ordering |
|---|---|
| Project | New construction or replacement |
| Configuration | Single or double |
| Arch profile | Semicircular, segmental, elliptical, other |
| Geometry | Width, crown, springline, rise, radius/profile drawing |
| Frame and rough opening | Approved drawings |
| Depth | Required jamb |
| Operation | Handing, swing, active leaf |
| Glass | Approved configuration |
| Hardware | Locks, handles, preparation |
| Threshold | Sill and finished-floor reference |
| Finish | Approved color/coating |
| Schedule | Approved shop drawings, production, delivery |
How Long Does Custom Production Take?
Selected USABD custom arched steel-door listings indicate approximately 8–12 weeks, subject to final configurations and current production schedules. Additional time may be required for field measurements, design approvals, shop drawings and installation coordination. Confirm the total project schedule before placing an order.
Delivery and Installation Preparation
Confirm installer access and appropriate handling for large steel-and-glass door assemblies. Inspect the delivery according to the seller’s freight procedures, document any damage promptly, and compare the received unit with approved drawings before installation. Use the manufacturer’s model-specific installation instructions and preserve required weather-management details.
Frequently Asked Questions
How do you measure an arched steel door?
Record width, crown height, springline, rise, arch geometry, frame size, jamb depth, threshold reference, and approved rough opening.
What is a springline?
The level where straight jambs transition into the arch.
What is arch rise?
Vertical distance from springline to crown.
What is radius?
The radius of the curve for a circular arch, not applicable as one constant radius to all shapes.
Is nominal door size the rough opening?
No, not necessarily.
Can arched doors be custom sized?
Selected USABD configurations offer custom sizing, subject to approval.
Do all arches have the same curve?
No. Confirm the precise profile.
Can an existing arch be replaced?
Potentially, after measuring the actual opening.
Do I need a template?
Complex or irregular profiles may require one.
Can the glass be insulated?
Depending on the product; verify the configuration.
Can I use a smart lock?
Potentially, with compatible and approved preparation.
Are these hurricane-rated?
USABD does not currently represent its steel-door collection as hurricane-rated or Miami-Dade approved.
What is the production lead time?
Selected custom arched doors list an estimated 8–12 weeks, subject to confirmation.
Explore USABD Custom Arched Steel Doors
USA Builders Depot offers architectural arched double steel doors, including selected full-lite and 3-lite designs. Buyers should provide approved measurements, arch profile, drawings, glazing, handing, finish, hardware requirements, and project location. See the steel-door rough-opening guide and the exterior double steel-door collection for related options. Confirm the final design and installation information before fabrication.
Final Thoughts
A custom arched steel door can become a defining architectural feature, but successful fabrication depends on accurate geometry and coordinated project details. Width, crown, springline, rise, radius, frame dimensions and rough opening must be distinguished. Confirm the complete unit and installation before construction and ordering. USA Builders Depot — Better Materials. A More Beautiful Tomorrow.
How to Install Acoustic Wood Slat Panels on Concrete or Brick Walls: Mounting, Moisture & Design Guide
Concrete and brick walls introduce distinctive texture to contemporary homes, lofts and offices, but many projects benefit from softening masonry with warm wood finishes. Decorative acoustic wood slat panels can create a striking architectural contrast and potentially help control sound reflections. Installation on masonry differs from ordinary drywall: the correct approach depends on the wall condition, moisture, chosen panel construction, mounting method and acoustic goals.
Quick Answer: Can Acoustic Wood Slat Panels Be Installed on Concrete or Brick Walls?
Yes. Acoustic slat panels can be installed over suitable masonry when the product, substrate and attachment method are compatible. Options may include manufacturer-approved adhesives, appropriate mechanical fasteners, masonry anchors and batten assemblies. Before work, confirm the wall is sound, moisture problems are resolved, the mounting approach is approved for the exact panel and substrate, and any acoustic or fire-performance requirements are documented.
1. Why Install Acoustic Wood Slat Panels Over Concrete?
Wood finishes can add visual warmth to gray concrete while repeating vertical slats introduce depth and shadow. Acoustic panels may also reduce reflected sound in a room when designed and installed appropriately. Masonry is a hard, reflective surface, so acoustic treatment can be useful in rooms with glass, stone or other reflective finishes. But decorative panels should never be used simply to conceal structural deterioration, active water intrusion or significant substrate defects.
2. Concrete, Brick, and CMU Are Different Substrates
Poured concrete varies from smooth to rough and may have coatings, sealers, dust or curing compounds that affect adhesion. Solid brick consists of units and mortar joints; both surface irregularity and condition influence attachment. Brick veneer is not the same as a load-bearing solid-brick wall and may have a drainage cavity and supporting structure behind it. Concrete masonry units (CMU) may be hollow or solid, which affects suitable anchor choices. Painted masonry requires assessment of the coating; weak paint can fail even if the adhesive is otherwise compatible. Identify the actual substrate before choosing fasteners or glue.
3. Three Ways to Mount Acoustic Panels on Masonry
Direct adhesive mounting: An approved adhesive can provide a shallow assembly where both product and wall are suitable, but the adhesive must bond to the actual panel backing and prepared masonry. Mechanical mounting: Manufacturer-permitted fasteners can connect panels through suitable masonry anchors. Anchor type, location, embedment and loading depend on the substrate and product; ordinary drywall screws are not masonry anchors. Battens or subframing: A separate mounting plane can help level irregular walls and create a designed cavity, but needs appropriately anchored supports, extra depth and coordination with moisture conditions. Use the method permitted for the exact panel.
4. Can You Glue Acoustic Slat Panels Directly to Concrete?
Possibly, when the panel and adhesive manufacturers expressly support the intended direct-bond application. Check concrete cleanliness and soundness, coatings or sealers, wall flatness, and moisture conditions. Dust, oil, loosely bonded paint, curing compounds and dampness can interfere with bonding. Concrete that appears dry may still transmit moisture, especially below grade. Follow the selected adhesive’s preparation, temperature, curing and temporary-support instructions. A generic construction adhesive label is not proof of compatibility with all acoustic backings or masonry.
5. Can Acoustic Wood Slat Panels Be Installed on Exposed Brick?
Yes, if the assembly is suitable. Brick and mortar joints can be uneven, which complicates achieving a straight, flush face. Existing paint may weaken adhesion, and older soft brick or mortar can require special care. Do not assume drilling into mortar is always preferable to drilling into brick; follow the specified anchoring method. On uneven or historic masonry, an approved batten system or another carefully designed support plane may be preferable to an improvised direct installation.
6. Why Moisture Matters Behind Acoustic Panels
Moisture is especially important with basement and foundation walls. Water can enter from rain, soil, leaks or condensation. Look for staining, efflorescence, peeling paint, damp patches, musty odors and deterioration before covering masonry. An installation that conceals a damp wall can make problems harder to detect and may affect adhesives, wood components and backing materials. Basement concrete can experience moisture migration and condensation. Resolve underlying problems before installing decorative panels. Do not add an arbitrary plastic vapor barrier; vapor-control and drying details depend on the complete foundation and climate-specific wall assembly.
7. Should You Install Battens Before Acoustic Panels?
Battens are useful when the masonry is uneven, when the panel requires a defined mechanical attachment plane, or when a specific acoustic cavity is part of the design. They are not universally necessary. Batten materials, anchoring, orientation and spacing must match the wall and panel requirements. The added wall thickness influences door returns, window trim, baseboards, receptacles, switches, lighting and other details. A separate mounting plane should not be used to bypass unresolved masonry moisture problems.
8. Do Acoustic Wood Slat Panels Need an Air Gap on Concrete?
Not necessarily. Some panels are suitable for direct mounting, while others can use an intentionally designed cavity. An air space may influence sound absorption, but its effects depend on panel construction, backing, cavity depth, and frequencies. Mineral wool or another specified infill may change performance again. Do not assume that any particular air-gap dimension guarantees an NRC value. Where measured acoustic performance matters, obtain testing for the complete installed assembly. Our guide to acoustic air gaps and battens provides more background.
9. Does Installing Acoustic Panels Make a Concrete Wall Soundproof?
No. Sound absorption and sound isolation are distinct. Absorptive acoustic panels can help reduce sound reflections and reverberation inside a room, while sound isolation concerns transmission between rooms. Isolation depends on the entire separating assembly, including wall mass, openings, joints and flanking paths. Decorative panels alone do not establish a specified improvement in sound isolation. Projects needing privacy between apartments or studios require a separate assessment.
10. How to Plan the Installation Layout
Measure wall width and height at multiple locations because masonry may be uneven or out of square. Locate doors, windows, electrical devices, corners, conduit and vents. Choose the intended slat direction and a starting point that produces balanced end cuts. Consider the appearance of narrow terminal pieces and panel joints. Calculate finished assembly depth based on direct mounting versus battens and coordinate transitions at nearby finishes. A carefully planned layout prevents unnecessary cuts and misalignments.
11. How to Cut Acoustic Wood Slat Panels for a Masonry Feature Wall
Cutting methods depend on the actual slats, facing, core and backing. Crosscuts may require an appropriate fine-finish saw blade, while width adjustments may involve trimming backing between slats where allowed. Support the panel, protect finished faces against chips and scratches, and test-fit cuts before permanent fixing. Visible ends may need compatible trim or end-slat accessories. Follow the manufacturer’s current instructions instead of assuming all felt-backed panels cut the same way.
12. How to Handle Electrical Outlets on Concrete and Brick Walls
Identify outlets, switches, conduit, wiring and concealed services before drilling or cutting. Added panel or batten thickness changes the finished face relative to device boxes and cover plates. Do not conceal required junction-box access. A qualified electrician should specify any needed adjustments, box extensions or wiring changes. The decorative installer should not improvise modifications to electrical assemblies.
13. What Acoustic Panel Finish Looks Best With Concrete or Brick?
Raw White Oak creates a light, natural contrast with dark concrete. Classic Oak adds warmth against exposed red brick. Light Brown Oak complements light gray concrete; Smoked Oak adds depth beside plaster or lighter concrete. Dark Ebony creates a bold contrast with light masonry, while white oak with gray felt has a quieter contemporary character. These are visual recommendations, not technical suitability claims. Review current USA Builders Depot finish availability and consider physical samples for color-sensitive projects.
14. Can Acoustic Panels Be Installed on Basement Concrete Walls?
Potentially, but review the foundation wall first. Determine whether there are leaks, staining, condensation, high humidity, insulation or vapor-control layers already present. Bare below-grade concrete differs from an appropriately finished interior wall assembly. A decorative panel should not substitute for moisture control, waterproofing or proper basement insulation. Have the conditions assessed where necessary before placing wood-based finishes against the assembly.
15. Common Installation Mistakes to Avoid
Avoid adhesives not approved for the actual backing and masonry; covering damp walls; selecting anchors without identifying solid versus hollow units; assuming brick veneer is structural; gluing to loose paint; ignoring layout; forgetting the added depth from battens; presuming that air gaps guarantee acoustic gains; describing absorption as soundproofing; and omitting applicable fire-related documentation. The correct details depend on the exact material, substrate and intended use.
16. Acoustic Panel Installation Planning Checklist
Before purchase and installation, confirm the wall type (poured concrete, brick, veneer or CMU), surface condition, moisture history, exact panel model and construction, approved adhesive or mechanical method, correct masonry anchors, any batten system, intended acoustic purpose, specified cavity or infill, electrical obstructions, fire-related requirements, complete panel layout, finish trims and current manufacturer’s instructions. Document uncertain conditions and resolve them before cutting panels.
Frequently Asked Questions
Can acoustic slat panels be installed directly on concrete? Potentially, when the actual panel and selected mounting method are approved for the substrate.
Can you glue acoustic panels to brick? Sometimes, subject to brick condition, paint, adhesive compatibility and panel instructions.
Do panels need battens on concrete? Not always; battens are a project-specific method for mounting, leveling or designed cavities.
Can I use acoustic panels on basement concrete? Only after unresolved moisture or condensation problems have been addressed.
What anchors should I use? Follow substrate-specific engineered or manufacturer instructions for the required load.
Can panels cover painted brick? Potentially, if the coating and attachment assembly are suitable.
Will acoustic panels soundproof concrete walls? No; absorption within a room is different from isolation between spaces.
Is an air gap necessary? Not always; follow the selected system and any tested performance requirements.
Can panels be installed horizontally? Some products allow this; check the instructions.
Are they suitable for commercial masonry walls? They may be where fire, acoustic, mounting and building requirements are satisfied.
What should I provide for a quote? Wall dimensions, substrate, preferred finish, quantity, project location and relevant performance requirements.
Final Thoughts: Beautiful Masonry Walls Deserve a Thoughtful Installation
Concrete and brick can be an attractive architectural foundation for wood-finish acoustic panels. Proper planning brings together visual texture, possible sound-absorption benefits, secure attachment and suitable moisture conditions. Begin by identifying the wall, resolving moisture issues, and confirming the approved panel and mounting system. For a new living-room feature wall, loft, office or basement, these steps help protect the finished installation.
Explore acoustic wood slat panels at USA Builders Depot and contact us with wall measurements, substrate details and your preferred finish.
USA BUILDERS DEPOT — Build a Better Tomorrow.